vue全局引入openlayers_vue使用openlayers实现移动点动画

本文实例为大家分享了vue使用openlayers实现移动点动画的具体代码,供大家参考,具体内容如下

做项目时,本来打算仿照官网的Example中动画制作,引入vue中后,发现它引用的库函数一直报错,最后我去vue中安装的依赖库中去查找这个函数,果然没有。也就是说官方例子使用的库和我安装的OL库存在一定差异。

后来我还是用笨方法去解决了,最终效果如下:

3547033319449923e4bb49bfb40e87ca.png

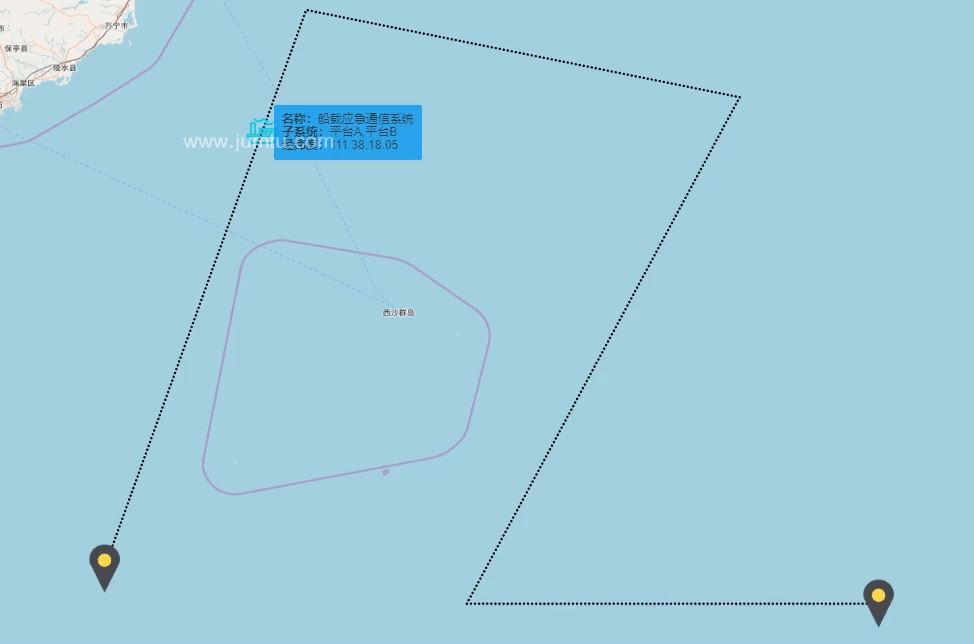
总体思路是将移动目标实例一个Overlay对象,然后将如图5个经纬度点没两点之间分割成多个(200个),之后通过定时器不断setPositon。

代码如下:

// import * as myol from '@/views/openstreetmap/openlayerstools.js'

// import img from '@/assets/images'

import 'ol/ol.css'

import { Map, View, Feature } from 'ol'

import * as layer from 'ol/layer.js'

import * as source from 'ol/source.js'

import * as geom from 'ol/geom.js'

import * as style from 'ol/style.js'

import Overlay from 'ol/Overlay.js'

import TileLayer from 'ol/layer/Tile'

import { deepclone } from '@/utils/index.js'

import myplanImg from '@/../static/images/船载应急通信系统.png'

// import * as myol from '@/views/openstreetmap/animation.js'

export default {

data() {

return {

// a simulated path

path: [

[115.6200, 14.82],

[112.79, 14.82],

[114.6636, 18.2977],

[111.6870, 18.8970],

[110.3014, 15.0630]

], // 模拟路径

pathIndex: 0, // 路径点索引

marker: null,//移动点

splitNumber: 200, // 每两个经纬度之间的分割点

setIntervalTime: 30, // 移动点间隔时间

myplanImg: myplanImg, // 移动点的图片

helpTooltipElement: null, // 平台信息div

helpTooltip: null // 平台信息overlay

}

},

created() {

this.analysisPath(this.splitNumber)

},

mounted() {

this.initSeamap()

},

methods: {

initSeamap: function() {

this.pathIndex = this.path.length - 1

var sourceFeatures = new source.Vector()

var layerFeatures = new layer.Vector({// 两端点Feature

source: sourceFeatures

})

var lineString = new geom.LineString([])

var layerRoute = new layer.Vector({// 两点之间的连线

source: new source.Vector({

features: [

new Feature({

geometry: lineString

})

]

}),

style: [

new style.Style({

stroke: new style.Stroke({

width: 3,

color: 'rgba(0, 0, 0, 1)',

lineDash: [0.1, 5]

}),

zIndex: 2

})

],

updateWhileAnimating: true

})

this.global.map = new Map({

target: 'map',

view: new View({

projection: 'EPSG:4326',

center: [109.8, 18.4],

zoom: 7,

minZoom: 3, // 限制最大显示

maxZoom: 14

}),

layers: [

new TileLayer({

source: new source.OSM()

}),

layerRoute, layerFeatures

]

})

var markerEl = document.getElementById('geo-marker')

markerEl.className = 'css_animation'

this.marker = new Overlay({

positioning: 'center-center',

offset: [0, 0],

element: markerEl,

stopEvent: false

})

this.global.map.addOverlay(this.marker)

var style1 = [// 开始结束点样式

new style.Style({

image: new style.Icon(({

src: 'static/images/marker.png'

}))

})

]

var feature_start = new Feature({

geometry: new geom.Point(this.path[0])

})

var feature_end = new Feature({

geometry: new geom.Point(this.path[this.path.length - 1])

})

feature_start.setStyle(style1)

feature_end.setStyle(style1)

sourceFeatures.addFeatures([feature_start, feature_end])

lineString.setCoordinates(this.path)

this.helpTooltipElement = document.createElement('div')

this.helpTooltipElement.className = 'measuretip'

this.helpTooltipElement.id = 'speed'

this.helpTooltip = new Overlay({

element: this.helpTooltipElement,

offset: [15, 0],

positioning: 'center-left'

})

this.global.map.addOverlay(this.helpTooltip)

this.global.map.once('postcompose', (event) => {

setInterval(() => {

this.animation()

}, this.setIntervalTime)

})

// this.global.map.getView().fit(lineString.getExtent())

},

animation: function() {

if (this.pathIndex === -1) {

this.pathIndex = this.path.length - 1

}

this.marker.setPosition(this.path[this.pathIndex])

this.helpTooltipElement.innerHTML = '名称:船载应急通信系统' + '\
' +

'子系统:平台A,平台B' + '\
' +

'经纬度:' + (this.path[this.pathIndex][0] + '').substring(0, 6) + ',' +

(this.path[this.pathIndex][1] + '').substring(0, 5)

this.helpTooltip.setPosition(this.path[this.pathIndex])

this.pathIndex--

},

analysisPath: function(splitNumber) {

var tempPath = deepclone(this.path)

var pathResults = []

var tempPoint = [0, 0]

if (tempPath.length > 1) {

for (let i = 0; i < tempPath.length - 1; i++) { // 每两个点之间分割出splitNumber个点

pathResults.push(tempPath[i])

for (let j = 0; j < splitNumber; j++) {

tempPoint[0] = (tempPath[i + 1][0] - tempPath[i ][0]) * (j + 1) / splitNumber + tempPath[i][0]

tempPoint[1] = (tempPath[i + 1][1] - tempPath[i ][1]) * (j + 1) / splitNumber + tempPath[i][1]

pathResults.push(deepclone(tempPoint))

}

}

pathResults.push(tempPath[tempPath.length - 1])

this.path = deepclone(pathResults)

console.log(this.path)

}

}

}

}

#map {

width: 100%;

height: 100%;

overflow: hidden;

}

.measuretip {

position: relative;

background-color: #0D9BF2;

opacity: 0.7;

border-radius: 3px;

padding: 10px;

font-size: 12px;

cursor: default;

}

以上就是本文的全部内容,希望对大家的学习有所帮助,也希望大家多多支持聚米学院。

  • 0
    点赞
  • 1
    收藏
    觉得还不错? 一键收藏
  • 0
    评论

“相关推荐”对你有帮助么?

  • 非常没帮助
  • 没帮助
  • 一般
  • 有帮助
  • 非常有帮助
提交
评论
添加红包

请填写红包祝福语或标题

红包个数最小为10个

红包金额最低5元

当前余额3.43前往充值 >
需支付:10.00
成就一亿技术人!
领取后你会自动成为博主和红包主的粉丝 规则
hope_wisdom
发出的红包
实付
使用余额支付
点击重新获取
扫码支付
钱包余额 0

抵扣说明:

1.余额是钱包充值的虚拟货币,按照1:1的比例进行支付金额的抵扣。
2.余额无法直接购买下载,可以购买VIP、付费专栏及课程。

余额充值