


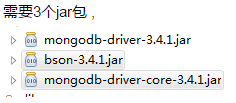
maven中添加依赖
http://mongodb.github.io/mongo-java-driver/

org.mongodb
mongodb-driver
3.4.1
org.mongodb
bson
3.4.1
JavaProject
连接数据库
连接数据库,你需要指定数据库名称,如果指定的数据库不存在,mongo会自动创建数据库。
连接数据库的Java代码如下:
import com.mongodb.MongoClient;
import com.mongodb.client.MongoDatabase;
public class MongoDBJDBC{
public static void main( String args[] ){
try{
// 连接到 mongodb 服务
MongoClient mongoClient = new MongoClient( "localhost" , 27017 );
// 连接到数据库
MongoDatabase mongoDatabase = mongoClient.getDatabase("mycol");
System.out.println("Connect to database successfully");
}catch(Exception e){
System.err.println( e.getClass().getName() + ": " + e.getMessage() );
}
}
}
现在,让我们来编译运行程序并连接到数据库 mycol。
你可以根据你的实际环境改变 MongoDB JDBC 驱动的路径。
本实例将 MongoDB JDBC 启动包 mongo-java-driver-3.2.2.jar 放在本地目录下:
$ javac -cp .:mongo-java-driver-3.2.2.jar MongoDBJDBC.java
$ java -cp .:mongo-java-driver-3.2.2.jar MongoDBJDBC
Connect to database successfully
Authentication: true
本实例中 Mongo 数据库无需用户名密码验证。如果你的 Mongo 需要验证用户名及密码,可以使用以下代码:
package com.iwhere.rongyun.config;
import static org.springframework.test.web.servlet.result.MockMvcResultMatchers.content;
import java.util.ArrayList;
import java.util.List;
import org.apache.commons.lang3.StringUtils;
import org.bson.Document;
import org.slf4j.Logger;
import org.slf4j.LoggerFactory;
import org.springframework.beans.factory.annotation.Value;
import org.springframework.context.annotation.Bean;
import org.springframework.context.annotation.Configuration;
import com.mongodb.MongoClient;
import com.mongodb.MongoClientOptions;
import com.mongodb.MongoCredential;
import com.mongodb.ServerAddress;
import com.mongodb.client.MongoCollection;
import com.mongodb.client.MongoDatabase;
@Configuration
public class MongoConfig {
private static Logger LOGGER = LoggerFactory.getLogger(MongoConfig.class);
@Value("${mongodb.hostports}")
private String hostports;
@Value("${mongodb.maxConnect}")
private String maxConnect;
@Value("${mongodb.maxWaitThread}")
private String maxWaitThread;
@Value("${mongodb.maxTimeOut}")
private String maxTimeOut;
@Value("${mongodb.maxWaitTime}")
private String maxWaitTime;
@Value("${mongodb.username}")
private String username;
@Value("${mongodb.password}")
private String password;
@Value("${mongodb.database}")
private String database;
@Value("${mongodb.collection")
private String collection;
@Bean
public MongoClient mongoClient() {
MongoClient mongoClient = null;
MongoClientOptions.Builder build = new MongoClientOptions.Builder();
build.connectionsPerHost(Integer.valueOf(maxConnect));
build.threadsAllowedToBlockForConnectionMultiplier(Integer.valueOf(maxWaitThread));
build.connectTimeout(Integer.valueOf(maxTimeOut) * 1000);
build.maxWaitTime(Integer.valueOf(maxWaitTime) * 1000);
MongoClientOptions options = build.build();
try {
List addrs = new ArrayList();
for (String hostport : hostports.split(", *")) {
if (StringUtils.isBlank(hostport)) {
continue;
}
hostport = hostport.trim();
ServerAddress serverAddress = new ServerAddress(hostport.split(":")[0],Integer.valueOf(hostport.split(":")[1]));
addrs.add(serverAddress);
}
MongoCredential credential = MongoCredential.createScramSha1Credential(username, database, password.toCharArray());
List credentials = new ArrayList();
credentials.add(credential);
mongoClient = new MongoClient(addrs,credentials, options);
LOGGER.info("【mongodb client】: mongodb客户端创建成功");
} catch (Exception e) {
LOGGER.error("【mongodb client】: mongodb客户端创建成功");
e.printStackTrace();
}
return mongoClient;
}
@Bean
public MongoDatabase mongoDatabase(MongoClient mongoClient) {
MongoDatabase mongoDatabase = mongoClient.getDatabase(database);
return mongoDatabase;
}
@Bean
public MongoCollection mongoCollection(MongoDatabase mongoDatabase) {
MongoCollection mongoCollection = mongoDatabase.getCollection(collection);
return mongoCollection;
}
}
通过spring配置文件注入所需的值即可, mondb.properties为:
mongodb.hostports=192.168.51.100:2,192.168.51.101:533,192.168.51.102:21
mongodb.maxConnect=50
mongodb.maxW
 最低0.47元/天 解锁文章


 611
611


 被折叠的 条评论
为什么被折叠?
被折叠的 条评论
为什么被折叠?
 到【灌水乐园】发言


