


什么情况下使用队列?
了解了为什么使用队列,那么一般有这么几类任务使用队列:
耗时比较久的,比如上传一个文件后进行一些格式的转化等。
需要保证送达率的,比如发送短信,因为要调用别人的 api,总会有几率失败,那么为了保证送达,重试就必不可少了。
使用队列的时候一定要想明白一个问题,这个任务到底是不是可以异步。
如果因为异步会导致问题,那么就要放弃使用队列。
一些小技巧
在开发环境我们想测试的时候,可以把 Queue driver 设置成为 sync,这样队列就变成了同步执行,方便调试队列里面的任务。
Job 里面的 handle 方法是可以注入别的 class 的,就像在 Controller action 里面也可以注入一样。
什么时候使用 queue:listen 什么时候使用 queue:work?
答:Laravel 5.3 的文档已经不写 queue:listen 这个指令怎么用了,所以你可以看出来可能官方已经不怎么建议使用 queue:listen 了,但是在本地调试的时候要使用 queue:listen,因为 queue:work 在启动后,代码修改,queue:work 不会再 Load 上下文,但是 queue:listen 仍然会重新 Load 新代码。
参数说明:
总体来说,在 supervisor 中一般要加这个 option,可以节省 CPU 使用。
--quiet
不输出任何内容
--delay=3
一个任务失败后,延迟多长时间后再重试,单位是秒。这个值的设定我个人建议不要太短,因为一个任务失败(比如网络原因),重试时间太短可能会出现连续失败的情况。
--sleep=3
去 Redis 中拿任务的时候,发现没有任务,休息多长时间,单位是秒。这个值的设定要看你的任务是否紧急,如果是那种非常紧急的任务,不能等待太长时间。
--tries=3
定义失败任务最多重试次数。这个值的设定根据任务的重要程度来确定,一般 3 次比较适合。
#count: 100
#job: null
+connection: null
+queue: null
+chainConnection: null
+chainQueue: null
+delay: null
+middleware: []
+chained: []
队列实现原理:
Redis 中的数据结构和操作:
1. queue:default
数据结构:
List,
操作:
LRANGE "queues:default" 0 -1 获取 List 里面的所有数据。
2. queue:default:reserved 和 queue:default:delay
数据结构:
Zset,时间是 zset 的 score,通过 score 来排序。
操作:
ZRANGE ”queues:default:reserved“ 0 -1 获取 zset 里面的所有数据。
ZRANGEBYSCORE queues:default:reserved -inf +inf 通过时间来排序获取所有数据
Redis 里面一个任务默认最多执行 60 秒,如果一个任务 60 秒没有执行完毕,会继续放回到队列中,循环执行
队列延迟执行
两种方式:
1、在任务的构造方法中使用delay方法class PrescriptionBackUrl implements ShouldQueue
{
use Dispatchable, InteractsWithQueue, Queueable, SerializesModels;
public $prescriptionId;
/**
* Create a new job instance.
*
* @param $prescriptionId
*/
public function __construct($prescriptionId)
{
$this->queue = 'prescription_back_url';
$this->prescriptionId = $prescriptionId;
$this->delay(now()->addSeconds(30)); //此队列30秒后触发
}
2、在调用队列的时候,使用delay方法
\App\Jobs\Jober::dispatch()->delay(30);
执行效果:$this->dispatch(new PrescriptionBackUrl(631612203711090890));

在30秒后触发执行的

Redis 会发生什么事情?
第一步:查看是否需要重启,如果 laravel:illuminate:queue:restart 存在,就重启队列
代码更新后,一定要重启队列,否则队列不会读取最新代码。
"GET"
"laravel:illuminate:queue:restart"
第二步:查看 zset queues:default:delayed ,注意这里的事务
"WATCH"
"queues:default:delayed"
"ZRANGEBYSCORE"
"queues:default:delayed"
"-inf"
"1485386782"
"UNWATCH"
第三步:查看 zset queues:default:reserved,注意这里的事务
"WATCH"
"queues:default:reserved"
"ZRANGEBYSCORE"
"queues:default:reserved"
"-inf"
"1485386782"
"UNWATCH"
第四步:从 queue:default list 中取任务,如果有任务,要把任务先暂存到 queues:default:reserved 中(过期时间 60 秒,Redis Queue 里面写一个任务最多执行 60 秒)。任务执行结束会把 queues:default:reserved 中的任务删除,如果任务报错(Throw exception),也会把 queues:default:reserved 中的任务删除,
然后把任务扔进 queues:default:delay,delay 的秒数是 3 秒(因为我们上面参数配置的是 --delay=3)。
"LPOP"
"queues:default"
#取出任务后,先要放到 queues:default:reserved zset 中
"ZADD"
"queues:default:reserved"
"1485386842"
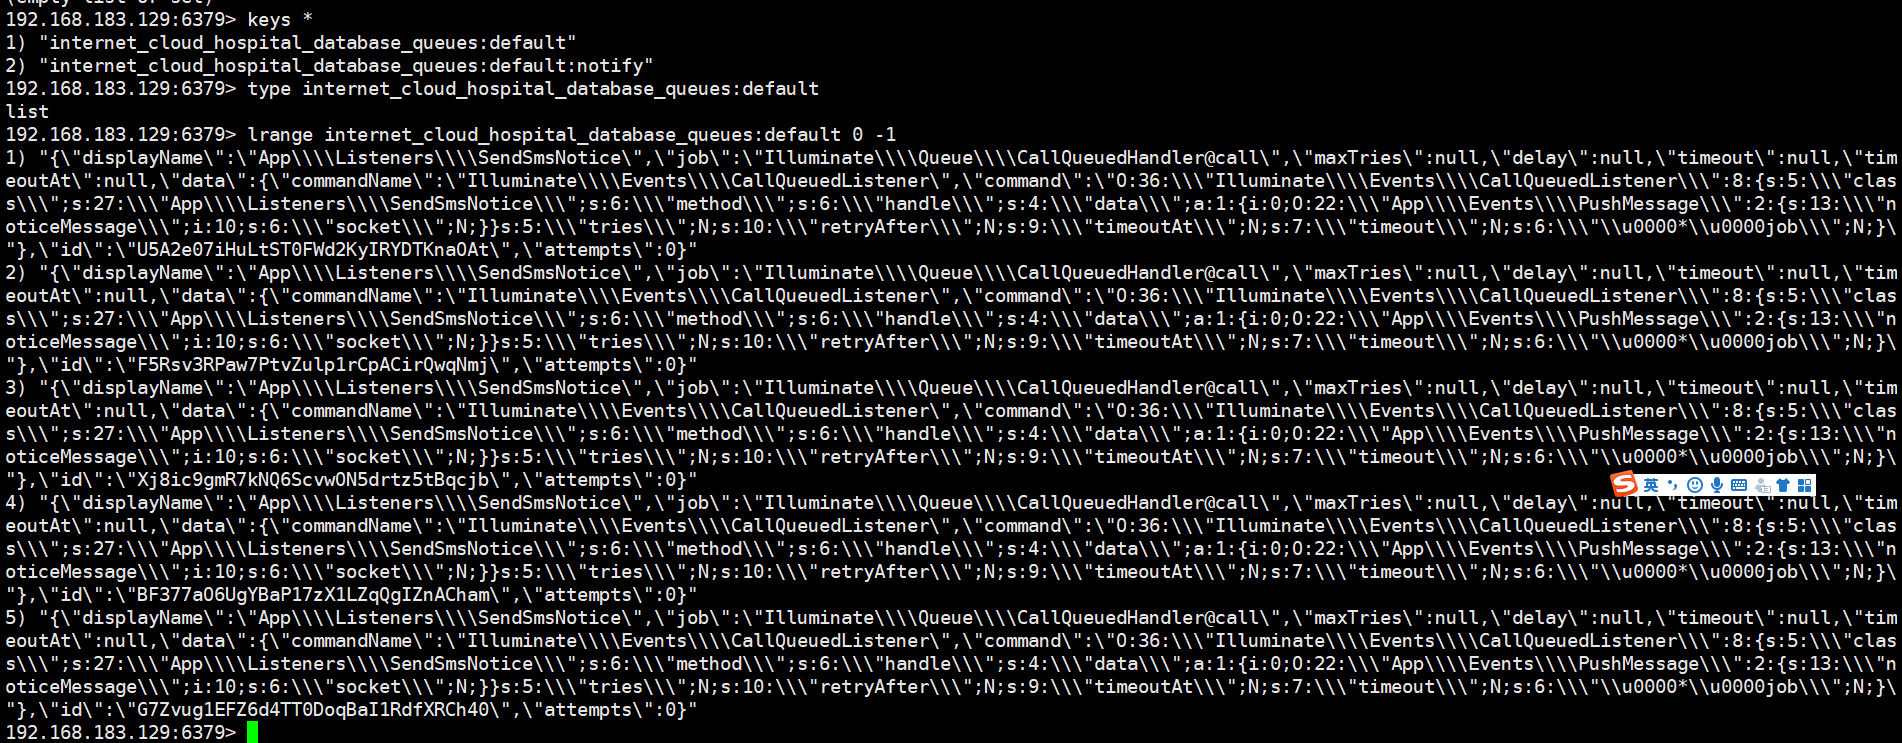
reids队列截图:
1、修改配置文件
laravel队列的配置文件在 config 目录下 有一个 queue.php 这样的一个文件
这读取的是.env 文件,QUEUUE_DRIVER 这个选项,我们更改成 database
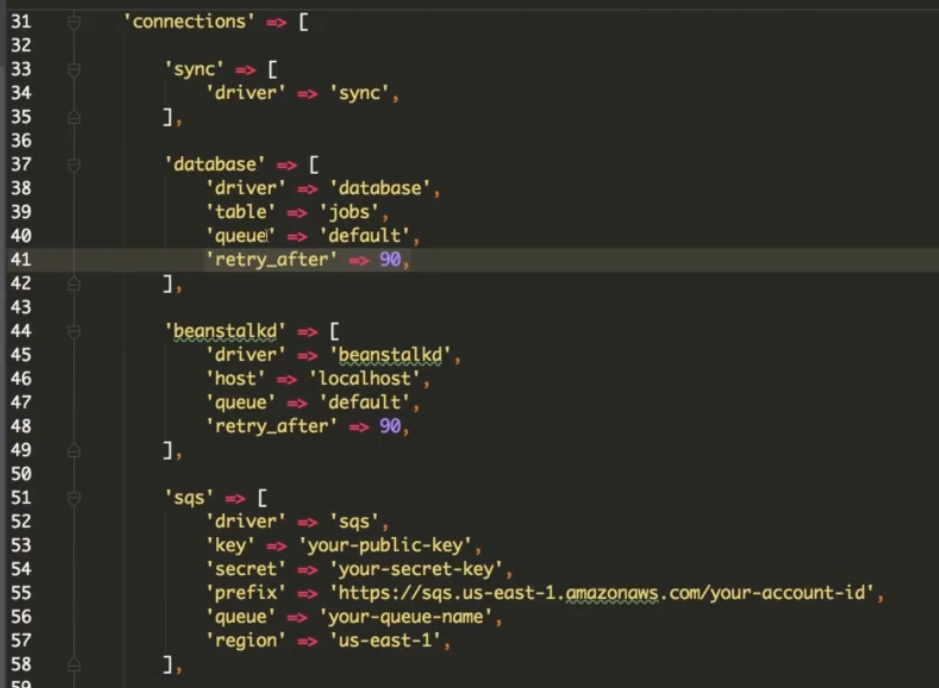
下面的connections 数组中有配置这几项:
我们这里不需要直接修改config/queue.php 这个文件,而是我们直接需要的是 修改 .env 文件
2、创建表
php artisan queue:table 创建 jobs 表的命令,执行命令后,会在migrations 目录下增加一个文件,G:\phpstudy\WWW\laravel_base>php artisan queue:table
Migration created successfully!
然后执行 php artisan migrate 命令就能在数据库创建一张jobs表。G:\phpstudy\WWW\laravel_base>php artisan migrate
Migration table created successfully.
Migrating: 2019_09_21_073645_create_jobs_table
Migrated: 2019_09_21_073645_create_jobs_table
job表创建结构mysql> show create table jobs \G
*************************** 1. row ***************************
Table: jobs
Create Table: CREATE TABLE `jobs` (
`id` bigint(20) unsigned NOT NULL AUTO_INCREMENT,
`queue` varchar(255) COLLATE utf8mb4_unicode_ci NOT NULL,
`payload` longtext COLLATE utf8mb4_unicode_ci NOT NULL,
`attempts` tinyint(3) unsigned NOT NULL,
`reserved_at` int(10) unsigned DEFAULT NULL,
`available_at` int(10) unsigned NOT NULL,
`created_at` int(10) unsigned NOT NULL,
PRIMARY KEY (`id`),
KEY `jobs_queue_index` (`queue`(250))
) ENGINE=MyISAM AUTO_INCREMENT=9 DEFAULT CHARSET=utf8mb4 COLLATE=utf8mb4_unicode_ci
1 row in set (0.00 sec)
//显示一条结构
mysql> select * from jobs limit 1 \G
*************************** 1. row ***************************
id: 1
queue: default
payload: {"displayName":"App\\Listeners\\SendOrderMail","job":"Illuminate\\Queue\\CallQueuedHandler@call"
,"maxTries":null,"delay":null,"timeout":null,"timeoutAt":null,
"data":{"commandName":"Illuminate\\Events\\CallQueuedListener",
"command":"O:36:\"Illuminate\\Events\\CallQueuedListener\":7:{s:5:\"class\";s:27:\"App\\Listeners\\SendOrderMail\";s:6:\"method\";
s:6:\"handle\";s:4:\"data\";a:1:{i:0;O:20:\"App\\Events\\UserEvent\":2:{s:7:\"\u0000*\u0000data\";a:2:{i:0;s:3:\"123\";i:1;s:3:\"456\";}
s:6:\"socket\";N;}}s:5:\"tries\";N;s:9:\"timeoutAt\";N;s:7:\"timeout\";N;s:6:\"\u0000*\u0000job\";N;}"}}
attempts: 0
reserved_at: NULL
available_at: 1569051999
created_at: 1569051999
1 row in set (0.00 sec)
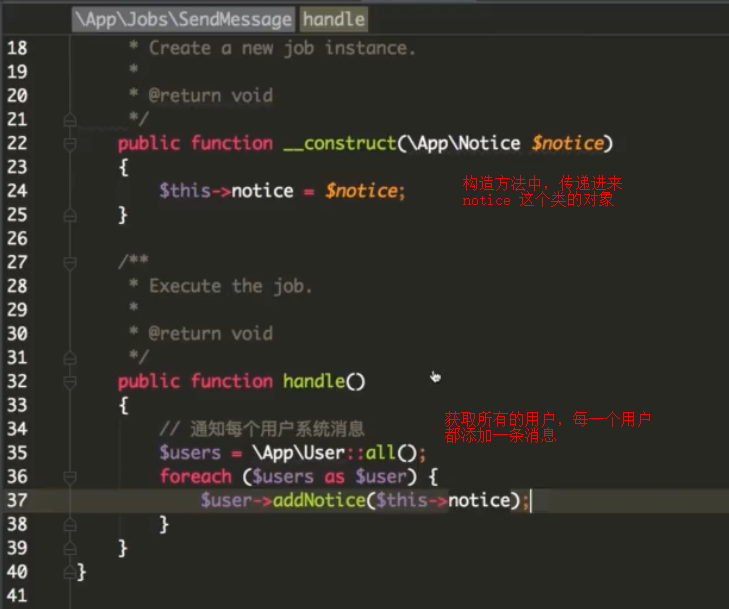
3、创建任务
php artisan make:job SendMessage
这样就会在app目录下,创建一个 Jobs文件夹 下面有一个 SendMessage.php
我们需要做的事情 放在 handle 方法下
4、创建发送逻辑 dispatch

或者使用:
在控制器中使用下面命令:
$this->dispatch(new SendEmail($user));
5、启动队列
php artisan queue:work
这样的队列会占用一个窗口
后台启动,不占用窗口,不受其他进程影响
nohup php artisan queue:work >> /dev/null &

都是需要开启work 去消费的
真实案例:
1、触发任务 IndexController.php
使用dispatch 方法触发
namespace App\Http\Controllers\News;
use App\Http\Controllers\Controller;
use App\Jobs\SendMessage;
use Illuminate\Http\Request;
class IndexController extends Controller
{
public function list(){
$this->dispatch(new SendMessage(100));
dump(123123);
}
}
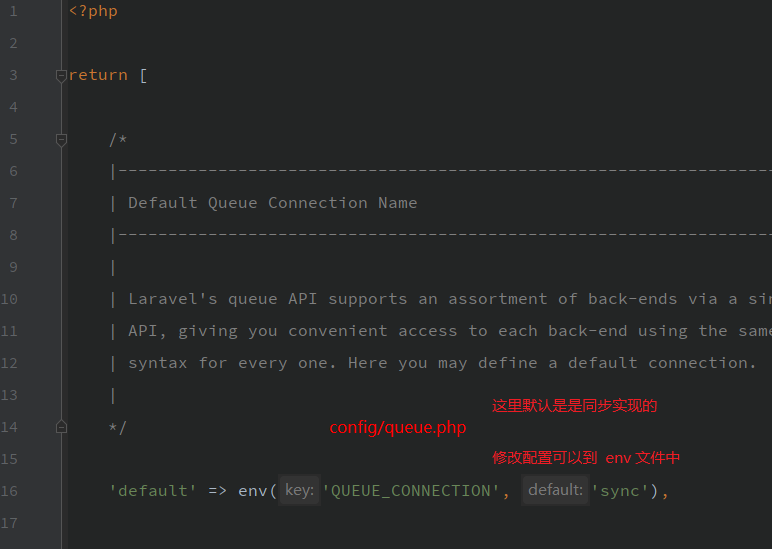
2、配置文件默认配置 config/queue.php
默认配置是 sync 同步。一般开发环境会设置为同步,生产环境会设置为 异步(database/redis)
3、执行结果:
同步执行的效果如下
日志:[2020-02-20 16:48:20] production.INFO: 当前方法:GET 当前请求路由地址:/news/list
[2020-02-20 16:48:20] production.INFO: requestParamsData:
[2020-02-20 16:48:20] production.INFO: 当前时间2020-02-20 16:48:20
[2020-02-20 16:48:20] production.INFO: current-count:100
[2020-02-20 16:48:20] production.INFO: current-count:99
[2020-02-20 16:48:20] production.INFO: current-count:98
[2020-02-20 16:48:20] production.INFO: current-count:97
[2020-02-20 16:48:20] production.INFO: current-count:96
[2020-02-20 16:48:20] production.INFO: current-count:95
[2020-02-20 16:48:20] production.INFO: current-count:94
[2020-02-20 16:48:20] production.INFO: current-count:93
[2020-02-20 16:48:20] production.INFO: current-count:92
...
[2020-02-20 16:48:20] production.INFO: current-count:7
[2020-02-20 16:48:20] production.INFO: current-count:6
[2020-02-20 16:48:20] production.INFO: current-count:5
[2020-02-20 16:48:20] production.INFO: current-count:4
[2020-02-20 16:48:20] production.INFO: current-count:3
[2020-02-20 16:48:20] production.INFO: current-count:2
[2020-02-20 16:48:20] production.INFO: current-count:1
[2020-02-20 16:48:20] production.INFO: 结束时间2020-02-20 16:48:20
我们看到很快就执行完毕了。
但是要知道 为什么会创建一个任务呢,就是为了执行比较耗时的操作。
下面做如下设置:
因为速度太快无法看到执行时间,为了给大家更清楚的看到效果,
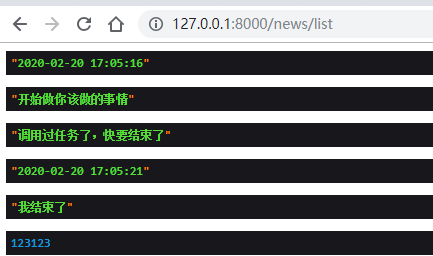
日志如下:
[2020-02-20 17:05:16] production.INFO: 当前方法:GET 当前请求路由地址:/news/list
[2020-02-20 17:05:16] production.INFO: requestParamsData:
[2020-02-20 17:05:16] production.INFO: 当前时间2020-02-20 17:05:16
[2020-02-20 17:05:16] production.INFO: current-count:100
[2020-02-20 17:05:16] production.INFO: current-count:99
[2020-02-20 17:05:16] production.INFO: current-count:98
[2020-02-20 17:05:16] production.INFO: current-count:97
[2020-02-20 17:05:16] production.INFO: current-count:96
.....
[2020-02-20 17:05:21] production.INFO: current-count:9
[2020-02-20 17:05:21] production.INFO: current-count:8
[2020-02-20 17:05:21] production.INFO: current-count:7
[2020-02-20 17:05:21] production.INFO: current-count:6
[2020-02-20 17:05:21] production.INFO: current-count:5
[2020-02-20 17:05:21] production.INFO: current-count:4
[2020-02-20 17:05:21] production.INFO: current-count:3
[2020-02-20 17:05:21] production.INFO: current-count:2
[2020-02-20 17:05:21] production.INFO: current-count:1
[2020-02-20 17:05:21] production.INFO: 结束时间2020-02-20 17:05:21
从上到下,看到执行了5秒钟 ,这是同步的。
如何改成异步?
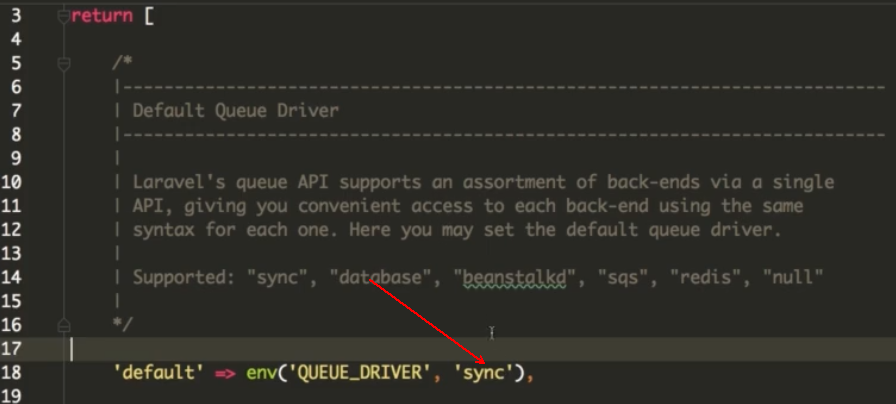
修改 config/queue.php 文件中 QUEUE_CONNECTION 设置队列的名字
可支持 sync database baanstalkd sqs redis null 这些驱动。
当然可以自己去定义,我个人认为没有必要。
这些驱动已经很全面了
/*
|--------------------------------------------------------------------------
| Default Queue Connection Name
|--------------------------------------------------------------------------
|
| Laravel's queue API supports an assortment of back-ends via a single
| API, giving you convenient access to each back-end using the same
| syntax for every one. Here you may define a default connection.
|
*/
'default' => env('QUEUE_CONNECTION', 'sync'),
/*
|--------------------------------------------------------------------------
| Queue Connections
|--------------------------------------------------------------------------
|
| Here you may configure the connection information for each server that
| is used by your application. A default configuration has been added
| for each back-end shipped with Laravel. You are free to add more.
|
| Drivers: "sync", "database", "beanstalkd", "sqs", "redis", "null"
|
*/
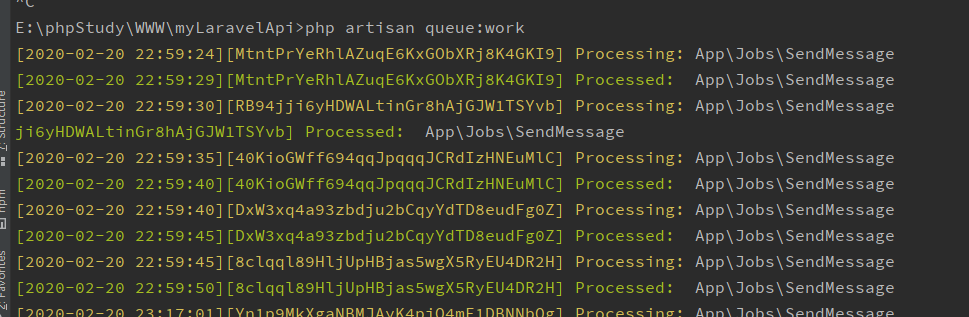
redis消费队列:
执行截图如下:
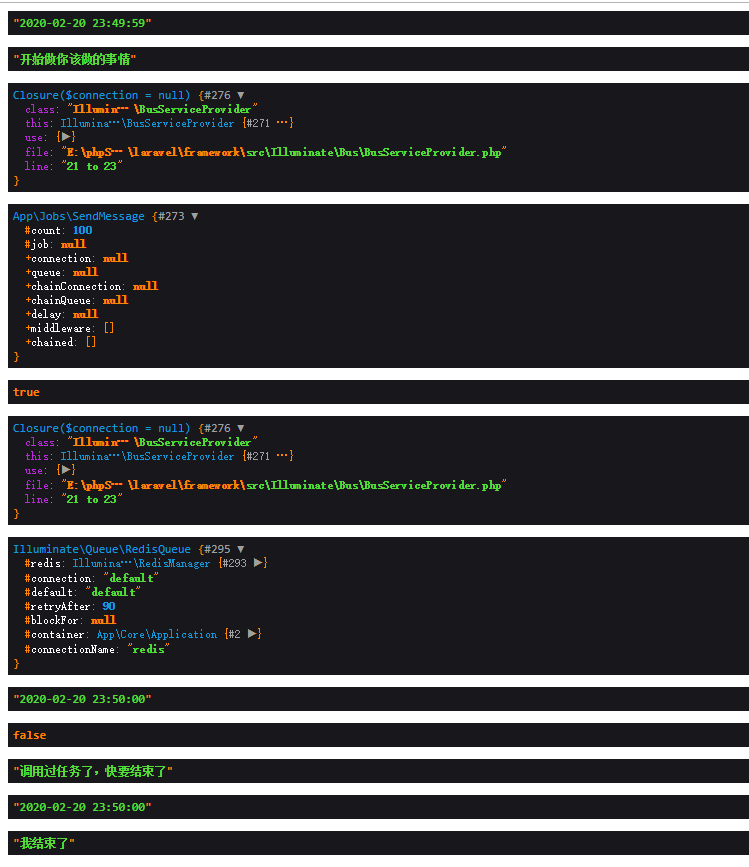
这是一个需要执行5秒才能结束的任务,现在只需要1秒 很快就能返回。
49秒 到 50秒
只需要消费1秒中的时间就可以消费完下面的任务。
执行日志结果:[2020-02-20 23:49:59] development.INFO: 当前方法:GET 当前请求路由地址:/news/list
[2020-02-20 23:49:59] development.INFO: requestParamsData:
[2020-02-20 23:50:02] development.INFO: 当前时间2020-02-20 23:50:02
[2020-02-20 23:50:02] development.INFO: current-count:100
[2020-02-20 23:50:02] development.INFO: current-count:99
[2020-02-20 23:50:02] development.INFO: current-count:98
[2020-02-20 23:50:02] development.INFO: current-count:97
[2020-02-20 23:50:02] development.INFO: current-count:96
[2020-02-20 23:50:02] development.INFO: current-count:95
[2020-02-20 23:50:02] development.INFO: current-count:94
...
[2020-02-20 23:50:06] development.INFO: current-count:16
[2020-02-20 23:50:06] development.INFO: current-count:15
[2020-02-20 23:50:06] development.INFO: current-count:14
[2020-02-20 23:50:06] development.INFO: current-count:13
[2020-02-20 23:50:06] development.INFO: current-count:12
[2020-02-20 23:50:06] development.INFO: current-count:11
[2020-02-20 23:50:06] development.INFO: current-count:10
[2020-02-20 23:50:06] development.INFO: current-count:9
[2020-02-20 23:50:06] development.INFO: current-count:8
[2020-02-20 23:50:06] development.INFO: current-count:7
[2020-02-20 23:50:06] development.INFO: current-count:6
[2020-02-20 23:50:06] development.INFO: current-count:5
[2020-02-20 23:50:07] development.INFO: current-count:4
[2020-02-20 23:50:07] development.INFO: current-count:3
[2020-02-20 23:50:07] development.INFO: current-count:2
[2020-02-20 23:50:07] development.INFO: current-count:1
[2020-02-20 23:50:07] development.INFO: 结束时间2020-02-20 23:50:07
从 59秒 执行到 07 秒 ,可以见到我们的脚本是异步消费的。
需要特殊说明一下:
使用任务,必须开启 消费队列
php artisan queue:work
protected $signature = 'queue:work
{connection? : The name of the queue connection to work}
{--queue= : The names of the queues to work}
{--daemon : Run the worker in daemon mode (Deprecated)}
{--once : Only process the next job on the queue}
{--stop-when-empty : Stop when the queue is empty}
{--delay=0 : The number of seconds to delay failed jobs}
{--force : Force the worker to run even in maintenance mode}
{--memory=128 : The memory limit in megabytes}
{--sleep=3 : Number of seconds to sleep when no job is available}
{--timeout=60 : The number of seconds a child process can run}
{--tries=1 : Number of times to attempt a job before logging it failed}';
ClassOrder Jobs<?php
namespace App\Jobs;
use Illuminate\Bus\Queueable;
use Illuminate\Queue\SerializesModels;
use Illuminate\Queue\InteractsWithQueue;
use Illuminate\Contracts\Queue\ShouldQueue;
use Illuminate\Foundation\Bus\Dispatchable;
use App\Models\Order;
// 代表这个类需要被放到队列中执行,而不是触发时立即执行
class CloseOrder implements ShouldQueue
{
use Dispatchable, InteractsWithQueue, Queueable, SerializesModels;
protected $order;
public function __construct(Order $order, $delay)
{
$this->order = $order;
// 设置延迟的时间,delay() 方法的参数代表多少秒之后执行
$this->delay($delay);
}
// 定义这个任务类具体的执行逻辑
// 当队列处理器从队列中取出任务时,会调用 handle() 方法
public function handle()
{
// 判断对应的订单是否已经被支付
// 如果已经支付则不需要关闭订单,直接退出
if ($this->order->paid_at) {
return;
}
// 通过事务执行 sql
\DB::transaction(function() {
// 将订单的 closed 字段标记为 true,即关闭订单
$this->order->update(['closed' => true]);
// 循环遍历订单中的商品 SKU,将订单中的数量加回到 SKU 的库存中去
foreach ($this->order->items as $item) {
$item->productSku->addStock($item->amount);
}
if ($this->order->couponCode) {
$this->order->couponCode->changeUsed(false);
}
});
}
}
调用:// 这里我们直接使用 dispatch 函数dispatch(new CloseOrder($order, config('app.order_ttl')));
处理失败的任务记录在failed_jobs数据库表中
如果一个任务已经到达了最大尝试次数,它就会被插入到 failed_jobs 数据库表中。
要创建 failed_jobs 数据库迁移表,你可以使用 queue:failed-table 命令:php artisan queue:failed-table
php artisan migrate
原理:
Laravel 只是driver 值允许一种dynamodb 其他的不支持。 从代码上看均不支持。
如果存在table 这个字段的话,会通过database 这个驱动存储到数据库表里面。'failed' => [
'driver' => env('QUEUE_FAILED_DRIVER', 'database'),
'database' => env('QUEUE_FAILED_DATABASE', 'mysql'),
'table' => 'failed_jobs',
],

重试失败的任务
要想查看所有被放入 failed_jobs 数据表中的任务,你可以使用 Artisan 命令 queue:failed :
php artisan queue:failed
queue:failed 命令会列出任务 ID ,队列,以及失败的时间。任务 ID 可能会被用于重试失败的任务。例如,要重试一个任务 ID 为 5 的任务,使用如下命令:
php artisan queue:retry 5
要重试所有失败的任务,执行 queue:retry 命令,将 all 作为 ID 传入:
php artisan queue:retry all
如果你想删除一个失败的任务,使用 queue:forget 命令:
php artisan queue:forget 5
要清空所有失败的任务,使用 queue:flush 命令:
php artisan queue:flush
任务中,在什么情况下会失败:
Laravel 可以通过 Dispatch 方法将 Job 压入队列,例如:
SendMailJob::dispatch($detail)->onQueue('sendEmail');
我的问题是, Laravel 如何判断 Job 执行的成功与失败从而删除或保留 queue 在 Jobs table 表中的记录。
背景:
我在 SendMailJob 的 handler 方法中,使用 abort 方法跳出任务,这貌似会被认为任务失败,但使用 abort 方法跳出任务在业务逻辑上是正确的,这就导致 Laravel 保留并重复执行该任务并始终失败。
回答1
如果 handler 抛出异常就会被认为失败,而 Laravel 的 abort 函数会抛出异常,所以被标记为 failure。
正确的做法应该是直接 return; 结束 handler 方法的执行。
回答2
谢谢,我在 handler 中使用自定义的逻辑来抛出异常,并希望 handler 的执行结果始终为 success,但这种方式貌似不被 laravel 接受。最终使用 try catch 捕获异常,并使用 $this->delete () 删除当前 job 在 jobs 表中的记录才消停。
// 这个任务将被分发到默认队列...
Job::dispatch();
// 这个任务将被发送到「emails」队列...
Job::dispatch()->onQueue('emails');
php artisan queue:work --queue=high,default
use App\Jobs\ProcessPodcast;
ProcessPodcast::dispatch($podcast);
//你可以在分发任务的时候使用 delay 方法。例如,让我们详细说明一个十分钟之后才会执行的任务:
ProcessPodcast::dispatch($podcast)
->delay(now()->addMinutes(10));
如果您想立即(同步)执行队列任务,可以使用 dispatchNow 方法。 使用此方法时,队列任务将不会排队,并立即在当前进程中运行:
ProcessPodcast::dispatchNow($podcast);
分发任务到指定队列#
->onQueue('processing');
ProcessPodcast::dispatch($podcast)->onQueue('processing');
分发任务到指定连接#
onConnection
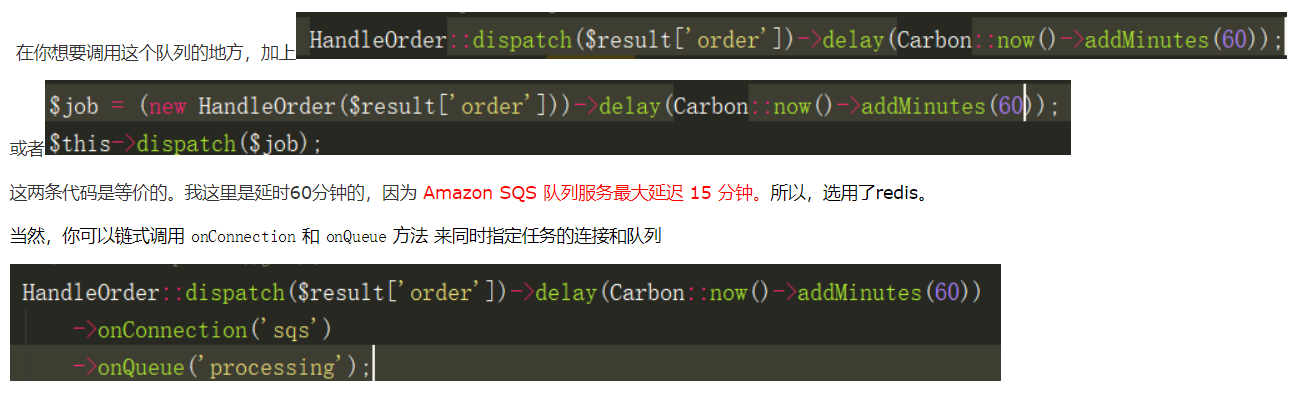
当然,你可以链式调用 onConnection 和 onQueue 方法来指定连接和队列:
ProcessPodcast::dispatch($podcast)
->onConnection('sqs')
->onQueue('processing');
或者,可以将 connection 指定为任务类的属性:
namespace App\Jobs;
class ProcessPodcast implements ShouldQueue
{
/**
* 应该处理任务的队列连接.
*
* @var string
*/
public $connection = 'sqs';
}
指定最大任务尝试次数 / 超时值
最大尝试次数
在一个任务重指定最大尝试次数可以通过 Artisan 命令的 --tries 选项 指定:
php artisan queue:work --tries=3
你可能想通过任务类自身对最大任务尝试次数进行一个更颗粒化的处理。如果最大尝试次数是在任务类中定义的,它将优先于命令行中的值提供:
namespace App\Jobs;
class ProcessPodcast implements ShouldQueue
{
/**
* 任务可以尝试的最大次数。
*
* @var int
*/
public $tries = 5;
}
超时
php artisan queue:work --timeout=30
namespace App\Jobs;
class ProcessPodcast implements ShouldQueue
{
/**
* 任务可以执行的最大秒数 (超时时间)。
*
* @var int
*/
public $timeout = 120;
}
频率限制 这个应用 只能使用redis才能使用
{note} 这个特性要求你的应用可以使用 Redis 服务器.
如果你的应用使用了 Redis,你可以通过时间或并发限制你的队列任务。当你的队列任务通过同样有速率限制的 API 使用时,这个特性将很有帮助。
例如,使用 throttle 方法,你可以限制一个给定类型的任务每 60 秒只执行 10 次。如果没有获得锁,一般情况下你应该将任务放回队列以使其可以被稍后重试。
Redis::throttle('key')->allow(10)->every(60)->then(function () {
// 任务逻辑...
}, function () {
// 无法获得锁...
return $this->release(10);
});
错误处理
如果在任务执行的时候出现异常,任务会被自动释放到队列中以再次尝试。
任务将会一直被释放直到达到应用允许的最大重试次数。
最大重试的数值由 queue:work Artisan 命令的 --tries 选项定义,
或者在任务类中定义。


 832
832


 被折叠的 条评论
为什么被折叠?
被折叠的 条评论
为什么被折叠?
 到【灌水乐园】发言


