


1.背景
用electron调用三方mac和windows原生接口,对方给的mac接口是.so格式的,用node通过ffi调用sdk
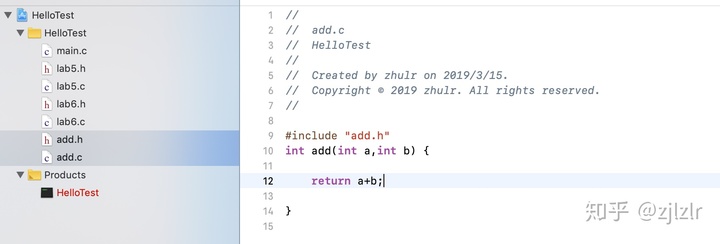
2.新建.c文件,mac上在xcode上新建c项目测试
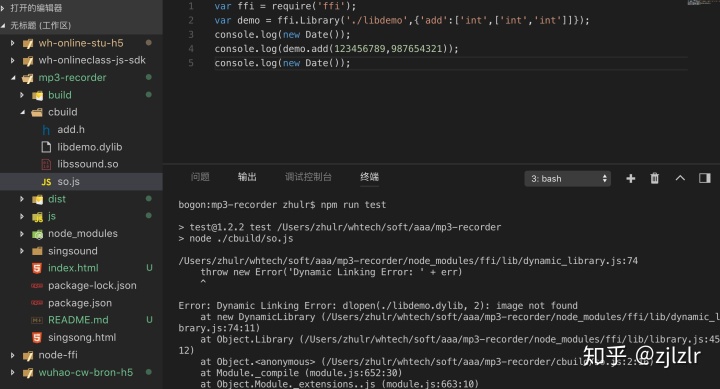
3.参考https://blog.csdn.net/u010049696/article/details/79427414,编译成.so文件,编译后用ffi调用,一直报错
解决方案:
1.用 lipo -info libssound.so,查看是不是mac格式

2.确定是mac格式,把.so后缀改成.dylib
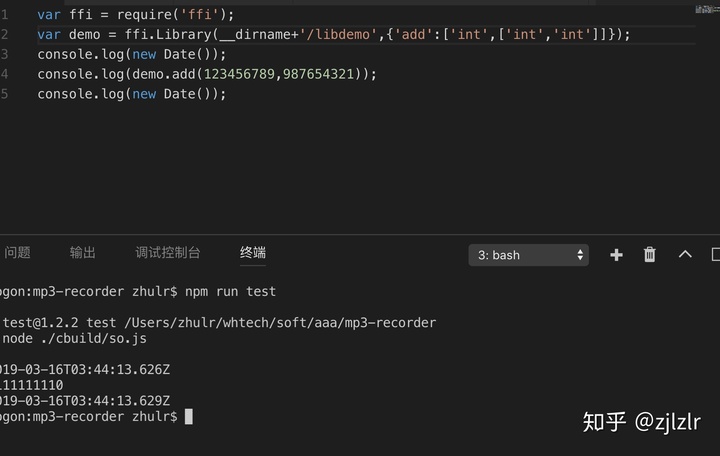
3.文件路径不对,修改为__dirname+'/libdemo'
4.最终结果
5.补充参考:
1、npm install -g node-gyp,如果安装前提示ssl相关错误,则需先安装ssl,使用命令yum install openssll
2、npm install ffi bindings --save 安装模块到项目目录下
生成动态库:
1、编写测试文件
//add.c
int add(int a,int b) {
rerturn a+b;
}
2、编写Makefile文件
all:
gcc -fPIC -shared -o libdemo.so add.c
clean:
rm -frv libdemo*
3、编译动态库文件libdemo.so
4、添加动态库到搜索路径
echo pwd >> /etc/ld.so.conf
ldconfig
5、查看动态库是否添加到成功
ldd *


 4217
4217


 被折叠的 条评论
为什么被折叠?
被折叠的 条评论
为什么被折叠?
 到【灌水乐园】发言


