


在这篇文章里,我们将学会如何在CentOS 7云服务器上安装LAMP环境,也就是Apache、PHP和MySQL。整个安装过程分为下面几个步骤。
更新操作系统
在安装之前,我们更新操作系统到最新版本,并重启云服务器。
yum update -y
reboot
安装Apache
通过以下命令安装Apache:
yum install httpd -y
systemctl start httpd
通过以下命令查看Apache的版本:
httpd -v
显示结果如下:
Server version: Apache/2.4.6 (CentOS)
Server built: Aug 8 2019 11:41:18
设置firewalld允许80端口访问:
firewall-cmd --zone=public --add-port=80/tcp --permanent
firewall-cmd --reload
还需要设置Apache跟随系统启动:
systemctl enable httpd
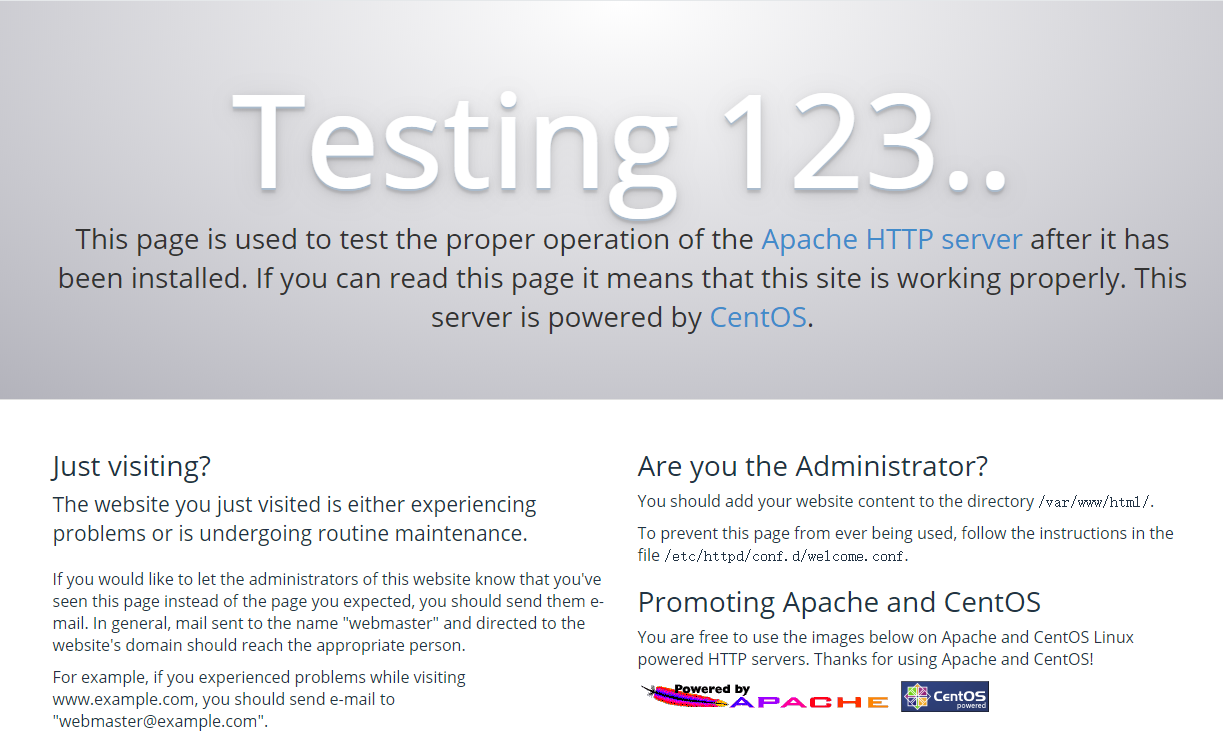
如果我们在浏览器上访问云服务器的IP地址 http://IPAddress ,出现Apache的默认页面,就说明Apache已经安装成功了。
安装PHP
通过以下命令安装PHP:
yum install php -y
接下来,安装必要的PHP扩展:
yum install php-{bcmath,intl,gd,mcrypt,mbstring,mysql,fpm} -y
通过以下命令查看PHP的版本:
php -v
显示结果如下:
PHP 5.4.16 (cli) (built: Nov 1 2019 16:04:20)
Copyright (c) 1997-2013 The PHP Group
Zend Engine v2.4.0, Copyright (c) 1998-2013 Zend Technologies
通过以下命令查看PHP安装的模块:
php -m
显示结果如下:
[PHP Modules]
bcmath
bz2
calendar
Core
ctype
curl
date
ereg
exif
fileinfo
filter
ftp
gd
gettext
gmp
hash
iconv
intl
json
libxml
mbstring
mhash
mysql
mysqli
openssl
pcntl
pcre
PDO
pdo_mysql
pdo_sqlite
Phar
readline
Reflection
session
shmop
SimpleXML
sockets
SPL
sqlite3
standard
tokenizer
xml
zip
zlib
[Zend Modules]
安装MySQL
通过以下命令安装MySQL:
yum install mariadb-server -y
systemctl start mariadb.service
通过以下命令查看MySQL的版本:
mysql -V
显示结果如下:
mysql Ver 15.1 Distrib 5.5.64-MariaDB, for Linux (x86_64) using readline 5.1
然后,运行MySQL安装配置向导:
mysql_secure_installation
在MySQL安装配置向导中,我们需要输入root密码,并回答一些安全性相关的问题,通常只需要选择向导提供的默认值即可。
NOTE: RUNNING ALL PARTS OF THIS SCRIPT IS RECOMMENDED FOR ALL MariaDB SERVERS IN PRODUCTION USE! PLEASE READ EACH STEP CAREFULLY!
In order to log into MariaDB to secure it, we'll need the current password for the root user. If you've just installed MariaDB, and you haven't set the root password yet, the password will be blank, so you should just press enter here.
Enter current password for root (enter for none):
OK, successfully used password, moving on...
Setting the root password ensures that nobody can log into the MariaDB
root user without the proper authorisation.
Set root password? [Y/n]
New password:
Re-enter new password:
Password updated successfully!
Reloading privilege tables..
... Success!
By default, a MariaDB installation has an anonymous user, allowing anyone to log into MariaDB without having to have a user account created for them. This is intended only for testing, and to make the installation go a bit smoother. You should remove them before moving into a production environment.
Remove anonymous users? [Y/n]
... Success!
Normally, root should only be allowed to connect from 'localhost'. This ensures that someone cannot guess at the root password from the network.
Disallow root login remotely? [Y/n]
... Success!
By default, MariaDB comes with a database named 'test' that anyone can access. This is also intended only for testing, and should be removed
before moving into a production environment.
Remove test database and access to it? [Y/n]
- Dropping test database...
... Success!
- Removing privileges on test database...
... Success!
Reloading the privilege tables will ensure that all changes made so far will take effect immediately.
Reload privilege tables now? [Y/n]
... Success!
Cleaning up...
All done! If you've completed all of the above steps, your MariaDB installation should now be secure.
Thanks for using MariaDB!
还需要设置MySQL跟随系统启动:
systemctl enable mariadb.service
最后,重启Apache使之和PHP一起工作:
systemctl restart httpd
以上就是在CentOS 7云服务器上安装Apache、PHP和MySQL的教程。


 318
318


 被折叠的 条评论
为什么被折叠?
被折叠的 条评论
为什么被折叠?
 到【灌水乐园】发言


