


CenterOS7下 Mysql 5.7 tar.gz安装

安装新版mysql前,需将系统自带的mariadb-lib卸载
[root@hadoop01 ~]# rpm -qa|grep mariadb
mariadb-libs-5.5.56-2.el7.x86_64
[root@hadoop01 ~]# rpm -e --nodeps mariadb-libs-5.5.56-2.el7.x86_64
[root@hadoop01 ~]# rpm -qa|grep mariadb
解压安装包
tar -zxvf mysql-5.7.24-el7-x86_64.tar.gz
将该文件夹拷贝到/usr/local/下 并重命名为 mysql57
mv mysql-5.7.24-el7-x86_64 /usr/local/mysql57
在mysql57 下创建文件夹3306(我们将该文件夹设置为端口3306实例的目录,为防备多实例的情况)
mkdir /usr/local/mysql57/3306
mkdir /usr/local/mysql57/3306/log
创建my.cnf 内容如下
# For advice on how to change settings please see
# http://dev.mysql.com/doc/refman/5.7/en/server-configuration-defaults.html
[client]
socket=/usr/local/mysql57/3306/mysql.sock
port=3306
[mysqld]
#
# Remove leading # and set to the amount of RAM for the most important data
# cache in MySQL. Start at 70% of total RAM for dedicated server, else 10%.
# innodb_buffer_pool_size = 128M
#
# Remove leading # to turn on a very important data integrity option: logging
# changes to the binary log between backups.
# log_bin
#
# Remove leading # to set options mainly useful for reporting servers.
# The server defaults are faster for transactions and fast SELECTs.
# Adjust sizes as needed, experiment to find the optimal values.
# join_buffer_size = 128M
# sort_buffer_size = 2M
# read_rnd_buffer_size = 2M
basedir=/usr/local/mysql57/
datadir=/usr/local/mysql57/3306/data
socket=/usr/local/mysql57/3306/mysql.sock
default-storage-engine=INNODB
character_set_server=utf8
port=3306
# Disabling symbolic-links is recommended to prevent assorted security risks
symbolic-links=0
log-error=/usr/local/mysql57/3306/log/mysqld3306.log
pid-file=/usr/local/mysql57/3306/mysqld3306.pid
log_bin=mysql3306-bin
server_id=1
#skip-grant-tables
将my.cnf 放到/etc/下
mv my.cnf /etc/
创建一个mysql 用户
groupadd mysql
useradd -r -g mysql mysql
passwd mysql
给目录授权限
chown -R mysql:mysql /usr/local/mysql57/
初始化数据库
cd /usr/local/mysql57/bin
./mysqld --initialize --user=mysql --basedir=/usr/local/mysql57 --datadir=/usr/local/mysql57/3306/data
给数据库加密
./mysql_ssl_rsa_setup --datadir=/usr/local/mysql57/3306/data
启动mysql
./mysqld_safe --user=mysql&
检查是否启动
ps -ef|grep mysql
发现有mysql进程 即成功
设置登录密码
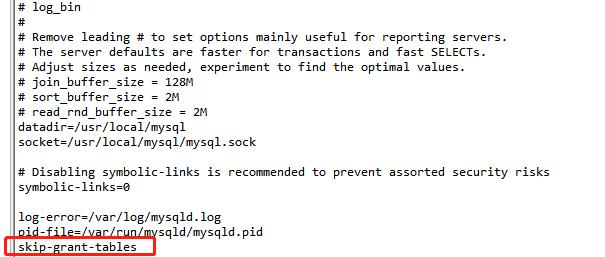
(1)修改/etc/my.cnf 添加skip-grant-tables
(2)重启服务(先关闭后开启)
./mysqladmin shutdown
ps –ef |grep mysql
如果没有了进程则说明停止服务成功
重新开启
./mysqld_safe --user=mysql&
(3)登录并修改密码
mysql –u root
update mysql.user set authentication_string=password('你要修改的密码') where user='root';
mysql> flush privileges;
Query OK, 0 rows affected (0.00 sec)
(4)把my.conf 中 skip-grant-tables 屏蔽
mysql5.7 需要再次登录上去:
[root@hadoop01 mysql-5.7]# mysql -u root -p
ALTER USER user() IDENTIFIED BY '123456';
使用alter user user() 再次设置下密码才可以, 到此 完成改密码操作
设置远程登录密码
[root@hadoop01 mysql-5.7]# mysql -u root -p
新创建用户:goodhope
创建用户:
create user 'goodhope@localhost' identified by '123456';
create user 'goodhope@%' identified by '123456';
删除用户:
drop user 'goodhope@%'
远程用户授权:
格式
格式:grant privileges on databasename.tablename to 'username'@'host' IDENTIFIED BY 'PASSWORD';
grant all privileges on *.* to 'goodhope'@'%' identified by '123456' with grant option;
# 刷新表
mysql> flush privileges;
Query OK, 0 rows affected (0.00 sec)
# 退出MySQL
mysql> quit;
Bye
设置开机自启动
1、添加服务mysql
cp support-files/mysql.server /etc/rc.d/init.d/mysqld
chmod a+x /etc/rc.d/init.d/mysqld
chkconfig --add mysqld
2、设置mysql服务为自启动
systemctl enable mysqld
注册服务后 启动 重启 关闭 查看状态指令分别是
systemctl start/restart/stop/status mysqld


 1459
1459


 被折叠的 条评论
为什么被折叠?
被折叠的 条评论
为什么被折叠?
 到【灌水乐园】发言


