


Docker安装
docker pull sonatype/nexus3

# 创建文件夹
mkdir -p /docker/nexus/
chmod 755 /docker/nexus/


# 启动容器
docker run -d --restart always --name nexus3 -p 8081:8081 -v /docker/nexus:/var/nexus-data sonatype/nexus3


# 启动容器 带内存大小
docker run -d --restart=always --name=nexus3 -p8081:8081 --privileged=true -e INSTALL4J_ADD_VM_PARAMS="-Xms512M -Xmx512M -XX:MaxDirectMemorySize=512M" -v /docker/nexus:/var/nexus-data sonatype/nexus3


# 访问地址
http://192.168.137.254:8081/


# 进入到容器中
docker exec -it nexus3 /bin/bash


# 查看初始密码
cat /nexus-data/admin.password

# 登录后修改密码即可
Windows安装
下载完成后,在指定位置进行安装;
打开CMD,使用管理员模式开启;并调整服务,使其自启动;
nexus.exe /install nexus配置
setting
<?xml version="1.0" encoding="UTF-8"?>
<settings xmlns="http://maven.apache.org/SETTINGS/1.2.0"
          xmlns:xsi="http://www.w3.org/2001/XMLSchema-instance"
          xsi:schemaLocation="http://maven.apache.org/SETTINGS/1.2.0 https://maven.apache.org/xsd/settings-1.2.0.xsd">
	<localRepository>D:\RunServer\apache-maven\apache-maven-repo</localRepository>
	<pluginGroups></pluginGroups>

	<proxies></proxies>

	<mirrors>
		<!-- 配置本地仓库资源来源 -->
		<mirror>
		  <id>maven-public</id>
		  <mirrorOf>*</mirrorOf>
		  <url>http://localhost:8081/repository/maven-public/</url>
		</mirror>
	</mirrors>

	<servers>
		<!-- 配置本地仓库访问私服的权限  nexus的 登录用户名密码 -->
		<server>
			<id>maven-releases</id>
			<username>admin</username>
			<password>admin</password>
		</server>
		<server>
			<id>maven-snapshots</id>
			<username>admin</username>
			<password>admin</password>
		</server>
	</servers>

	<repositories></repositories>

	<profiles>
		<profile>
			<id>dev-profile</id>
			<properties>
				<maven.compiler.source>1.8</maven.compiler.source>
				<maven.compiler.target>1.8</maven.compiler.target>
				<maven.compiler.compilerVersion>1.8</maven.compiler.compilerVersion>
			</properties>

			<!-- 远程仓库列表 maven 用来填充构建系统本地仓库所使用的一组远程仓库 -->
			<repositories>
				<repository>
					<id>maven-releases</id>
					<url>http://localhost:8081/repository/maven-releases/</url>
					<releases>
						<enabled>true</enabled>
					</releases>
					<snapshots>
						<enabled>false</enabled>
					</snapshots>
				</repository>

				<repository>
					<id>maven-snapshots</id>
					<url>http://localhost:8081/repository/maven-snapshots/</url>
					<releases>
						<enabled>true</enabled>
					</releases>
					<snapshots>
						<enabled>true</enabled>
					</snapshots>
				</repository>
			</repositories>

			<pluginRepositories>
				<pluginRepository>
					<id>maven-public</id>
					<url>http://localhost:8081/repository/maven-public</url>
				</pluginRepository>
			</pluginRepositories>
		</profile>
	</profiles>

	<!-- 生效标签 -->
	<activeProfiles>
		<activeProfile>dev-profile</activeProfile>
	</activeProfiles>
</settings>
pom
<?xml version="1.0" encoding="UTF-8"?>
<project xmlns="http://maven.apache.org/POM/4.0.0"
         xmlns:xsi="http://www.w3.org/2001/XMLSchema-instance"
         xsi:schemaLocation="http://maven.apache.org/POM/4.0.0 http://maven.apache.org/xsd/maven-4.0.0.xsd">
    <modelVersion>4.0.0</modelVersion>

    <groupId>com.isoftstone.cloud</groupId>
    <artifactId>test-core</artifactId>
    <version>1.0</version>
    <!-- 注意这里是父类POM,在这里配置的话,就不需要在下面的子模块里面配置 -->
    <packaging>pom</packaging>
    <modules>
        <module>test-core-apig</module>
    </modules>

    <dependencies>
        <dependency>
            <groupId>commons-lang</groupId>
            <artifactId>commons-lang</artifactId>
            <version>2.6</version>
        </dependency>
    </dependencies>

    <!--  maven仓库配置 deploy时可推送到对应的配置仓库中	-->
    <distributionManagement>
        <!--  正式版推送到这	-->
        <repository>
            <id>maven-releases</id>
            <name>Nexus Releases Repository Pro</name>
            <url>http://localhost:8081/repository/maven-releases/</url>
        </repository>

        <!--  测试版推送到这	-->
        <snapshotRepository>
            <id>maven-snapshots</id>
            <name>Nexus Snapshots Repository Pro</name>
            <url>http://localhost:8081/repository/maven-snapshots/</url>
        </snapshotRepository>
    </distributionManagement>


</project>
测试
新建项目
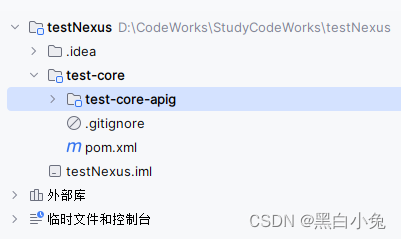
test-core -> POM.xml
<?xml version="1.0" encoding="UTF-8"?>
<project xmlns="http://maven.apache.org/POM/4.0.0"
         xmlns:xsi="http://www.w3.org/2001/XMLSchema-instance"
         xsi:schemaLocation="http://maven.apache.org/POM/4.0.0 http://maven.apache.org/xsd/maven-4.0.0.xsd">
    <modelVersion>4.0.0</modelVersion>

    <groupId>com.isoftstone.cloud</groupId>
    <artifactId>test-core</artifactId>
    <version>1.0</version>
    <!-- 注意这里是父类POM,在这里配置的话,就不需要在下面的子模块里面配置 -->
    <packaging>pom</packaging>
    <modules>
        <module>test-core-apig</module>
    </modules>

    <dependencies>
        <dependency>
            <groupId>commons-lang</groupId>
            <artifactId>commons-lang</artifactId>
            <version>2.6</version>
        </dependency>
    </dependencies>

    <!--  maven仓库配置 deploy时可推送到对应的配置仓库中	-->
    <distributionManagement>
        <!--  正式版推送到这	-->
        <repository>
            <id>maven-releases</id>
            <name>Nexus Releases Repository Pro</name>
            <url>http://localhost:8081/repository/maven-releases/</url>
        </repository>

        <!--  测试版推送到这	-->
        <snapshotRepository>
            <id>maven-snapshots</id>
            <name>Nexus Snapshots Repository Pro</name>
            <url>http://localhost:8081/repository/maven-snapshots/</url>
        </snapshotRepository>
    </distributionManagement>


</project>
test-core-apig -> POM.xml
<?xml version="1.0" encoding="UTF-8"?>
<project xmlns="http://maven.apache.org/POM/4.0.0"
         xmlns:xsi="http://www.w3.org/2001/XMLSchema-instance"
         xsi:schemaLocation="http://maven.apache.org/POM/4.0.0 http://maven.apache.org/xsd/maven-4.0.0.xsd">
    <modelVersion>4.0.0</modelVersion>
    <!-- 引用父类,在父类里面增加配置信息 -->
    <parent>
        <groupId>com.isoftstone.cloud</groupId>
        <artifactId>test-core</artifactId>
        <version>1.0</version>
    </parent>

    <artifactId>test-core-apig</artifactId>

    <!-- 没有配置Nexus上传配置信息 -->

</project>
执行代码

结果显示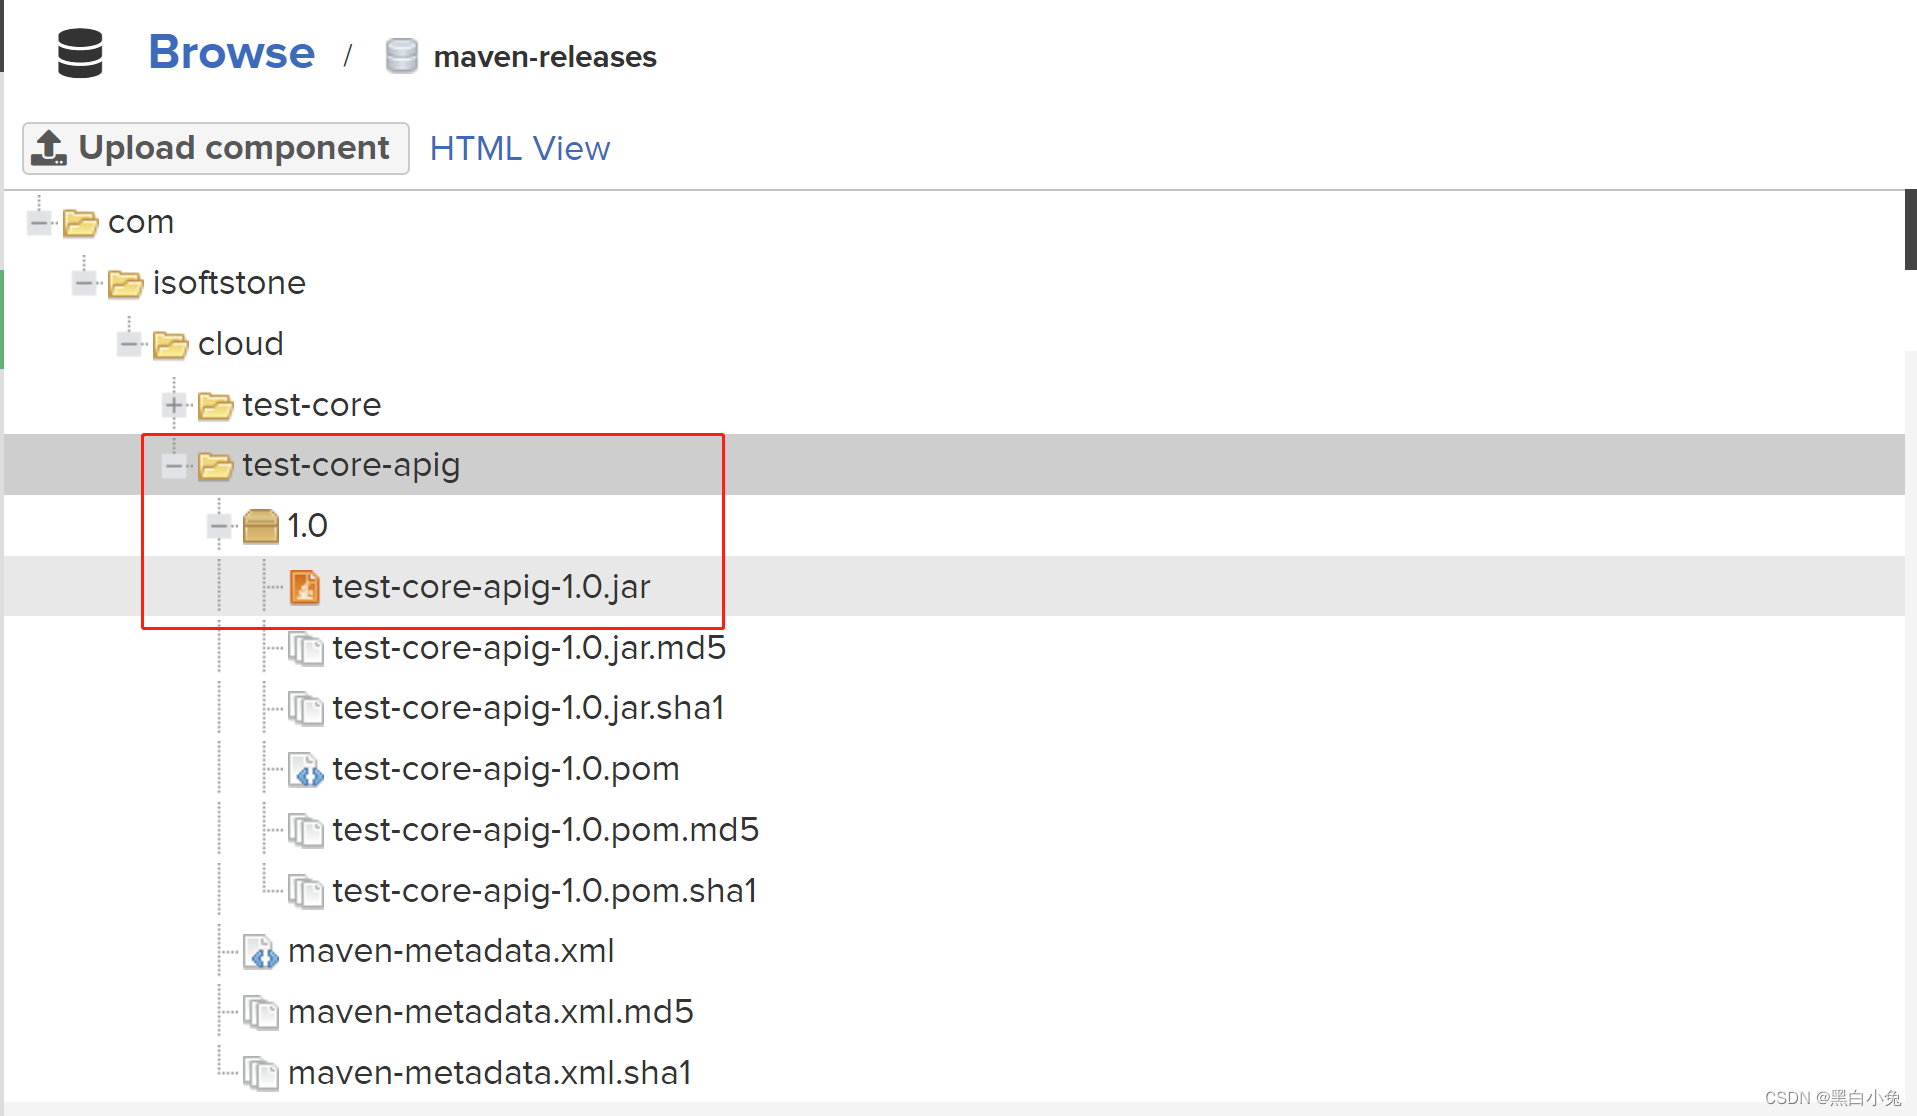


 177
177


 被折叠的 条评论
为什么被折叠?
被折叠的 条评论
为什么被折叠?
 到【灌水乐园】发言


