


android studio 官网 https://developer.android.com/studio/index.html
注意:Eclipse 和 android studio 不要用一个android sdk目录,否则eclipse报错:failed to get the required adt version number from the sdk错误,eclipse用不了
Android Studio Gradle Build Running 特别慢的问题--- !!!加速方法,不错
解决方法:
gradle.properties 中添加
org.gradle.parallel=true
org.gradle.daemon=true
0. android studio 安装后运行错误
(1) 解决AndroidStudio导入项目在 Building gradle project info 一直卡住
原文网址:
http://blog.csdn.net/yyh352091626/article/details/51490976
http://blog.csdn.net/liuhuiyi/article/details/21861733
解决办法主要有两种,一是直接下载gradle离线包,二是修改项目的gradle-wrapper.properties里的gradle版本为自己电脑已有的版本。
> 首先查看当前项目执行gradle版本, 项目的 /gradle/wrapper/gradle-wrapper.properties 文件,distributionUrl=https\://services.gradle.org/distributions/gradle-2.8-all.zip
gradle-2.8-all.zip 就是项目中指定的gradle版本
离线包下载导入方式
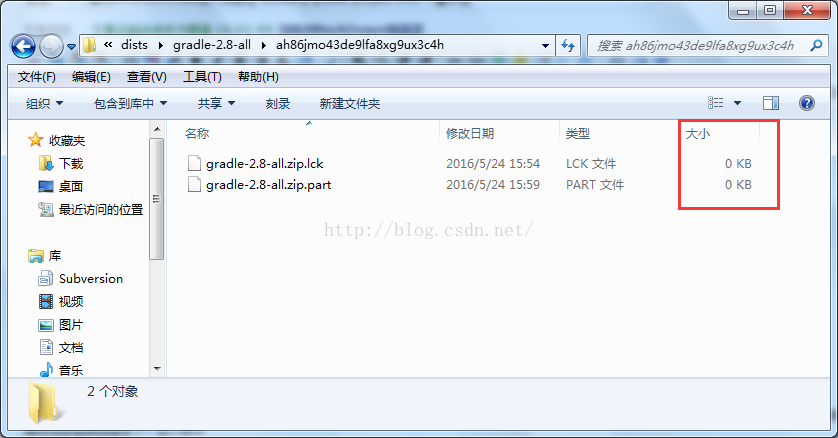
查看所需gradle版本:打开C:\Users\用户名\.gradle\wrapper\dists\gradle-x.xx-all\xxxxxxxxxxxx,如果里面的gradle-xx-all.zip不完整(如0KB),则说明下载不成功,需要下载离线包放置到该目录下。如下所示
那么,则需要下载gradle-2.8-all.zip。gradle各个版本离线包下载地址:http://services.gradle.org/distributions/
重启 android Studio,重新导入项目就可以了~~
(1) Android Studio导入工程报错[Plugin with id 'com.android.application' not found]
原文网址:http://blog.csdn.net/seafishyls/article/details/53572939
解决方案:
将build.gradle里面的配置脚本拷贝到Module下的 build.gradle里面,也就是下面的脚本:
buildscript {
    repositories {
        jcenter()
    }
    dependencies {
        classpath 'com.android.tools.build:gradle:2.2.0'
        //注意:更换成自己的AS的版本
    }
}
allprojects {
    repositories {
        jcenter()
    }
}
1. KVM is not installed on this machine (/dev/kvm is missing)
原文网址:http://askubuntu.com/questions/564910/kvm-is-not-installed-on-this-machine-dev-kvm-is-missing
I'm using Ubuntu 14.04 ...recently install the android studio I run a hello world program there will be a error:
/home/praveen/Android/Sdk/tools/emulator -avd Nexus_6_API_21 -netspeed full -netdelay none
emulator: ERROR: x86 emulation currently requires hardware acceleration!
Please ensure KVM is properly installed and usable.
CPU acceleration status: KVM is not installed on this machine (/dev/kvm is missing).
Use the below command to check whether the KVM is installed in the machine or not,
kvm-ok
Output:
INFO: /dev/kvm exists
KVM acceleration can be used
Output like the below means,
INFO: Your CPU does not support KVM extensions
KVM acceleration can NOT be used
In this scenario need to install KVM using the below command,
sudo apt-get install qemu-kvm libvirt-bin ubuntu-vm-builder bridge-utils
Hope this helps.
Worked on Ubuntu 15.04, Intel's CPU
sudo apt-get install qemu-kvm- Enable Virtualization Technology in BIOS
sudo kvm-ok
2. Android studio 中文社区
http://android-studio.org/index.php/download
gradle发布网址
http://services.gradle.org/distributions/
3.
No JVM installation found. Please install a 64-bit JDK.
(找不到JVM的安裝,請安裝64位元JDK)
If you already have a JDK installed, define a JAVA_HOME variable in
(如果你已經安裝JDK,請定義 JAVA_HOME 變數在以下位址)
Computer > System Properties > System Settings > Environment Variables
(電腦→內容→進階系統設定→環境變數)
解决方法:
win7下可以通过echo %JAVA_HOME%查看JAVA_HOME有没有配置好
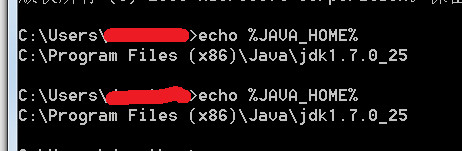
遇到了已经配置好,还提示上述问题的诡异现象,最后发现,原来在运行android studio时
我还开着eclipse,两个软件同时使用JVM冲突了。悲剧!!!
2. Android Studio显示行数
原文网址:http://blog.csdn.net/hyr83960944/article/details/36684399
Android Studio在打开的文件左侧单击鼠标右键,也能像Eclipse一样设置显示代码行数,如图1。但是这边跟Eclipse有一个很大的区别,Eclipse设置后,其余的对应文件也跟着生效,即使文件关闭后重新打开行数也还是会显示,但是在Android Studio中这种设置只是针对本文件,而且也只是暂时的,文件关闭重新打开后行数又不显示了,感觉这功能很鸡肋啊。
那如何设置才能使行数永久显示呢,见图2。
图1:
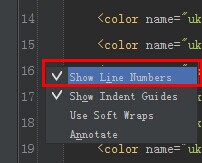
图2:

3. android studio 中的编码问题
原文网址:http://blog.csdn.net/zhaoyw2008/article/details/45533093
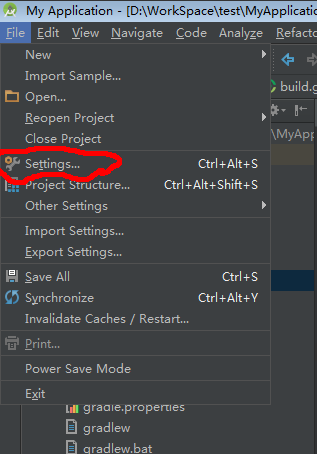
在 Android studio 中直接创建项目和导入其他项目都会有一个文件编码设定的问题,在 android studio (version 1.2.0)中设置文件的编码,只需要两步:
1.打开Setting->Editor->File Encoding 进行编码设置
2.打开module的 build.gradle 文件修改编译器使用的编码
1.打开Setting->Editor->File Encoding 进行编码设置
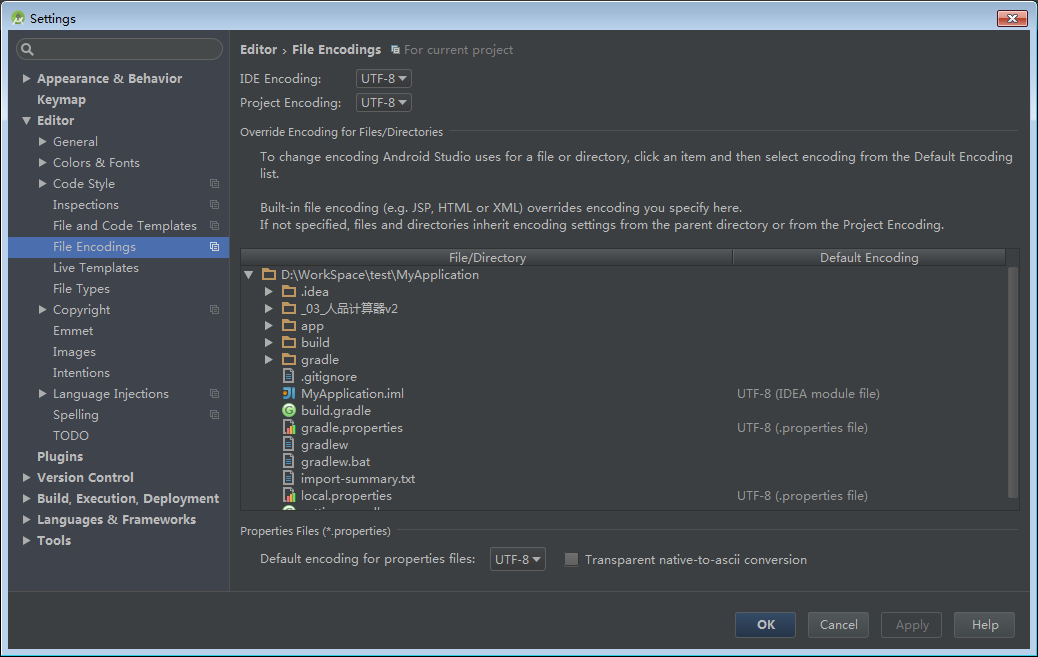
这里面主要有4块
IDE Encoding:ide 的编码
Project Encoding:项目的编码
File or Director Encoding:各个文件或者目录的编码
Property File Encoding:属性文件的编码
如果各个文件或者目录没有指定编码,默认使用 Project 的编码,如果 Project 没有加载的时候没有指定编码,默认使用 IDE 的编码,属性文件不能单个文件指定编码,只能通过 Property File Encoding 统一指定编码。
2.打开module的 build.gradle 文件修改编译器使用的编码
经过上面的设置,只能影响你在 IDE 里面编辑器视图里面看到的文件内容的编码。编译器使用的编码还需要单独设置,否则 gradle 默认使用 utf-8 的编码和文件的实际编码不一致,就会导致程序运行的时候显示乱码。
gradle 配置编码在 build.gradle 脚本文件中配置。添加上下面配置就行。
android {
......
compileOptions {
encoding "GBK"
}
}
4. 将Eclipse代码导入到AndroidStudio的两种方式 (不错 )
参考:http://www.cnblogs.com/wi100sh/p/7797408.html
5. Android Studio各种情况下导入library的教程(图解)
参考:http://blog.csdn.net/white__cat/article/details/53239409
6. Android Studio解决--错误Error: error in parsing "g/"
原文网址:http://blog.csdn.net/mazaiting/article/details/67646519
在app->build.gradle中defaultConfig中添加
vectorDrawables.useSupportLibrary = true
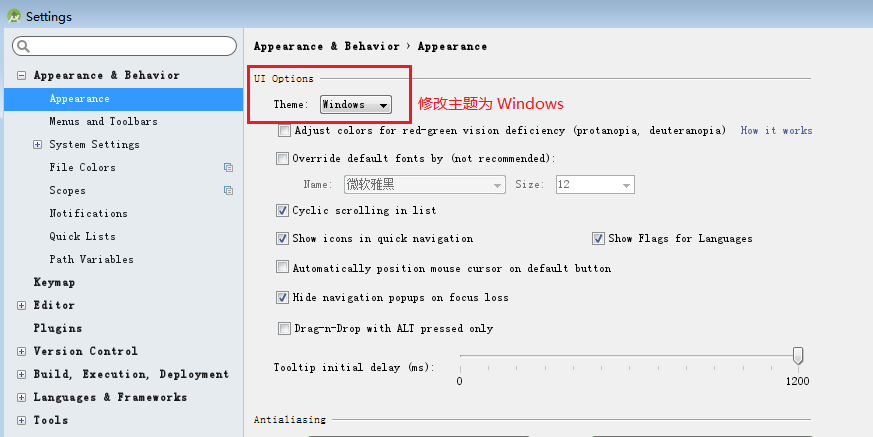
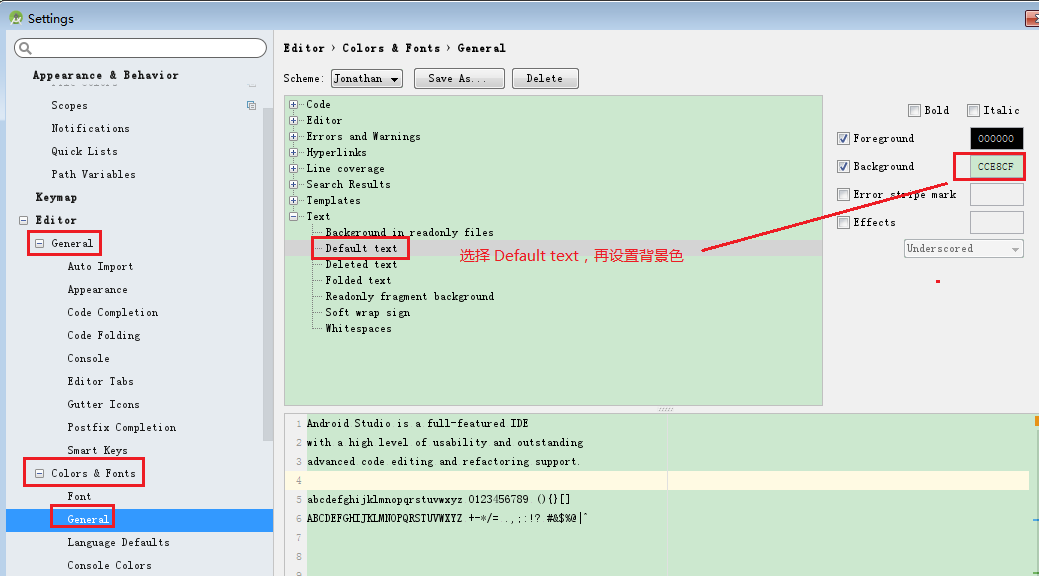
7. 背景色设置
(1) 修改主题
(2) 修改Text的背景色
8. Android Studio 设置代码提示和代码自动补全快捷键--Eclipse 风格
原文网址:http://blog.csdn.net/csdnzouqi/article/details/50454703
9. 设置 TextView字体颜色
setBackgroundColor(ContextCompat.getColor(this, R.color.blue_bg)
10. 产生内存泄漏
public class HomeFragment extends Fragment implements View.OnClickListener {
  ...
  private static RecordFragment1 firstRecord = null;
  private static RecordFragment2 secondRecord = null;
去掉static关键字
11.


 1万+
1万+


 被折叠的 条评论
为什么被折叠?
被折叠的 条评论
为什么被折叠?
 到【灌水乐园】发言


