


这个学期学了《数字信号处理》,当中最重要的就是快速傅里叶变换(FFT)了,FFT发展到现在已经出现了好几种算法,他们各有优劣,我这里就不一一列出来,因为我不想搞的博客又臭又长。我这里的FFT是FFT-DIT(时域抽取法FFT),算法来自西安电子科技大学出版社的教材《数字信号处理》(高西全,丁美玉),这本书里面有对FFT-DIT适用于计算机算法的详细介绍,我这里也不讲具体算法,要想清楚我的程序为什么是这样子,请自己看教材里面的内容。软件是VS2008。
这里接直接贴代码。先是用C++控制台的代码:
头文件:


  1 #include <complex>
  2
  3 using namespace std;
  4
  5 //蝶形变换
  6 complex<double> *bitRev(complex<double> *x ,int N)
  7 {
  8     complex<double> temp = 0;    //
  9     int n;            //normal index
 10     int r = 0;            //bit-reversed index
 11     int k;            //array
 12
 13     for(n = 0; n <= N-2;n++)
 14     {
 15         if( n < r)    //swap samples only for first half of the array
 16         {
 17             temp = x[n];
 18             x[n] = x[r];
 19             x[r] = temp;
 20         }
 21
 22         k = N/2;    //even n: adds to the previous r
 23                     //odd n: subtract from the previous r
 24
 25         while( r>k || r==k)
 26         {
 27             r= r - k;    //keep subtracting reverse carry
 28             k = k/2;    //generated next reverse array
 29         }
 30
 31         r = r + k;
 32     }
 33
 34     return x;
 35 }
 36
 37 //FFT
 38 complex<double> *FFTdit(complex<double> *a,int N)
 39 {
 40     int t=2;
 41     int m,L = 1 ,L2 ,ir ,ib, it;
 42     complex<double> temp(0,0),j(0,1);
 43     complex<double> *x;
 44     complex<double> W(0,0);                    //twiddle factor
 45     complex<double> pi(3.1415926535898,0);  //define value of pi
 46     int nu;
 47
 48
 49     x = bitRev(a,N);
 50
 51     nu = (int)(log((double)N)/log((double)t));
 52
 53     for(m = 1; m <= nu; m++)
 54     {
 55         L = L*2;
 56
 57         L2 = L/2;
 58
 59         for(ir = 0; ir < L2; ir++)
 60         {
 61             W = exp(-j*(complex<double>)2*pi*(complex<double>)ir/(complex<double>)L);
 62             for(it = ir; it < N;it = it + L)
 63             {
 64                 ib = it + L2;
 65                 temp = x[ib] * W;
 66                 x[ib] = x[it] - temp;
 67                 x[it] = x[it] + temp;
 68             }
 69         }
 70     }
 71
 72     return x;
 73 }
 74
 75 //IFFT--inverse FFT
 76 complex<double> *IFFT(complex<double> *X,int N)
 77 {
 78     int m = (int)ceil(log((double)N)/log(2.0));
 79     int n = 1 << m;
 80     int i;
 81     complex<double> *tempx ;
 82     complex<double> *x = new complex<double>[n];
 83
 84     for(i = 0; i < n; i++)
 85         X[i].imag(-imag(X[i]));
 86
 87     tempx = FFTdit(X,n);
 88
 89     for(i = 0; i < N; i++)
 90     {
 91         if((real<double>(tempx[i]))/n < 1e-14)
 92             x[i].real(0);
 93         else
 94             x[i].real((real<double>(tempx[i]))/n);
 95
 96         if((imag<double>(tempx[i]))/n < 1e-14)
 97             x[i].imag(0);
 98         else
 99             x[i].imag(-(imag<double>(tempx[i]))/n);
100     }
101
102     return x;
103 }
测试文件:
 1 #include <iostream>
 2 #include "DIT_FFT.h"
 3
 4 using namespace std;
 5
 6 void main()
 7 {
 8     int i,N;
 9     complex<double> *p ,*x;
10     complex<double> a[16]={0,1,2,3,4,5,6,7,9,10,11,12,13,14,15};
11
12     N = sizeof(a)/sizeof(complex<double>);
13
14     p = FFTdit(a,N);
15
16     cout << "经过FFT之后的排列:" << endl;
17     for(i = 0; i < N; i++)
18         cout << *(p+i) << endl;
19
20     cout << "经过abs(FFT)之后的排列:" << endl;
21     for(i = 0; i < N; i++)
22         cout << abs(*(p+i))/(N/2) << endl;
23
24     x = IFFT(p,N);
25     cout << "经过IFFT之后的排列:" << endl;
26     for(i = 0; i < N; i++)
27         cout << *(x+i) << endl;
28
29     cout << "x取绝对值" << endl;
30     for(i = 0; i < N; i++)
31         cout << abs(*(x+i)) << endl;
32
33     cout << endl << endl;
34     cout << "522/400 = ";
35     cout << (double)(522.0/400.0) << endl;
36
37 }
上面的内容可直接拷贝出来直接用,但是要注意我用的是VS2008。
其实MFC的实现FFT和控制台的没什么不同,只是MFC要进行一些操作而已。
首先我想要在在对话框中用FFT进行信号的幅频分析显示,在对话框中加入Picture控件用于显示,再加入一个Button控件用于打开文件获取要分析的数据。然后利用类视图中选中
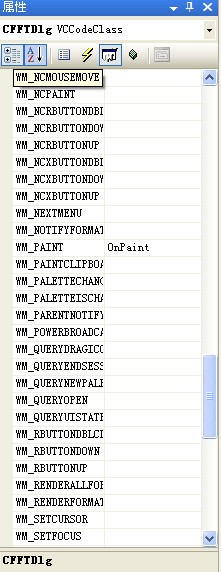
相应的类,比如我的是FFTDlg类右键添加函数,添加函数时没有的类型就自己手动添加。如下图:

 1 // FFT前的蝶形变换
 2 complex<double>* CFFTDlg::bitRev(complex<double>* x, int N)
 3 {
 4     complex<double> temp = 0;    //
 5     int n;            //normal index
 6     int r = 0;            //bit-reversed index
 7     int k;            //array
 8
 9     for(n = 0; n <= N-2;n++)
10     {
11         if( n < r)    //swap samples only for first half of the array
12         {
13             temp = x[n];
14             x[n] = x[r];
15             x[r] = temp;
16         }
17
18         k = N/2;    //even n: adds to the previous r
19                     //odd n: subtract from the previous r
20
21         while( r>k || r==k)
22         {
23             r= r - k;    //keep subtracting reverse carry
24             k = k/2;    //generated next reverse array
25         }
26
27         r = r + k;
28     }
29
30     return x;
31 }
 1 // FFT-DIT变换
 2 complex<double>* CFFTDlg::FFTdit(complex<double>* a, int N)
 3 {
 4     int t=2;
 5     int m,L = 1 ,L2 ,ir ,ib, it;
 6     complex<double> temp(0,0),j(0,1);
 7     complex<double> *x;
 8     complex<double> W(0,0);                    //twiddle factor
 9     complex<double> pi(3.1415926535898,0);  //define value of pi
10     int nu;
11
12     x = bitRev(a,N);
13
14     nu = (int)(log((double)N)/log((double)t));
15
16     for(m = 1; m <= nu; m++)
17     {
18         L = L*2;
19
20         L2 = L/2;
21
22         for(ir = 0; ir < L2; ir++)
23         {
24             W = exp(-j*(complex<double>)2*pi*(complex<double>)ir/(complex<double>)L);
25             for(it = ir; it < N;it = it + L)
26             {
27                 ib = it + L2;
28                 temp = x[ib] * W;
29                 x[ib] = x[it] - temp;
30                 x[it] = x[it] + temp;
31             }
32         }
33     }
34
35     return x;
36 }
头文件所需:
 1 #include <complex>
 2
 3 using namespace std;
 4
 5
 6
 7
 8
 9
10 complex<double> *cydata;
11 complex<double> *dataFFT;
下面对Button控件添加消息处理函数:
 1 void CFFTDlg::OnBnClickedButtonInputfile()
 2 {
 3     // TODO: 在此添加控件通知处理程序代码
 4     CFileDialog dlg(TRUE); // 定义一个文件对话框变量
 5     if(dlg.DoModal()==IDOK)
 6     {
 7     //成功打开文件时先销毁链表,再获取链表
 8         xdata.clearList();
 9         ydata.clearList();
10 //取得文件路径及文件名
11         CString m_FilePath = dlg.GetPathName();
12         CStdioFile File;
13 //以读模式打开文本文件
14         File.Open(m_FilePath,CFile::modeRead);
15         CString FileData;        //定义一个CString变量作为缓冲区
16         File.ReadString(FileData);//读取第一行数据,第一行数据为坐标点数据
17 //字符数组,如果出现"TempStr2 was corrupted",这时要把TempStr2的内存再改大一些
18         char TempStr1[20];
19         char TempStr2[20];
20
21         memset(TempStr1,'\0',10);
22         memset(TempStr2,'\0',10);
23         sscanf(FileData,"%s",TempStr1);
24         m_PointNum = atoi(TempStr1);   // 获取坐标点个数
25 //初始化cydata
26         cydata = new complex<double>[m_PointNum];
27 //逐行读取坐标数据
28         for (int i = 0;i<m_PointNum;i++)
29         {
30             File.ReadString(FileData);
31             sscanf(FileData,"%s %s",TempStr1,TempStr2);
32             if(i < m_PointNum/2)
33                 xdata.insertAt(i,atof(TempStr1));
34             //ydata.insertAt(i,atof(TempStr2));
35             *(cydata+i) = atof(TempStr2);
36         }
37 //进行FFT变化
38         dataFFT =  FFTdit(cydata,m_PointNum);
39
40         for(int i = 0;i <m_PointNum/2; i++)
41         {
42             ydata.insertAt(i,abs(*(dataFFT+i))/(m_PointNum/2));
43         }
44 //删除内存
45         delete cydata;
46    }
47 }
其中,xdata和 ydata为我自己写的模板类arrayListType,这个类的模板也是从我之前上课练习的控制台代码拿出来的,因为我里面有添加一些我需要的函数。这里也贴出来,不完善,但是能用,不会报错。
  1 #include <cassert>
  2 //#include <iostream>
  3
  4 //using namespace std;
  5
  6 template<class elemType>
  7 class arrayListType
  8 {
  9 public:
 10     const arrayListType<elemType>&
 11                     operator=(const arrayListType<elemType>&);
 12         //Overload the assigment operator
 13
 14     bool isEmpty();
 15         //Function to determine whether the list is empty
 16         //Postcondition:Return true if the list is empty;
 17         //                otherwise,returns false.
 18
 19     bool isFull();
 20         //Function to determine whether the list is full.
 21         //Postcondition:Return true if the list is empty
 22         //                otherwise,return false.
 23
 24     int listSize();
 25         //Function to determine the number of elements in
 26         //the list.
 27         //Postcondition:Return the value of length.
 28
 29     int maxListSize();
 30         //Function to determine the size of the lise.
 31         //Postcondition:Returns the value of maxSize.
 32
 33     void print();
 34         //Function to output the elements of the list.
 35         //Postcondition:The elements of the list are output
 36         //                on the standard output device.
 37
 38     bool isItemAtEqual(int location,const elemType& item);
 39         //Function to determine whether the item is the
 40         //same as the item in the list at the position
 41         //specified by location.
 42         //Postcondition:Returns true if the list[location]
 43         //                is the same as the item ;otherwise
 44         //                returns false.
 45
 46     void insertAt(int location,const elemType& insertItem);
 47         //Function to insert an item in the list at the
 48         //position specified by location.The item to be
 49         //inserted is passed as a parameter to the function
 50         //Postcondition:Starting at location ,the elements
 51         //                of the list are shifted down,
 52         //                list[location] = insertItem; ,
 53         //                and length++;
 54         //                If the list is full or location is
 55         //                out of range ,an appropriate message
 56         //                is displayed.
 57
 58     void insertEnd(const elemType& insertItem);
 59         //Function to insert an item at the of the list.
 60         //The parameter insertItem specified the item to
 61         //be inserted.
 62         //Postcondition:list[length] = insetItem; and length++;
 63         //    If the list is full, an appropriate message is
 64         //    displayed.
 65
 66     void removeAt(int location);
 67         //Function to remove the item from the list at
 68         //the position specified by location.
 69         //Postcondition:The list elememt at list[location]
 70         //                is removed.and length is determined by 1.
 71         //    If location is out of range ,an appropriate message
 72         //    is displayed.
 73
 74     //void retrieveAt(int location,elemType& retItem);
 75     //    //Function to retrieve the element from the list at
 76     //    //the position specified by location .
 77     //    //Postcondition:retItem = list[location]
 78     //    //                If location is out of range,an appropiate
 79     //    //                message is displayed.
 80
 81     elemType retrieveAt(int location);
 82         //Function to retrieve the element from the list at
 83         //the position specified by location .
 84         //Postcondition:list[location]
 85         //                If location is out of range,an appropiate
 86         //                message is displayed.
 87
 88     void replaceAt(int location, const elemType& repItem);
 89         //Function to replace the element in the list at
 90         //the position specified by location .The item to be
 91         //Postcondition:list[location] = repItem
 92         //                If location is out of range ,an appropriate
 93         //                message is displayed.
 94
 95     void clearList();
 96         //Function to remove all the elements from the list.
 97         //After this operation ,the size of the list is zero.
 98
 99     int seqSearch(const elemType& item);
100         //Function to search the list for a given item
101         //Postcondition:If the item is found ,teturns the
102         //                location in the array where the
103         //                item is found ;otherwise return -1.
104
105     void insert(const elemType& insertItem);
106         //Function to insert the item specified by the
107         //parameter insertItem at the end of the list.
108         //However,first the list is searched to see whether
109         //the item to be inserted is already in the list.
110         //Postcondition:list[length] = insertItem;and length++
111         //    If the item is already in the list or the list is
112         //    full,an appropriate message is displayed.
113
114     void remove(const elemType& removeItem);
115         //Function to remove an item from the list.The
116         //parameter removeItem specified the item to be
117         //removed.
118         //Postcondition:If removeItem is found in the list
119         //                it is removed from the list and
120         //                length is decremented by one.
121
122     elemType maxValue();
123         //Function to determne the max value in the list
124         //Postcondition:Return the max value int the list
125
126     elemType minValue();
127         //Function to determne the min value in the list
128         //Postcondition:Return the min value int the list
129
130     arrayListType(int size = 10000);
131         //constructor
132         //Creates an array of the size specified  by parameter
133         // size.The default array size is 100.
134         //Postcondition:The list points to the array;
135         //                length = 0;and maxSize = size
136
137     arrayListType(const arrayListType<elemType>& otherList);
138         //copy constructor
139
140     ~arrayListType();
141         //destructor
142         //Deallocates the memory occuped by the array
143
144 protected:
145     elemType *list;        //array to hold the list
146                         //elements
147     int length;            //variable to store the length of
148                         //the list
149     int maxSize;        //variable to store the maximum size
150                         //of the list.
151 };
152
153
154 template<class elemType>
155 bool arrayListType<elemType>::isEmpty()
156 {
157     return(length == 0);
158 }
159
160 template<class elemType>
161 bool arrayListType<elemType>::isFull()
162 {
163     return(length == maxSize);
164 }
165
166 template<class elemType>
167 int arrayListType<elemType>::listSize()
168 {
169     return length;
170 }
171
172 template<class elemType>
173 int arrayListType<elemType>::maxListSize()
174 {
175     return maxSize;
176 }
177
178 template<class elemType>
179 void arrayListType<elemType>::print()
180 {
181     for(int i = 0; i < length; i++);
182         //cout << list[i] << " " << endl;
183 }
184
185 template<class elemType>
186 bool arrayListType<elemType>::isItemAtEqual
187                             (int location, const elemType &item)
188 {
189     return(list[location] == item);
190 }
191
192 template<class elemType>
193 void arrayListType<elemType>::insertAt
194                             (int location, const elemType &insertItem)
195 {
196     if(location < 0 || location >= maxSize);
197     /*    cerr << "The position of the item to be inserted"
198              << " is out of range." << endl;*/
199     else
200         if(length >= maxSize)
201         {
202             //cout << "Can not insert in a full list" << endl;
203             maxSize = length;    //我添加的
204         }
205         else
206         {
207             for(int i = length; i > location; i--)
208                 list[i] = list[i-1];
209
210             list[location] = insertItem;
211
212             length++;
213         }
214 }
215
216 template<class elemType>
217 void arrayListType<elemType>::insertEnd(const elemType &insertItem)
218 {
219     if(length >= maxSize);
220         //cerr << "Cannot insert in a full list" << endl;
221     else
222     {
223         list[length] = inserItem;
224         length++;
225     }
226 }
227
228 template<class elemType>
229 void arrayListType<elemType>::removeAt(int location)
230 {
231     if(location < 0 || location >= length);
232     /*    cerr << "The location of the item to be removed "
233              << "is out of range." << endl;*/
234     else
235     {
236         for(int i = location; i < length; i++)
237             list[i] = list[i+1];
238
239         length--;
240     }
241 }
242
243 //template<class elemType>
244 //void arrayListType<elemType>::retrieveAt(int location, elemType &retItem)
245 //{
246 //    if(location <0 || location >= length)
247 //        cerr << "The location of the item to be retrieved is "
248 //             << "out of range." << endl;
249 //    else
250 //        retItem = list[location];
251 //}
252
253
254 template<class elemType>
255 elemType arrayListType<elemType>::retrieveAt(int location)
256 {
257     if(location <0 || location >= length);
258     /*    cerr << "The location of the item to be retrieved is "
259              << "out of range." << endl;*/
260     else
261         return list[location];
262 }
263
264 template<class elemType>
265 void arrayListType<elemType>::replaceAt(int location, const elemType &repItem)
266 {
267     if(location < 0 || location >= length);
268     /*    cerr << "The location of the item to be retrieved is "
269              << "out of range." << endl;*/
270     else
271         list[location] = repItem;
272 }
273
274 template<class elemType>
275 void arrayListType<elemType>::clearList()
276 {
277     length = 0;
278 }
279
280 template<class elemType>
281 arrayListType<elemType>::arrayListType(int size)
282 {
283     if(size < 0)
284     {
285     /*    cerr << "The array size must be positive.Creating "
286              << "an array of size 100" << endl;*/
287     ;}
288     else
289         maxSize = 10000;
290
291     length = 0;
292
293     list = new elemType[maxSize];
294     assert(list != NULL);
295 }
296
297 template<class elemType>
298 arrayListType<elemType>::~arrayListType()
299 {
300     delete []list;
301 }
302
303 template<class elemType>
304 arrayListType<elemType>::arrayListType
305                 (const arrayListType<elemType> &otherList)
306 {
307     maxSize = otherList.maxSize;
308     length = otherList.length;
309     list = new elemType[maxSize];
310     assert(list != NULL);
311
312     for(int i = 0; i < length; i++)
313         list[i] = otherList.list[i];
314 }
315
316 template<class elemType>
317 const arrayListType<elemType>&
318                     arrayListType<elemType>::operator =
319                     (const arrayListType<elemType> &otherList)
320 {
321     if(this != &otherList)
322     {
323         delete [] list;
324         maxSize = otherList.maxSize;
325         length = otherList.length;
326
327         list = new elemType[maxSize];
328         assert(list != NULL);
329
330         for(int i= 0; i < lenght; i++)
331             list[i] = otherList.list[i];
332     }
333
334     return *this;
335 }
336
337
338 template<class elemType>
339 int arrayListType<elemType>::seqSearch(const elemType &item)
340 {
341     int loc;
342     bool found = false;
343
344     for(loc = 0;loc < length; loc++)
345         if(list[loc] == item)
346         {
347             found = true;
348             break;
349         }
350
351         if(found)
352             return loc;
353         else
354             return -1;
355 }
356
357 template<class elemType>
358 void arrayListType<elemType>::insert(const elemType& insertItem)
359 {
360     int loc;
361
362     if(length == 0)
363         list[length++] = insertItem;
364     else
365         if(length == maxSize);
366             //cerr << "Cannot insert in a full list." << endl;
367         else
368         {
369             loc = seqSearch(insertTtem);
370             if(loc == -1)
371                 list[length++] = insertItem;
372         /*    else
373                 cerr << "The item to be inserted is already in "
374                      << "list .No duplicates are allowed." << endl;*/
375         }
376 }
377
378 template<class elemType>
379 void arrayListType<elemType>::remove(const elemType& removeItem)
380 {
381     int loc;
382
383     if(length == 0);
384         //cerr << "Cannot delete from an empty list." << endl;
385     else
386         loc = seqSearch(removeItem);
387
388     if(loc != -1)
389         removeAt(loc);
390 /*    else
391         co*/ut << "The item to be deleted is not in the list." << endl;
392 }
393
394 template<class elemType>
395 elemType arrayListType<elemType>::maxValue()
396 {
397     elemType temp;
398
399     temp = list[0];
400     for(int i = 0; i < length; i++)
401         if(temp < list[i])
402             temp = list[i];
403
404     return temp;
405 }
406
407 template<class elemType>
408 elemType arrayListType<elemType>::minValue()
409 {
410     elemType temp;
411
412     temp = list[0];
413     for(int i = 0; i < length; i++)
414         if(temp > list[i])
415             temp = list[i];
416
417     return temp;
418 }
记得把要用的头文件和变量添加到自己对话框类的头文件中
1 #include "arrayListType.h"
2
3
4
5 CArray<CPoint,CPoint> m_PointArray; // 用于记录坐标点数据
6 int m_PointNum;   // 用于记录坐标点个数,在视图类构造函数中初始化为0。
7
8 arrayListType<double> xdata;
9 arrayListType<double> ydata;
 1 void CFFTDlg::OnPaint()
 2 {
 3     CPaintDC dc(this); // device context for painting
 4     // TODO: 在此处添加消息处理程序代码
 5     CRect rc;
 6     CWnd* pWnd;
 7     pWnd = GetDlgItem(IDC_STATIC_DISFFT);    //IDC_STATIC_DISFFT是Picture控件的ID
 8     pWnd->GetWindowRect(rc);    //获取Picture控件的方框大小
 9     CDC* pDC = pWnd->GetDC();    //获取DC
10 //绘图函数,
11     DrawGrid(rc.Width(), rc.Height(), 1, pDC);
12     // 不为绘图消息调用 CDialog::OnPaint()
13 }
上面代码中函数DrawGrid用于双缓存绘图,其中的flag不用理会,这是我有别的用处加进去的,不用对flag进行处理。代码如下:
 1 void CFFTDlg::DrawGrid(int width, int height, int flag, CDC* pDC)
 2 {
 3     CPen newPen;       // 用于创建新画笔
 4     CPen *pOldPen;     // 用于存放旧画笔
 5     CBrush newBrush;   // 用于创建新画刷
 6     CBrush *pOldBrush; // 用于存放旧画刷
 7
 8     CRect rectPicture;
 9     CWnd* pWnd;
10     pWnd = GetDlgItem(IDC_STATIC_DISFFT); //IDC_STATIC_DISFFT是Picture控件的ID
11     pWnd->GetWindowRect(rectPicture);
12
13 //这里是从网上摘下,自己改的
14 //*******************************************************************
15     CDC   MemDC;   //首先定义一个显示设备对象
16     CBitmap   MemBitmap;//定义一个位图对象
17   //随后建立与屏幕显示兼容的内存显示设备
18     MemDC.CreateCompatibleDC(NULL);
19   //这时还不能绘图,因为没有地方画   ^_^
20   //下面建立一个与屏幕显示兼容的位图,至于位图的大小嘛,可以用窗口的大小
21     MemBitmap.CreateCompatibleBitmap(pDC,width,height);
22
23   //将位图选入到内存显示设备中
24   //只有选入了位图的内存显示设备才有地方绘图,画到指定的位图上
25     CBitmap   *pOldBit=MemDC.SelectObject(&MemBitmap);
26
27   //先用背景色将位图清除干净,这里我用的是白色作为背景
28   //你也可以用自己应该用的颜色
29     MemDC.FillSolidRect(0,0,width,height,RGB(0,0,0));
30 //*******************************************************************
31
32     // 创建黑色新画刷
33     /*if(nreverse == 0)*/
34         newBrush.CreateSolidBrush(RGB(0,0,0));
35     /*else
36         newBrush.CreateSolidBrush(RGB(255,255,255)); */
37     // 选择新画刷,并将旧画刷的指针保存到pOldBrush
38     pOldBrush = MemDC.SelectObject(&newBrush);
39     // 以黑色画刷为绘图控件填充黑色,形成黑色背景
40     MemDC.Rectangle(rectPicture);
41     // 恢复旧画刷
42     MemDC.SelectObject(pOldBrush);
43     // 删除新画刷
44     newBrush.DeleteObject();
45
46     // 创建实心画笔,粗度为1,颜色为绿色
47     newPen.CreatePen(PS_SOLID, 1, RGB(0,255,0));
48     // 选择新画笔,并将旧画笔的指针保存到pOldPen
49     pOldPen = MemDC.SelectObject(&newPen);
50
51 //这两个函数是自己添加的
52 //*******************************************************************
53 //绘制网格
54     DrawPic(width, height, &MemDC);
55 //绘制图形
56     Plot(width, height,1,rectPicture,&MemDC);
57 //*******************************************************************
58
59     MemDC.SelectObject(pOldPen);   // 恢复旧画笔
60     newPen.DeleteObject();   // 删除新画笔
61   //*******************************************************************
62 //将内存中的图拷贝到屏幕上进行显示
63     pDC->BitBlt(0,0,width,height,&MemDC,0,0,SRCCOPY);
64
65   //绘图完成后的清理
66     MemBitmap.DeleteObject();
67     MemDC.DeleteDC();
68 }
上面的DrawPic用于绘制网格和边框以及刻度,不需要刻度的,请自己修改,这是没来得及完善的作品。DrawPic的代码如下:
  1 oid CFFTDlg::DrawPic(int width, int height, CDC* pDC)
  2 {
  3     //边框到窗口的距离
  4     int g = 10;
  5 //绘制网格的参数
  6     int x = g;
  7     int y = g;
  8     int h = height - 2*g;
  9     int w = width - 2*g;
 10     int wg = (int)(w/10);
 11     int hg = (int)(h/6);
 12     int sg = (width - 2*g)/50;
 13
 14     int wi[10];
 15     int hi[5];
 16     int i;
 17 //竖线
 18     switch(w%10)
 19     {
 20     case 0:
 21         for(i = 0; i < 10; i++)
 22             wi[i] = wg;
 23         break;
 24     case 1:
 25         for(i = 0; i < 10; i++)
 26         {
 27             if(i == 0)
 28                 wi[i] = wg+1;
 29             else
 30                 wi[i] = wg;
 31         }
 32         break;
 33     case 2:
 34         for(i = 0; i < 10; i++)
 35         {
 36             if(i <= 1)
 37                 wi[i] = wg+1;
 38             else
 39                 wi[i] = wg;
 40         }
 41         break;
 42     case 3:
 43         for(i = 0; i < 10; i++)
 44         {
 45             if(i <= 2)
 46                 wi[i] = wg+1;
 47             else
 48                 wi[i] = wg;
 49         }
 50         break;
 51     case 4:
 52         for(i = 0; i < 10; i++)
 53         {
 54             if(i <= 3)
 55                 wi[i] = wg+1;
 56             else
 57                 wi[i] = wg;
 58         }
 59         break;
 60     case 5:
 61         for(i = 0; i < 10; i++)
 62         {
 63             if(i <= 4)
 64                 wi[i] = wg+1;
 65             else
 66                 wi[i] = wg;
 67         }
 68         break;
 69     case 6:
 70         for(i = 0; i < 10; i++)
 71         {
 72             if(i <= 5)
 73                 wi[i] = wg+1;
 74             else
 75                 wi[i] = wg;
 76         }
 77         break;
 78     case 7:
 79         for(i = 0; i < 10; i++)
 80         {
 81             if(i <= 6)
 82                 wi[i] = wg+1;
 83             else
 84                 wi[i] = wg;
 85         }
 86         break;
 87     case 8:
 88         for(i = 0; i < 10; i++)
 89         {
 90             if(i <= 7)
 91                 wi[i] = wg+1;
 92             else
 93                 wi[i] = wg;
 94         }
 95         break;
 96     case 9:
 97         for(i = 0; i < 10; i++)
 98         {
 99             if(i <= 8)
100                 wi[i] = wg+1;
101             else
102                 wi[i] = wg;
103         }
104         break;
105     }
106 //横线
107     switch(h%6)
108     {
109     case 0:
110         for(i = 0; i < 5; i++)
111             hi[i] = hg;
112         break;
113     case 1:
114         for(i = 0; i < 5; i++)
115         {
116             if(i == 0)
117                 hi[i] = hg+1;
118             else
119                 hi[i] = hg;
120         }
121         break;
122     case 2:
123         for(i = 0; i < 5; i++)
124         {
125             if(i <= 1)
126                 hi[i] = hg+1;
127             else
128                 hi[i] = hg;
129         }
130         break;
131     case 3:
132         for(i = 0; i < 5; i++)
133         {
134             if(i <= 2)
135                 hi[i] = hg+1;
136             else
137                 hi[i] = hg;
138         }
139         break;
140     case 4:
141         for(i = 0; i < 5; i++)
142         {
143             if(i <= 3)
144                 hi[i] = hg+1;
145             else
146                 hi[i] = hg;
147         }
148         break;
149     case 5:
150         for(i = 0; i < 5; i++)
151         {
152             if(i <= 4)
153                 hi[i] = hg+1;
154             else
155                 hi[i] = hg;
156         }
157         break;
158
159     }
160
161 //刻度
162     int temp1;
163     int temp2;
164     int j = 0;
165     int gi[50];
166     for(i = 0; i < 10; i++)
167     {
168         temp1 = wi[i]/5;
169         temp2 = wi[i]%5;
170         switch(temp2)
171         {
172         case 0:
173             for(j = 0; j < 5; j++)
174                 gi[5*i+j] = temp1;
175             break;
176         case 1:
177             for(j = 0; j < 5; j++)
178             {
179                 if(j == 0)
180                     gi[5*i+j] = temp1 + 1;
181                 else
182                     gi[5*i+j] = temp1;
183             }
184             break;
185         case 2:
186             for(j = 0; j < 5; j++)
187             {
188                 if(j <= 1)
189                     gi[5*i+j] = temp1 + 1;
190                 else
191                     gi[5*i+j] = temp1;
192             }
193             break;
194         case 3:
195             for(j = 0; j < 5; j++)
196             {
197                 if(j <= 2)
198                     gi[5*i+j] = temp1 + 1;
199                 else
200                     gi[5*i+j] = temp1;
201             }
202             break;
203         case 4:
204             for(j = 0; j < 5; j++)
205             {
206                 if(j <= 3)
207                     gi[5*i+j] = temp1 + 1;
208                 else
209                     gi[5*i+j] = temp1;
210             }
211             break;
212         }
213     }
214
215
216     CPen newPen;
217     CPen* pOldPen;
218
219     //if(flag == 0)
220     //    newPen.CreatePen(PS_DOT,1,RGB(128,128,128));    //网格的颜色为灰色
221     //else
222         newPen.CreatePen(PS_DOT,1,RGB(169,169,169));    //网格的颜色为深灰色
223     pOldPen = pDC->SelectObject(&newPen);        //选择画笔
224
225 //绘制竖线
226     for(int i = 0; i < 9 ; i++)
227     {
228         x = x + wi[i];
229         y = y + hi[i];
230         //绘制竖虚线
231         pDC->MoveTo(x,g);
232         pDC->LineTo(x,height-g);
233         //绘制横虚线
234         if(i < 5 && i != 2)
235         {
236             pDC->MoveTo(g,y);
237             pDC->LineTo(width-g,y);
238         }
239     }
240
241 //销毁画笔
242     newPen.DeleteObject();
243
244     /*if(flag == 0)*/
245         newPen.CreatePen(PS_SOLID,1,RGB(255,255,255));    //定义画笔,颜色为白色
246     //else
247     //    newPen.CreatePen(PS_SOLID,1,RGB(0,0,0));    //定义画笔,颜色为黑色
248         pDC->SelectObject(newPen);    //选择新画笔
249
250 //绘制坐标轴的边框
251     x = g;
252     y = g;
253     pDC->MoveTo(g,g);
254     pDC->LineTo(width-g,g);
255     pDC->MoveTo(width-g,g);
256     pDC->LineTo(width-g,height-g);
257     pDC->MoveTo(width-g,height-g);
258     pDC->LineTo(g,height-g);
259     pDC->MoveTo(g,height-g);
260     pDC->LineTo(g,g);
261 //绘制x轴轴线
262     pDC->MoveTo(x,y+3*hg);
263     pDC->LineTo(width-g,y+3*hg);
264
265 //绘制刻度
266     int x1 = g;
267     int yv = y+3*hg;
268     for(int i = 0; i < 50; i++)
269     {
270         x1 = x1 + gi[i];
271         pDC->MoveTo(x1,yv+3);
272         pDC->LineTo(x1,yv-2);
273     }
274
275     pDC->SelectObject(pOldPen);
276     newPen.DeleteObject();
277 }
Plot用于绘制用FFT之后的数据绘制频谱,代码如下:
 1 // 绘图接口函数,width绘图区域的长度,height为绘图区域的高,flag为标志位,pdc为指针
 2 void CFFTDlg::Plot(int width, int height, int flag, CRect rc, CDC* pdc)
 3 {
 4     CPen newPen;
 5     CPen* pOldPen;
 6     newPen.CreatePen(PS_SOLID,2,RGB(178,34,34));    //绘制曲线的颜色,火砖色
 7     pOldPen = pdc->SelectObject(&newPen);
 8
 9     int w = width - 20;
10     int h = height - 20;
11
12     int x = 20;
13     int y = 20;
14     int i;
15
16     double W = double(w*100)/100.0;
17     double H = double(h*100)/100.0;
18
19     if(ydata.minValue()< 0.0)
20         pdc->MoveTo(10,(int)(height/2));
21     else
22         pdc->MoveTo(10,height-10);
23     for(i = 0; i < m_PointNum/2;i++)
24     {
25         if(ydata.minValue() < 0.0)
26         {
27             x = int(10+2*W*xdata.retrieveAt(i)/xdata.maxValue());
28             y = int((int)(height/2)-H/2*ydata.retrieveAt(i)/ydata.maxValue());
29         }
30         else
31         {
32             x = int(10+W*xdata.retrieveAt(i)/xdata.maxValue());
33             y = int(height - 10 -H*ydata.retrieveAt(i)/ydata.maxValue());
34         }
35         pdc->LineTo(x,y);
36     }
37
38     pdc->SelectObject(pOldPen);
39     newPen.DeleteObject();
40 }
我自己的程序是可以用的,上面的内容应该没有完全,自己拷贝拿来用的时候注意是否初始化了变量,是否添加了函数等,不要盲目直接用,最后一直报错却说我的代码不行,鄙视这种人!
最后的贴出粗糙的效果图,我还没有全部完成,比如图中还没有添加刻度文字等等。

上面三个是要用的函数,自己看。


 3219
3219

 被折叠的 条评论
为什么被折叠?
被折叠的 条评论
为什么被折叠?
 到【灌水乐园】发言


