


码个蛋(codeegg)第 696 次推文
作者:Kuky_xs
博客:https://www.jianshu.com/p/97c2dbcac3af
还记得Flutter系列不?上一次讲到网络的,想不起来的回顾一下~
Flutter入门指北(Part 13)之网络
今天分析Flutter入门指北系列的最终篇啦~
讲完了常用的部件和网络请求后,差不多该进入整体实战了,这里我们将写一个比较熟悉的项目,郭神的 cool weather。项目将使用 fluro 实现路由管理,dio 实现网络请求,rxdart 实现 BLoC 进行状态管理和逻辑分离,使用文件,shared_preferences,sqflite 实现本地的数据持久化。这边先给出项目的地址:flutter_weather,以及最后实现的效果图:
除了 fluro 别的基本上前面都讲了,所以在开始正式的实战前,先讲下 fluro
Fluro
fluro 是对 Navigator 的一个封装,方便更好的管理路由跳转,当然还存在一些缺陷,例如目前只支持传递字符串,不能传递中文等,但是这些问题都算不上是大问题。
fluro 的使用很简单,大概分如下的步骤:
1. 在全局定义一个 Router实例
final router = Router();2. 使用 Router实例定义路径和其对应的 Handler对象
// 例如定义一个 CityPage 的路径和 Handler
Handler cityHandler = Handler(handlerFunc: (_, params) {
// 传递的参数都在 params 中,params 是一个 Map> 类型参数
 String cityId = params['city_id']?.first;
return BlocProvider(child: WeatherPage(city: cityId), bloc: WeatherBloc());
});

// 定义路由的路径和参数
// 需要注意的是,第一个页面的路径必须为 "/",别的可为 "/" + 任意拼接
router.define('/city', handler: cityHandler);
// 或者官方提供的另一种方式
router.define('/city/:city_id', handler: cityHandler);
3. 将router注册到MaterialApp的 onGenerateRoute 中
MaterialApp(onGenerateRoute: router);4. 最后通过 Router 实例进行跳转,如果有参数传递则会在新的页面收到
router.navigateTo(context, '/city?city_id=CN13579');
// 或者官方的方式
router.navigateTo(context, '/city/CN13579');
在 fluro 中提供了多种路由动画,包括 fadeIn,inFromRight 等。讲完了使用,就进入实战了。
flutter_weather 实战
导入插件
在开始的时候,已经提到了整体功能的实现需求,所以这边需要导入的插件以及存放图片的文件夹如下:
dependencies:
flutter:
sdk: flutter

cupertino_icons: ^0.1.2
fluro: ^1.4.0
dio: ^2.1.0
shared_preferences: ^0.5.1+2
sqflite: ^1.1.3
fluttertoast: ^3.0.3
rxdart: ^0.21.0
path_provider: 0.5.0+1

dev_dependencies:
flutter_test:
sdk: flutter

flutter:
uses-material-design: true

assets:
 - images/
顶层静态实例的实现
有许多实例需要在顶层注册,然后在全局使用,包括但不限于 fluro 的 router,http,database 等等。在这个项目中,需要用到的就是这三个实例,会在全局调用,所以在开始前进行初始化,当然 http 和 database 在使用的时候创建也可以,完全看个人习惯,但是 fluro 的管理类必须在一开始就注册完成。首先需要定义一个 Application类用来存放这些静态实例
class Application {
static HttpUtils http; // 全局网络
static Router router; // 全局路由
static DatabaseUtils db; // 全局数据库
}
接着就是对相应方法类的编写,其中 HttpUtil和 DatabaseUtils在前面有讲过,这边不重复讲,会讲下数据库如何建立。
Fluro 路由管理类
首先,需要知道,该项目的界面大概分如下的界面(当然可先只定义首页,剩下用到了再定义,该项目相对简单,所以先列出来):省选择页,市选择页,区选择页,天气展示页,设置页。所以 fluro 的管理类可按如下定义:
// 查看 `routers/routers.dart` 文件
class Routers {
/// 各个页面对应的路径
static const root = '/';
static const weather = '/weather';
static const provinces = '/provinces';
static const cities = '/cities';
static const districts = '/districts';
static const settings = '/settings';

/// 该方法用于放到 `main` 方法中定义所有的路由,
/// 对应的 handler 可放同一个文件,也可放另一个文件,看个人喜好
static configureRouters(Router router) {
 router.notFoundHandler = notFoundHandler;

 router.define(root, handler: rootHandler); // 首页

 router.define(weather, handler: weatherHandler); // 天气展示页

 router.define(provinces, handler: provincesHandler); // 省列表页

 router.define(cities, handler: citiesHandler); // 省下市列表页

 router.define(districts, handler: districtsHandler); // 市下区列表页

 router.define(settings, handler: settingsHandler); // 设置页
 }

/// 生成天气显示页面路径,需要用到城市 id
static generateWeatherRouterPath(String cityId) => '$weather?city_id=$cityId';

/// 生成省下的市列表页相应路径 需要用到省 id 及省名
static generateProvinceRouterPath(int provinceId, String name)=> '$cities?province_id=$provinceId&name=$name';

/// 生成市下的区列表页相应路径,需用到市 id 及市名
static generateCityRouterPath(int provinceId, int cityId, String name)=> '$districts?province_id=$provinceId&city_id=$cityId&name=$name';
}
/// 查看 `routers/handler.dart` 文件
Handler notFoundHandler = Handler(handlerFunc: (_, params) {
Logger('RouterHandler:').log('Not Found Router'); // 当找不到相应的路由时,打印信息处理
});
Handler rootHandler = Handler(handlerFunc: (_, params) => SplashPage());
Handler weatherHandler = Handler(handlerFunc: (_, params) {
String cityId = params['city_id']?.first; // 获取相应的参数
return WeatherPage(city: cityId);
});
Handler provincesHandler = Handler(handlerFunc: (_, params) => ProvinceListPage());
Handler citiesHandler = Handler(handlerFunc: (_, params) {
String provinceId = params['province_id']?.first;
String name = params['name']?.first;
return CityListPage(provinceId: provinceId,
name: FluroConvertUtils.fluroCnParamsDecode(name));
});
Handler districtsHandler = Handler(handlerFunc: (_, params) {
String provinceId = params['province_id']?.first;
String cityId = params['city_id']?.first;
String name = params['name']?.first;
return DistrictListPage(provinceId: provinceId, cityId: cityId,
name: FluroConvertUtils.fluroCnParamsDecode(name));
});
Handler settingsHandler = Handler(handlerFunc: (_, params) => SettingsPage());那么界面的路由到这就编写好了,但是前面提到了 fluro 目前不支持中文的传递,所以在传递中文时候,需要先进行转码,这边提供一个自己写的方法,小伙伴有更好的方法也可以直接在项目提 issue
/// 查看 `utils/fluro_convert_util.dart` 文件
class FluroConvertUtils {
/// fluro 传递中文参数前,先转换,fluro 不支持中文传递
static String fluroCnParamsEncode(String originalCn) {
 StringBuffer sb = StringBuffer();
var encoded = Utf8Encoder().convert(originalCn); // utf8 编码,会生成一个 int 列表
 encoded.forEach((val) => sb.write('$val,')); // 将 int 列表重新转换成字符串
return sb.toString().substring(0, sb.length - 1).toString();
 }

/// fluro 传递后取出参数,解析
static String fluroCnParamsDecode(String encodedCn) {
var decoded = encodedCn.split('[').last.split(']').first.split(','); // 对参数字符串分割
var list = [];
 decoded.forEach((s) => list.add(int.parse(s.trim()))); // 转回 int 列表return Utf8Decoder().convert(list); // 解码
 }
}
Database 管理类编写
因为数据库的开启是一个很耗资源的过程,所以这边通过单例并提取到顶层。在该项目中,数据库主要用于存储城市信息,因为城市之间的关联比较复杂,如果通过 shared_preferences 或者文件存储会很复杂。
/// 查看 `utils/db_utils.dart` 文件
class DatabaseUtils {
final String _dbName = 'weather.db'; // 数据表名
final String _tableProvinces = 'provinces'; // 省表
final String _tableCities = 'cities'; // 市表
final String _tableDistricts = 'districts'; // 区表
static Database _db;

static DatabaseUtils _instance;

static DatabaseUtils get instance => DatabaseUtils();

/// 将数据库的初始化放到私有构造中,值允许通过单例访问
  DatabaseUtils._internal() {
    getDatabasesPath().then((path) async {
      _db = await openDatabase(join(path, _dbName), version: 1, onCreate: (db, version) {
        db.execute('create table $_tableProvinces('
'id integer primary key autoincrement,'
'province_id integer not null unique,' // 省 id,id 唯一
'province_name text not null' // 省名
')');

        db.execute('create table $_tableCities('
'id integer primary key autoincrement,'
'city_id integer not null unique,' // 市 id,id 唯一
'city_name text not null,' // 市名
'province_id integer not null,' // 对应的省的 id,作为外键同省表关联
'foreign key(province_id) references $_tableProvinces(province_id)'
')');

        db.execute('create table $_tableDistricts('
'id integer primary key autoincrement,'
'district_id integer not null unique,' // 区 id
'district_name text not null,' // 区名
'weather_id text not null unique,' // 查询天气用的 id,例如 CN13579826,id 唯一
'city_id integer not null,' // 对应市的 id,作为外键同市表关联
'foreign key(city_id) references $_tableCities(city_id)'
')');
      }, onUpgrade: (db, oldVersion, newVersion) {});
    });
  }

/// 构建单例
factory DatabaseUtils() {
if (_instance == null) {
      _instance = DatabaseUtils._internal();
    }
return _instance;
  }

/// 查询所有的省,`ProvinceModel` 为省市接口返回数据生成的 model 类
/// 查看 `model/province_model.dart` 文件
  Future<List> queryAllProvinces() async =>
      ProvinceModel.fromProvinceTableList(await _db.rawQuery('select province_id, province_name from $_tableProvinces'));/// 查询某个省内的所有市
  Future<List> queryAllCitiesInProvince(String proid) async => ProvinceModel.fromCityTableList(await _db.rawQuery('select city_id, city_name from $_tableCities where province_id = ?',
        [proid],
      ));/// 查询某个市内的所有区,`DistrictModel` 为区接口返回数据生成的 model 类/// 查看 `model/district_model.dart` 文件
  Future<List> queryAllDistrictsInCity(String cityid) async => DistrictModel.fromDistrictTableList(await _db.rawQuery('select district_id, district_name, weather_id from $_tableDistricts where city_id = ?',
        [cityid],
      ));/// 将所有的省插入数据库
  Future<void> insertProvinces(List provinces) async {var batch = _db.batch();
    provinces.forEach((p) => batch.rawInsert('insert or ignore into $_tableProvinces (province_id, province_name) values (?, ?)',
          [p.id, p.name],
        ));
    batch.commit();
  }/// 将省对应下的所有市插入数据库
  Future<void> insertCitiesInProvince(List cities, String proid) async {var batch = _db.batch();
    cities.forEach((c) => batch.rawInsert('insert or ignore into $_tableCities (city_id, city_name, province_id) values (?, ?, ?)',
          [c.id, c.name, proid],
        ));
    batch.commit();
  }/// 将市下的所有区插入数据库
  Future<void> insertDistrictsInCity(List districts, String cityid) async {var batch = _db.batch();
    districts.forEach((d) => batch.rawInsert('insert or ignore into $_tableDistricts (district_id, district_name, weather_id, city_id) values (?, ?, ?, ?)',
          [d.id, d.name, d.weatherId, cityid],
        ));
    batch.commit();
  }
}
定义完全局使用的方法,就可以在 main 函数中进行相关的初始化了
/// 查看 `main.dart` 文件
void main() {
// 初始化 fluro router
 Router router = Router();
 Routers.configureRouters(router);
 Application.router = router;

// 初始化 http
 Application.http = HttpUtils(baseUrl: WeatherApi.WEATHER_HOST);

// 初始化 db
 Application.db = DatabaseUtils.instance;

// 强制竖屏,因为设置竖屏为 `Future` 方法,防止设置无效可等返回值后再启动 App
 SystemChrome.setPreferredOrientations([DeviceOrientation.portraitDown, DeviceOrientation.portraitUp]).then((_) {
 runApp(WeatherApp()); // App 类可放在同个文件,个人习惯单独一个文件存放

if (Platform.isAndroid) {
 SystemChrome.setSystemUIOverlayStyle(SystemUiOverlayStyle(statusBarColor: Colors.transparent));
 }
 });
}
class WeatherApp extends StatelessWidget {
@override
Widget build(BuildContext context) {
return MaterialApp(
title: 'Weather App',
onGenerateRoute: Application.router.generator, // 将 fluro 的路由进行注册
debugShowCheckedModeBanner: false,
);
}
}初始化完毕,接着就可以进行页面的编写了。
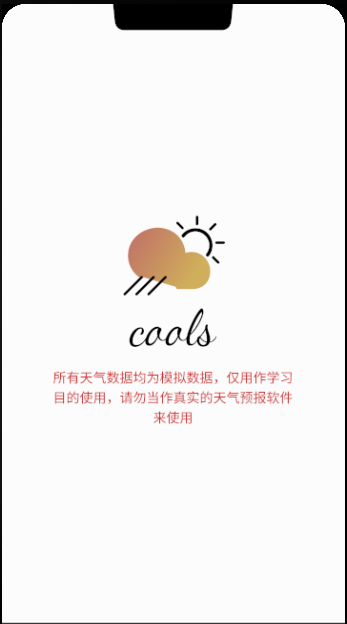
首页编写
首页主要是为了对 App 的一个大概展示,或者是一些广告的展示,同时也给一些数据初始化提供时间,当用户进入后有更好的体验效果。我们在这里就做一个图标的展示(图标可自行到项目中 images文件夹查找),延时 5s 后跳转下个页面。
/// 查看 `splash_page.dart` 文件
class SplashPage extends StatelessWidget {
@override
 Widget build(BuildContext context) {
/// 因为已经引入了 rxdart,这里通过 rxdart.timer 进行倒计时
/// 当然也可以使用 Futuer.delayed 进行倒计时
/// 5s 计时,如果已经选择城市,跳转天气界面,否则进入城市选择
Observable.timer(0, Duration(milliseconds: 5000)).listen((_) {
PreferenceUtils.instance.getString(PreferencesKey.WEATHER_CITY_ID)
.then((city) {
// 如果当前还未选择城市,则进入城市选择页,否则跳转天气详情页
// replace: true 即为 Navigator.pushReplacement 方法
Application.router.navigateTo(context, city.isEmpty
 ? Routers.provinces: Routers.generateWeatherRouterPath(city),
replace: true);
 });
 });

return Scaffold(
body: Container(
alignment: Alignment.center,
color: Colors.white,
child: Column(
mainAxisAlignment: MainAxisAlignment.center,
children: [// 展示图标
 Image.asset(Resource.pngSplash, width: 200.0, height: 200.0),// 展示文字提醒,用 SizedBox 设置区域大小
 SizedBox(width: MediaQuery.of(context).size.width * 0.7,child: Text('所有天气数据均为模拟数据,仅用作学习目的使用,请勿当作真实的天气预报软件来使用',textAlign: TextAlign.center,softWrap: true,style: TextStyle(color: Colors.red[700], fontSize: 16.0),
 ))
 ],
 ),
 ),
 );
 }
}
城市选择页面
当首次进入的时候,用户肯定没有选择城市,所以先编写城市选择列表页面,因为整体的项目使用 BLoC 分离业务逻辑和页面,所以先编写数据管理类吧,把数据请求和改变的业务逻辑放到这块,BLoC 的实现在前面讲过了,这边就不重复提了。可以查看文章:状态管理及 BLoC
/// 查看 `provinces_bloc.dart` 文件
class ProvincesBloc extends BaseBloc {
final _logger = Logger('ProvincesBloc');

List _provinces = []; // 全国省List _cities = []; // 省内市List _districts = []; // 市内区List get provinces => _provinces;List get cities => _cities;List get districts => _districts;
 BehaviorSubject<List> _provinceController = BehaviorSubject();
 BehaviorSubject<List> _citiesController = BehaviorSubject();
 BehaviorSubject<List> _districtController = BehaviorSubject();/// stream,用于 StreamBuilder 的 stream 参数
 Observable<List> get provinceStream
 => Observable(_provinceController.stream);
 Observable<List> get cityStream => Observable(_citiesController.stream);
 Observable<List> get districtStream
 => Observable(_districtController.stream);/// 通知刷新省份列表
 changeProvinces(List provinces) {
 _provinces.clear();
 _provinces.addAll(provinces);
 _provinceController.add(_provinces);
 }/// 通知刷新城市列表
 changeCities(List cities) {
 _cities.clear();
 _cities.addAll(cities);
 _citiesController.add(_cities);
 }/// 通知刷新区列表
 changeDistricts(List districts) {
 _districts.clear();
 _districts.addAll(districts);
 _districtController.add(_districts);
 }/// 请求全国省
 Future<List> requestAllProvinces() async {var resp = await Application.http.getRequest(WeatherApi.WEATHER_PROVINCE,
 error: (msg) => _logger.log(msg, 'province'));return resp == null || resp.data == null ? [] : ProvinceModel.fromMapList(resp.data);
 }/// 请求省内城市
 Future<List> requestAllCitiesInProvince(String proid) async {var resp = await Application.http
 .getRequest('${WeatherApi.WEATHER_PROVINCE}/$proid',
 error: (msg) => _logger.log(msg, 'city'));return resp == null || resp.data == null ? [] : ProvinceModel.fromMapList(resp.data);
 }/// 请求市内的区
 Future<List> requestAllDistricts(String proid, String cityid) async {var resp = await Application.http
 .getRequest('${WeatherApi.WEATHER_PROVINCE}/$proid/$cityid',
 error: (msg) => _logger.log(msg, 'district'));return resp == null || resp.data == null ? [] : DistrictModel.fromMapList(resp.data);
 }
 @override
 void dispose() { // 及时销毁
 _provinceController?.close();
 _citiesController?.close();
 _districtController?.close();
 }
}
写完 BLoC 需要对其进行注册,因为城市选择相对还是比较频繁的,所以可以放最顶层进行注册
return BlocProvider(
bloc: ProvincesBloc(), // 城市切换 BLoC
child: MaterialApp(
title: 'Weather App',
onGenerateRoute: Application.router.generator,
debugShowCheckedModeBanner: false,
 ),
 );
城市选择就是一个列表,直接通过 ListView 生成即可,前面讲 ListView 的时候提到,尽可能固定 item 的高度,会提高绘制效率
/// 查看 `provinces_page.dart` 文件
class ProvinceListPage extends StatelessWidget {
 @override
 Widget build(BuildContext context) {
var _bloc = BlocProvider.of(context);// 进入的时候先使用数据库的数据填充界面
 Application.db.queryAllProvinces().then((ps) => _bloc.changeProvinces(ps));// 网络数据更新列表并刷新数据库数据
 _bloc.requestAllProvinces().then((provinces) {
 _bloc.changeProvinces(provinces);
 Application.db.insertProvinces(provinces);
 });return Scaffold(
 appBar: AppBar(
 title: Text('请选择省份'),
 ),body: Container(
 color: Colors.black12,alignment: Alignment.center,// 省列表选择
 child: StreamBuilder(
 stream: _bloc.provinceStream,initialData: _bloc.provinces,builder: (_, AsyncSnapshot> snapshot)
 => !snapshot.hasData || snapshot.data.isEmpty// 如果当前的数据未加载则给一个加载,否则显示列表加载
 ? CupertinoActivityIndicator(radius: 12.0)
 : ListView.builder(
 physics: BouncingScrollPhysics(),padding: const EdgeInsets.symmetric(horizontal: 12.0),itemBuilder: (_, index) => InkWell(
 child: Container(
 alignment: Alignment.centerLeft,child: Text(snapshot.data[index].name, style: TextStyle(fontSize: 18.0, color: Colors.black)),
 ),onTap: () => Application.router.navigateTo(
 context,// 跳转下层省内城市选择,需要将当前的省 id 以及省名传入
 Routers.
 generateProvinceRouterPath(snapshot.data[index].id, FluroConvertUtils.fluroCnParamsEncode(snapshot.data[index].name)),transition: TransitionType.fadeIn),
 ),itemExtent: 50.0,itemCount: snapshot.data.length),
 ),
 ),
 );
 }
}
对于市和区的列表选择也类似,除了最后的点击会有些区别页面的布局几乎一致,这边只提下点击事件
/// 查看 `cities_page.dart` 文件
Application.router.navigateTo(
 context,
// 跳转下层省内城市选择
 Routers.generateProvinceRouterPath(
 snapshot.data[index].id, FluroConvertUtils.fluroCnParamsEncode(snapshot.data[index].name)),
transition: TransitionType.fadeIn),
 )
// 设置为当前区,并清理路由 stack,并将天气界面设置到最上层
onTap: () {
PreferenceUtils.instance
.saveString(PreferencesKey.WEATHER_CITY_ID, snapshot.data[index].weatherId);
Application.router.navigateTo(context, Routers.generateWeatherRouterPath(snapshot.data[index].weatherId),
transition: TransitionType.inFromRight, clearStack: true);
})天气详情页面
天气详情页面相对部件会多点,为了看着舒服一点,这里拆成多个部分来编写,在这之前还是先编写数据的管理类,因为天气详情接口返回的数据嵌套层次比较多,关系比较复杂,不适合用 database来做持久化,所以这里采用文件持久化方式。当然有些小伙伴会问干嘛不使用 shared_preferences来存储,理论上应该没有太大的问题,但是个人建议相对复杂的数据使用文件存储会相对比较好点,一定要说个为什么,我也说不出来。
/// 查看 `weather_bloc.dart` 文件
class WeatherBloc extends BaseBloc {
 final _logger = Logger('WeatherBloc');

 WeatherModel _weather; // 天气情况

String _background = WeatherApi.DEFAULT_BACKGROUND; // 背景

 WeatherModel get weather => _weather;

String get background => _background;

 BehaviorSubject _weatherController = BehaviorSubject();
 BehaviorSubject<String> _backgroundController = BehaviorSubject();
 Observableget weatherStream => Observable(_weatherController.stream);
 Observable<String> get backgroundStream => Observable(_backgroundController.stream);/// 更新天气情况
 updateWeather(WeatherModel weather) {
 _weather = weather;
 _weatherController.add(_weather);
 }/// 更新天气背景
 updateBackground(String background) {
 _background = background;
 _backgroundController.add(_background);
 }// 请求天气情况
 Future requestWeather(String id) async {var resp = await Application.http
 .getRequest(WeatherApi.WEATHER_STATUS,
 params: {'cityid': id, 'key': WeatherApi.WEATHER_KEY},
 error: (msg) => _logger.log(msg, 'weather'));// 请求数据成功则写入到文件中if (resp != null && resp.data != null) {
 _writeIntoFile(json.encode(resp.data));
 }return WeatherModel.fromMap(resp.data);
 }
 Future<String> requestBackground() async {var resp = await Application.http
 .getRequest<String>(WeatherApi.WEATHER_BACKGROUND,
 error: (msg) => _logger.log(msg, 'background'));return resp == null || resp.data == null ? WeatherApi.DEFAULT_BACKGROUND : resp.data;
 }// 获取存储文件路径
 Future<String> _getPath() async =>'${(await getApplicationDocumentsDirectory()).path}/weather.txt';// 写入到文件
 _writeIntoFile(String contents) async {
 File file = File(await _getPath());if (await file.exists()) file.deleteSync();
 file.createSync();
 file.writeAsString(contents);
 }// 文件读取存储信息,如果不存在文件则返回空字符串 '',不推荐返回 null
 Future<String> readWeatherFromFile() async {
 File file = File(await _getPath());return (await file.exists()) ? file.readAsString() : '';
 }@overridevoid dispose() {
 _weatherController?.close();
 _backgroundController?.close();
 }
}
天气详情的刷新只有当个页面,所以 BLoC 的注册值需要在路由上注册即可,在 fluro 对应 handler 中加入注册
Handler weatherHandler = Handler(handlerFunc: (_, params) {
 String cityId = params['city_id']?.first; // 这个 id 可以通过 BLoC 获取也可以
return BlocProvider(child: WeatherPage(city: cityId), bloc: WeatherBloc());
});
那么接下来就可以编写界面了,先实现最外层的背景图变化
/// 查看 `weather_page.dart` 文件
class WeatherPage extends StatelessWidget {
 final String city;

 WeatherPage({Key key, this.city}) : super(key: key);

 @override
 Widget build(BuildContext context) {
var _bloc = BlocProvider.of(context);// 请求背景并更新
 _bloc.requestBackground().then((b) => _bloc.updateBackground(b));// 先读取本地文件缓存进行页面填充
 _bloc.readWeatherFromFile().then((s) {if (s.isNotEmpty) {
 _bloc.updateWeather(WeatherModel.fromMap(json.decode(s)));
 }
 });// 再请求网络更新数据
 _bloc.requestWeather(city).then((w) => _bloc.updateWeather(w));return Scaffold(
 body: StreamBuilder(
 stream: _bloc.backgroundStream,initialData: _bloc.background,builder: (_, AsyncSnapshot<String> themeSnapshot) => Container(
 padding: const EdgeInsets.symmetric(horizontal: 12.0, vertical: 20.0),alignment: Alignment.center,decoration: BoxDecoration(
 color: Colors.black12,image: DecorationImage(
 image: NetworkImage(themeSnapshot.data), fit: BoxFit.cover),
 ),child: // 具体内部布局通过拆分小部件实现
 )),
 );
 }
}
页面最顶部是显示两个按钮,一个跳转城市选择,一个跳转设置页面,显示当前的城市
class FollowedHeader extends StatelessWidget {
 final AsyncSnapshot snapshot; // snapshot 通过上层传入
 FollowedHeader({Key key, this.snapshot}) : super(key: key);
 @override
 Widget build(BuildContext context) {return Row(
 mainAxisAlignment: MainAxisAlignment.spaceBetween,
 children: [// 城市选择页面跳转按钮
 IconButton(
 icon: Icon(Icons.home, color: Colors.white, size: 32.0),
 onPressed: () => Application.router.
 navigateTo(context, Routers.provinces,
 transition: TransitionType.inFromLeft)),// 当前城市
 Text('${snapshot.data.heWeather[0].basic.location}',
 style: TextStyle(fontSize: 28.0, color: Colors.white)),// 设置页面跳转按钮
 IconButton(
 icon: Icon(Icons.settings, color: Colors.white, size: 32.0),
 onPressed: () => Application.router
 .navigateTo(context, Routers.settings,
 transition: TransitionType.inFromRight))
 ],
 );
 }
}
接着是当前的天气详情部分
class CurrentWeatherState extends StatelessWidget {
final AsyncSnapshot snapshot;
 CurrentWeatherState({Key key, this.snapshot}) : super(key: key);@overrideWidget build(BuildContext context) {
 var _now = snapshot.data.heWeather[0].now;
 var _update = snapshot.data.heWeather[0].update.loc.split(' ').last;return Column(
 crossAxisAlignment: CrossAxisAlignment.end,
 children: [// 当前的温度
 Text('${_now.tmp}℃', style: TextStyle(fontSize: 50.0, color: Colors.white)),// 当前的天气状况
 Text('${_now.condTxt}', style: TextStyle(fontSize: 24.0, color: Colors.white)),
 Row( // 刷新的时间
 mainAxisAlignment: MainAxisAlignment.end,
 children: [
 Icon(Icons.refresh, size: 16.0, color: Colors.white),
 Padding(padding: const EdgeInsets.only(left: 4.0)),
 Text(_update, style: TextStyle(fontSize: 12.0, color: Colors.white))
 ],
 )
 ],
 );
 }
}
接下来是一个天气预报的列表块,以为是一个列表,当然可以通过 Cloumn来实现,但是前面有提到过一个列表「粘合剂」---- CustomScrollView,所以这里的整体连接最后会通过 CustomScrollView来实现,那么你可以放心在最上层容器的 child属性加上 CustomScrollView了。接着来实现这块预报模块
class WeatherForecast extends StatelessWidget {
final AsyncSnapshot snapshot;
 WeatherForecast({Key key, this.snapshot}) : super(key: key);@overrideWidget build(BuildContext context) {
 var _forecastList = snapshot.data.heWeather[0].dailyForecasts; // 获取天气预报return SliverFixedExtentList(
 delegate: SliverChildBuilderDelegate(
 (_, index) => Container(
 color: Colors.black54, // 外层设置背景色,防止被最外层图片背景遮挡文字
 padding: const EdgeInsets.all(12.0),
 alignment: Alignment.centerLeft,
 child: index == 0 // 当第一个 item 情况,显示 ‘预报’
 ? Text('预报', style: TextStyle(fontSize: 24.0, color: Colors.white))
 : Row(
 mainAxisAlignment: MainAxisAlignment.spaceBetween,
 crossAxisAlignment: CrossAxisAlignment.center,
 children: [
 Text(_forecastList[index - 1].date, // 预报的日期
 style: TextStyle(fontSize: 16.0, color: Colors.white)),
 Expanded( // 天气情况,这边通过 expanded 进行占位,并居中显示
 child: Center(child: Text(_forecastList[index - 1].cond.txtD,
 style: TextStyle(fontSize: 16.0, color: Colors.white))),
 flex: 2),
 Expanded(
 child: Row( // 最高温度,最低温度
 mainAxisAlignment: MainAxisAlignment.spaceBetween,
 children: [
 Text(_forecastList[index - 1].tmp.max,
 style: TextStyle(fontSize: 16.0,
 color: Colors.white)),
 Text(_forecastList[index - 1].tmp.min,
 style: TextStyle(fontSize: 16.0,
 color: Colors.white)),
 ],
 ),
 flex: 1)
 ],
 )),
 childCount: _forecastList.length + 1, // 这个数量需要 +1,因为有个标题需要一个数量
 ),
 itemExtent: 50.0);
 }
}
接着是空气质量报告,一个标题,下面由两个布局进行平分
class AirQuality extends StatelessWidget {
final AsyncSnapshot snapshot;
 AirQuality({Key key, this.snapshot}) : super(key: key);@overrideWidget build(BuildContext context) {
 var quality = snapshot.data.heWeather[0].aqi.city;return Container(
 padding: const EdgeInsets.all(12.0),
 color: Colors.black54,
 alignment: Alignment.centerLeft,
 child: Column(
 crossAxisAlignment: CrossAxisAlignment.start,
 children: [// 标题
 Padding(padding: const EdgeInsets.only(bottom: 20.0), child:
 Text('空气质量', style: TextStyle(fontSize: 24.0,
 color: Colors.white))),
 Row(
 children: [// 通过 expanded 进行平分横向距离
 Expanded(
 child: Center(// 内部居中显示
 child: Column(
 children: [
 Text('${quality.aqi}', style:
 TextStyle(fontSize: 40.0, color: Colors.white)),
 Text('AQI 指数', style:
 TextStyle(fontSize: 20.0, color: Colors.white)),
 ],
 ),
 )),
 Expanded(
 child: Center(
 child: Column(
 children: [
 Text('${quality.pm25}', style:
 TextStyle(fontSize: 40.0, color: Colors.white)),
 Text('PM2.5 指数', style:
 TextStyle(fontSize: 20.0, color: Colors.white)),
 ],
 ),
 )),
 ],
 )
 ],
 ));
 }
}
接下来是生活质量模块,看着也是个列表,但是后台返回的不是列表,而是根据不同字段获取不同质量指数,因为布局类似,所以可以对其进行封装再整体调用
class LifeSuggestions extends StatelessWidget {
final AsyncSnapshot snapshot;
 LifeSuggestions({Key key, this.snapshot}) : super(key: key);// 生活指数封装
 Widget _suggestionWidget(String content) =>
 Padding(padding: const EdgeInsets.only(top: 20.0), child:
 Text(content, style: TextStyle(color: Colors.white, fontSize: 16.0)));
 @override
 Widget build(BuildContext context) {var _suggestion = snapshot.data.heWeather[0].suggestion;return Container(
 padding: const EdgeInsets.all(12.0),
 color: Colors.black54,
 alignment: Alignment.centerLeft,
 child: Column(
 crossAxisAlignment: CrossAxisAlignment.start,
 children: [
 Text('生活建议', style: TextStyle(fontSize: 24.0, color: Colors.white)),
 _suggestionWidget('舒适度:${_suggestion.comf.brf}\n${_suggestion.comf.txt}'),
 _suggestionWidget('洗车指数:${_suggestion.cw.brf}\n${_suggestion.cw.txt}'),
 _suggestionWidget('运动指数:
 ${_suggestion.sport.brf}\n${_suggestion.sport.txt}'),
 ],
 ),
 );
 }
}
所有的分模块都已经编写完成,剩下就是通过粘合剂进行组装了
child: StreamBuilder(
initialData: _bloc.weather,
stream: _bloc.weatherStream,
builder: (_, AsyncSnapshot snapshot) => !snapshot.hasData
 ? CupertinoActivityIndicator(radius: 12.0)
 : SafeArea(child: RefreshIndicator(child: CustomScrollView(physics: BouncingScrollPhysics(),slivers: [
 SliverToBoxAdapter(child: FollowedHeader(snapshot: snapshot)),// 实时天气
 SliverPadding(padding: const EdgeInsets.symmetric(vertical: 30.0),sliver: SliverToBoxAdapter(child: CurrentWeatherState(snapshot: snapshot, city: city),
 ),
 ),// 天气预报
 WeatherForecast(snapshot: snapshot),// 空气质量
 SliverPadding(padding: const EdgeInsets.symmetric(vertical: 30.0),sliver: SliverToBoxAdapter(child: AirQuality(snapshot: snapshot)),
 ),// 生活建议
 SliverToBoxAdapter(child: LifeSuggestions(snapshot: snapshot))
 ],
 ),onRefresh: () async {
 _bloc.requestWeather(city).then((w) => _bloc.updateWeather(w));
 return null;
 }),
 )),
最后就剩下设置页的全局主题切换了
设置页全局主题切换
既然提到了数据的切换,那肯定就涉及 BLoC 毫无疑问了,还是照常编写管理类
/// 查看 `setting_bloc.dart` 文件
class SettingBloc extends BaseBloc {
/// 所有主题色列表
static const themeColors = [Colors.blue, Colors.red, Colors.green,
 Colors.deepOrange, Colors.pink, Colors.purple];

 Color _color = themeColors[0];

 Color get color => _color;

 BehaviorSubject _colorController = BehaviorSubject();
 Observableget colorStream => Observable(_colorController.stream);/// 切换主题通知刷新
 switchTheme(int themeIndex) {
 _color = themeColors[themeIndex];
 _colorController.add(_color);
 }
 @overridevoid dispose() {
 _colorController?.close();
 }
}
因为是全局的切换,那么这个 BLoC 肯定需要在最顶层进行注册,这边就不贴代码了,同 ProvinceBloc一致。接着编写界面,设置界面因为有 GridView和其他部件,所以也需要用 CustomScrollView作为粘合剂,当然,你也可以用 Wrap代替 GridView来实现网格,就不需要用 CustomScrollView,使用 Column即可。
class SettingsPage extends StatelessWidget {
@override
 Widget build(BuildContext context) {
var _bloc = BlocProvider.of(context);return StreamBuilder(
 stream: _bloc.colorStream,
 initialData: _bloc.color,// Theme 是 Flutter 自带的一个设置主题的部件,里面可以设置多种颜色,// 通过接收到 color 的变化,改变主题色,其他页面也如此设置,小伙伴可以自己添加
 builder: (_, AsyncSnapshot snapshot) => Theme(// IconThemeData 用于设置按钮的主题色
 data: ThemeData(primarySwatch: snapshot.data, iconTheme: IconThemeData(color: snapshot.data)),
 child: Scaffold(
 appBar: AppBar(
 title: Text('设置'),
 ),
 body: Container(
 color: Colors.black12,
 padding: const EdgeInsets.symmetric(horizontal: 12.0, vertical: 20.0),
 child: CustomScrollView(
 slivers: [
 SliverPadding(
 padding: const EdgeInsets.only(right: 12.0),
 sliver: SliverToBoxAdapter(
 child: Row(
 mainAxisAlignment: MainAxisAlignment.spaceBetween,
 crossAxisAlignment: CrossAxisAlignment.center,
 children: [
 Text('当前主题色:', style: TextStyle(fontSize: 16.0,
 color: snapshot.data)),
 Container(width: 20.0, height: 20.0, color: snapshot.data)
 ],
 )),
 ),
 SliverPadding(padding: const EdgeInsets.symmetric(vertical: 15.0)),
 SliverGrid(
 delegate: SliverChildBuilderDelegate((_, index) => InkWell(
 child: Container(color: SettingBloc.themeColors[index]),
 onTap: () {// 选择后进行保存,当下次进入的时候直接使用该主题色// 同时切换主题色
 _bloc.switchTheme(index);
 PreferenceUtils.instance.saveInteger(PreferencesKey.THEME_COLOR_INDEX, index);
 },
 ),
 childCount: SettingBloc.themeColors.length),
 gridDelegate: SliverGridDelegateWithFixedCrossAxisCount(crossAxisCount: 3, mainAxisSpacing: 20.0, crossAxisSpacing: 20.0)),
 ],
 ),
 ),
 ),
 ));
 }
}
最终全局的主题切换也实现了。
编写完代码,需要打包啊,Android 下的打包大家肯定没问题,这里讲下 flutter 下如何打包 apk,ipa 因为没有 mac 所以你们懂的。
apk文件打包
1. 创建 jks 文件,如果已经存在可忽略这步从第二步开始。打开终端并输入
keytool -genkey -v -keystore [你的签名文件路径].jks -keyalg RSA -keysize 2048 -validity 10000 -alias key

然后输入密码以及一些基本信息就可以创建成功了
2. 在项目的 android 目录下创建一个 key.properties 文件,里面进行如下配置
storePassword=keyPassword=keyAlias=keystoreFile=3. 在 android/app 下的 build.gradle 中进行如下修改
apply from: "$flutterRoot/packages/flutter_tools/gradle/flutter.gradle"

// 增加如下部分代码
def keystorePropertiesFile = rootProject.file("key.properties")
def keystoreProperties = new Properties()
keystoreProperties.load(new FileInputStream(keystorePropertiesFile))

android {
// ...
 defaultConfigs{
// ...
 }

// 增加如下代码
 signingConfigs {
 release {
 keyAlias keystoreProperties['keyAlias']
 keyPassword keystoreProperties['keyPassword']
storeFile file(keystoreProperties['storeFile'])
 storePassword keystoreProperties['storePassword']
 }
 }
 buildTypes{
// ...
 }
}
4. 再次打开终端运行 flutter build apk会自动生成一个 apk 文件,文件路径为
[你的项目地址]\build\app\outputs\apk\release
5. 通过 flutter install就可以将正式包运行到手机上
总结
2019.03.09 - 2019.04.08,一个月时间,花了整整一个月终于是写完了,也算是给一直关注的小伙伴们有个交代了。
对于写系列文,说实话真的很煎熬,一是因为前期需要做好整体的思路构造,需要从简入繁,一步步深入,如果整体思路没有搭建好,那就会走向一条不归路,要么硬着头皮上,要么退回来从头开始,二是为了写这套系列文,基本上舍弃了所有的私人时间,写完了自己还得看上好几遍才敢发布。但是收获的的确很多,期间看了很多 flutter 的源码,对部件上的一些认识和理解也会有所的加深,也会去学习源码的编写规范,对日后工作上也会有很大帮助。
最后希望这套系列文能带更多的小伙伴入门 Flutter,大家下次再见咯~
往期Flutter系列文,保你一周掌握!(持续更新!!!)
Flutter从配置安装到填坑指南详解
Flutter 入门指北之 Dart
Flutter 入门指北之基础部件
Flutter 入门指北之快速搭建界面
Flutter 入门指北之常用布局
Flutter 入门指北之路由
Flutter 入门指北之输入处理(登录界面实战)
Flutter 入门指北之滑动部件(超详细)
Flutter入门指北之Sliver 组件及NestedScrollView
Flutter 入门指北之弹窗和提示(干货)
Flutter 入门指北之手势处理和动画
Flutter 入门指北之数据持久化
Flutter入门指北(Part 13)之网络
今日问题:
Flutter最近有在学习吗?

快来码仔社群解锁新姿势吧!社群升级:Max你的学习效率


 3440
3440


 被折叠的 条评论
为什么被折叠?
被折叠的 条评论
为什么被折叠?
 到【灌水乐园】发言


