


GCNA实验文档
第一篇
远程登陆实验
思科
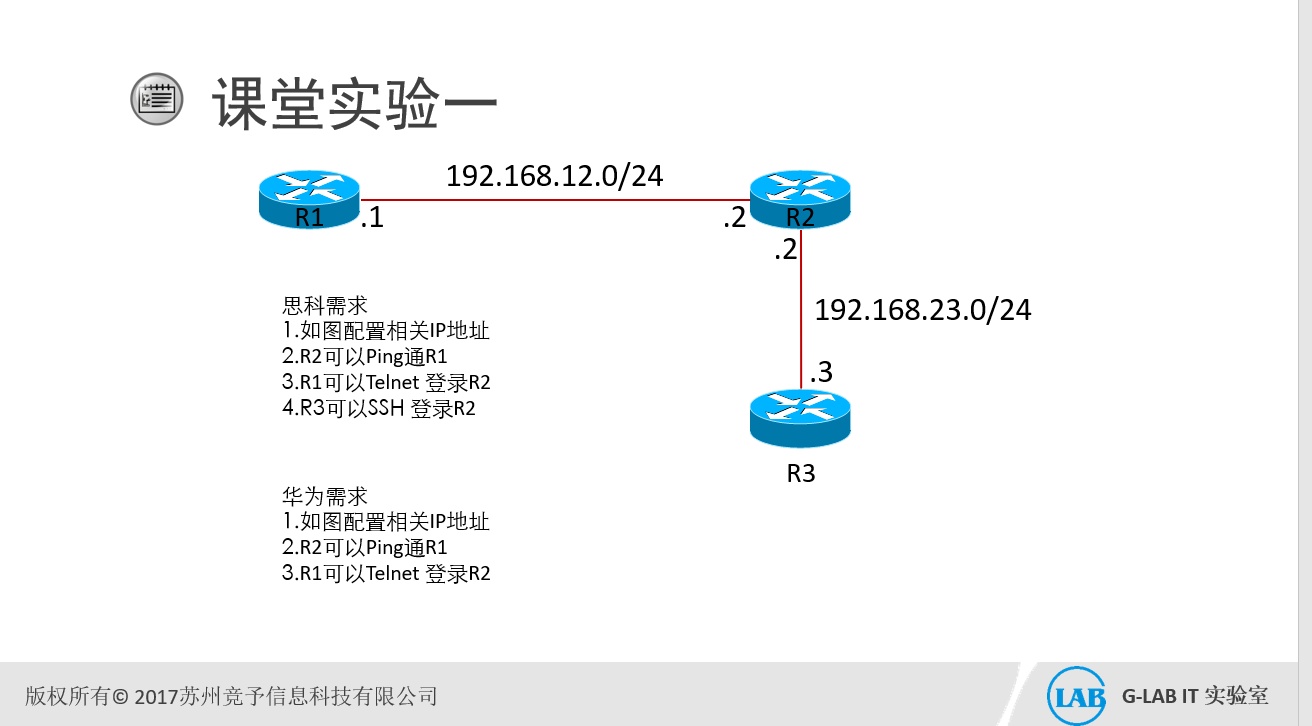
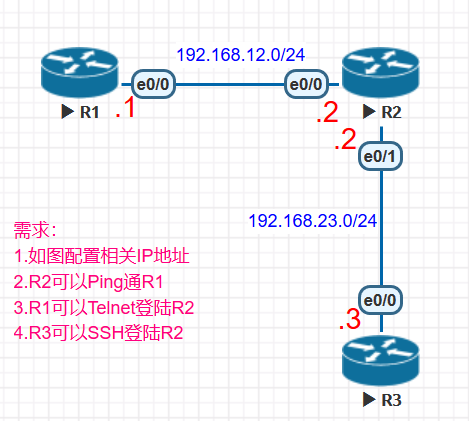
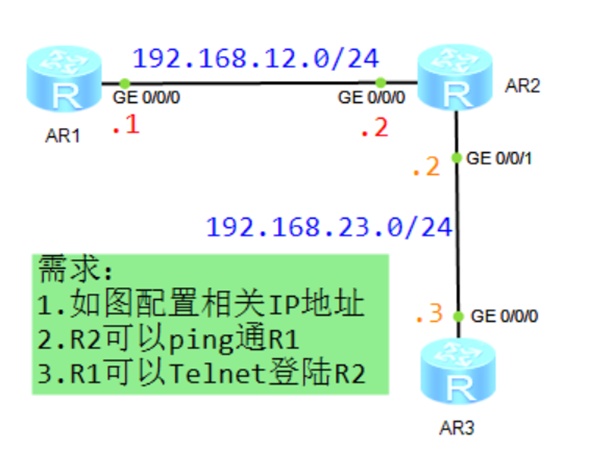
实验拓扑及需求
实验步骤
- 配置相关地址及连通性测试
R1:
R1(config)#interface Ethernet0/0
R1(config-if)#ip address 192.168.12.1 255.255.255.0
R1(config-if)#no shutdown
R2:
R2(config)#int e0/0
R2(config-if)#ip add 192.168.12.2 255.255.255.0
R2(config-if)#no shutdown
R2(config)#int e0/1
R2(config-if)#ip add 192.168.23.2 255.255.255.0
R2(config-if)#no shutdown
R3:
R3(config)#int e0/0
R3(config-if)# ip add 192.168.23.3 255.255.255.0
R3(config-if)#no shutdown
测试连通性:
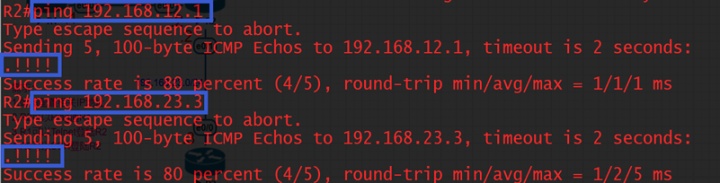
此时,在R2上ping R1和R3的接口地址都能ping通
- R2配置telnet
R2:
R2(config)#line vty 0 4
R2(config-line)#password cisco (设置远程登陆密码为cisco)
R2(config-line)#transport input telnet (开启telnet,默认是none)
R2(config-line)#login(默认,可以配置no login来无口令telnet登入)
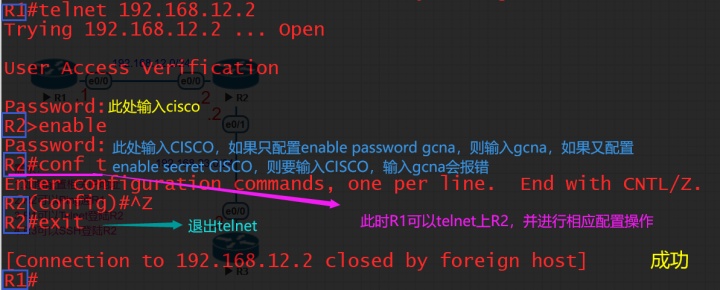
此时,在R1上telnetR2:
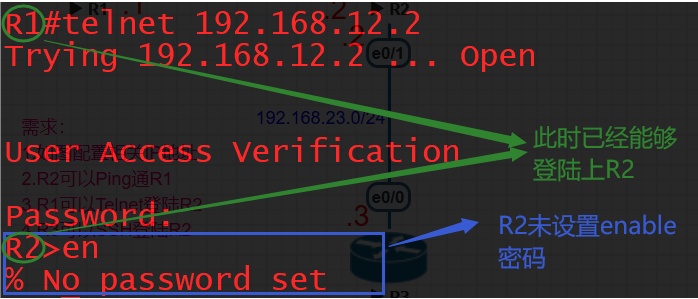
所以还需要在R2上设置enable密码gcna
R2:R2(config)#enable password gcna
(明文密码,能够通过show run 看出来)

或者R2(config)# enable secret CISCO
(密文密码,不能通过show run 看出来)

两种同时配的时候,enable密码需要输入srcret密码CISCO
此时,再去R1上telnetR2:
除了上述配置方法外,还有一种配置方式,以R1为例:
R1:
R1(config)#enable password gcna (先设置enable密码gcna)
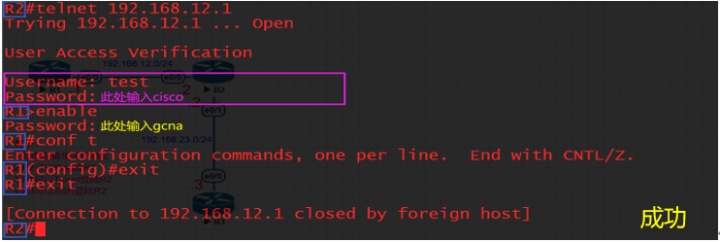
R1(config)#username test password cisco
(创建远程登陆账户为test,明文密码cisco)
R1(config)#line vty 0 4
R1(config-line)#login local (配置本地认证)
R1(config-line)#transport input telnet (开启telnet)
此时在R2上telnetR1:
- R2配置ssh
R2:
R2(config)#hostname R2 (设置主机名)
R2(config)#ip domain name cisco (设置域名)
RSA的密钥是用hostname和domain name产生的
R2(config)#crypto key generate rsa modulus 1024
(配置加密方式,生成1024位的RSA密钥)
主机将自己的公钥分发给客户机,客户机访问主机的时候通过公钥来加密数据,主机则使用自己的私钥解密数据,从而实现主机密钥认证。
当生成RSA秘钥后SSH服务会自动开启,反之会自动关闭,
要删除 RSA 密钥对,请使用 crypto key zeroize rsa 全局配置模式命令。删除 RSA 密钥对之后,SSH 服务将自动禁用
R2(config)#username test secret glab
(配置登陆用户test,密文密码为glab)
R2(config-line)#transport input ssh (开启ssh)
R2(config-line)#login local
R2上查看rsa密钥状况以及ssh状态信息:

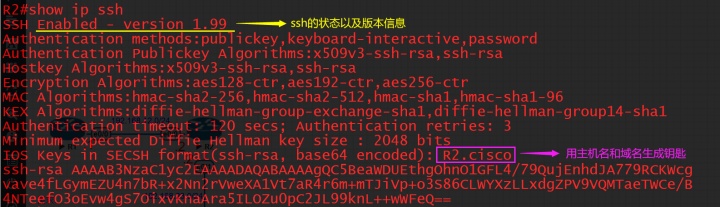
也可以通过命令show
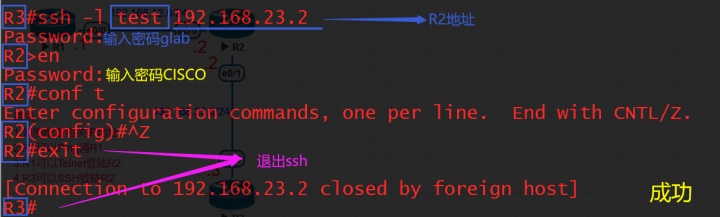
此时去R3上sshR2:
华为
- 实验拓扑及需求
- 实验步骤
配置相关地址及连通性测试
R1:
[R1]int GigabitEthernet 0/0/0
[R1-GigabitEthernet0/0/0]ip address 192.168.12.1 24
R2:
[R2]int gi 0/0/0
[R2-GigabitEthernet0/0/0]ip add 192.168.12.2 24
[R2]int gi 0/0/1
[R2-GigabitEthernet0/0/1]ip add 192.168.23.2 24
R3:
[R3]int gi 0/0/0
[R3-GigabitEthernet0/0/0]ip add 192.168.23.3 24
测试连通性:
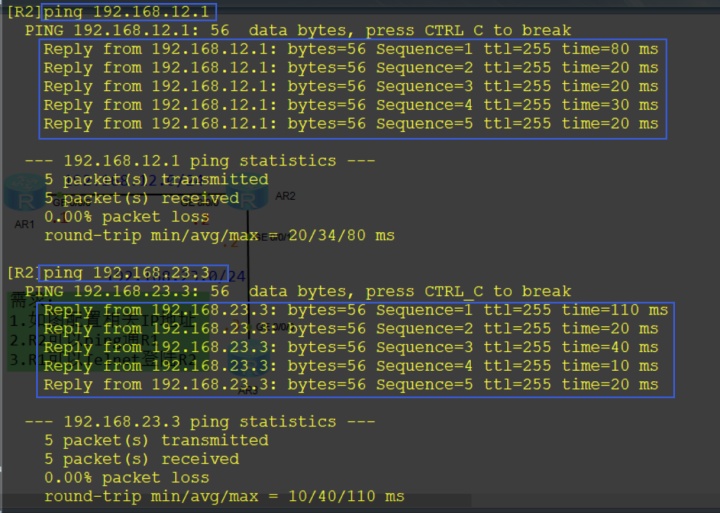
此时,在R2上ping R1和R3的接口地址都能ping通
R2配置telnet
R2:
[R2]telnet server enable (使能telnet,默认开启的)
[R2]user-interface vty 0 4 (vty线程下开启telnet,默认开启的)
[R2-ui-vty0-4]protocol inbound telnet
[R2-ui-vty0-4]authentication-mode password
Please configure the login password (maximum length 16):huawei
(配置验证方式为password,密码为huawei)
[R2-ui-vty0-4]user privilege level 3
(设置用户权限为3,默认是0,无法进入配置模式)
此时在R1上telnetR2:

除了上述配置方法外,还有一种配置方式,以R1为例:
[R1]aaa
[R1-aaa]local-user huawei password cipher gcna
(创建aaa账户huawei,密码是gcna)
[R1-aaa]local-user huawei service-type telnet
(开启账户huawei的telnet服务 )
[R1-aaa]local-user huawei privilege level 3
(设置用户权限为3)
[R1]user-interface vty 0 4
[R1-ui-vty0-4]authentication-mode aaa
(设置验证方式为aaa)
此时在R2上telnetR1:

R2配置ssh
R2:
[R2]aaa
[R2-aaa]local-user test password cipher hcia
(创建本地账户test,密码为hcia)
[R2-aaa]local-user test privilege level 3
(设置test账户权限为3,也可以在vty线程下针对所有账号开启)
[R2-aaa]local-user test service-type ssh
(设置test账户的ssh服务)
[R2]stelnet server enable
(开启stelnet服务)
[R2]user-interface vty 0 4
[R2-ui-vty0-4]authentication-mode aaa (验证方式为aaa)
[R2-ui-vty0-4]protocol inbound ssh (开启ssh服务)
[R2]ssh user test authentication-type password(默认使用密码验证)
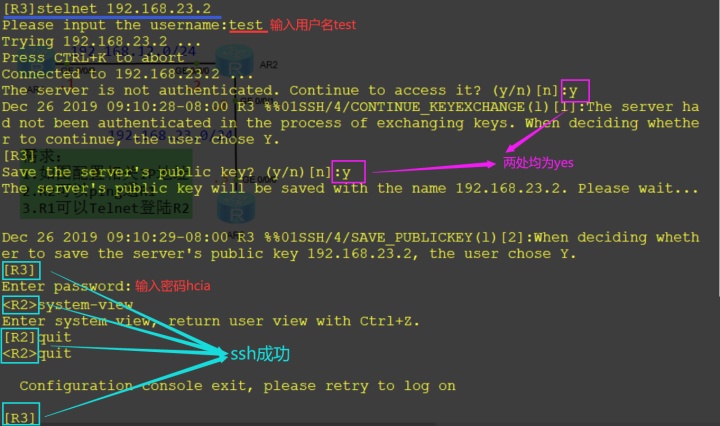
此时去R3上sshR2:

所以还需要去R3上使能SSH客户端首次认证功能:
[R3]ssh client first-time enable
此时再去R3上测试:
除了使用密码验证外,还可以使用密钥(rsa/dsa)认证,以R2新建一个用户名test1为例:
[R2]aaa
[R2-aaa]local-user test1 service-type ssh(开启test1的ssh功能)
[R2-aaa]local-user test1 privilege level 3 (设置登陆权限为3)
[R2]ssh user test1 authentication-type rsa
(设置test1账户验证方式为rsa,此时去R3上是ssh不了R2的)
此时需要去R3(客户端)上创建本地rsa密钥对:
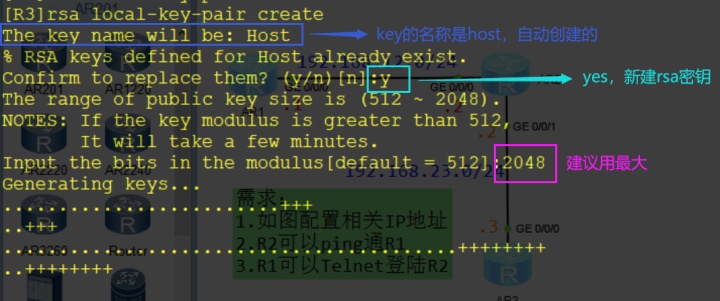
创建完成后查看rsa密钥:display rsa local-key-pair public

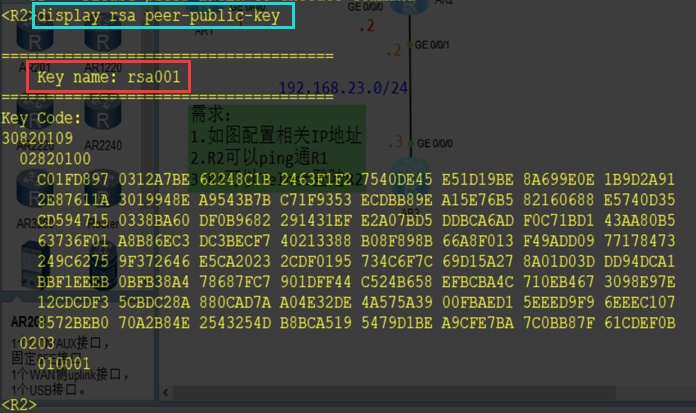
接下来需要将R3上的rsa公钥配置到R2(服务器端)上:
[R2]rsa peer-public-key rsa001 (配置rsa钥匙名称为rsa001)
[R2-rsa-public-key]public-key-code begin
(进入到code里面,并且将R3上的rsa公钥copy到code里面)
[R2-rsa-key-code]public-key-code end (退出code)
[R2-rsa-public-key]peer-public-key end (退出key)
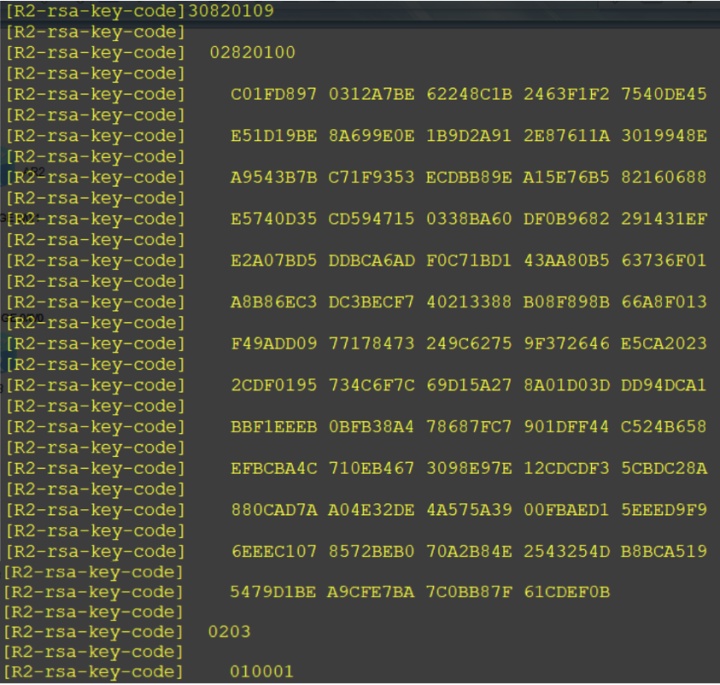
此时,在R2上可以查看rsa密钥:display rsa peer-public-key:
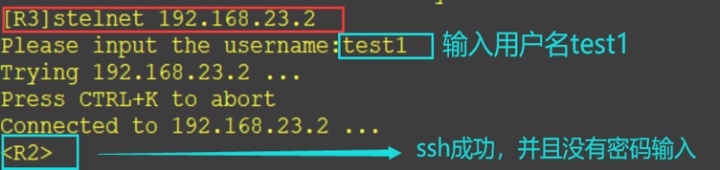
[R2]ssh user test1 assign rsa-key rsa001
(给test1账户绑定密钥rsa001)
此时去R3上测试:
此上就是关于思科和华为设备的远程登陆管理配置。


 3412
3412

 被折叠的 条评论
为什么被折叠?
被折叠的 条评论
为什么被折叠?
 到【灌水乐园】发言


