


1. Dilation膨胀算法的Matlab实现
咋们家FPGA真是太好了,能做那么多实时处理的算法,在上一步进行边缘检测后,现在进行膨胀(额,我有膨胀了)!!!实现一定程度的噪声的抑制!!!不过这个太特么简单了。。。。我简单说几句吧!!!
1.1. Dilation算法简介
前一章中已经实现了Sobel边缘检测算法,得到了二值图像。但是无法避免的噪声或者背景中的黑点。本章通过介绍Dilation算法的应用,实现对图像的erosion(腐蚀),实现的Sobel算法后的深度优化,让边缘检测更厚重。
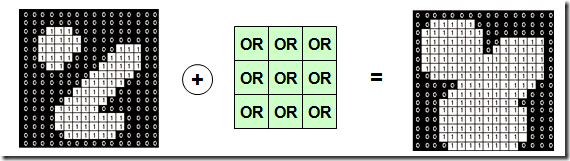
简而言之,就是通过或运算来膨胀3X3区域,对黑点进行一定的腐蚀,来达到扩张的效果。
1.2. Dilation算法实现
1.2.1. Matlab代码
Sobel求得边缘位0,其他位1。
在Sobel算子的基础上,进行一定程度的腐蚀,算法如下所示,非常简单:
% -----------------------------------------------------------------------
% Dilation Sobel image
IMG_Dilation = true(h,w); %边缘信息,二值化数据
for i = 2 : h-1 %舍弃了边缘信息
for j = 2 : w-1
IMG_Dilation(i,j) = IMG_Sobel(i-1,j-1) | IMG_Sobel(i-1,j) | IMG_Sobel(i-1,j+1) |...
IMG_Sobel(i,j-1) | IMG_Sobel(i,j) | IMG_Sobel(i,j+1) |...
IMG_Sobel(i+1,j-1) | IMG_Sobel(i+1,j) | IMG_Sobel(i+1,j+1);
end
end
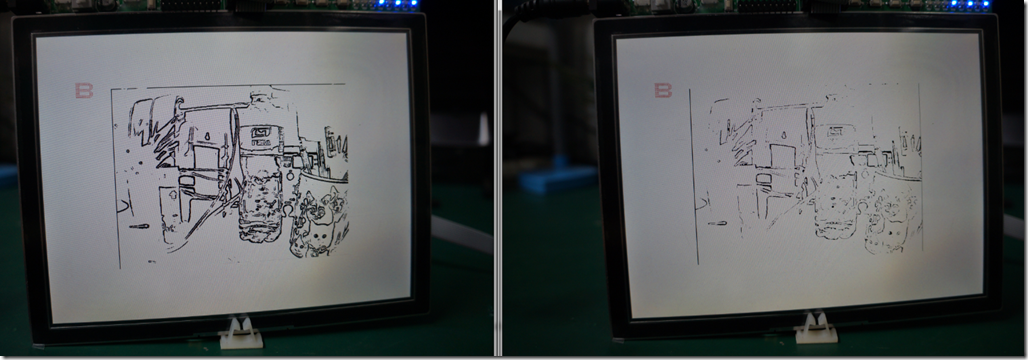
1.2.2. 效果图
如下图所示,THRESHOLD = 50下的图像。效果不是很明显因为噪声不是很大。但如果应用在硬件中,对CMOS图像Sobel后进行再处理,那效果可想而知。

以下是FPGA实现,简直不想多说,so native!!
、//---------------------------------------
//Dilation with or operation, step1
regpost_img_Bit_1;
regpost_img_Bit_2;
regpost_img_Bit_3;
always@(posedge clk or negedge rst_n)
begin
if(!rst_n)
begin
post_img_Bit_1 <= 1'b1;//Default White
post_img_Bit_2 <= 1'b1;//Default White
post_img_Bit_3 <= 1'b1;//Default White
end
else
begin
post_img_Bit_1 <= image_p11 | image_p12 | image_p13;
post_img_Bit_2 <= image_p21 | image_p22 | image_p23;
post_img_Bit_3 <= image_p21 | image_p32 | image_p33;
end
end


 791
791


 被折叠的 条评论
为什么被折叠?
被折叠的 条评论
为什么被折叠?
 到【灌水乐园】发言


