


 博客围绕将黑白灰度图像转换为热图表示展开,介绍了两种方法。一是结合Matplotlib和OpenCV,先将图像以灰度模式加载,再用Matplotlib获取热图,最后转换为Numpy格式和BGR色彩空间;二是直接使用OpenCV的内置热图函数。推荐第一种方法,因其有更多颜色映射可选。
I have a (540, 960, 1) shaped image with values ranging from [0..255] which is black and white. I need to convert it to a "heatmap" representation. As an example, pixels with 255 should be of most heat and pixels with 0 should be with least heat. Others in-between. I also need to return the heat maps as Numpy arrays so I can later merge them to a video. Is there a way to achieve this?
解决方案
Here are two methods, one using Matplotlib and one using only OpenCV
To implement a grayscale (1-channel) -> heatmap (3-channel) conversion, we first load in the image as grayscale. By default, OpenCV reads in an image as 3-channel, 8-bit BGR.
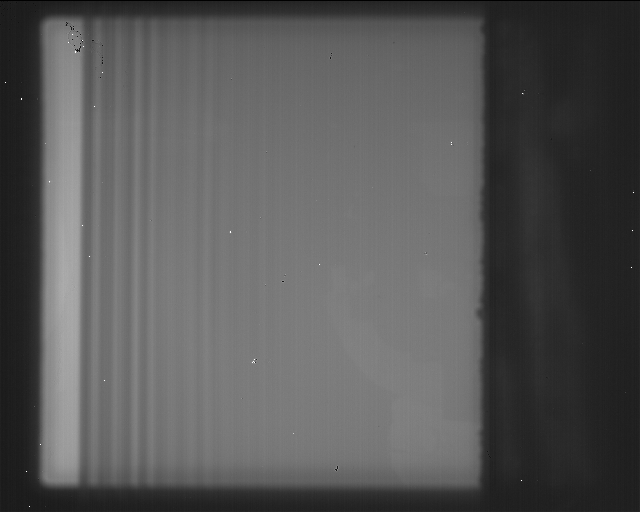
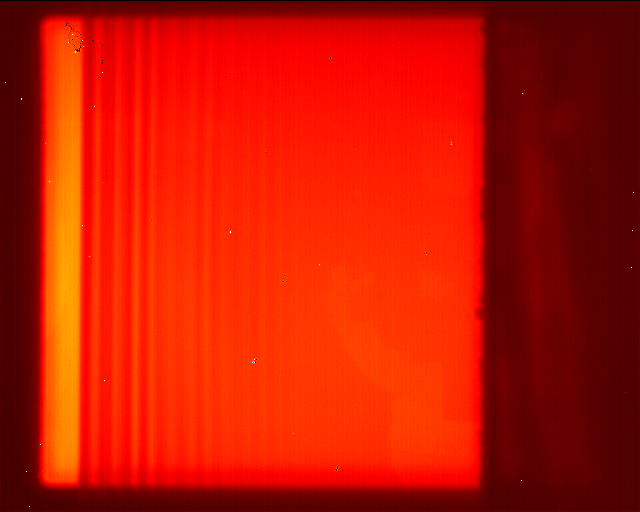
We can directly load in an image as grayscale using cv2.imread() with the cv2.IMREAD_GRAYSCALE parameter or use cv2.cvtColor() to convert a BGR image to grayscale with the cv2.COLOR_BGR2GRAY parameter. Once we load in the image, we throw this grayscale image into Matplotlib to obtain our heatmap image. Matplotlib returns a RGB format so we must convert back to Numpy format and switch to BGR colorspace for use with OpenCV. Here's a example using a scientific infrared camera image as input with the inferno colormap. See choosing color maps in Matplotlib for available built-in colormaps depending on your desired use case.
Input image:
Output heatmap image:

Code
import matplotlib.pyplot as plt
import numpy as np
import cv2
image = cv2.imread('frame.png', 0)
colormap = plt.get_cmap('inferno')
heatmap = (colormap(image) * 2**16).astype(np.uint16)[:,:,:3]
heatmap = cv2.cvtColor(heatmap, cv2.COLOR_RGB2BGR)
cv2.imshow('image', image)
cv2.imshow('heatmap', heatmap)
cv2.waitKey()
We can use OpenCV's built in heatmap function. Here's the result using the cv2.COLORMAP_HOT heatmap
Code
import cv2
image = cv2.imread('frame.png', 0)
heatmap = cv2.applyColorMap(image, cv2.COLORMAP_HOT)
cv2.imshow('heatmap', heatmap)
cv2.waitKey()
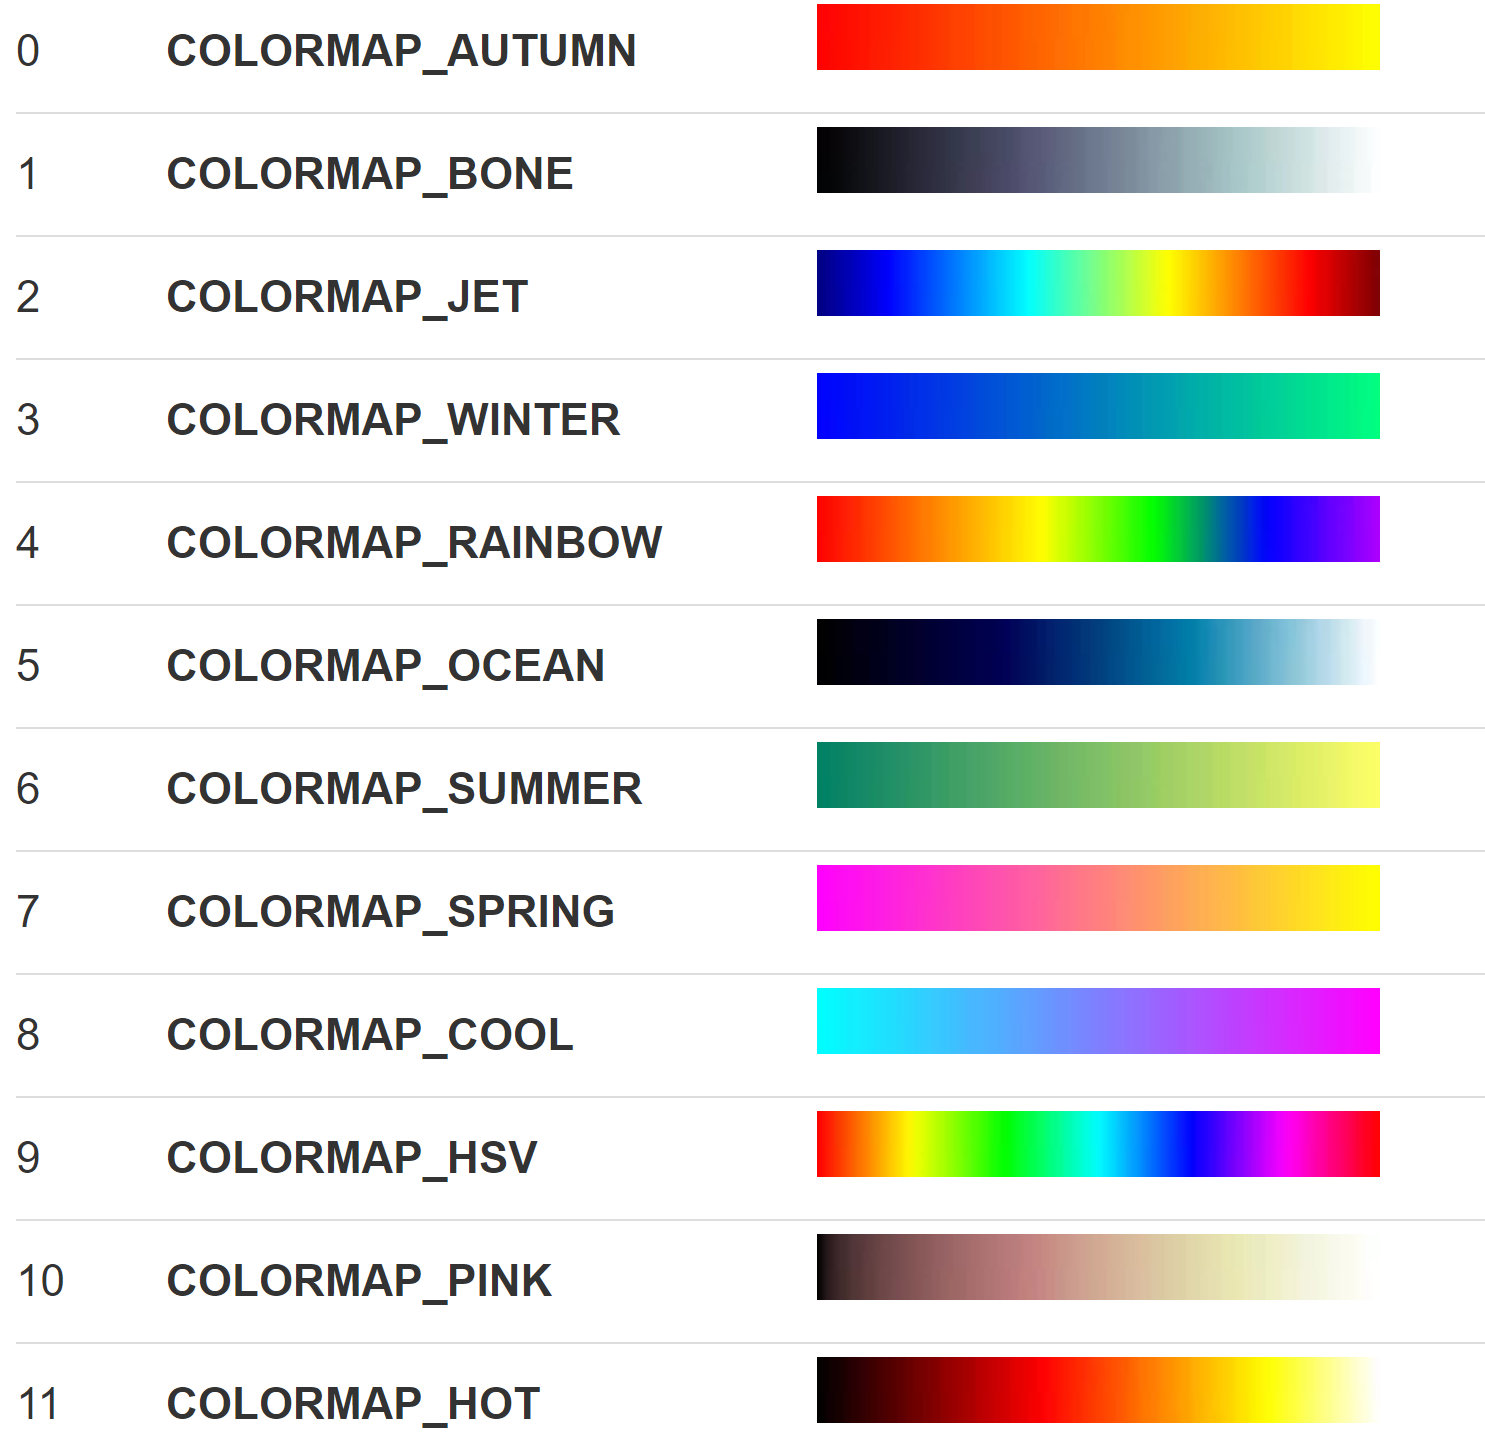
Note: Although OpenCV's built-in implementation is short and quick, I recommend using Method #1 since there is a larger colormap selection. Matplotlib has hundreds of various colormaps and allows you to create your own custom color maps while OpenCV only has 12 to choose from. Here's the built in OpenCV colormap selection:


 被折叠的 条评论
为什么被折叠?
被折叠的 条评论
为什么被折叠?
 到【灌水乐园】发言


