实现步骤:
1、创建工程并添加Spring支持

2、编写bean
package com.jack.bus;

import lombok.Getter;
import lombok.Setter;

@Getter
@Setter
public class Food {

	private String name;

}
package com.jack.bus;

public abstract class Person {

	public abstract void eat();
}
package com.jack.impl;

import lombok.Getter;
import lombok.Setter;

import com.jack.bus.Food;

public class Apple extends Food {
	@Setter
	@Getter
	private String name;
}
package com.jack.impl;

import lombok.Getter;
import lombok.Setter;

import com.jack.bus.Food;

public class Orange extends Food {
	@Setter
	@Getter
	private String name;
}
package com.jack.impl;

import lombok.Setter;

import com.jack.bus.Food;

public class Man {
	@Setter
	Food food;

	public void eat() {
		System.out.println("man eating " + food.getName());
	}
}
3、编写配置文件
<?xml version="1.0" encoding="UTF-8"?>
<beans xmlns="http://www.springframework.org/schema/beans"
	xmlns:xsi="http://www.w3.org/2001/XMLSchema-instance" xmlns:p="http://www.springframework.org/schema/p"
	xsi:schemaLocation="http://www.springframework.org/schema/beans http://www.springframework.org/schema/beans/spring-beans-3.1.xsd">

	<bean id="man" name="m" class="com.jack.impl.Man">
		<property name="food">
			<!-- 下面这一句实现了依赖关系 -->
			<ref local="apple" />
		</property>
	</bean>

	<bean id="apple" class="com.jack.impl.Apple">
		<property name="name">
			<value>Apple</value>
		</property>
	</bean>

	<bean id="orange" class="com.jack.impl.Orange">
		<property name="name">
			<value>Orange</value>
		</property>
	</bean>

</beans>
4、测试
package com.test;

import org.junit.Test;
import org.springframework.context.ApplicationContext;
import org.springframework.context.support.FileSystemXmlApplicationContext;

import com.jack.impl.Man;

public class Testing {
	public ApplicationContext getAC() {
		ApplicationContext ac = new FileSystemXmlApplicationContext(
				"src/applicationContext.xml");
		return ac;
	}

	@Test
	public void eatingTest() {
		Man man = (Man) getAC().getBean("man");
		man.eat();
	}
}
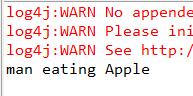
运行结果:


 372
372

 被折叠的 条评论
为什么被折叠?
被折叠的 条评论
为什么被折叠?
 到【灌水乐园】发言


