


vnc简介:VNC(Virtual Network Computing)基本上是属于一种显示系统,也就是说它能将完整的窗口界面通过网络,传输到另一台的屏幕上
1.vnc软件下载
软件下载地址:http://www.realvnc.com/download/viewer/


在这一步之后网站会跳转到令一个界面

只要输入你的名字和密码,点击提交按钮就可以进行到下一步了

接受服务条款前面要勾选上

点击下载就可以了,我把.zip和.exe这两个版本都下载了,不一一截图,其实吧。压缩包里的文件也是.exe文件也就是说都一样的,双击就可以用了
在输入地址之前要在服务器端配置vnc的服务
2.服务端安装vnc服务
服务器端:
[root@localhost ~]# yum install vncserver
[root@localhost ~]# yum install vnc
[root@localhost etc]# vncserver
You will require a password to access your desktops.
Password:
Verify:
xauth: creating new authority file /root/.Xauthority
New 'localhost.localdomain:1 (root)' desktop is localhost.localdomain:1
Creating default startup script /root/.vnc/xstartup
Starting applications specified in /root/.vnc/xstartup
Log file is /root/.vnc/localhost.localdomain:1.log
ps aux|grep vnc
Warning: bad syntax, perhaps a bogus '-'? See /usr/share/doc/procps-3.2.7/FAQ
root 4224 0.0 0.1 61180 756 pts/2 R+ 06:52 0:00 grep vnc
[root@localhost ~]# vi .vnc/xstartup

开启如下两行
[root@localhost ~]# vi /etc/sysconfig/vncservers
VNCSERVERS="2:root"
VNCSERVERARGS[2]="-geometry 800x600 "
[root@localhost etc]# vncserver
New 'localhost.localdomain:2 (root)' desktop is localhost.localdomain:2
Starting applications specified in /root/.vnc/xstartup
Log file is /root/.vnc/localhost.localdomain:2.log
[root@localhost etc]# netstat -lnt
Active Internet connections (only servers)
Proto Recv-Q Send-Q Local Address Foreign Address State
tcp 0 0 127.0.0.1:2208 0.0.0.0:* LISTEN
tcp 0 0 0.0.0.0:5801 0.0.0.0:* LISTEN
tcp 0 0 0.0.0.0:5802 0.0.0.0:* LISTEN
tcp 0 0 0.0.0.0:5901 0.0.0.0:* LISTEN
tcp 0 0 0.0.0.0:5902 0.0.0.0:* LISTEN
tcp 0 0 0.0.0.0:111 0.0.0.0:* LISTEN
tcp 0 0 0.0.0.0:6001 0.0.0.0:* LISTEN
tcp 0 0 0.0.0.0:6002 0.0.0.0:* LISTEN
tcp 0 0 127.0.0.1:631 0.0.0.0:* LISTEN
tcp 0 0 0.0.0.0:983 0.0.0.0:* LISTEN
tcp 0 0 127.0.0.1:25 0.0.0.0:* LISTEN
tcp 0 0 127.0.0.1:2207 0.0.0.0:* LISTEN
tcp 0 0 :::6001 :::* LISTEN
tcp 0 0 :::6002 :::* LISTEN
tcp 0 0 :::22 :::* LISTEN
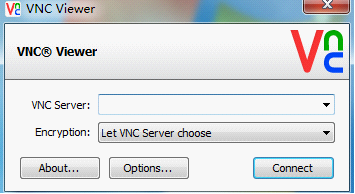
3.客户端(本地)连接服务器


当我的在重新连接vnc的时候别忘记先删除/tmp下的.X*几个文件,要不然vnc view连接的时候端口总是要加1的上面的那个连接后的界面太难看了,
所以编辑配置文件
[root@localhost ~]# vim .vnc/xstartup
加上 gnome-session &
因为系统用的是gnome环境


测试成功,你们也搭建下试试吧!
转载于:https://blog.51cto.com/learon/1066454


 817
817

 被折叠的 条评论
为什么被折叠?
被折叠的 条评论
为什么被折叠?
 到【灌水乐园】发言


