


先上效果图 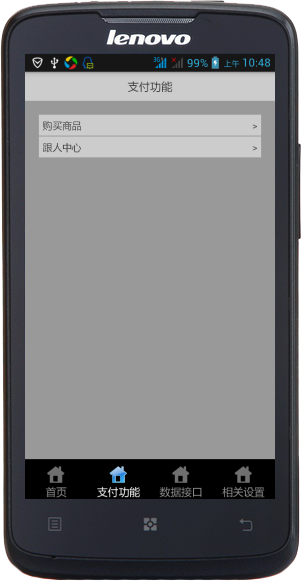
此图就是我所实现的底部菜单栏
xml布局如下:
<!-- lang: xml -->
      <TabHost xmlns:android="http://schemas.android.com/apk/res/android"
        xmlns:tools="http://schemas.android.com/tools"
        android:id="@android:id/tabhost"
        android:layout_width="match_parent"
        android:layout_height="match_parent" >

          <LinearLayout
            android:orientation="vertical"
            android:layout_width="fill_parent"
            android:layout_height="fill_parent">
            <FrameLayout
                android:id="@android:id/tabcontent"
                android:layout_width="fill_parent"
                android:layout_height="0.0dip"
                android:layout_weight="1.0" />
            <TabWidget
                android:id="@android:id/tabs"
                android:visibility="gone"
                android:layout_width="fill_parent"
                android:layout_height="wrap_content"
                android:layout_weight="0.0" />
            <RadioGroup
                android:gravity="center_vertical"
                android:layout_gravity="bottom"
                android:orientation="horizontal"
                android:id="@+id/main_radio"
                android:background="#000000"
                android:layout_width="fill_parent"
                android:layout_height="wrap_content">
                <RadioButton
                    android:id="@+id/radio_button0"
                    android:tag="radio_button0"
                    android:layout_marginTop="2.0dip"
                    android:text="@string/main_home"
                    style="@style/main_tab_bottom" />
                <RadioButton
                    android:id="@+id/radio_button1"
                    android:tag="radio_button1"
                    android:layout_marginTop="2.0dip"
                     android:text="@string/main_pay"
                    style="@style/main_tab_bottom" />
                <RadioButton
                    android:id="@+id/radio_button2"
                    android:tag="radio_button2"
                    android:layout_marginTop="2.0dip"
                       android:text="@string/main_data_interface"
                    style="@style/main_tab_bottom" />
                <RadioButton
                    android:id="@+id/radio_button3"
                    android:tag="radio_button3"
                    android:layout_marginTop="2.0dip"
                     android:text="@string/main_setting"
                    style="@style/main_tab_bottom" />
            </RadioGroup>
        </LinearLayout>
    </TabHost>
从布局可以看出,虽然使用了tabhost,但实际实现图上菜单效果的是radiogroup和radiobutton,在布局上将TabWidget 控件隐藏,显示时用radiobutton来代替,这样也容易自定义一些效果。
radiobutton的样式:
<!-- lang: xml -->
      <style name="main_tab_bottom">
        <item name="android:textSize">@dimen/bottom_tab_font_size</item>
        <item name="android:textColor">@drawable/main_menu_text_selector</item>
        <item name="android:ellipsize">marquee</item>
        <item name="android:gravity">center_horizontal</item>
        <item name="android:background">@null</item>
        <item name="android:paddingTop">@dimen/bottom_tab_padding_up</item>
        <item name="android:layout_width">fill_parent</item>
        <item name="android:layout_height">wrap_content</item>
        <item name="android:button">@null</item>
        <item name="android:drawableTop">@drawable/main_menu_background_selector</item>
        <item name="android:singleLine">true</item>
        <item name="android:drawablePadding">@dimen/bottom_tab_padding_drawable</item>
        <item name="android:layout_weight">1.0</item>
    </style>
图上点击选项卡的效果就是通过样式中的android:textColor和android:drawableTop来改变的。 就是通过selector来控制,需注意,在此处所应用的场景中,所选状态的改变应该通过checked属性来控制,而不是focused和pressed。如下:
<!-- lang: xml -->
    <?xml version="1.0" encoding="utf-8"?>
    <selector xmlns:android="http://schemas.android.com/apk/res/android" >
        <item android:drawable="@drawable/home_selected" android:state_checked="true"/>
        <item android:drawable="@drawable/home_normal"></item>
    </selector>
activity代码:
<!-- lang: java -->
      public class MainActivity extends TabActivity implements OnCheckedChangeListener {

    	private TabHost tabHost;
    	private RadioGroup radioGroup;

    	@Override
    	protected void onCreate(Bundle savedInstanceState) {
    		super.onCreate(savedInstanceState);
    		requestWindowFeature(Window.FEATURE_NO_TITLE);
    		setContentView(R.layout.activity_main);

    		radioGroup = (RadioGroup)findViewById(R.id.main_radio);
    		tabHost = getTabHost();

    		tabHost.addTab(addTabSpec("1", "1", new Intent(this, HomeActivity.class)));
    		tabHost.addTab(addTabSpec("2", "2", new Intent(this, PayActivity.class)));
    		tabHost.addTab(addTabSpec("3", "3", new Intent(this, DataInterfaceActivity.class)));
    		tabHost.addTab(addTabSpec("4", "4", new Intent(this, SettingActivity.class)));

    		radioGroup.setOnCheckedChangeListener(this);
    	}

    	private TabHost.TabSpec addTabSpec(String tag,String label,Intent intent){
    		return tabHost.newTabSpec(tag).setIndicator(label).setContent(intent);
    	}

    	@Override
    	public void onCheckedChanged(RadioGroup arg0, int checkedId) {
    		switch (checkedId) {
    		case R.id.radio_button0:
    			tabHost.setCurrentTabByTag("1");
    			break;
    		case R.id.radio_button1:
    			tabHost.setCurrentTabByTag("2");
    			break;
    		case R.id.radio_button2:
    			tabHost.setCurrentTabByTag("3");
    			break;
    		case R.id.radio_button3:
    			tabHost.setCurrentTabByTag("4");
    			break;
    		}
    	}
    }
代码编写上,仍然通过tabhost来切换不同的页面。


 139
139

 被折叠的 条评论
为什么被折叠?
被折叠的 条评论
为什么被折叠?
 到【灌水乐园】发言


