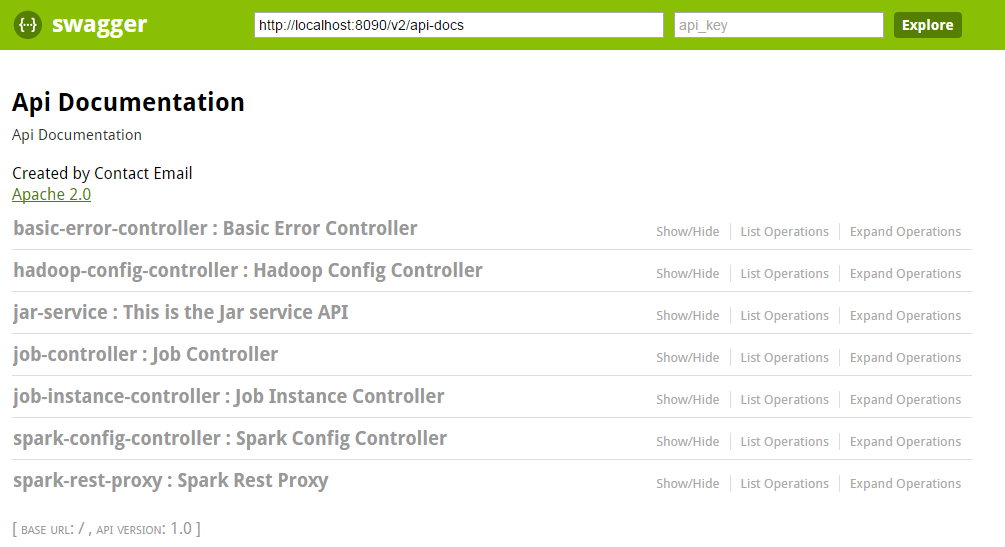
This wiki writes down the integration between spring-boot and Swagger. Swagger is a powerful restful API framework. It can discover and generate documentation for rest API by using the annotation at code level. This makes the documentation always synchronized with the actual API.
For more of Swagger's capability, please refer to: http://swagger.io
Setup
Here are the steps to set up your spring-boot application to use Swagger. Assume maven is used.
-
Add below dependencies to your POM.
<dependency>
    <groupId>io.springfox</groupId>
    <artifactId>springfox-swagger-ui</artifactId>
    <version>2.2.2</version>
</dependency>
<dependency>
    <groupId>io.springfox</groupId>
    <artifactId>springfox-swagger2</artifactId>
    <version>2.2.2</version>
</dependency>
Swagger does not support spring-boot officially. The support comes from a third-party project springfox. Here is the official site of springfox: http://springfox.github.io/springfox/
-
In your main application, add swagger support by simply adding an annotation "@EnableSwagger2"
@SpringBootApplication
@EnableSwagger2
public class Application {

    public static void main(String[] args) throws Exception {
        SpringApplication.run(Application.class, args);
    }
}
That's all the magic! restart the spring-boot application and visit in your browser: http://localhost:8090/v2/api-docs
You will see all the restful API returned as a JSON. But that's not so friendly. - Using the swagger UI.
NOTE: springfox docket is another option if you just want to use the default swagger ui. And It's not possible to use both options.
Clone the project from https://github.com/swagger-api/swagger-ui and put the "dist" folder to src/main/resources/static and rename it to "swagger". Reboot the application and then visit: http://localhost:8090/swagger/index.html
You will see all the registered APIs in your application.
By default, swagger will generate the link text and description based on you controller's name. For example, "JobController" will be shown as "job-controller" and "Job Controller".
You can customize the display text in your code by using annotation, which will be covered in next section.
You can also customize the UI code. -
Using Springfox Docket
Springfox Docket is another option to show the service UI. Just declare a Docket using "@Bean" as shown below. Note if you are using docket, you got convenience by sacrificing the customizability.@SpringBootApplication @EnableAutoConfiguration(exclude = {HypermediaAutoConfiguration.class}) @EnableSwagger2 public class Application { public static void main(String[] args) throws Exception { SpringApplication.run(Application.class, args); } @Bean public Docket newsApi() { return new Docket(DocumentationType.SWAGGER_2) .groupName("Process Solution") .apiInfo(apiInfo()) .select() .build(); } private ApiInfo apiInfo() { return new ApiInfoBuilder() .title("Cfl Rest API") .description("Powered By Spring Boot") .build(); } }
And then visit: http://localhost:8090/swagger-ui.htmlFor details, please refer to http://springfox.github.io/springfox/docs/current
Swagger annotations
The springfox is smart to generate the documentation by parsing the spring rest service declaration. Most of the time, this is enough. You just need to name your class and method in a meaningful way. But sometimes if you want to generate more detailed information, you can leverage the swagger annotation.
This wiki will only list the typical annotations, for full details please refer to: https://github.com/swagger-api/swagger-core/wiki/Annotations-1.5.X#api
- "@Api"From Swagger 2.0, this annotation is used to declared all the operations under the class.
- "@ApiOperation"
This is used to document a rest method. - "@ApiParam"
This is used to document a parameter in a method. - "@ApiModel"
This is used to document the model(a java bean) that will be shown in swagger UI.
Here is a sample restful service with swagger:
|
Declare a model API to be inspected by swagger

Here shows the net effect:


 1029
1029


 被折叠的 条评论
为什么被折叠?


