


这次研究celery的Next Step部分。
先创建一个python module:
mkdir proj
cd proj
touch __init__.py
在proj目录中创建celery.py:
from __future__ import absolute_import
from celery import Celery
app = Celery('proj',
             broker='amqp://',
             backend='amqp://',
             include=['proj.tasks'])
# Optional configuration, see the application user guide.
app.conf.update(
    CELERY_TASK_RESULT_EXPIRES=3600,
    CELERY_TASK_SERIALIZER='json',
    CELERY_ACCEPT_CONTENT=['json'],
    CELERY_RESULT_SERIALIZER='json'
)
if __name__ == '__main__':
    app.start()
解析:
app=Celery('proj'),命名这个模块为'proj',详细可参考User Guide的Main Name部分
broker='amqp://',指定broker,这里用的是rabbitmq。因为rabbitmq默认的用户为guest(密码为guest),你也可以这样写:amqp://guest@localhost//
backend='amqp://',指定一个backend,若需要检查worker执行任务完成后的返回内容,你必须设置一个backend
app.conf.update(....),在该程序中修改相关配置,最佳实践是把配置放到一个独立的文件中。修改的内容是当使用amqp为backend时,result保存的时间。这里好像用的是秒为单位
include[]是为了指定要导入的文件
备注:默认情况下,celery使用pickle作为payload,我测试时用的是root用户,会提示有安全问题,而不予执行。因而我需要配置CELERY_TASK_SERIALIZER,CELERY_ACCEPT_CONTENT,CELERY_RESULT_SERIALIZER为json。(另外请参考我的另一篇blog:http://my.oschina.net/hochikong/blog/393270
同一目录中,创建tasks.py:
from __future__ import absolute_import
from proj.celery import app
@app.task
def add(x, y):
    return x + y
@app.task
def mul(x, y):
    return x * y
@app.task
def xsum(numbers):
    return sum(numbers)
启动worker:
celery -A proj worker -l info提示如下:
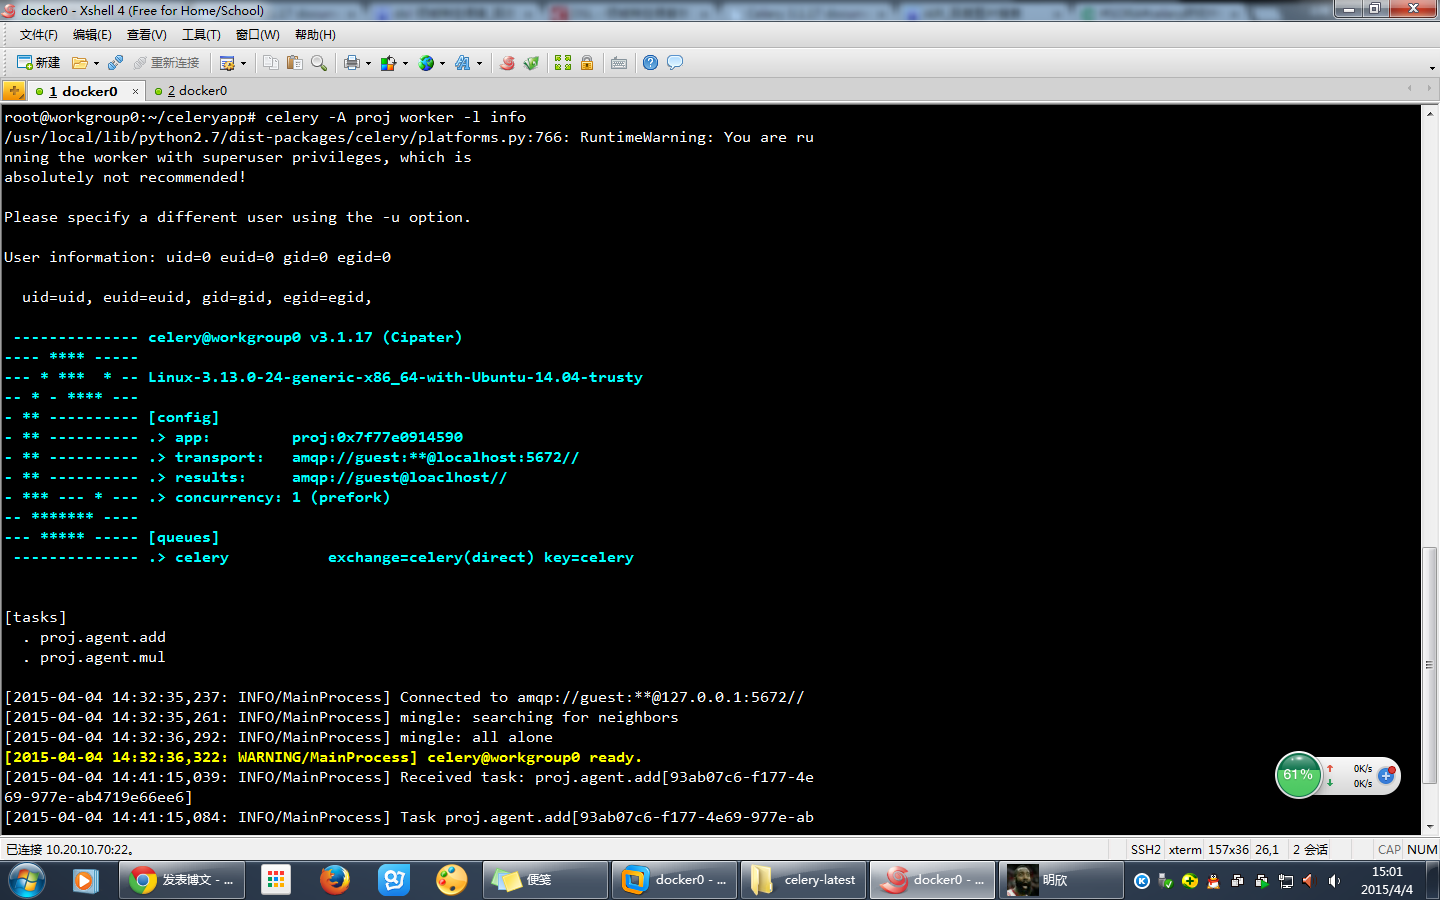
可以看到:
RuntimeWarning: You are running the worker with superuser privileges, which is
absolutely not recommended!
其他相关解析请参考celery文档。
在本机传递任务给worker(新开一个终端):
root@workgroup0:~/celeryapp# ls
cagent.py  cagent.pyc  config.py  config.pyc  proj  test.py
可以看到proj这个目录
进入python解释器:
root@workgroup0:~/celeryapp# python
Python 2.7.6 (default, Mar 22 2014, 22:59:56)
[GCC 4.8.2] on linux2
Type "help", "copyright", "credits" or "license" for more information.
>>> from proj.agent import add             #我的tasks.py重命名为agent.py
>>> res = add.delay(2,5)
>>>
注意import的形式:因为具体的函数保存在tasks.py(我的是agent.py),所以import的方法应为:module.path:attribute(具体见celery对于import的解释)
我们调用delay(2,5)执行add函数(也可以使用apply_async(),但参数需要放在元组里传入),传入的参数分别是2和5,返回一个对象res
>>> res
<AsyncResult: c08c72ed-8566-4025-b7f5-6ea5a9137966>
调用get()方法获取运算结果:
>>> res.get()
7
注意,如果任务执行的时间很久,get()需要设置timeout,例如:get(timeout=1)
获取运算任务的信息:
>>> res.state
u'SUCCESS'
返回一个unicode字符串SUCCESS
我们看看另一个终端,即启动worker那个:
[2015-04-04 14:41:29,772: INFO/MainProcess] Received task: proj.agent.add[60eea8f6-0b6a-4bb4-909f-60a377936dcc]
[2015-04-04 14:41:29,798: INFO/MainProcess] Task proj.agent.add[60eea8f6-0b6a-4bb4-909f-60[2015-04-04 15:05:38,847: INFO/MainProcess] Received task: proj.agent.add[c08c72ed-8566-4025-b7f5-6ea5a9137966]
[2015-04-04 15:05:38,867: INFO/MainProcess] Task proj.agent.add[c08c72ed-8566-4025-b7f5-6ea5a9137966] succeeded in 0.0136815000001s: 7
可以看到任务执行的信息。
要关闭worker,直接按Ctrl+C即可


 7625
7625

 被折叠的 条评论
为什么被折叠?
被折叠的 条评论
为什么被折叠?
 到【灌水乐园】发言


