


Linux全攻略--Samba服务器配置与管理(一)
SMB(Samba简称)是一组通信协议,它运行于Unix.OS/2和MS-Windows系统之间,以实现文件共享和打印机共享服务,WIDOWS客户机通过NetBIOS对话传送服务器消息来使用服务器的文件和打印机资源.NETBIOS定义了运行于DOS上的网络界面,但没有规定实际用来传送数据的网络协议.Samba使用NetBIOS over TCP/IP,这种方式有很多优点.
SMB使LINUX计算机在网络邻居中看起来如同一台WINDOWS计算机.WINDOWS计算机的用户可以登录到LINUX计算机中,从LINUX文件系统中复制文件等.
一、启动Samba
可以图形化启动,也可以命令行启动方式。
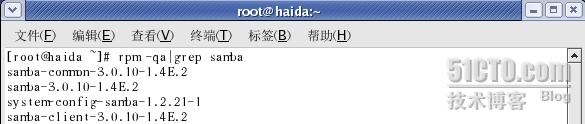
先检查下安装没,这里可以看到安装好了。

然后命令方式启动,成功。
二、smb.conf文件说明
下面看文件的说明
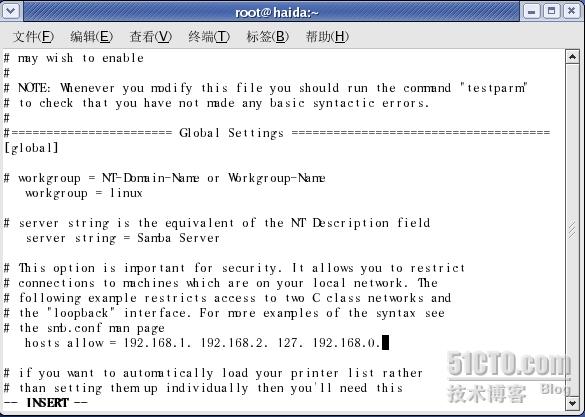
[global] //设置整体环境
workgroup = MYGROUP //设置工作组名称,该名称会出现在WINDOWS的网上邻居和LINUX的网络服务器中。
server string = Samba Server // 服务器名说明
; hosts allow = 192.168.1. 192.168.2. 127. 此选项对于安全性非常重要,它严格限制了可访问Samba Server的IP范围,默认是允许所有的IP访问,如果设置,那么设置好这后应去掉前面的“;”号
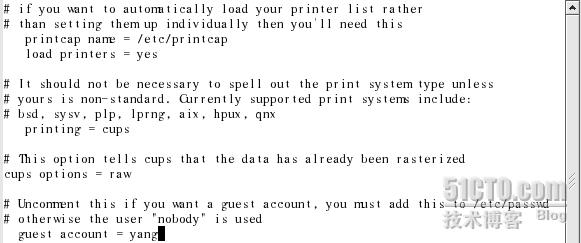
printcap name = /etc/printcap // 设置打印机配置文件路径
load printers = yes //是否将打印机共享
; printing = cups //打印机的类型,若使用的打印机是LINUX标准型的,则不需要更改打印机类型,通常标准型的打印机类型包括:bsd,sysv,plp,lprng,aix,hpux,qnx和cups
cups options = raw //
; guest account = pcguest //如果想让用户“pcguest:以匿名用户身份登录,去掉前面的“;”号,并确保在/etc/passwd中有此用户,这里的“pcguest“可以根据需要改成用户自己设置的本地用户。
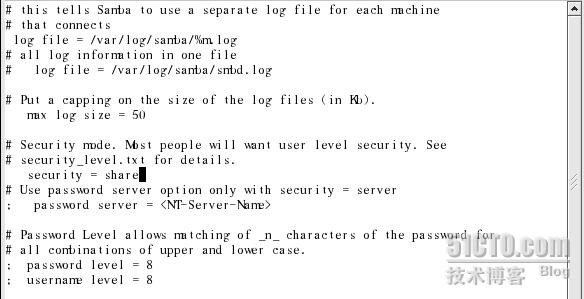
log file = /var/log/samba/%m.log // log会在此目录中为每个登录Samba的用户建立不同的日志文件。
max log size = 50 //定义了文件夹的大小,默认是不对日志文件做大小限制的
workgroup = MYGROUP //设置工作组名称,该名称会出现在WINDOWS的网上邻居和LINUX的网络服务器中。
server string = Samba Server // 服务器名说明
; hosts allow = 192.168.1. 192.168.2. 127. 此选项对于安全性非常重要,它严格限制了可访问Samba Server的IP范围,默认是允许所有的IP访问,如果设置,那么设置好这后应去掉前面的“;”号
printcap name = /etc/printcap // 设置打印机配置文件路径
load printers = yes //是否将打印机共享
; printing = cups //打印机的类型,若使用的打印机是LINUX标准型的,则不需要更改打印机类型,通常标准型的打印机类型包括:bsd,sysv,plp,lprng,aix,hpux,qnx和cups
cups options = raw //
; guest account = pcguest //如果想让用户“pcguest:以匿名用户身份登录,去掉前面的“;”号,并确保在/etc/passwd中有此用户,这里的“pcguest“可以根据需要改成用户自己设置的本地用户。
log file = /var/log/samba/%m.log // log会在此目录中为每个登录Samba的用户建立不同的日志文件。
max log size = 50 //定义了文件夹的大小,默认是不对日志文件做大小限制的
下面是关于安全级别的设置
security = user // 安全级别,提供了4种安全等级:share,user,server,domain
; password server = <NT-Server-Name> //密码验证服务器,当用户从WINDOWS通过SAMBA使用LINUX时,会自动传送登录WINDOWS时的用户名与密码给SAMBA,然后SAMNBA向PASSWORD SERVER验证这两项信息是否正确,若不正确,则会出现对话框,要求用户重新输入。(WINDOWS NT和WINDOWS2000也会如上,WINDOWS98只会要求输入密码,因此建议与LINUX账号相同的名称来登录WINSOW98。)而这个密码服务器可以是WINDOWS NT SERVER(通常是主域控制器),或是另外一个SAMBA SERVER。因此若SECURITY=SERVER,则需要指定密码服务器,若SECURITY=SHARE,则需删除关于密码服务器的那一行。
; password level = 8 //密码级别设置
; username level = 8
; encrypt passwords = yes// 用户密码要加密,由于现在WINDOWS98/NT皆使用加密的密码,因此要有这一项,当然也可以要求使用不加密的密码。
; smb passwd file = /etc/samba/smbpasswd //奖密码服务器设置为SAMBA SERVER时,需要用此行来指定要验证的密码文件,若设置为WIDOWS NT SERVER,则不需要此行,这里最重要的是密码文件设置的路径。
; unix password sync = Yes
; passwd program = /usr/bin/passwd %u //接下来的两行设置用来容许WINDOWS密码改变后更新LINUX系统的密码,确定“encrypt passwords“和"smb passwd file“项被启用
; passwd chat = *New*UNIX*password* %n\n *ReType*new*UNIX*password* %n\n *passwd:*all*authentication*tokens*updated*successfully*
; username map = /etc/samba/smbusers//在此文件中设置对应的用户名称
; include = /etc/samba/smb.conf.%m //在此行允许用户自己定义每台计算机的基本配置文件,%m代表NETBIOS正在连接的计算机名称。
socket options = TCP_NODELAY SO_RCVBUF=8192 SO_SNDBUF=8192 //设置服务器和客户之间会话的socket选项,此项设置将优化传输速度。
; interfaces = 192.168.12.2/24 192.168.13.2/24 //如果有多网络界面必须在此列出
; remote browse sync = 192.168.3.25 192.168.5.255 // 本行和下一行是远程浏览设置
; remote announce = 192.168.1.255 192.168.2.44
; local master = no
; os level = 33
; os level = 33
; domain master = yes
; preferred master = yes
; domain logons = yes
; logon script = %m.bat
; logon script = %U.bat
; logon path = \\%L\Profiles\%U
; name resolve order = wins lmhosts bcast
; wins support = yes
; wins server = w.x.y.z //WINS客户端设置
; wins proxy = yes障碍
dns proxy = no //DNS PROXY设置,默认是不为客户做DNS查询
; preserve case = no
; short preserve case = no
; default case = lower
; case sensitive = no
#============================ Share Definitions ==============================
idmap uid = 16777216-33554431
idmap gid = 16777216-33554431
template shell = /bin/false
winbind use default domain = no
[homes] //用户访问自己目录的设置
comment = Home Directories //说明文件或目录类型
browseable = no //用户私人目录,不需要给别人浏览
writable = yes //用户写入自己目录的权限
idmap uid = 16777216-33554431
idmap gid = 16777216-33554431
template shell = /bin/false
winbind use default domain = no
[homes] //用户访问自己目录的设置
comment = Home Directories //说明文件或目录类型
browseable = no //用户私人目录,不需要给别人浏览
writable = yes //用户写入自己目录的权限
# Un-comment the following and create the netlogon directory for Domain Logons
; [netlogon] //域用户登录目录设置
; comment = Network Logon Service
; path = /home/netlogon
; guest ok = yes
; writable = no
; share modes = no
; [netlogon] //域用户登录目录设置
; comment = Network Logon Service
; path = /home/netlogon
; guest ok = yes
; writable = no
; share modes = no
# Un-comment the following to provide a specific roving profile share
# the default is to use the user's home directory
;[Profiles] //默认PROFILE设置
; path = /home/profiles
; browseable = no
; guest ok = yes
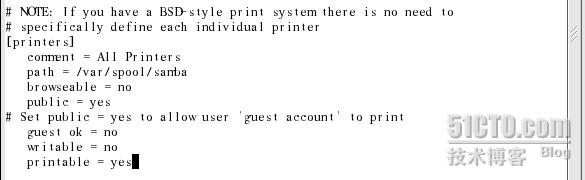
# NOTE: If you have a BSD-style print system there is no need to
# specifically define each individual printer
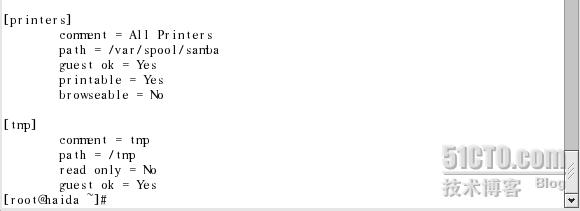
[printers] //打印机设置
comment = All Printers //说明要把全部打印机共享
path = /var/spool/samba //打印机池,用户必须自行创建目录
browseable = no //此地存放打印机的临时文件
# Set public = yes to allow user 'guest account' to print
guest ok = no
writable = no
printable = yes //用户是否可以打印
# This one is useful for people to share files
;[tmp] //用户共享资源设置(可定义新的共享目录)
; comment = Temporary file space //说明
; path = /tmp //共享目录设置
; read only = no //是否只读或可写入
; public = yes //是否共享
;[tmp] //用户共享资源设置(可定义新的共享目录)
; comment = Temporary file space //说明
; path = /tmp //共享目录设置
; read only = no //是否只读或可写入
; public = yes //是否共享
# A publicly accessible directory, but read only, except for people in
# the "staff" group
;[public] //用户资源共享设置
; comment = Public Stuff
; path = /home/samba
; public = yes
; read only = yes
; write list = @staff
# the "staff" group
;[public] //用户资源共享设置
; comment = Public Stuff
; path = /home/samba
; public = yes
; read only = yes
; write list = @staff
# Other examples.
#
# A private printer, usable only by fred. Spool data will be placed in fred's
# home directory. Note that fred must have write access to the spool directory,
# wherever it is.
;[fredsprn]
; comment = Fred's Printer
; valid users = fred
; path = /homes/fred
; printer = freds_printer
; public = no
; writable = no
; printable = yes
# A private directory, usable only by fred. Note that fred requires write
# access to the directory.
;[fredsdir]
; comment = Fred's Service
; path = /usr/somewhere/private
; valid users = fred
; public = no
; writable = yes
; printable = no
# access to the directory.
;[fredsdir]
; comment = Fred's Service
; path = /usr/somewhere/private
; valid users = fred
; public = no
; writable = yes
; printable = no
# a service which has a different directory for each machine that connects
# this allows you to tailor configurations to incoming machines. You could
# also use the %u option to tailor it by user name.
# The %m gets replaced with the machine name that is connecting.
;[pchome]
; comment = PC Directories
; path = /usr/pc/%m
; public = no
; writable = yes
# this allows you to tailor configurations to incoming machines. You could
# also use the %u option to tailor it by user name.
# The %m gets replaced with the machine name that is connecting.
;[pchome]
; comment = PC Directories
; path = /usr/pc/%m
; public = no
; writable = yes
# A publicly accessible directory, read/write to all users. Note that all files
# created in the directory by users will be owned by the default user, so
# any user with access can delete any other user's files. Obviously this
# directory must be writable by the default user. Another user could of course
# be specified, in which case all files would be owned by that user instead.
;[public]
; path = /usr/somewhere/else/public
; public = yes
; only guest = yes
; writable = yes
; printable = no
# The following two entries demonstrate how to share a directory so that two
# users can place files there that will be owned by the specific users. In this
# setup, the directory should be writable by both users and should have the
# sticky bit set on it to prevent abuse. Obviously this could be extended to
# as many users as required.
;[myshare]
; comment = Mary's and Fred's stuff
; path = /usr/somewhere/shared
; valid users = mary fred
; public = no
; writable = yes
; printable = no
; create mask = 0765
三.配置Samba服务器
1.配置share级服务器.
share级在4个等级中是最低的,配置方法也是最简单.只需修改/etc/smb.conf文件如下:
看最后一行,允许IP段访问.
看光标所在处,这里需要指定一个用户账号,yang是服务器中已经存在的一个账号.
光标处是share

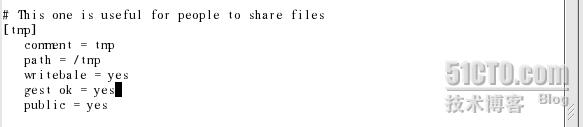
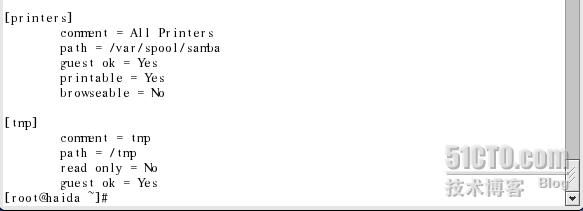
[tmp]这里是可以设置要共享的任何目录.
设置好后要检查正确性了.
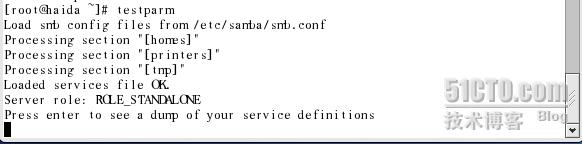
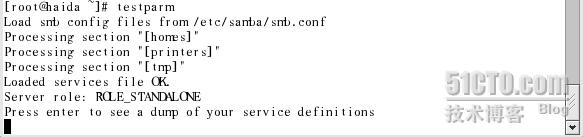
执行testparm命令.测试smb.conf的正确性
有"OK"表示加载正常.
下面按ENTER
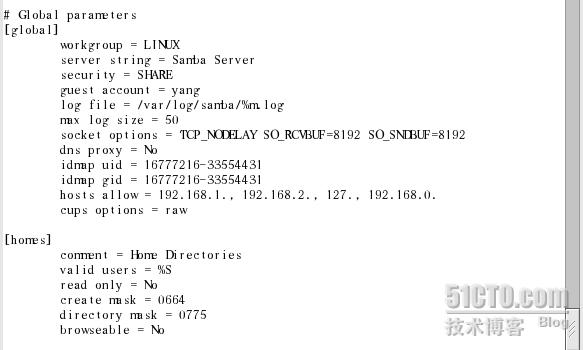
上面列出了配置的情况
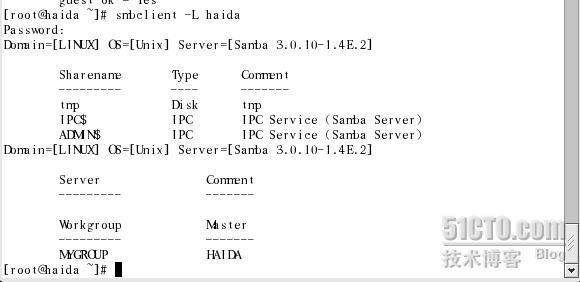
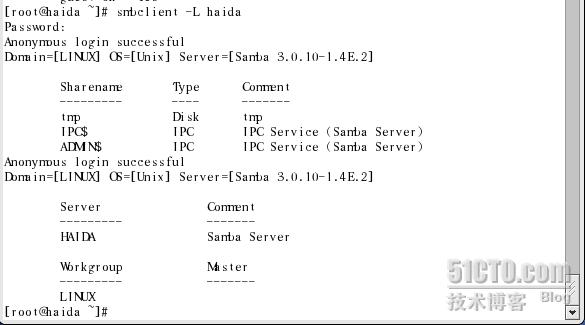
执行snvclient命令查看资源共享情况.
最后要重新启动Samba服务.使配置文件生效.
下面来看测试.
这是在WINDOWS上,打开网上邻居.可看到配置时显示的名称LINUX.
进去以后看到服务器.
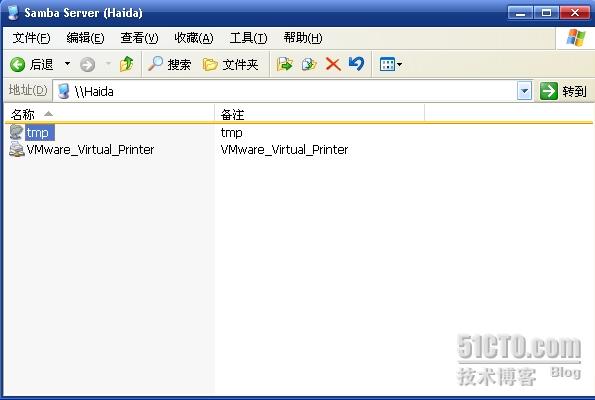
可看到配置的共享文件夹TMP
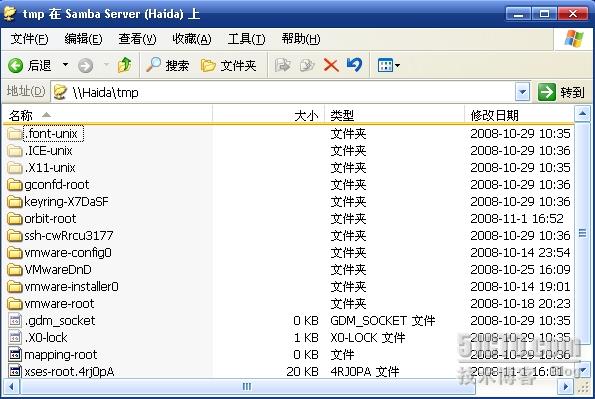
进去后可访问里面的内容了.可知配置成功.
然后来看用LINUX客户访问

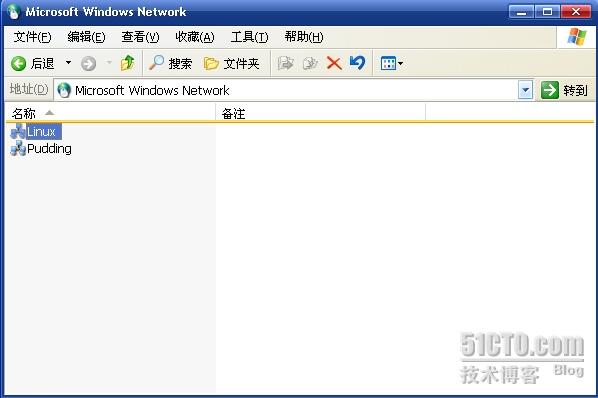
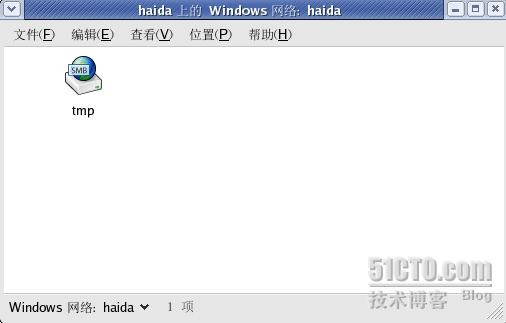
在LINUX系统中,打开应用程序/网络服务器.然后点WINDOWS网络.
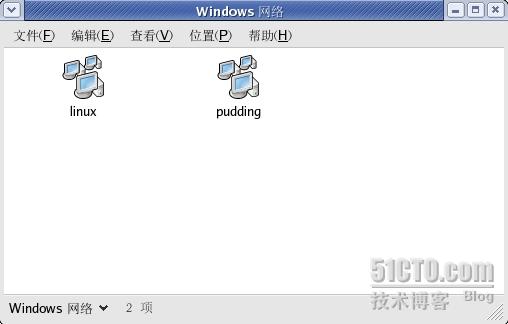
可看到LINUX
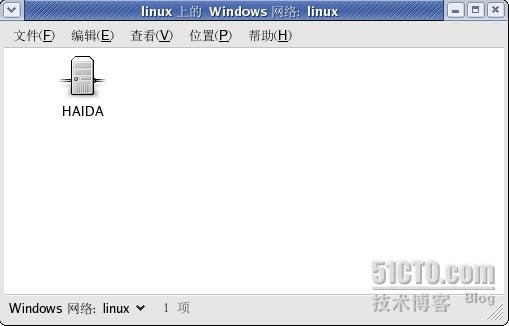
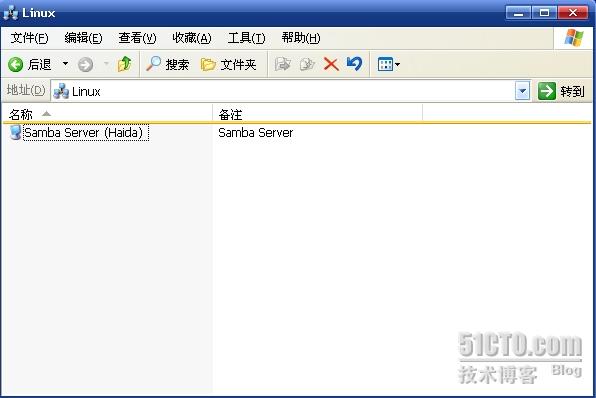
可看到刚才第一个画面的HAIDA,其实是一样的.
可看到共享文件夹是一个卷.
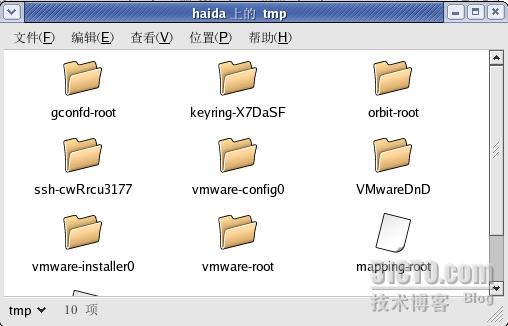
进去后同样可访问其内容了.
Linux全攻略--Samba服务器配置与管理(二)
一、配置user级服务器
user级比share级的安全性高,其配置中最重要的是设置Samba密码文件配置方法如下:
在share级的配置基础上修改:

登录的用户帐号

安全级别设置为user。
当对配置文件/etc/smb.conf进行user级的设置后,需要设置Samba密码文件,建立smbpasswd帐号和口令。使其与/etc/passwd的帐号和口令相同。
1)建立本地帐号,生成口令文件/etc/passwd,把/etc/passwd里的用户都加到/etc/samba/smbpasswd文件中,注意,该过程是先在本地帐号和帐号的密码。然后再把口令文件付给/etc/samba/smbpasswd,顺序不能反,即本地帐号的口令和Samba服务器中帐号的口令是不相同的。
在这里本地已经有了yang的帐号就不再建立了。

这条命令是将生成“/etc/samba/smbpasswd"口令文件,同时把/etc/passwd里的用户都加到sambpasswd文件中。注意一定不要输错,这里的“/etc/samba/smbpasswd"和“smb passwd file =/etc/samba/smbpasswd"的路径要一模一样。
2)利用smbpasswd命令来为刚才建立的帐号设立Samba Server口令。

输入两次口令。

然后重新启动。
用testparm测试。可以看到配置是没有问题的。

再来看另一个测试.
可以看到都是没有什么问题的.
下面来进行测试了.
先在WINDOWS计算机网上邻居查看.
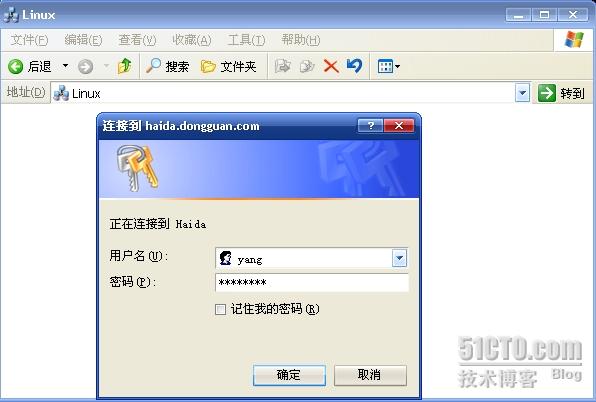
当点击时要输入用户名和密码.
这个是配置好的用户
在LINUX上看下.

点击时可看到下面
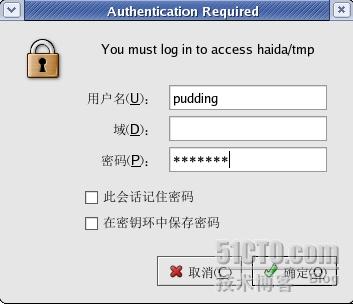
这个用户是我另外配置的.
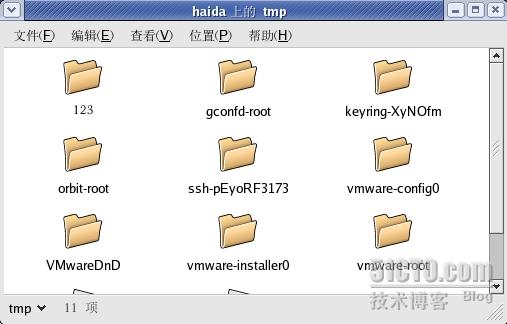
同样点击认证后可以看到共享的目录.
二.配置server级服务器.
server级的安全性比user级更高.配置方法如下:

安全级别改为server.
然后添加 password server = xuesheng //密码服务器,这里是主域控制器"xuesheng"来做密码服务器.
注释掉:smb passwd file = /etc/samba/smbpasswd
这样当一台Windows NT/98计算机登录xuesheng域服务器时,同时也登录上了Samba Server,不过,这时的用户帐号和密码在xuesheng和Samba Server上应该是相同的.如果是已经加入xuesheng主域控制器的计算机,就可以输入用户帐号和密码来打开samba server的共享文件,期货计算机虽然也和samba server在同一个网段上,但如果不用xuesheng和samba server共有的用户帐号和密码登录系统,就不能访问samba server的共享资源.
三.配置domain级服务器
domain 级是samba server 级别中最高的,只要掌握几人民上关键配置.就很容易:
首先,使用windows NT域中PDC上的"服务器管理器"把samba server的NetBIOS名,加入到WINDOWS NT域.并在主域控制器上的"安全帐号管理员"数据库中创建这个计算机的帐号,注意应该把samba server作为"Windows NT主域控制器"加入到域,而不是一个主域或备份域控制器.
其次看如下配置:
security = domain
workgroup = libt //这是主域控制器域名
添加:NetBIOS = linux //为Samba server起一个NETBIOS名,并添加在smb.conf文件的最前面
password server = libserver //用WINDOWS 2000主域控制器libserver来做密码服务器.
并注释掉:
smb passwd file = /etc/samba/smbpasswd
..以上的服务器可用WINDOWS2003.由于实验环境关系就不再验证了.
四.同机LINUX分区和WINDOWS分区资源共享设置
SAMBA服务器解决了异机之间资源共享和互访的问题,但是,如果同一台计算机上奖有双系统时那么就要看下面了.
1.从LINUX分区访问WINDOS分区
1)在LINUX系统下用fdisk -l 命令查看WINDOWS系统所在的分区.
#fdisk - l
2)在LINUX的/mnt目录建立一个子目录(用来存放WINDOWS下的文件)
#mkdir /mnt/winpart
3)在LINUX下执行如下命令:
#mount -t auto /dev/hda1 /mnt/winpart
至此就可以实现分区之间的互访了.
取消用:#umount /mnt/winpart
2.从WINDOWS分区访问LINUX分区.
这个就需要用另个的软件来实现.学用的有explore2fs和fsdext2.其实很简单的,安装好后自然点点就会使用,可以看到LINUX下的资源.
由于没有安装双系统,就不做实验了,原理都在这,大家可以试试.
五.配置Samba打印共享
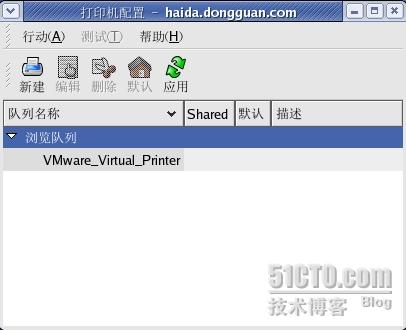
选择应用程序/系统设置/打印/就可以看到上面的窗口.眯新建.
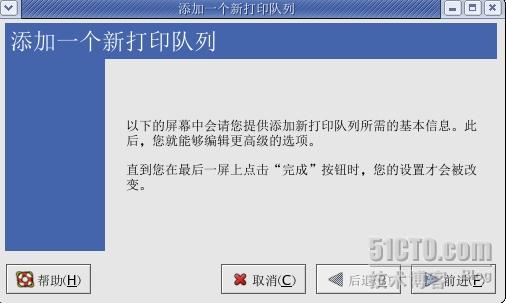
前进
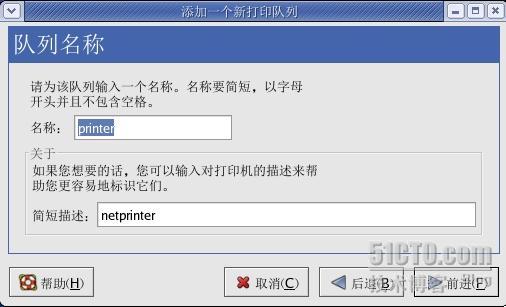
输入名称.
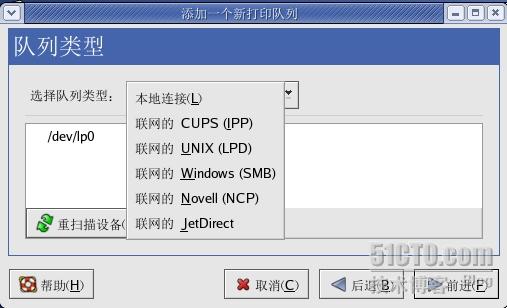
队列类型有好多个可选择.
LINUX大部分在安装时都为并行打印机自动创建3个设备名:lp0,lp1.lp2.这些名称中的数字与PC的并行端口相对应的.
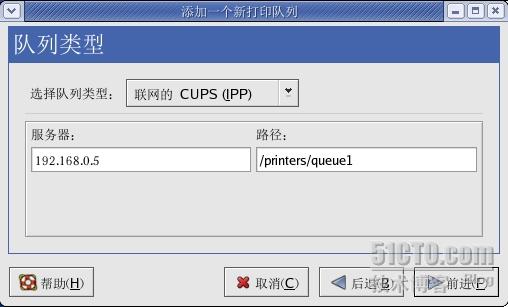
要填服务器的IP地址.
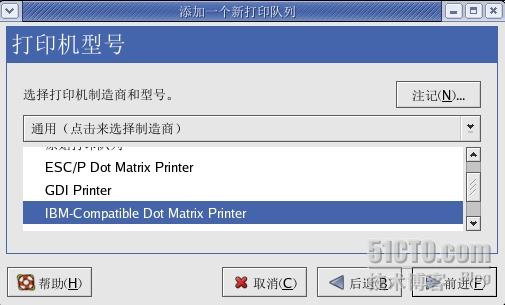
选择打印机型号
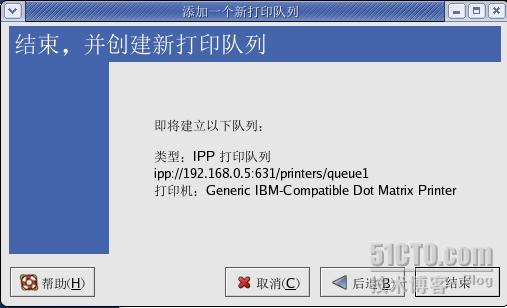
点结束
便会出现上面的窗口
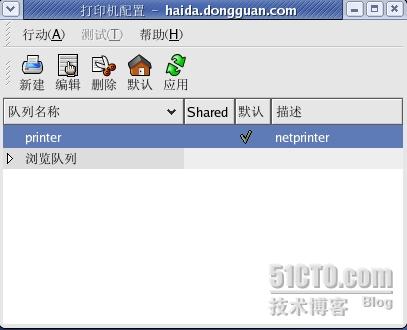
这样合便建立好了
点其属性
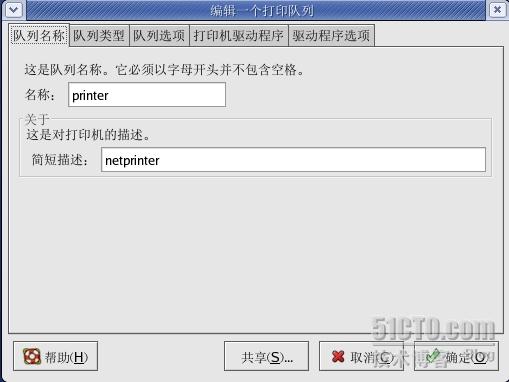
然后可以进行修改
下面看下Samba相关命令和程序
smbd:SAMBA 服务器守护进程,为SMB客户端提供文件和打印服务
nmbd :SAMBA守护进程,提供NETBIOS名称解析和服务浏览的支持
smbclient:为LINUX客户端提供对SAMBA服务的类似于FTP的访问
smbmount :在LINUX客户端挂载SAMBA的共享目录
smbumount:取消在LINUX客户端的SAMBA共享目录
smbpasswd :改变在SAMBA服务器中的加密口令
smbstatus :显示当前情况下SMB网络连接的状态
smbrun :SMBD和外部程序之间的接口程序
testparm:测试SAMBA配置文件,即smb.conf文件
smbtar :直接备份SMB/CIFS共享资源到UNIX磁带驱动器
nmblookup具:映射一个WINDOWS计算机的NETBIOS名到它的IP地址.
testrns :检查打印机配置文件的正确性.
SWAT:SAMBA的WEB管理工具,通过使用WEB浏览器配置smb.conf文件,使用户可以使用WEB页面接口创建和维护配置文件smb.conf
非常简单的samba服务器上的方法:
cd /etc/samba/
mv smb.conf smbbak.conf
vi smb.conf
复制以下内容
[global]
workgroup = JESUNGHYD
server string = jsoa
security = SHARE
[public]
path = /oa_setup/oa
read only = No
guest ok =yes
转载于:https://blog.51cto.com/3apple/474640


 184
184

 被折叠的 条评论
为什么被折叠?
被折叠的 条评论
为什么被折叠?
 到【灌水乐园】发言


