##1、UIView动画 一些简单的动画直接在UIView上面就可以进行设置,需要做一些复杂或者比较炫的效果时才用Core Animation(核⼼心动画),下面先来介绍一下UIView的一些动画使用:
###1.1 transform
transform我们一般称为形变属性,其本质是通过矩阵变化改变控件的大小、位置、角度等,这里我们通过一个例子来看一下具体的操作,在下面的例子中我们也会看到UIImageView控件的常用操作。
图片旋转方法,注意参数中的btn表示当前点击按钮:
-(void)rotation:(UIButton *)btn{
    [self animation:^{
        //注意旋转角度必须是弧度,不是角度
        CGFloat angle=M_PI_4;//M开头的宏都是和数学(Math)相关的宏定义,M_PI_4表示四分之派,M_2_PI表示2派
        //使用CGAffineTransformMakeRotation获得一个旋转角度形变
        //但是需要注意tranform的旋转不会自动在原来的角度上进行叠加,所以下面的方法旋转一次以后再点击按钮不会旋转了
        //_imageView.transform=CGAffineTransformMakeRotation(angle);
        //利用CGAffineTransformRotate在原来的基础上产生一个新的角度(当然也可以定义一个全局变量自己累加)
        _imageView.transform=CGAffineTransformRotate(_imageView.transform, angle);

    }];
}
图片缩放方法:
-(void)scale:(UIButton *)btn{
    //    [self animation:^{
    //        CGFloat scalleOffset=0.9;
    //        //   _imageView.transform=CGAffineTransformMakeScale(scalleOffset, scalleOffset);
    //        _imageView.transform=    CGAffineTransformScale(_imageView.transform, scalleOffset, scalleOffset);
    //    }];
    //通常我们使用UIView的静态方法实现动画而不是自己写一个方法
    [UIView animateWithDuration:0.5 animations:^{
        CGFloat scalleOffset=0.9;
        //_imageView.transform=CGAffineTransformMakeScale(scalleOffset, scalleOffset);
        _imageView.transform= CGAffineTransformScale(_imageView.transform, scalleOffset, scalleOffset);
    }];
}
图片移动方法:
-(void)translate:(UIButton *)btn{
    [self animation:^{
        CGFloat translateY=50;
        //_imageView.transform=CGAffineTransformMakeTranslation(0, translateY);
        _imageView.transform=CGAffineTransformTranslate(_imageView.transform, 0, translateY);
    }];
}
动画执行方法,注意这里可以使用UIView的animateWithDuration方法代替这里只是为了演示:
-(void)animation:(ButtonHandle)handle{
    //开始动画
    [UIView beginAnimations:@"animation" context:nil];
    //设置动画执行时间
    [UIView setAnimationDuration:0.5];

    handle();

    //执行动画操作
    [UIView commitAnimations];

}
运行效果:
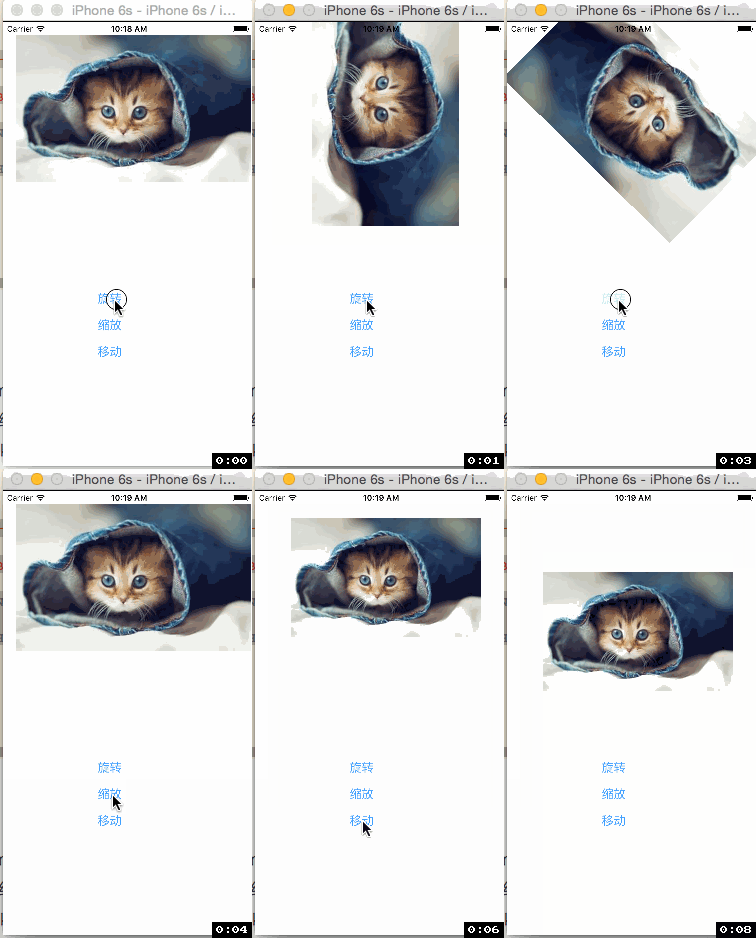
-
获得CGAffineTransform有多种方法,例如使用CGAffineTransformMake,但是对于矩阵操作相对比较麻烦,事实上iOS已经为我们准备好了三个方法:CGAffineTransformMakeRotation(旋转)、CGAffineTransformMakeScale(缩放)、CGAffineTransformMakeTranslation(移动);
-
transform进行旋转、缩放、移动的时候不是在原来的基础上增量形变的,因此如果需要持续在原来的基础上旋转、缩放、移动那么每次需要在原来的基础上增加或减少。当然,我们可以定义一个全局变量进行累加,但是事实上iOS已经为我们提供好了三个对应的方法,分别用于在原来的角度、缩放、移动位置的基础上做出修改:CGAffineTransformRotate、CGAffineTransformScale、CGAffineTransformTranslate; Objc语法规定不允许直接修改一个对象的结构体属性的成员,只能给这个属性直接赋值为一个结构体类型,例如上面的代码中如果写成“_btnRotation.frame.origin.x=380;”是不正确的;
-
上面的代码中我们用到了UIView的动画相关方法,在iOS开发中动画开发异常简单,而且动画和逻辑处理是完全分离的,只要在两个动画方法之间修改一个控件的属性那么当代码执行时就会自动添加动画效果,这里我们实现了一个类似于animation方法,类似于UIViewanimateWithDuration静态方法的功能,仅仅为了说明它的实现原理,实际开发中可以直接调用animateWithDuration即可(而且它有多种重载);
###1、2 animateWithDuration方法示例
1、简单的动画:
    [UIView animateWithDuration:1 animations:^{

        aniView.transform = CGAffineTransformScale(aniView.transform, 1.5, 1.5);
        aniView.layer.cornerRadius = 100;
    }];
2、处理动画完成后的操作:
    [UIView animateWithDuration:2 animations:^{

        aniView.layer.cornerRadius = 100;
        aniView.transform = CGAffineTransformScale(aniView.transform, 1.5, 1.5);

    } completion:^(BOOL finished) {

        aniView.transform = CGAffineTransformIdentity;
        aniView.layer.cornerRadius = 0;
    }];
3、设置动画的延迟进行:
	/*
     delay:延迟的秒数,
     options: 动画的线性变换

        UIViewAnimationOptionCurveEaseInOut   进入、出去时加速
        UIViewAnimationOptionCurveEaseIn      进入时加速
        UIViewAnimationOptionCurveEaseOut     出去时加速
        UIViewAnimationOptionCurveLinear      匀速
     */
    [UIView animateWithDuration:2 delay:2 options:UIViewAnimationOptionCurveLinear animations:^{

        aniView.layer.cornerRadius = 50;
        aniView.transform = CGAffineTransformScale(aniView.transform, 2, 2);

    } completion:^(BOOL finished) {

        aniView.transform = CGAffineTransformIdentity;
        aniView.layer.cornerRadius = 0;
    }];
4、带有缓存效应的动画,Damping:缓存只(0~1),值越小缓冲越大,Velocity: 动画播放速度
    [UIView animateWithDuration:2 delay:0 usingSpringWithDamping:0.3
          initialSpringVelocity:1 options:0 animations:^{

        aniView.layer.cornerRadius = 50;
        aniView.transform = CGAffineTransformScale(aniView.transform, 2, 2);

    } completion:^(BOOL finished) {

        aniView.transform = CGAffineTransformIdentity;
        aniView.layer.cornerRadius = 0;
    }];
5、视图转场动画, 从一个视图到另一个视图的转化过程:
 options:转场样式
        UIViewAnimationOptionTransitionNone            = 0 << 20, // default
        UIViewAnimationOptionTransitionFlipFromLeft    = 1 << 20,
        UIViewAnimationOptionTransitionFlipFromRight   = 2 << 20,
        UIViewAnimationOptionTransitionCurlUp          = 3 << 20,
        UIViewAnimationOptionTransitionCurlDown        = 4 << 20,
        UIViewAnimationOptionTransitionCrossDissolve   = 5 << 20,
        UIViewAnimationOptionTransitionFlipFromTop     = 6 << 20,
        UIViewAnimationOptionTransitionFlipFromBottom

    [UIView transitionFromView:self.view toView:aniView duration:1 options:UIViewAnimationOptionTransitionCurlUp completion:^(BOOL finished) {

    }];
6、嵌套动画:多个动画组合成一个动画组:
    [UIView animateWithDuration:2 animations:^{

        aniView.transform = CGAffineTransformScale(aniView.transform, 2, 2);

    } completion:^(BOOL finished) {

        [UIView animateWithDuration:2 animations:^{

            aniView.layer.cornerRadius = 50;

        } completion:^(BOOL finished) {

            [UIView animateWithDuration:2 delay:0 usingSpringWithDamping:0.5 initialSpringVelocity:1 options:0 animations:^{

                aniView.transform = CGAffineTransformScale(aniView.transform, 0.5, 0.5);

            } completion:^(BOOL finished) {

            }];
        }];

    }];
}
###1.3 autoresizingMask autoresizingMask这个属性一般我们进行屏幕旋转的时候经常用到,它的值是一个枚举类型:
typedef NS_OPTIONS(NSUInteger, UIViewAutoresizing) {
    UIViewAutoresizingNone                 = 0,      //不进行自动调整
    UIViewAutoresizingFlexibleLeftMargin   = 1 << 0, //自动调整与superview左侧距离,右侧距离保持不变
    UIViewAutoresizingFlexibleWidth        = 1 << 1, //自动调整控件自身宽度,保证与superview左右距离不变
    UIViewAutoresizingFlexibleRightMargin  = 1 << 2, //自动调整与superview右侧距离,左侧距离保持不变
    UIViewAutoresizingFlexibleTopMargin    = 1 << 3, //自动调整与superview顶部距离,底部距离保持不变
    UIViewAutoresizingFlexibleHeight       = 1 << 4, //自动调整控件自身高度,保证与superview上下距离不变
    UIViewAutoresizingFlexibleBottomMargin = 1 << 5  //自动调整与superview底部距离,顶部距离保持不变
};
通过注释大家应该大概了解每个枚举值的意义,但是我们知道枚举经常进行按位或操作(“|”),例如如果autoresizingMask=UIViewAutoresizingFlexibleWidth|UIViewAutoresizingFlexibleLeftMargin那么iOS如何处理呢?此时会自动调整左边的距离和控件自身宽度,右侧距离不变,同时保证左侧距离和控件宽度同等比例的调整(延长或缩短)。例如在iPhone 5中,如果一个按钮假设自身宽度为200,左右侧距离均为60(左侧和宽度比例3:10),当从竖屏旋转到横屏的时候(此时宽度由320变为568,注意如果有状态栏则宽度变为568-20=548),由于右侧边距不变为60,根据比例左侧边距应该是(568-60)* (3/13)=117,宽度为:(568-60)* (10/13)=391。
##2、Core Animation基本概念
-
什么是Animation(动画),简单点说就是在一段时间内,显示的内容发生了变化.对CALayer来说就是在一段时间内,其Animatable Property发生了变化.从CALayer(CA = Core Animation)类名来看就可以看出iOS的Layer就是为动画而生的,便于实现良好的交互体验. 这里涉及到两个东西: 一是Layer(基类CALayer),二是Animation(基于CAAnimation). Animation作用于Layer.CALayer提供了接口用于给自己添Animation. 用于显示的Layer本质上讲是一个Model,包含了Layer的各种属性值. Animation则包含了动画的时间,变化,以及变化的速度 。Core Animation(核⼼心动画)是一组非常强大的动画处理API,使用它能做出⾮常炫丽的动画效果,⽽且往往是事半功倍!
-
使用它需要先添加QuartzCore.framework和引入对应的框架<QuartzCore/ QuartzCore.h>
创建动画的步骤:
- 初始化⼀一个动画对象(CAAnimation)并设置⼀一些动画相关的属性
- CALayer中有很多属性都可以通过CAAnimation实现动画效果,包括:opacity、position、transform、bounds、contents等
- 使⽤用CALayer的addAnimation:forKey⽅方法增加动画到层,当动画对象添加到层后会⾃动执⾏。
- Core Animation的动画执⾏过程都是在后台操作的,不会阻塞主线程。
###2.1 CAAnimation继承结构:
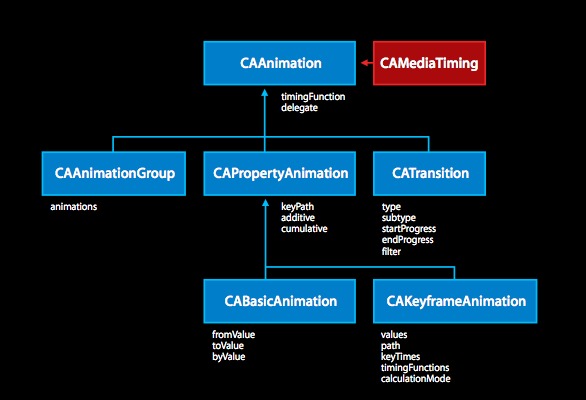
这里再强调关于动画的两个重要的点:
一是中间状态的插值计算(Interpolation),
二是动画节奏控制(Timing); 有时候插值计算也和Timing有一定关系. 如果状态是一维空间的值(比如透明度),那么插值计算的结果必然再起点值和终点值之间,如果状态是二维空间的值(比如position),那么一般情况下插值得到的点会落在起点和终点之间的线段上(当然也有可能连线是圆滑曲线).
-
核心动画类(CAAnimation)包含CABasicAnimation(基本动画)、CATransition(转场动画)、CAKeyframeAnimation(关键帧动画)、CAAnimationGrup(动画组),动画的对象是图层(layer)
-
CABasicAnimation:提供了在图层的属性值间简单的动画。 -
CAKeyframeAnimation: 提供支持关键帧动画。你指定动画的一个图层属性的关键路径,一个表示在动画的每个阶段的价值的数组,还有一个关键帧时间的数组和时间函数。 -
CATransition:提供了一个影响整个图层的内容过渡效果。在动画显示过程中采用淡出(fade)、推出(push)、显露(reveal)图层的内容。 -
CAAnimationGroup: 允许一系列动画效果组合在一起,并行显示动画。
###2.2CAAnimation 简介:
CAAimation是所有动画对象的基类,负责控制动画的持续时间和速度,是个抽象类,不能直接使⽤用,应该使⽤用它具体的⼦子类
属性说明:
removedOnCompletion// 动画是否⾃自动移出duration// 动画持续时间speed//速度timeOffset// 动画时间的偏移repeatCount// 动画重复执⾏行的次数(HUGE_VALF无限次)repeatDuration// 动画重复执⾏行的总时间autoreverses// 反转动画delegate// 代理fillMode// 填充模式timingFunction//速度控制函数
###2.3fillMode(填充模式):
fillMode的作用就是决定当前对象过了非active时间段的行为. 比如动画开始之前,动画结束之后。如果是一个动画CAAnimation,则需要将其removedOnCompletion设置为NO,要不然fillMode不起作用. 下面来讲各个fillMode的意义
1.kCAFillModeRemoved 这个是默认值,也就是说当动画开始前和动画结束后,动画对 layer都没有影响,动画结束后,layer会恢复到之前的状态
2.kCAFillModeForwards 当动画结束后,layer会一直保持着动画最后的状态
3.kCAFillModeBackwards 这个和kCAFillModeForwards是相对的,就是在动画开始前,你只要将动画加入了⼀个layer,layer便立即进入动画的初始状态并等待动画开始.你可以这样设定测试代码,将一个动画加⼊一个layer的时候延迟5秒执⾏行.然后就会发现在动画没有开 始的时候,只要动画被加入了layer,layer便处于动画初始状态
4.kCAFillModeBoth 理解了上⾯两个,这个就很好理解了,这个其实就是上⾯两个的合成.动画加入后开始之前,layer便处于动画初始状态,动画结束后layer保持动画最后的状态.
注意:要想fillMode有效,必须设置removedOnCompletion = NO
###2.4timingFunction(速度控制函数)
Timing Function的会被用于变化起点和终点之间的插值计算.形象点说是Timing Function决定了动画运行的节奏(Pacing),比如是均匀变化(相同时间变化量相同),先快后慢,先慢后快还是先慢再快再慢.
1.kCAMediaTimingFunctionLinear :线性(匀速)
2.kCAMediaTimingFunctionEaseIn :先慢
3.kCAMediaTimingFunctionEaseOut :后慢
4.kCAMediaTimingFunctionEaseInEaseOut :先慢 后慢 中间快
##3、基本动画(CABasicAnimation)
- CABasicAnimation 用于实现layer属性值从一个值(fromValue)到另外一个值(toValue)变化的简单动画,比如旋转、缩放、逐渐透明、移动等。
- 相关属性:
1.fromValue:keyPath相应属性的初始值
2.byValue:keyPath相应属性的中间值
3.toValue:keyPath相应属性的结束值
这三个属性都是可选的,但不能同时多于两个为非空.最终都是为了确定animation变化的起点和终点
设置了动画的起点和终点之后,中间的值都是通过插值方式计算出来的.插值计算的结果由timingFunction指定,默认timingFunction为nil,会使用liner的,也就是变化是均匀的.
随着动画的进行,在长度为duration的持续时间内,keyPath相应属性的值从fromValue渐渐地变为toValue
如果fillMode=kCAFillModeForwards``removedOnComletion=NO,那么在动画执行完毕后,图层会保持显示动画执行后的状态。但在实质上,图层的属性值还是动画执行前的初始值,并没有真正被改变。
比如,CALayer的position初始值为(0,0),CABasicAnimation的fromValue为(10,10),toValue为(100,100),虽然动画执行完毕后图层保持在(100,100)这个位置,实质上图层的position还是为(0,0)
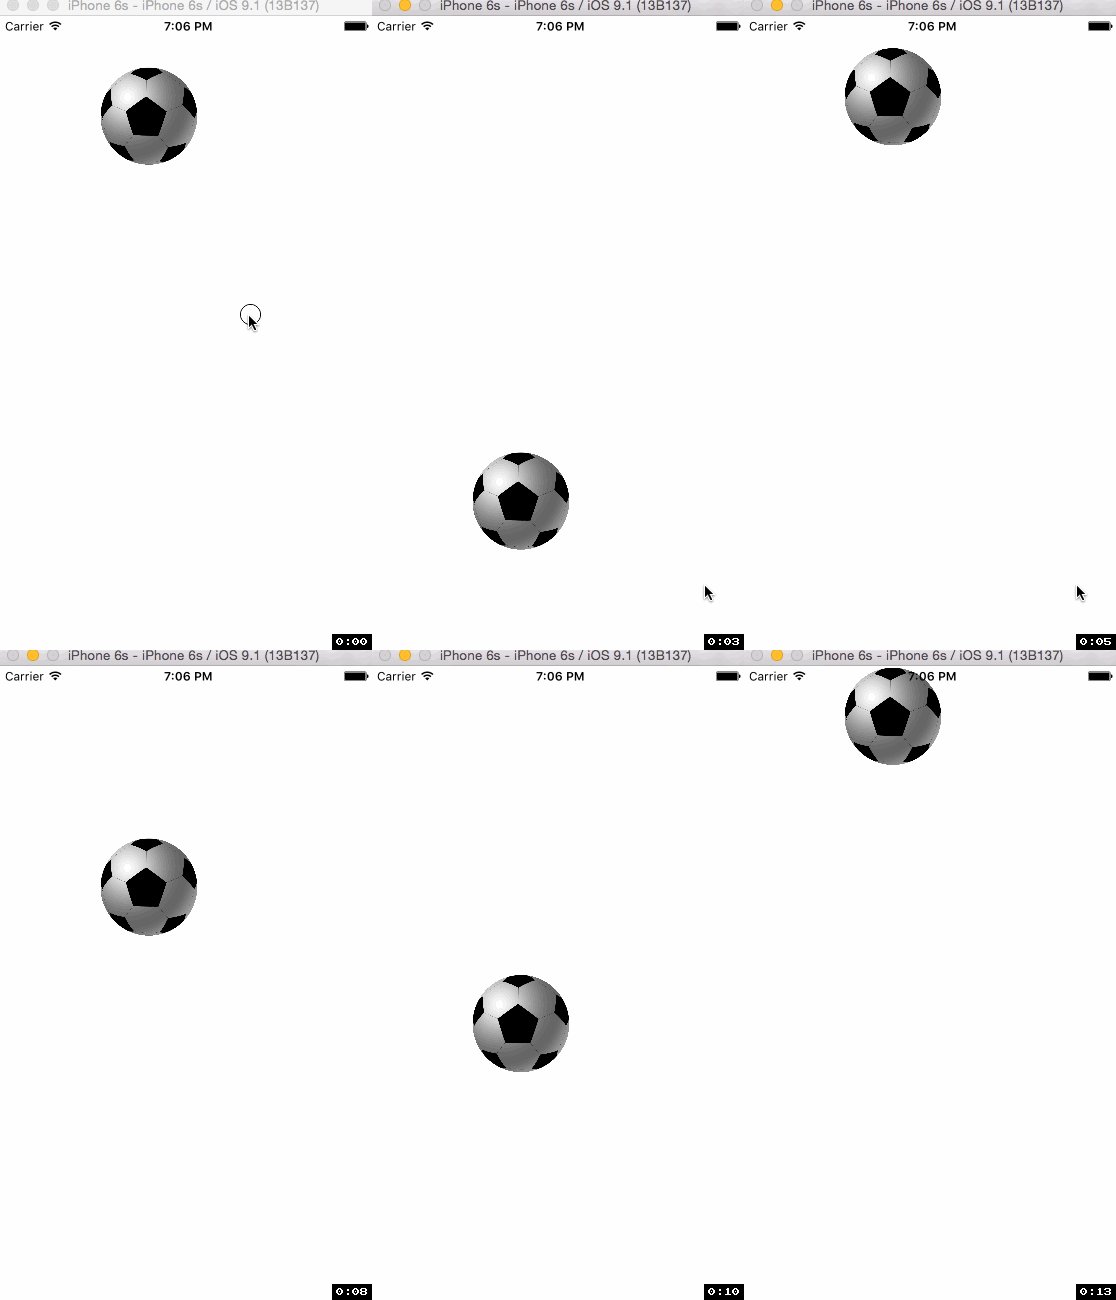
###3.1平移动画
创建动画,设置的animationWithKeyPath是@"position",说明要修改的是CALayer的position属性,也就是会执行平移动画
CABasicAnimation *animation = [CABasicAnimation animationWithKeyPath:@"position"];
动画的属性:
animation.fromValue,animation.toValue这里的属性接收的时id类型的参数,因此并不能直接使用CGPoint这种结构体类型,而是要先包装成NSValue对象后再使用。
byValue和toValue的区别,前者是在当前的位置上增加多少,后者是到指定的位置。
    //设置初始值
    animation.fromValue = [NSValue valueWithCGPoint:CGPointMake(150, 50)];
    //设置结束值
    animation.toValue = [NSValue valueWithCGPoint:CGPointMake(150, 550)];
    //动画时间
    animation.duration = 2.0;
    //填充模式
    animation.fillMode = kCAFillModeForwards;
默认情况下,动画执行完毕后,动画会自动从CALayer上移除,CALayer又会回到原来的状态。为了保持动画执行后的状态,可以加入animation.removedOnCompletion = NO;
    //动画结束后是否自动移除
    animation.removedOnCompletion = NO;
    //反转动画
    animation.autoreverses = YES;
    //循环次数
    animation.repeatCount = HUGE_VALF; //  HUGE_VALF 最大浮点数,表示无限次重复
动画的线性变换(动画速度变化):
	/*
     kCAMediaTimingFunctionLinear 匀速
     kCAMediaTimingFunctionEaseIn 加速
     kCAMediaTimingFunctionEaseOut 减速
     kCAMediaTimingFunctionEaseInEaseOut 缓慢进入缓慢出去
     kCAMediaTimingFunctionDefault 默认
     */
    animation.timingFunction = [CAMediaTimingFunction functionWithName:kCAMediaTimingFunctionEaseIn];
添加动画:
[anilayer addAnimation:animation forKey:@"position"];
实现效果:
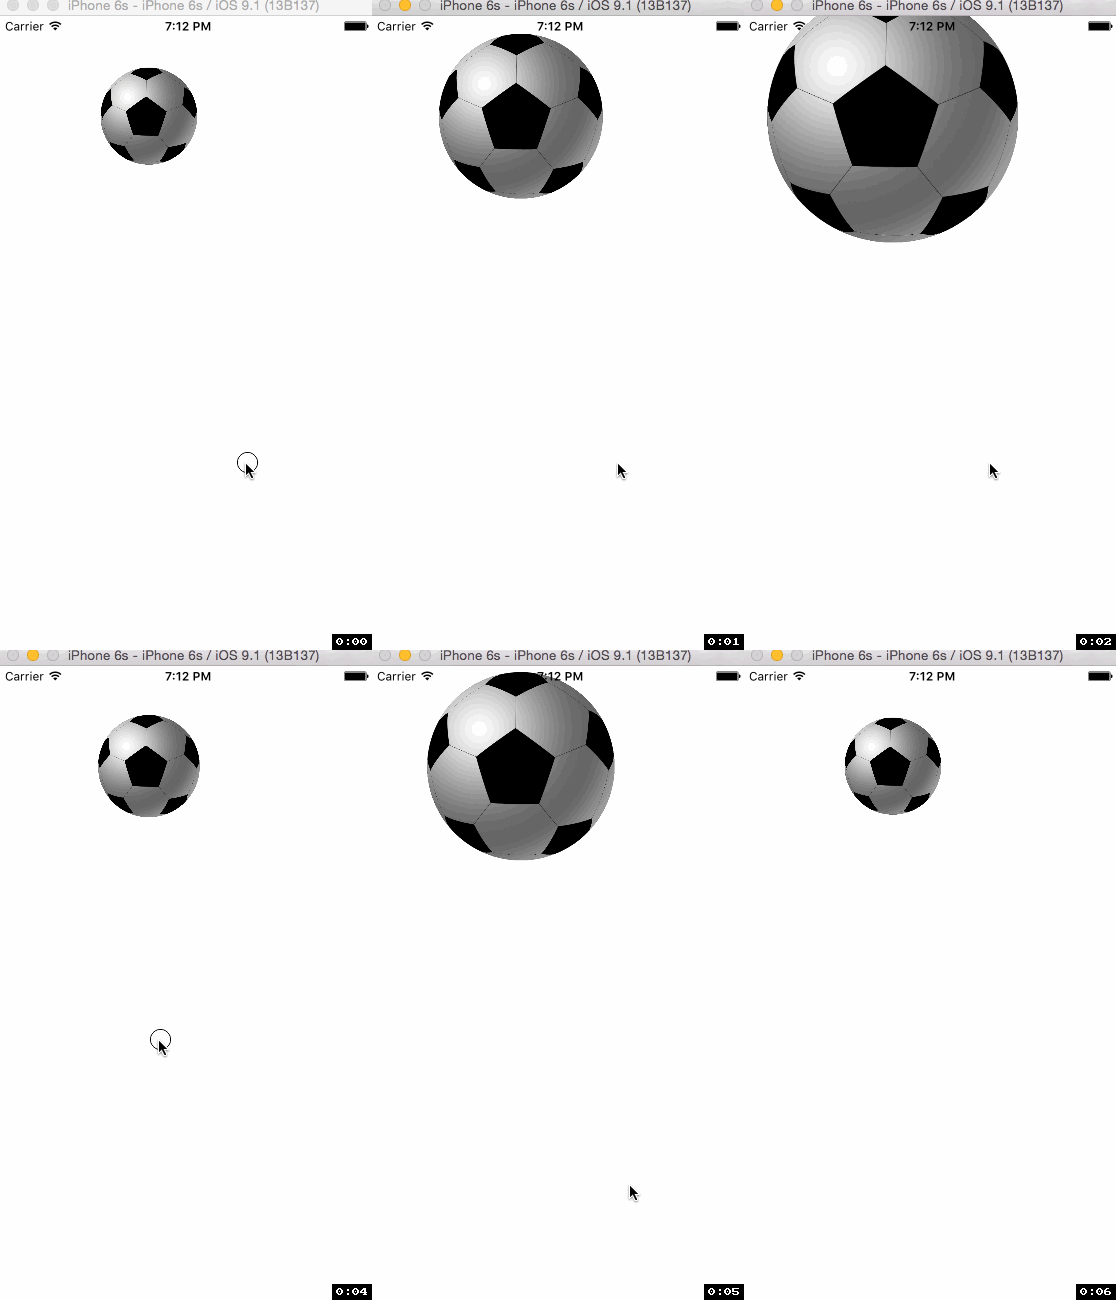
###3.2缩放动画
实现缩放动画的代码示例:
    CABasicAnimation *animation = [CABasicAnimation animationWithKeyPath:@"bounds"];
    animation.fromValue = [NSValue valueWithCGRect:CGRectMake(0, 0, 100, 100)];
    animation.toValue = [NSValue valueWithCGRect:CGRectMake(0, 0, 300, 300)];

    animation.duration = 2.0;

    [anilayer addAnimation:animation forKey:@"bounds"];
实现效果:
###3.3旋转动画
示例代码:
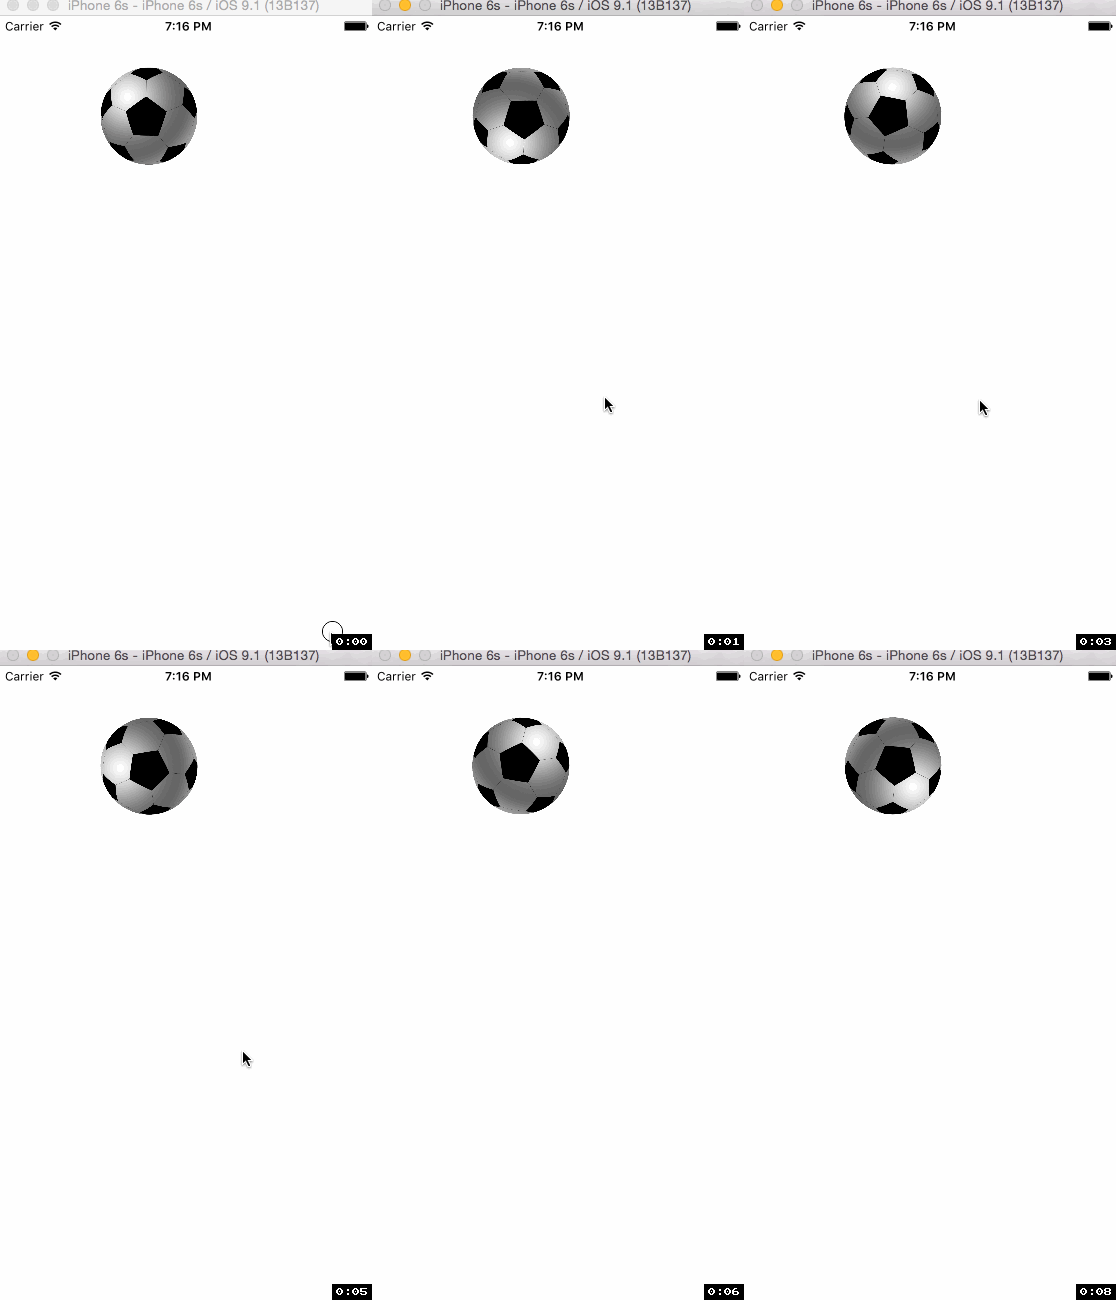
    CABasicAnimation *animation = [CABasicAnimation animationWithKeyPath:@"transform.rotation"];
    // animation.fromValue = @0;
    // animation.toValue = @(2 * M_PI);
    animation.byValue = @( -2 * M_PI);

    animation.duration = 2.0;
    animation.fillMode = kCAFillModeForwards;
    animation.removedOnCompletion = NO;
    animation.autoreverses = YES;
    animation.repeatCount = HUGE_VALF; //  HUGE_VALF 最大浮点数,表示无限次重复

	[anilayer addAnimation:animation forKey:@"rotation"];
实现效果:
##4、CAKeyframeAnimation(关键帧动画)
-
CAKeyframeAnimation,也是CAPropertyAnimation的⼦子类,但关键帧动画与 简单动画的区别是,简单动画只能从一个数值过渡到另⼀个数值,⽽而关键帧动画 会有一个NSArray来保存多个数值的过渡。
-
相关属性:
values:就是上述的NSArray对象。里面的元素称为”关键帧”(keyframe)。动画对象会在指定的时间(duration)内,依次显示values数组中的每一个关键帧
path:可以设置一个CGPathRef \ CGMutablePathRef,让层跟着路径移动。path只对CALayer的anchorPoint和position起作用。如果你设置了path,那么values将被忽略
keyTimes:可以为对应的关键帧指定对应的时间点,其取值范围为0到1.0,keyTimes中的每一个时间值都对应values中的每一帧.当keyTimes没有设置的时候,各个关键帧的时间是平分的
说明:CABasicAnimation可看做是最多只有2个关键帧的CAKeyframeAnimation
calculationMode(计算模式): 在关键帧动画中还有一个⾮非常重要的参数,那便是calculationMode,计算模式.其主要针对的是每一帧的内容为一个座标点的情况,也就是对anchorPoint 和 position 进⾏行的动 画.当在平⾯座标系中有多个离散的点的时候,可以是离散的,也可以直线相连后进行插值计算,也可以使⽤圆滑的曲线将他们相连后进⾏行插值计算.
calculationMode提供如下几种模式:
kCAAnimationLinear 默认值,表示当关键帧为座标点的时候,关键帧之间直接直线 相连进⾏行插值计算
kCAAnimationDiscrete离散的,不进⾏行插值计算,所有关键帧直接逐个进⾏行显⽰示 kCAAnimationPaced 使得动画均匀进行,而不是按keyTimes设置的或者按关键帧平 分时间,此时keyTimes和timingFunctions⽆效
kCAAnimationCubic 对关键帧为座标点的关键帧进⾏圆滑曲线相连后插值计算,这⾥的主要目的是使得运行的轨迹变得圆滑
kCAAnimationCubicPaced 看这个名字就知道kCAAnimationCubic有⼀定联系,其实就是在kCAAnimationCubic的基础上使得动画运行变得均匀,就是系统时间内运 动的距离相同,此时keyTimes以及timingFunctions也是无效的
###4.1多个目标值得动画
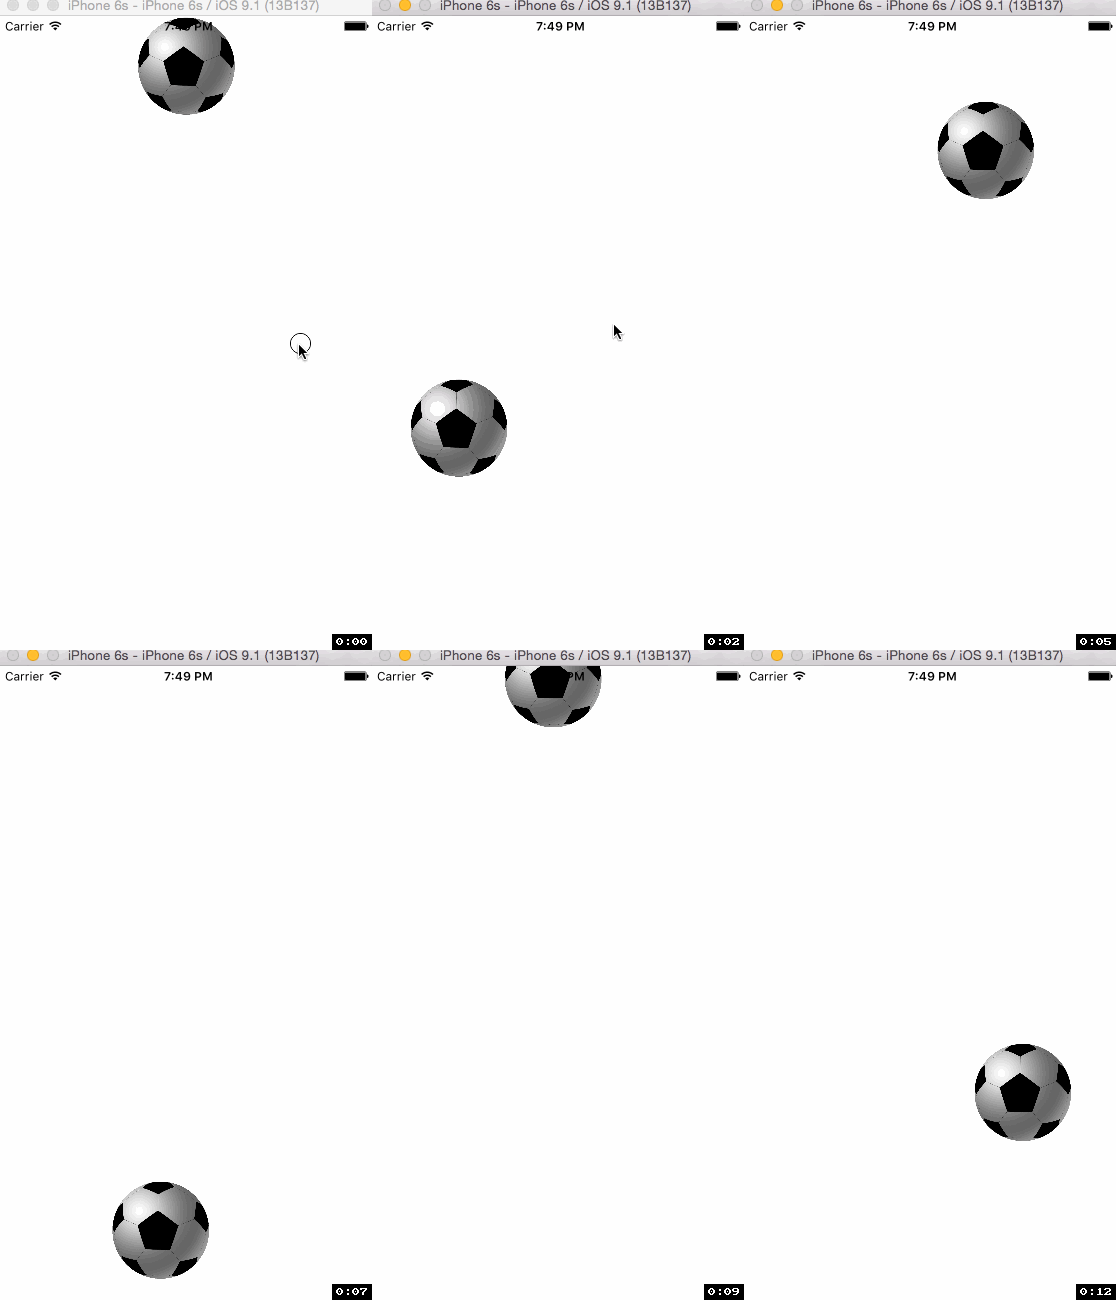
创建关键帧动画:
    CAKeyframeAnimation *keyAnimation = [CAKeyframeAnimation animationWithKeyPath:@"position"];
    keyAnimation.duration = 4;
    //    keyAnimation.autoreverses = YES;
    keyAnimation.repeatCount = HUGE_VALF;
    keyAnimation.fillMode = kCAFillModeForwards;
    keyAnimation.removedOnCompletion = NO;
设置动画的点并添加到values上:
     NSValue *point_1 = [NSValue valueWithCGPoint:CGPointMake(Width / 2,0)];
     NSValue *point_2 = [NSValue valueWithCGPoint:CGPointMake(50,Height / 2)];
     NSValue *point_3 = [NSValue valueWithCGPoint:CGPointMake(Width / 2,Height - 50)];
     NSValue *point_4 = [NSValue valueWithCGPoint:CGPointMake(Width - 50,Height / 2)];
     NSValue *point_5 = [NSValue valueWithCGPoint:CGPointMake(Width / 2,0)];

     // values:设置关键帧(多个目标点)
     keyAnimation.values = @[point_1,point_2,point_3,point_4,point_5];
设置每一帧所在的时间比例
keyAnimation.keyTimes = @[@0, @0.2, @0.5, @0.6,@1.0];
插值计算模式:
     kCAAnimationLinear  关键帧之间进行插值计算(线性的)
     kCAAnimationDiscrete 关键帧之间不进行插值计算(离散的)
     kCAAnimationPaced 关键帧之间匀速切换,keyTimes\timingFunctions的设置将不起作用
     kCAAnimationCubic 关键帧进行圆滑曲线相连后插值计算
     kCAAnimationCubicPaced 匀速并且关键帧进行圆滑曲线相连后插值计算
     */
    keyAnimation.calculationMode = kCAAnimationLinear;
实现效果:
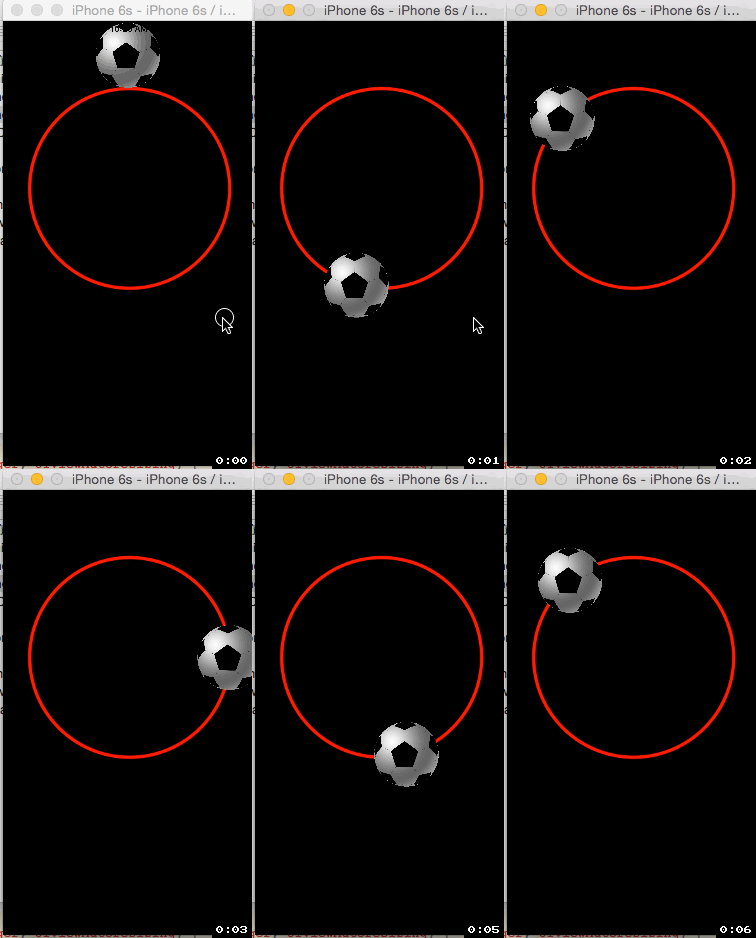
###4.2 使用(path)让layer在指定的路径上移动(绘图):
创建layer并设置代理,
    CALayer *bgLayer = [CALayer layer];
    bgLayer.frame = self.view.bounds;
    bgLayer.backgroundColor = [UIColor blackColor].CGColor;
    [self.view.layer addSublayer:bgLayer];
    bgLayer.delegate = self;
用调用重绘方法:
    [bgLayer setNeedsDisplay];

    aniLayer = [CALayer layer];
    aniLayer.bounds = CGRectMake(0 , 0, 100, 100);
    aniLayer.position = CGPointMake(Width / 2, 50);
    aniLayer.contents = (__bridge id _Nullable)([UIImage imageNamed:@"足球"].CGImage);
    [self.view.layer addSublayer:aniLayer];
重绘方法:
- (void)drawLayer:(CALayer *)layer inContext:(CGContextRef)ctx {

    CGContextAddPath(ctx , [self path].CGPath);
    CGContextSetStrokeColorWithColor(ctx, [UIColor redColor].CGColor);
    CGContextSetLineWidth(ctx, 5);
    CGContextDrawPath(ctx, kCGPathStroke);
}
绘制路径:
- (UIBezierPath *)path {

    // 椭圆
    //    UIBezierPath *path = [UIBezierPath bezierPathWithOvalInRect:self.view.bounds];
    // 圆角矩形
    //    UIBezierPath *path = [UIBezierPath bezierPathWithRoundedRect:self.view.bounds cornerRadius:50];
    // 内切圆
    UIBezierPath *path = [UIBezierPath bezierPathWithOvalInRect:CGRectMake(40, 100, 300, 300)];

    // 贝塞尔曲线
//    UIBezierPath *path = [UIBezierPath bezierPath];
//    [path moveToPoint:CGPointMake(0, Height)];
//    CGPoint point_1 = CGPointMake(Width, Height);
//    CGPoint controPoint_1 = CGPointMake(Width / 2, - Height);
//    //    CGPoint controPoint_2 = CGPointMake(TScreenWidth / 4 * 3, TScreenHeight);
//
//    [path addQuadCurveToPoint:point_1 controlPoint:controPoint_1];
    //    [path addCurveToPoint:point_1 controlPoint1:controPoint_1 controlPoint2:controPoint_2];

    return path;
}
创建关键帧:
    CAKeyframeAnimation *keyAnimation = [CAKeyframeAnimation animationWithKeyPath:@"position"];
    keyAnimation.duration = 4;
    //    keyAnimation.autoreverses = YES;
    keyAnimation.repeatCount = HUGE_VALF;
    keyAnimation.fillMode = kCAFillModeForwards;
    keyAnimation.removedOnCompletion = NO;

        keyAnimation.calculationMode = kCAAnimationLinear;
    keyAnimation.path = [self path].CGPath;

    [aniLayer addAnimation:keyAnimation forKey:@"keyAnimation"];
实现效果:
5、CATransition(转场动画)
- CATransition 用于视图的页面切换、页面更新时的转场动画,提供了多种type和subType转场效果 能够为层提供移出屏幕和移入屏幕的动画效果。iOS比Mac OS X的转场动画效果少一点
ps:UINavigationController就是通过CATransition实现了将控制器的视图推入屏幕的动画效果
- 相关属性:
type : 转场动画效果(API中公开的效果只有fade、moveIn、push、reveal四种,其他为私有)。
subtype:动画过渡方向
startProgress:动画起点(在整体动画的百分比)
endProgress:动画终点(在整体动画的百分比)
转场效果: 1. fade 淡出效果 2. moveIn 进入效果 3. push 推出效果 4. reveal 移出效果
未公开的: 5. cube 立方体翻转效果 6. suckEffect 抽走效果 7. rippleEffect 水波效果 8. pageCurl 翻开页效果 9. pageUnCurl 关闭页效果 10. cameraIrisHollowOpen 相机镜头打开效果 11. cameraIrisHollowClose 相机镜头关闭效果
    CATransition *transitionAni = [CATransition animation];
    transitionAni.duration = 1.0;

    transitionAni.type = kCATransitionPush;
    // transitionAni.type = @"push";

    // 转场的方向:`fromLeft', `fromRight', `fromTop'  `fromBottom'
    transitionAni.subtype = @"fromRight";

    // 开始转场和结束转场的进度位置
    // transitionAni.startProgress = 0.5;
    // transitionAni.endProgress = 1;

    [imageView.layer addAnimation:transitionAni forKey:@"keyAnimation"];
实现效果:

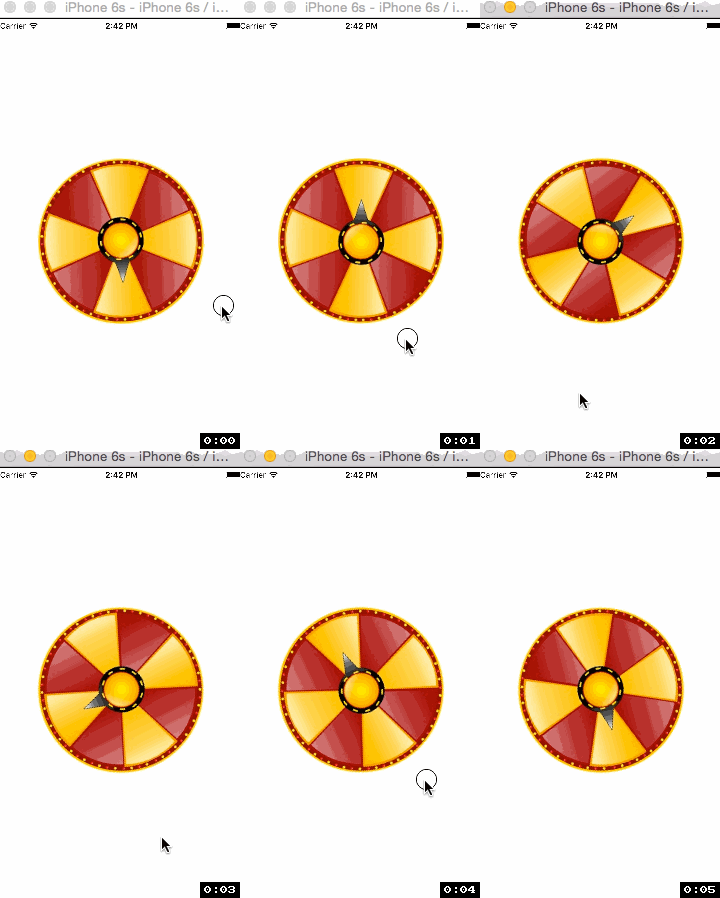
6、暂停/继续动画
coreAnimation的动画是存在于CALayer上面的,有些时候需要突然暂停某个组件的动画效果,同时保留当前动画的状态,
如果是用removeAnimation会显得很突兀,不够平滑,所以可以利用设置动画速度和设置一个时间偏移量来暂停动画:
暂停动画:
    // CACurrentMediaTime(): 当前媒体时间,表示系统启动后到当前的秒数,当系统重启后这个时间也重置
    CFTimeInterval pauseTime = [layer convertTime:CACurrentMediaTime() fromLayer:nil];
    // 设置动画的时间的偏移
    layer.timeOffset = pauseTime;

    layer.speed = 0;
继续动画:
    // 获取暂停时的时间
    CFTimeInterval pasuseTime = [layer timeOffset];

    layer.speed = 1;
    layer.timeOffset = 0;
    layer.beginTime = 0;

    // 设置开始的时间(继续动画,这样设置相当于让动画等待的秒数等于暂停的秒)
    layer.beginTime = [layer convertTime:CACurrentMediaTime() fromLayer:nil] - pasuseTime;
实现效果:
##7、CAAnimationGroup(动画组)
CABasicAnimation和CAKeyframeAnimation仅仅作用于单独的属性,⽽CAAnimationGroup可以把这些动画组合在一起。CAAnimationGroup是另⼀个继承于 CAAnimation的⼦类,它添加了一个animations数组的属性,⽤来组合别的动画。
- 相关属性:
animations:用来保存一组动画对象的NSArray
ps:默认情况下,⼀组动画对象是同时运行的,也可以通过设置动画对象的beginTime属性来更改动画的开始时间
创建关键帧动画:
   CAKeyframeAnimation *keyAni = [CAKeyframeAnimation animationWithKeyPath:@"position"];

   keyAni.duration = 3.0;
   keyAni.fillMode = kCAFillModeForwards;
   keyAni.removedOnCompletion = NO;
   keyAni.path = path.CGPath;
创建基本动画:
    CABasicAnimation *animation = [CABasicAnimation animationWithKeyPath:@"transform.rotation.z"];

    animation.beginTime = 3.0;
    animation.duration = 2.0;
    animation.fillMode = kCAFillModeForwards;
    animation.removedOnCompletion = NO;
    animation.byValue = @(2 * M_PI);

    CABasicAnimation *animation1 = [CABasicAnimation animationWithKeyPath:@"position"];

    animation1.fillMode = kCAFillModeForwards;
    animation1.removedOnCompletion = NO;
    animation1.beginTime = 3.0;
    animation1.duration = 2.0;
    animation1.byValue = [NSValue valueWithCGPoint:CGPointMake(-100, Height)];
绘制路径;
    UIBezierPath *path = [UIBezierPath bezierPath];
    [path moveToPoint:CGPointMake(0, Height)];
    CGPoint toPoint = CGPointMake(Width, 0);

    CGPoint controlPoint = CGPointMake(Width,Height);
    [path addQuadCurveToPoint:toPoint controlPoint:controlPoint];
创建一个动画组,用于组合多种动画:
    CAAnimationGroup * aniGroup = [CAAnimationGroup animation];

    // 动画组的完成时间
    aniGroup.duration = 5.0;
    aniGroup.fillMode = kCAFillModeForwards;
    aniGroup.removedOnCompletion = NO;
    // 组合多个动画
    aniGroup.animations = @[keyAni,animation,animation];
添加动画组到layer上:
[self.imageView.layer addAnimation:aniGroup forKey:@"group"];
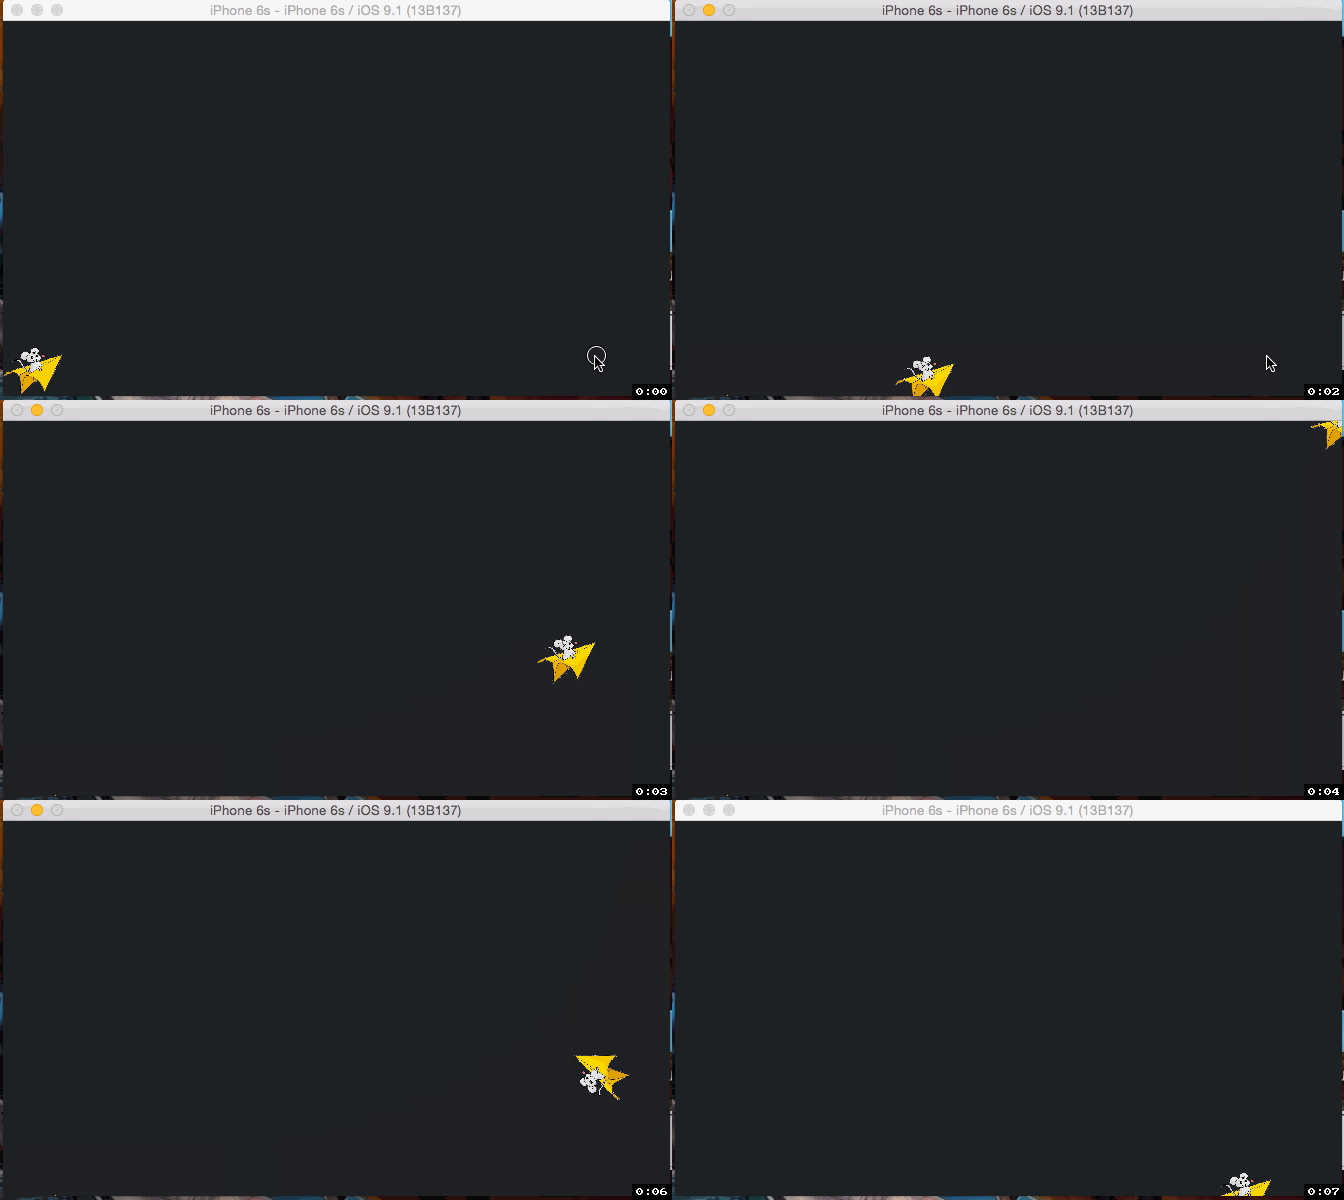
实现效果:
Demo地址:
https://github.com/fuxinto/HfxDemo


 3537
3537

 被折叠的 条评论
为什么被折叠?


