


 本文介绍了一种基于JAlertDialog的简化版Android对话框库,仅需四个核心类和少量XML配置,便于灵活定制且节省资源。作者提供了详细的用法示例,包括自定义布局、文本设置、点击事件和动画控制。
作者: Jooyer, 时间: 2018.08.05
Github地址,欢迎点赞,fork
大家看到GIF,就知道,其自定义很是简单,为何还要说一说呢?
主要是 github 上有很多大佬写的很好的库,只是功能多了,文件就多了,很多时候引入一个第三方,还得考虑方法数,库的大小等,而且有些时候,我们不需要那么多功能.
工作中使用频率又很高,每使用一次自定义一个,确实有些浪费精力了.本文还是在大佬的肩膀上做了些拓展,具体大佬链接,文章末尾给出.
好了,下面进入正题( PS:源码有彩蛋哦).
只需要四个类 + 几个 XML 文件即可,即拷即用
接下来我们依次讲解:
JAlertDialog
JAlertController
JDialogViewHelper
OnJAlertDialogClickListener
其他几个 XML 文件
首先我们看看 JAlertDialog:
public class JAlertDialog extends Dialog {
private JAlertController mAlert;
public JAlertDialog(Context context, int themeResId) {
super(context, themeResId);
mAlert = new JAlertController(this, getWindow());
}
public static class Builder {
private final JAlertController.AlertParams mAlertParams;
public Builder(Context context) {
this(context, R.style.JDialogStyle);
}
public Builder(Context context, @StyleRes int themeRes) {
mAlertParams = new JAlertController.AlertParams(context, themeRes);
}
public Builder setContentView(View view) {
mAlertParams.mView = view;
mAlertParams.mViewLayoutResId = 0;
return this;
}
public Builder setContentView(int layoutResId) {
mAlertParams.mView = null;
mAlertParams.mViewLayoutResId = layoutResId;
return this;
}
public Builder setCancelable(boolean cancelable) {
mAlertParams.mCancelable = cancelable;
return this;
}
public Builder setText(@IdRes int viewId, CharSequence text) {
mAlertParams.mTextArr.put(viewId,text);
return this;
}
public Builder setFromBottom() {
mAlertParams.mGravity = Gravity.BOTTOM;
return this;
}
public Builder setAnimation(@StyleRes int styleAnim) {
mAlertParams.mAnimation = styleAnim;
return this;
}
public Builder setHasAnimation(boolean hasAnimation) {
mAlertParams.mHasAnimation = hasAnimation;
return this;
}
public Builder setFullWidth() {
mAlertParams.mWidth = ViewGroup.LayoutParams.MATCH_PARENT;
return this;
}
public Builder setWidthAndHeight(int width,int height) {
mAlertParams.mWidth = width;
mAlertParams.mHeight = height;
return this;
}
public Builder setOnClick(@IdRes int viewId) {
mAlertParams.mClickArr.put(mAlertParams.mClickArr.size(),viewId);
return this;
}
public Builder setOnJAlertDialogCLickListener(OnJAlertDialogClickListener onJAlertDialogClickListener) {
mAlertParams.mOnJAlertDialogClickListener = onJAlertDialogClickListener;
return this;
}
public Builder setOnCancelListener(OnCancelListener onCancelListener) {
mAlertParams.mOnCancelListener = onCancelListener;
return this;
}
public Builder setOnOnDismissListener(OnDismissListener onDismissListener) {
mAlertParams.mOnDismissListener = onDismissListener;
return this;
}
public Builder setOnKeyListener(OnKeyListener onKeyListener) {
mAlertParams.mOnKeyListener = onKeyListener;
return this;
}
public JAlertDialog create() {
final JAlertDialog dialog = new JAlertDialog(mAlertParams.mContext, mAlertParams.mThemeRes);
mAlertParams.apply(dialog.mAlert);
dialog.setCancelable(mAlertParams.mCancelable);
if (mAlertParams.mCancelable) {
dialog.setCanceledOnTouchOutside(true);
}
dialog.setOnCancelListener(mAlertParams.mOnCancelListener);
dialog.setOnDismissListener(mAlertParams.mOnDismissListener);
if (mAlertParams.mOnKeyListener != null) {
dialog.setOnKeyListener(mAlertParams.mOnKeyListener);
}
return dialog;
}
public JAlertDialog show() {
JAlertDialog dialog = create();
dialog.show();
return dialog;
}
}
}
复制代码
代码没有什么注释,其实很简单,就是一个建造者模式,仿系统做法,没有什么很特别的地方...
然后我们看看 JAlertController:
public class JAlertController {
private JAlertDialog mDialog;
private Window mWindow;
public JAlertController(JAlertDialog dialog, Window window) {
mDialog = dialog;
mWindow = window;
}
public JAlertDialog getDialog() {
return mDialog;
}
public Window getWindow() {
return mWindow;
}
public static class AlertParams {
public Context mContext;
/**
* Dialog 主题,有一个默认主题
*/
public int mThemeRes;
/**
* 存放显示文本的控件和文本内容
*/
public SparseArray mTextArr = new SparseArray<>();
/**
* 存放点击事件的控件和监听
*/
public SparseIntArray mClickArr = new SparseIntArray();
/**
* 点击空白是否可以取消,默认不可以
*/
public boolean mCancelable = false;
/**
* Dialog 取消监听
*/
public DialogInterface.OnCancelListener mOnCancelListener;
/**
* Dialog 消失监听
*/
public DialogInterface.OnDismissListener mOnDismissListener;
/**
* Dialog 按键监听
*/
public DialogInterface.OnKeyListener mOnKeyListener;
/**
* Dialog 布局 View
*/
public View mView;
/**
* Dialog 布局 ID
*/
public int mViewLayoutResId;
public int mWidth = ViewGroup.LayoutParams.WRAP_CONTENT;
public int mHeight = ViewGroup.LayoutParams.WRAP_CONTENT;
public int mGravity = Gravity.CENTER;
public int mAnimation = R.style.JDialogAnimation;
public boolean mHasAnimation = true;
public OnJAlertDialogClickListener mOnJAlertDialogClickListener;
public AlertParams(Context context, @StyleRes int themeRes) {
mContext = context;
mThemeRes = themeRes;
}
/**
* 设置参数
*/
public void apply(JAlertController alert) {
JDialogViewHelper viewHelper = null;
// 1. 设置布局
if (0 != mViewLayoutResId) {
viewHelper = new JDialogViewHelper(mContext, mViewLayoutResId);
}
if (null != mView) {
viewHelper = new JDialogViewHelper(mContext, mView);
}
if (null == viewHelper) {
throw new IllegalArgumentException("请设置Dialog布局");
}
alert.getDialog().setContentView(viewHelper.getContentView());
viewHelper.setOnJAlertDialogClickListener(mOnJAlertDialogClickListener);
// 2. 设置文本,控件和文本内容一一对应的
for (int i = 0, len = mTextArr.size(); i < len; i++) {
viewHelper.setText(mTextArr.keyAt(i), mTextArr.valueAt(i));
}
// 3. 设置点击事件
for (int i = 0, len = mClickArr.size(); i < len; i++) {
viewHelper.setOnClick(mClickArr.keyAt(i), mClickArr.valueAt(i));
}
// 4. 设置dialog宽高动画等
Window window = alert.getWindow();
window.setGravity(mGravity);
if (mHasAnimation) {
window.setWindowAnimations(mAnimation);
}
WindowManager.LayoutParams params = window.getAttributes();
params.width = mWidth;
params.height = mHeight;
window.setAttributes(params);
alert.getDialog().setOnCancelListener(mOnCancelListener);
alert.getDialog().setOnDismissListener(mOnDismissListener);
}
}
}
复制代码
这里,有意思点的是, 注释3 ,点击事件,我通过拓展类似文本设置效果,在点击事件上做了点优化,具体看使用代码,不要心急!
接着,瞅瞅那个布局文件:JDialogViewHelper
public class JDialogViewHelper {
private Context mContext;
private View mContentView;
private SparseArray> mViews;
public OnJAlertDialogClickListener mOnJAlertDialogClickListener;
public JDialogViewHelper(Context context, int viewLayoutResId) {
mViews = new SparseArray<>();
mContentView = LayoutInflater.from(context).inflate(viewLayoutResId, null);
}
public JDialogViewHelper(Context context, View view) {
mViews = new SparseArray<>();
mContentView = view;
}
public void setText(@IdRes int viewId, CharSequence charSequence) {
TextView textView = getView(viewId);
if (null != textView) {
textView.setText(charSequence);
}
}
public void setOnClick(final int position, @IdRes int viewId) {
View view = getView(viewId);
if (null != view) {
view.setOnClickListener(new View.OnClickListener() {
@Override
public void onClick(View v) {
if (null != mOnJAlertDialogClickListener){
mOnJAlertDialogClickListener.onClick(v,position);
}
}
});
}
}
public View getContentView() {
return mContentView;
}
@SuppressWarnings("unchecked")
public T getView(int viewId) {
View view = null;
WeakReference viewWeakReference = mViews.get(viewId);
if (null != viewWeakReference) {
view = viewWeakReference.get();
}
if (null == view) {
view = mContentView.findViewById(viewId);
if (null != view)
mViews.put(viewId, new WeakReference(view));
}
return (T) view;
}
复制代码
借鉴了类似 ListView 中 自定义的 ViewHolder ,不说什么了,一目了然啊,哈哈
倒数第二就是看哈回调了,贴个代码,来凑行数....,哈哈
public void setOnJAlertDialogClickListener(OnJAlertDialogClickListener onJAlertDialogClickListener) {
mOnJAlertDialogClickListener = onJAlertDialogClickListener;
}
}
复制代码
一个简单的回调,我能说什么呢...
最后就是几个我就一股脑都抛出来了,准备接招!!!
1.在 res/anim 中创建自己需要的动画,我这里贴上gif效果的动画
jdialog_enter.xml ---> 这个必须要,默认效果,当然如果你拷贝源码修改了也是可以不要的...
android:duration="200"
android:fromYDelta="100%"
android:toYDelta="0" />
复制代码
jdialog_exit.xml ---> 这个必须要,默认效果,当然如果你拷贝源码修改了也是可以不要的...
android:duration="200"
android:fromYDelta="0"
android:toYDelta="100%" />
复制代码
update_scale_fade_in.xml
android:fromXScale="0.0"
android:fromYScale="0.0"
android:toXScale="1.0"
android:toYScale="1.0"
android:duration="400"
android:pivotX="50%"
android:pivotY="50%"
/>
android:duration="400"
android:fromAlpha="0.0"
android:toAlpha="1.0" >
复制代码
update_scale_fade_out.xml
android:fromXScale="1.0"
android:fromYScale="1.0"
android:toXScale="0.0"
android:toYScale="0.0"
android:duration="400"
android:pivotX="50%"
android:pivotY="50%"
/>
android:duration="400"
android:fromAlpha="1.0"
android:toAlpha="0.0" >
复制代码在 res/values/style.xml 设置 Dialog 属性 和动画
@android:color/transparent
@null
true
@null
true
0.3
true
true
@anim/jdialog_enter
@anim/jdialog_exit
@anim/update_scale_fade_in
@anim/update_scale_fade_out
复制代码
基本上就是这么多了,是不是很简单呢?
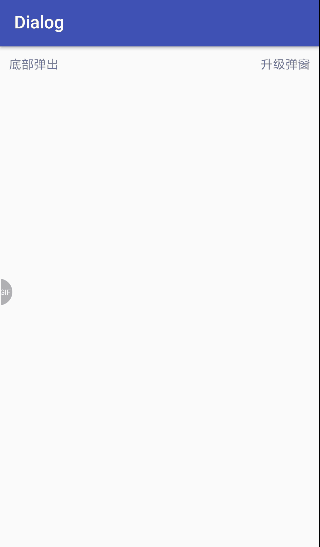
下面看看基本用法
class MainActivity : AppCompatActivity() {
private lateinit var mBottomDialog: JAlertDialog;
private lateinit var mUpdateDialog: JAlertDialog;
override fun onCreate(savedInstanceState: Bundle?) {
super.onCreate(savedInstanceState)
setContentView(R.layout.activity_main)
initBottomDialog()
initUpdateDialog()
tv_center.setOnClickListener {
mBottomDialog.show()
}
tv_updpate.setOnClickListener {
mUpdateDialog.show()
}
}
/**
* 底部弹出
*/
private fun initBottomDialog() {
mBottomDialog = JAlertDialog.Builder(this)
.setContentView(R.layout.dialog) // 设置布局,可以是 View
.setCancelable(false)
.setHasAnimation(true) //是否拥有动画,默认true,
// .setAnimation() // 设置动画,会覆盖默认动画
.setText(R.id.btn_left, "test1") // 设置空间文本,如果有多个,则调用多次即可
.setFromBottom() // 是否是从底部弹出,具体效果可以自己试试,感受更明显
.setFullWidth() // 宽度铺满屏幕
// .setWidthAndHeight() // 可以指定宽高(如果升级APP提示弹框等...)
.setOnClick(R.id.btn_left) //第一个点击的 View
.setOnClick(R.id.btn_right) // 第二个点击的 View
// 如果设置了点击 View,则需要下面这个方法回调, 注意 position 是从 0 开始的
.setOnJAlertDialogCLickListener(OnJAlertDialogClickListener { view, position ->
if (mBottomDialog.isShowing) {
mBottomDialog.dismiss()
}
when (position) {
// 这个顺序,和上面添加点击 View 是一致的
0 -> Toast.makeText(this@MainActivity, "点击左边按钮", Toast.LENGTH_SHORT).show()
1 -> Toast.makeText(this@MainActivity, "点击右边按钮", Toast.LENGTH_SHORT).show()
}
}).create()
}
/**
* 中间弹出,类似升级APP提示框
*/
private fun initUpdateDialog() {
val view = LayoutInflater.from(this).inflate(R.layout.dialog_update_app, null);
// 彩蛋一枚,自定义 ArcBackgroundDrawable 解决底部 TextViev 设置背景没有圆角问题
// 当然直接写xml也可以,只是本例中多了一个圆弧效果,看起来更 cool, 哈哈,不喜欢,你来打我啊!@!
val tv_bottom_update = view.findViewById(R.id.tv_bottom_update);
tv_bottom_update.background = ArcBackgroundDrawable()
mUpdateDialog = JAlertDialog.Builder(this)
.setAnimation(R.style.UpdateAnimation)
.setCancelable(false)
.setContentView(view)
.setOnClick(R.id.iv_close_update)
.setOnClick(R.id.tv_bottom_update)
.setOnJAlertDialogCLickListener { view, position ->
when (position) {
0 -> { // 关闭
mUpdateDialog.dismiss()
}
1 -> { // 开始下载
mUpdateDialog.dismiss()
// TODO
}
}
}
.create()
}
}
复制代码
用法需要注意的地方,我有提示哈,其实就是自定义一个布局,然后把需要设置文本和点击的,给设置了,最后时从哪里弹起给搞设置下.基本就可以了!我没有过多的提供动画效果,需要什么样的自己发挥了! 这样在使用时还是比较方便的,我们多个项目使用哦!
哈哈,彩蛋就是源码有一个自定义的圆弧 ArcBackgroundDrawable, 大家可以去看看哈,就是升级弹窗底部的那个圆弧,可以解决比如一个圆形背景,但是底部按钮给了背景后圆弧不见了的问题!
膜拜的大神:
https://www.jianshu.com/p/87288925ee1f


 626
626

 被折叠的 条评论
为什么被折叠?
被折叠的 条评论
为什么被折叠?
 到【灌水乐园】发言


