


一、官网下载
https://www.elastic.co/downloads/elasticsearch
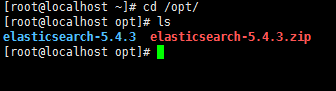
#解压
unzip elasticsearch-5.4.3.zip
二、编辑elasticsearch.yml
vi /opt/elasticsearch-5.4.3/config/elasticsearch.yml# ======================== Elasticsearch Configuration =========================
#
# NOTE: Elasticsearch comes with reasonable defaults for most settings.
# Before you set out to tweak and tune the configuration, make sure you
# understand what are you trying to accomplish and the consequences.
#
# The primary way of configuring a node is via this file. This template lists
# the most important settings you may want to configure for a production cluster.
#
# Please consult the documentation for further information on configuration options:
# https://www.elastic.co/guide/en/elasticsearch/reference/index.html
#
# ---------------------------------- Cluster -----------------------------------
#
# Use a descriptive name for your cluster:
#
#cluster.name: my-application
#
# ------------------------------------ Node ------------------------------------
#
# Use a descriptive name for the node:
#
#node.name: node-1
#
# Add custom attributes to the node:
#
#node.attr.rack: r1
#
# ----------------------------------- Paths ------------------------------------
#
# Path to directory where to store the data (separate multiple locations by comma):
#
path.data: /opt/data/elasticsearch/data
#
# Path to log files:
#
path.logs: /opt/data/elasticsearch/logs
#
# ----------------------------------- Memory -----------------------------------
#
# Lock the memory on startup:
#
bootstrap.memory_lock: false
bootstrap.system_call_filter: false
#
# Make sure that the heap size is set to about half the memory available
# on the system and that the owner of the process is allowed to use this
# limit.
#
# Elasticsearch performs poorly when the system is swapping the memory.
#
# ---------------------------------- Network -----------------------------------
#
path.data: /opt/data/elasticsearch/data
path.logs: /opt/data/elasticsearch/logs
network.host: 192.168.200.128
http.port: 9200
去掉#号
bootstrap.memory_lock: false
bootstrap.system_call_filter: false
修改以上改为false
三、运行
cd /opt/elasticsearch-5.4.3/bin目录
执行
./elasticsearch出现错误一:
max file descriptors [4096] for elasticsearch process likely too low, increase to at least [65536]
解决方法:切换到root用户,进入vi /etc/security/limits.conf ,增加配置(保存后注意切回work用户的时候才能生效,sudo 修改的不能立即生效):
[elsearch@localhost bin]$ su root
[root@localhost bin]# vi /etc/security/limits.conf

# /etc/security/limits.conf
#
#This file sets the resource limits for the users logged in via PAM.
#It does not affect resource limits of the system services.
#
#Also note that configuration files in /etc/security/limits.d directory,
#which are read in alphabetical order, override the settings in this
#file in case the domain is the same or more specific.
#That means for example that setting a limit for wildcard domain here
#can be overriden with a wildcard setting in a config file in the
#subdirectory, but a user specific setting here can be overriden only
#with a user specific setting in the subdirectory.
#
#Each line describes a limit for a user in the form:
#
#<domain>        <type>  <item>  <value>
#
#Where:
#<domain> can be:
#        - a user name
#        - a group name, with @group syntax
#        - the wildcard *, for default entry
#        - the wildcard %, can be also used with %group syntax,
#                 for maxlogin limit
#
#<type> can have the two values:
#        - "soft" for enforcing the soft limits
#        - "hard" for enforcing hard limits
#
#<item> can be one of the following:
#        - core - limits the core file size (KB)
#        - data - max data size (KB)
#        - fsize - maximum filesize (KB)
#        - memlock - max locked-in-memory address space (KB)
#        - nofile - max number of open file descriptors
#        - rss - max resident set size (KB)
#        - stack - max stack size (KB)
#        - cpu - max CPU time (MIN)
#        - nproc - max number of processes
#        - as - address space limit (KB)
#        - maxlogins - max number of logins for this user
#        - maxsyslogins - max number of logins on the system
#        - priority - the priority to run user process with
#        - locks - max number of file locks the user can hold
#        - sigpending - max number of pending signals
#        - msgqueue - max memory used by POSIX message queues (bytes)
#        - nice - max nice priority allowed to raise to values: [-20, 19]
#        - rtprio - max realtime priority
#
#<domain>      <type>  <item>         <value>
#

*               soft    nofile           65536
*               hard    nofile           65536
#@student        hard    nproc           20
#@faculty        soft    nproc           20
#@faculty        hard    nproc           50
#ftp             hard    nproc           0
#@student        -       maxlogins       4
将soft hard栏改成以下结果
![]()
出现错误二:
用root账号启动会报错:java.lang.RuntimeException: can not runelasticsearch as root
因为Elasticsearch5.0之后,不能使用root账户启动,我们先创建一个elasticsearch组和账户:
groupadd elsearch
useradd elsearch -g elsearch -p elasticsearch
chown -R elsearch.elsearch /opt/elasticsearch-5.4.3/
出现错误三:
因为设置了data和log的文件夹目录,涉及到了权限问题
#/opt/data的权限就变成777 , /opt/data下的所有子目录和文件权限都将变成777
[root@localhost /]# chmod -R 777 /opt/data
后台启动
su -elsearch -c "/opt/elasticsearch-5.4.3/bin/elasticsearch -d"
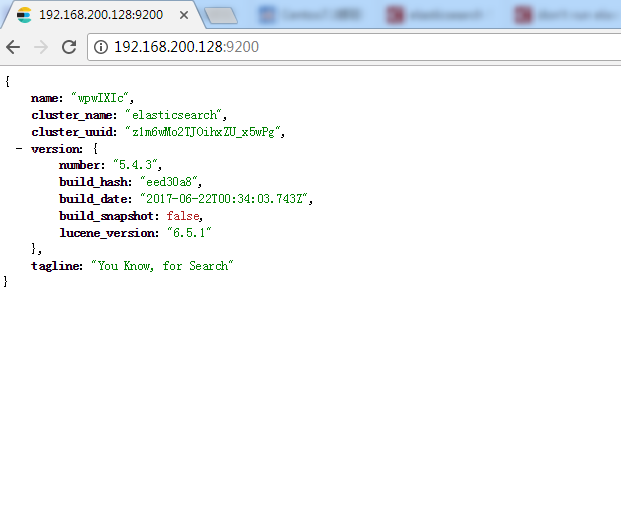
通过访问看到以下界面就证明启动成功
四、elasticsearch-head插件的安装和使用
下载地址:https://www.elastic.co/downloads/elasticsearch
1、安装nodejs
yum install -y nodejs

node -v

npm -v
2、安装grunt
进入/opt/elasticsearch-5.4.3/elasticsearch-head/node_modules/ 目录下
npm install-g grunt-cli
npm install grunt
grunt -version
3、npm安装依赖
到elasticsearch-head目录下,运行命令:
npm install
如果速度较慢或者安装失败,可以使用国内镜像:
npm install -g cnpm --registry=https://registry.npm.taobao.org
4、修改Elasticsearch配置文件
编辑elasticsearch-5.4.3/config/elasticsearch.yml,加入以下内容:
http.cors.enabled: true
http.cors.allow-origin: "*"
5、修改Gruntfile.js
打开elasticsearch-head-master/Gruntfile.js,找到下面connect属性,新增hostname: ‘0.0.0.0’:
connect: {
server: {
options: {
hostname: '*',
port: 9100,
base: '.',
keepalive: true
}
}
}
6、启动elasticsearch-head
在/opt/elasticsearch-5.4.3/elasticsearch-head/node_modules/grunt/bin目录下,运行启动命令:
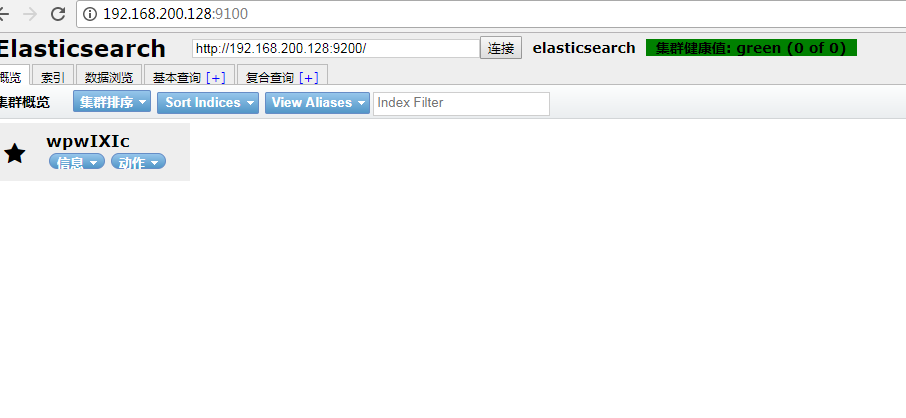
./grunt server访问http://192.168.200.128:9100/
7、后台启动elasticsearch-head
后台启动grunt server命令;
nohup grunt server &exit
如果想关闭head插件,使用Linux查找进程命令:
ps aux|grep head
结束进程:
kill进程号


 724
724


 被折叠的 条评论
为什么被折叠?
被折叠的 条评论
为什么被折叠?
 到【灌水乐园】发言


