


一、前言
我们经常见到的,如果需要在每一行的数据前面加上序号咋办?是用数据库里面的id,错了,我们需要用一个for循环里面的东西forloop。还有我们需要添加一对多的数据,就是往一个有外键的表里面插入数据。今天我们就来写一个增加一对多的数据示例
二、forloop添加序号
2.1、单循环
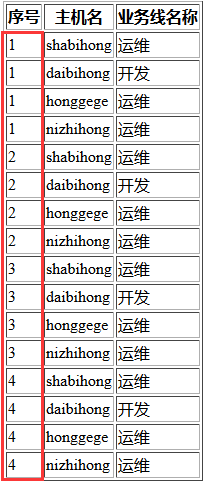
说明:我们在单个for循环下,获取序号。
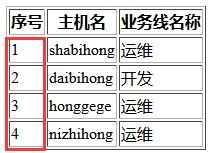
①顺序从1开始,即:forloop.counter
{% for row in v2 %}
    <tr h-id="{{ row.nid }}" b-id="{{ row.business_id }}">
        <td>{{ forloop.counter }}</td> #顺序从1开始
        <td>{{ row.hostname }}</td>
        <td>{{ row.business__caption }}</td>
    </tr>
{% endfor %}
如图:
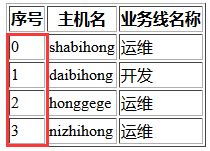
②顺序从0开始,即:forloop.counter0
{% for row in v2 %}
    <tr h-id="{{ row.nid }}" b-id="{{ row.business_id }}">
        <td>{{ forloop.counter0 }}</td>  #顺序从0开始
        <td>{{ row.hostname }}</td>
        <td>{{ row.business__caption }}</td>
    </tr>
{% endfor %}
如图:
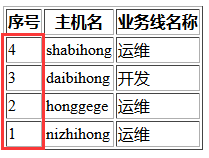
③倒叙以1结束,即:forloop.revcounter
{% for row in v2 %}
    <tr h-id="{{ row.nid }}" b-id="{{ row.business_id }}">
        <td>{{ forloop.revcounter }}</td>
        <td>{{ row.hostname }}</td>
        <td>{{ row.business__caption }}</td>
    </tr>
{% endfor %}
如图:
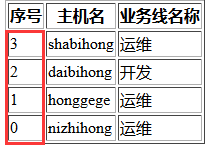
⑤倒叙以0结束,即:forloop.revcounter0
{% for row in v2 %}
    <tr h-id="{{ row.nid }}" b-id="{{ row.business_id }}">
        <td>{{ forloop.revcounter0 }}</td>  #倒叙以0结束
        <td>{{ row.hostname }}</td>
        <td>{{ row.business__caption }}</td>
    </tr>
{% endfor %}
如图:
2.2、for语句嵌套循环
说明:我们需要获取嵌套循环的信息的话,那么就需要用到forloop.parentloop的功能了
{% for i in v2 %}
    {% for row in v2 %}
        <tr h-id="{{ row.nid }}" b-id="{{ row.business_id }}">
            <td>{{ forloop.parentloop }}</td>  #获取父循环的信息
            <td>{{ row.hostname }}</td>
            <td>{{ row.business__caption }}</td>
        </tr>
    {% endfor %}
{% endfor %}
如图:
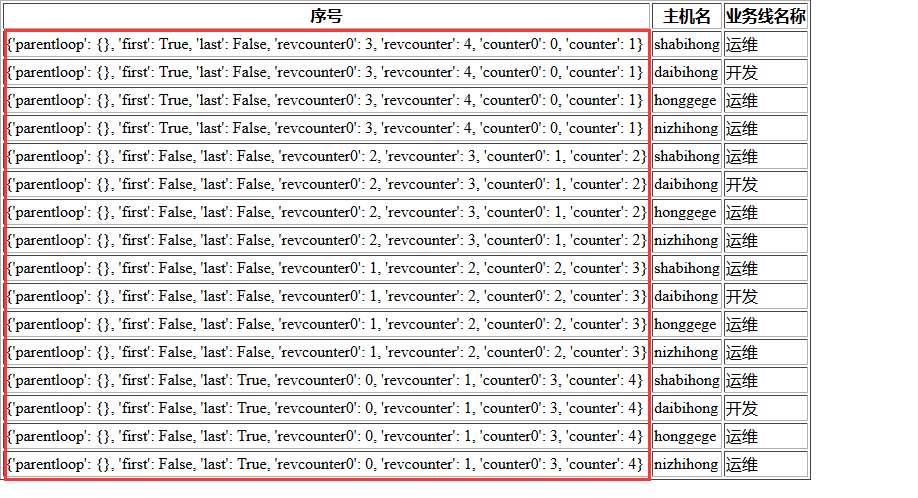
如果想获取父循环中的counter字段的值:
{% for i in v2 %}
    {% for row in v2 %}
        <tr h-id="{{ row.nid }}" b-id="{{ row.business_id }}">
            <td>{{ forloop.parentloop.counter }}</td>  #父循环信息中获取counter值
            <td>{{ row.hostname }}</td>
            <td>{{ row.business__caption }}</td>
        </tr>
    {% endfor %}
{% endfor %}
如图:
其他的以此类推,不过这玩意几乎用不到,这边只是介绍一下。
三、增加增加一对多数据示例
3.1、urls.py的连接
from django.contrib import admin
from django.urls import path,re_path
from app01 import views

urlpatterns = [
    path('admin/', admin.site.urls),
    re_path('^host/$',views.host)
]
3.2、templates的模板信息host.html
说明:先要配置jquery.js的文件地址


 1 <head>
 2     <meta charset="UTF-8">
 3     <title>Title</title>
 4     <style>
 5         .hide{
 6             display: none;
 7         }
 8         .shade{
 9            position: fixed;
10             top:0;
11             right:0;
12             left:0;
13             bottom: 0;
14             background: black;
15             opacity: 0.6;
16             z-index: 100;
17         }
18         .add-modal{
19             position: fixed;
20             height: 300px;
21             width: 400px;
22             top:200px;
23             left: 50%;
24             z-index: 101;
25             border: 1px solid white;
26             background: white;
27             margin-left: -200px;
28         }
29     </style>
30 </head>
31 <body>
32     <h1>主机列表(对象)</h1>
33     <div>
34         <input id="add_host" type="button" value="添加"/>
35     </div>
36     <table border="1">
37         <thead>
38             <tr>
39                 <th>序号</th>
40                 <th>主机名</th>
41                 <th>IP</th>
42                 <th>端口</th>
43                 <th>业务线名称</th>
44                 <th>业务线编码</th>
45             </tr>
46         </thead>
47         <tbody>
48             {% for row in v1 %}
49                 <tr h-id="{{ row.nid }}" b-id="{{ row.business.id }}">
50                     <td>{{ forloop.counter }}</td>
51                     <td>{{ row.hostname }}</td>
52                     <td>{{ row.ip }}</td>
53                     <td>{{ row.port }}</td>
54                     <td>{{ row.business.caption }}</td>
55                     <td>{{ row.business.code }}</td>
56                 </tr>
57             {% endfor %}
58         </tbody>
59     </table>
60
61     <div class="shade hide"></div>
62     <div class="add-modal hide">
63         <form method="post" action="/host/">
64             <div class="group">
65                 <input type="text" placeholder="主机名" name="hostname">
66             </div>
67             <div class="group">
68                 <input type="text" placeholder="IP" name="ip">
69             </div>
70             <div class="group">
71                 <input type="text" placeholder="端口" name="port">
72             </div>
73             <div class="group">
74                 <select name="b_id">
75                     {% for row in business_list %}
76                         <option value="{{ row.id }}">{{ row.caption }}</option>
77                     {% endfor %}
78                 </select>
79             </div>
80             <input type="submit" value="提交">
81             <input id="cancel" type="button" value="取消">
82         </form>
83     </div>
84     <script src="/static/jquery-1.12.4.js"></script>
85     <script>
86         $(function(){
87             $("#add_host").click(function(){
88                 $(".shade,.add-modal").removeClass("hide");
89             });
90
91             $("#cancel").click(function(){
92                 $(".shade,.add-modal").addClass("hide");
93             });
94         })
95     </script>
96 </body>
3.3、view.py的代码
def host(request):
    if request.method == "GET":
        v1 = models.Host.objects.filter(nid__gte=1)
        business_list = models.Business.objects.all()

        return render(request,"host.html",{'v1':v1,"business_list":business_list})
    elif request.method == "POST":
        h = request.POST.get("hostname")
        i = request.POST.get("ip")
        p = request.POST.get("port")
        b = request.POST.get("b_id")
        models.Host.objects.create(
            hostname=h,
            ip=i,
            port=p,
            business_id=b
        )
        return redirect("/host/")  #注意了,这边不要用render,因为render是需要渲染数据的,如果用这个,你压根就没有往里面传数据,跳转页面就会变成空,所以还是增加完毕直接跳转即可
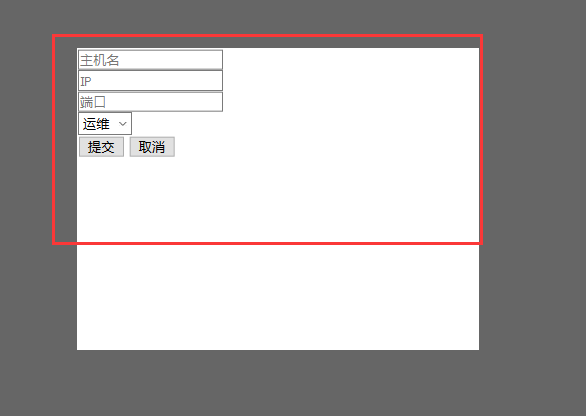
如图:

模态对话框:


 271
271


 被折叠的 条评论
为什么被折叠?
被折叠的 条评论
为什么被折叠?
 到【灌水乐园】发言


