


本文通过分析cocos2dx提供的示例程序HelloCpp来分析cocos2dx的启动过程。
我们从HelloCpp.java开始:
[java] view plaincopy![]()
![]()
package org.cocos2dx.hellocpp;
import org.cocos2dx.lib.Cocos2dxActivity;
import android.os.Bundle;
public class HelloCpp extends Cocos2dxActivity{
protected void onCreate(Bundle savedInstanceState){
super.onCreate(savedInstanceState);
}
static {
System.loadLibrary("hellocpp");
}
}
HelloCpp是一个Activity,首先会执行静态代码块,加载libhellocpp.so库,然后就是执行onCreate方法,这里调用了父类的onCreate方法。我们看看Cocos2dxActivity的onCreate方法,该类在cocos2dx的库工程libcocos2dx中:
[java] view plaincopy![]()
![]()
@Override
protected void onCreate(final Bundle savedInstanceState) {
super.onCreate(savedInstanceState);
sContext = this;
this.mHandler = new Cocos2dxHandler(this);
this.init();
Cocos2dxHelper.init(this, this);
}
这里主要是执行初始化过程,Cocos2dxHandler主要处理显示Dialog的消息,Cocos2dxHelper是个辅助类,我们主要看init()方法:
[java] view plaincopy![]()
![]()
public void init() {
// FrameLayout
ViewGroup.LayoutParams framelayout_params =
new ViewGroup.LayoutParams(ViewGroup.LayoutParams.FILL_PARENT,
ViewGroup.LayoutParams.FILL_PARENT);
FrameLayout framelayout = new FrameLayout(this);
framelayout.setLayoutParams(framelayout_params);
// Cocos2dxEditText layout
ViewGroup.LayoutParams edittext_layout_params =
new ViewGroup.LayoutParams(ViewGroup.LayoutParams.FILL_PARENT,
ViewGroup.LayoutParams.WRAP_CONTENT);
Cocos2dxEditText edittext = new Cocos2dxEditText(this);
edittext.setLayoutParams(edittext_layout_params);
// ...add to FrameLayout
framelayout.addView(edittext);
// Cocos2dxGLSurfaceView
this.mGLSurfaceView = this.onCreateView();
// ...add to FrameLayout
framelayout.addView(this.mGLSurfaceView);
// Switch to supported OpenGL (ARGB888) mode on emulator
if (isAndroidEmulator())
this.mGLSurfaceView.setEGLConfigChooser(8 , 8, 8, 8, 16, 0);
this.mGLSurfaceView.setCocos2dxRenderer(new Cocos2dxRenderer());
this.mGLSurfaceView.setCocos2dxEditText(edittext);
// Set framelayout as the content view
setContentView(framelayout);
}
这里就是为Activity绑定View Hierarchy,大家做Android开发的对着一定很熟悉。View Hierarchy的根View是个FrameLayout,FrameLayout又包含一个EditText和一个GLSurfaceView,这个GLSurfaceView就是cocos引擎用来绘制游戏画面的关键View,我们来详细分析一下它。首先看一下Cocos2dxActivity的onCreateView方法:
[java] view plaincopy![]()
![]()
public Cocos2dxGLSurfaceView onCreateView() {
return new Cocos2dxGLSurfaceView(this);
}
该方法就是新建一个Cocos2dxGLSurfaceView,Cocos2dxGLSurfaceView又继承于GLSurfaceView。我们都知道GLSurfaceView的核心就是Renderer,初始化时会调用Renderer的onSurfaceCreated方法,每一帧的绘制是通过调用Renderer的onDrawFrame方法。Cocos2dxGLSurfaceView的Renderer是一个Cocos2dxRenderer对象,我们先来看Cocos2dxRenderer对象的onSurfaceCreated方法:
[java] view plaincopy![]()
![]()
@Override
public void onSurfaceCreated(final GL10 pGL10, final EGLConfig pEGLConfig) {
Cocos2dxRenderer.nativeInit(this.mScreenWidth, this.mScreenHeight);
this.mLastTickInNanoSeconds = System.nanoTime();
}
这里调用了一个本地方法nativeInit(final int pWidth, final int pHeight),本地方法的实现在jni/hellocpp/main.cpp中实现的:
[java] view plaincopy![]()
![]()
void Java_org_cocos2dx_lib_Cocos2dxRenderer_nativeInit(JNIEnv* env, jobject thiz, jint w, jint h)
{
if (!CCDirector::sharedDirector()->getOpenGLView())
{
CCEGLView *view = CCEGLView::sharedOpenGLView();
view->setFrameSize(w, h);
AppDelegate *pAppDelegate = new AppDelegate();
CCApplication::sharedApplication()->run();
}
else
{
......
}
}
CCDirector是游戏的导演类,一个游戏只有一个导演类用来控制和管理场景。CCDirector::sharedDirector()是个静态方法,用来获取导演类的单例对象:
[java] view plaincopy![]()
![]()
CCDirector* CCDirector::sharedDirector(void)
{
if (!s_SharedDirector)
{
s_SharedDirector = new CCDisplayLinkDirector();
s_SharedDirector->init();
}
return s_SharedDirector;
}
CCCCDisplayLinkDirector是CCDirector的子类。我们再回到nativeinit方法中,获取到导演类的单例对象后又调用了它的getOpenGLView()方法:
[java] view plaincopy![]()
![]()
inline CCEGLView* getOpenGLView(void) { return m_pobOpenGLView; }
该方法返回用于游戏绘制的CCEGLView,在Android平台下,这个CCEGLView其实没有什么作用,因为游戏都是绘制在Cocos2dxGLSurfaceView上的。由于我们是初始化过程,所以此时m_pobOpenGLView为null,所以if (!CCDirector::sharedDirector()->getOpenGLView())条件成立,执行以下的代码:
[java] view plaincopy![]()
![]()
CCEGLView *view = CCEGLView::sharedOpenGLView();
view->setFrameSize(w, h);
AppDelegate *pAppDelegate = new AppDelegate();
CCApplication::sharedApplication()->run();
同样,我们先获取一个CCEGLView的单例对象,接下来又新建了一个AppDelegate对象,大家可能在工程中找不到AppDelegate类。我们打开工程目录的上一级目录: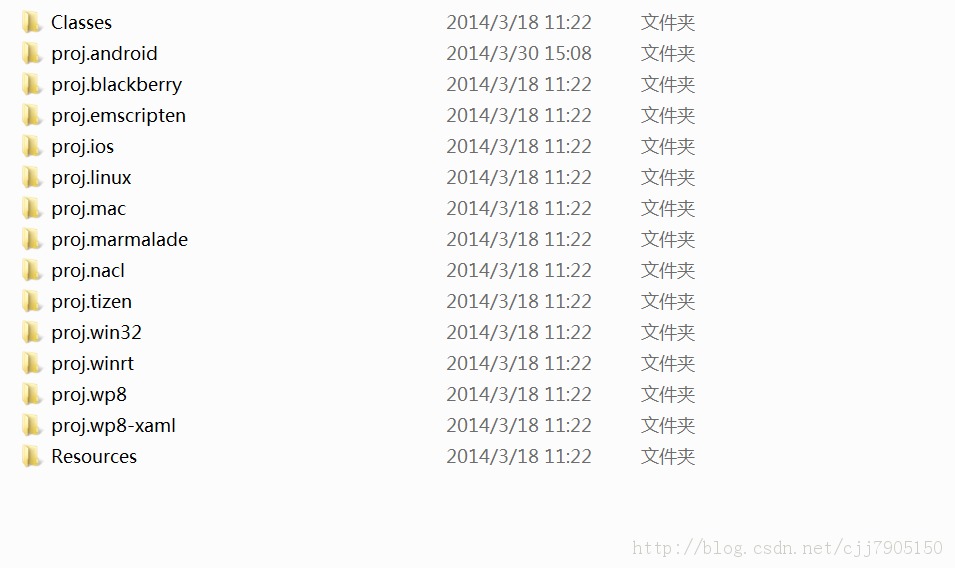
我们的Android工程是在proj.android文件夹中,而AppDelegate类就在Classes文件夹中。因为cocos2dx是跨平台的,而AppDelegate在各个平台之间是通用的不需要修改的,所以就放在一个公用的目录下。
[java] view plaincopy![]()
![]()
#ifndef _APP_DELEGATE_H_
#define _APP_DELEGATE_H_
#include "cocos2d.h"
/**
@brief The cocos2d Application.
The reason for implement as private inheritance is to hide some interface call by CCDirector.
*/
class AppDelegate : private cocos2d::CCApplication
{
public:
AppDelegate();
virtual ~AppDelegate();
/**
@brief Implement CCDirector and CCScene init code here.
@return true Initialize success, app continue.
@return false Initialize failed, app terminate.
*/
virtual bool applicationDidFinishLaunching();
/**
@brief The function be called when the application enter background
@param the pointer of the application
*/
virtual void applicationDidEnterBackground();
/**
@brief The function be called when the application enter foreground
@param the pointer of the application
*/
virtual void applicationWillEnterForeground();
};
#endif // _APP_DELEGATE_H_
AppDelegate是继承CCApplication类的,我们看一下CCApplication的构造方法:
[java] view plaincopy![]()
![]()
// sharedApplication pointer
CCApplication * CCApplication::sm_pSharedApplication = 0;
CCApplication::CCApplication()
{
CCAssert(! sm_pSharedApplication, "");
sm_pSharedApplication = this;
}
我们看到在新建CCApplication对象时,会把该对象赋给一个全局变量sm_pSharedApplication。所以我们在new AppDelegate()的时候,就把它象赋给全局变量sm_pSharedApplication。我们再看下CCApplication的CCApplication::sharedApplication方法:
[java] view plaincopy![]()
![]()
CCApplication* CCApplication::sharedApplication()
{
CCAssert(sm_pSharedApplication, "");
return sm_pSharedApplication;
}
此时,sm_pSharedApplication指向的是一个AppDelegate对象。所以我们执行CCApplication::sharedApplication()->run()时其实执行的是AppDelegate对象的run方法。现在我们应该明白这个类为什么叫AppDelegate了,因为CCApplication的工作实际都委托给了AppDelegate类了。看一下AppDelegate的方法:
[java] view plaincopy![]()
![]()
int CCApplication::run()
{
// Initialize instance and cocos2d.
if (! applicationDidFinishLaunching())
{
return 0;
}
return -1;
}
[java] view plaincopy![]()
![]()
bool AppDelegate::applicationDidFinishLaunching() {
// initialize director
CCDirector* pDirector = CCDirector::sharedDirector();
CCEGLView* pEGLView = CCEGLView::sharedOpenGLView();
pDirector->setOpenGLView(pEGLView);
CCSize frameSize = pEGLView->getFrameSize();
// Set the design resolution
#if (CC_TARGET_PLATFORM == CC_PLATFORM_WINRT) || (CC_TARGET_PLATFORM == CC_PLATFORM_WP8)
pEGLView->setDesignResolutionSize(designResolutionSize.width, designResolutionSize.height, kResolutionShowAll);
#else
pEGLView->setDesignResolutionSize(designResolutionSize.width, designResolutionSize.height, kResolutionNoBorder);
#endif
vector<string> searchPath;
// In this demo, we select resource according to the frame's height.
// If the resource size is different from design resolution size, you need to set contentScaleFactor.
// We use the ratio of resource's height to the height of design resolution,
// this can make sure that the resource's height could fit for the height of design resolution.
// if the frame's height is larger than the height of medium resource size, select large resource.
if (frameSize.height > mediumResource.size.height)
{
searchPath.push_back(largeResource.directory);
pDirector->setContentScaleFactor(MIN(largeResource.size.height/designResolutionSize.height, largeResource.size.width/designResolutionSize.width));
}
// if the frame's height is larger than the height of small resource size, select medium resource.
else if (frameSize.height > smallResource.size.height)
{
searchPath.push_back(mediumResource.directory);
pDirector->setContentScaleFactor(MIN(mediumResource.size.height/designResolutionSize.height, mediumResource.size.width/designResolutionSize.width));
}
// if the frame's height is smaller than the height of medium resource size, select small resource.
else
{
searchPath.push_back(smallResource.directory);
pDirector->setContentScaleFactor(MIN(smallResource.size.height/designResolutionSize.height, smallResource.size.width/designResolutionSize.width));
}
// set searching path
CCFileUtils::sharedFileUtils()->setSearchPaths(searchPath);
// turn on display FPS
pDirector->setDisplayStats(true);
// set FPS. the default value is 1.0/60 if you don't call this
pDirector->setAnimationInterval(1.0 / 60);
// create a scene. it's an autorelease object
CCScene *pScene = HelloWorld::scene();
// run
pDirector->runWithScene(pScene);
return true;
}


 108
108

 被折叠的 条评论
为什么被折叠?
被折叠的 条评论
为什么被折叠?
 到【灌水乐园】发言


