


前言
本文旨在研究学习和使用层面做一点分享,一是为了加深自己的理解,另一方面也希望这篇文章可以帮助到一些朋友。

简介
ElasticSearch是一个开源免费,用Java开发的,基于Lucene框架的,提供RESTful web接口的、分布式多用户能力的,实时的分布式搜索分析引擎。简单高效,开箱即用。
快速入口
安装
1、在安装es之前,我们需要先安装一个java,为什么呢?因为es是java语言开发的,依赖你懂的!
没有搭建Java环境朋友去这里:《Centos下搭建java环境》
这里要提醒一下,elasticsearch java支持最低 jdk1.8 !
2、es官方提供多种方式下载途径,我这里推荐使用zip/tar.gz方式来下载安装,因为zip和tar.gz适用于任何操作系统,以下是基于Linux系统的案例。
#下载es
wget https://artifacts.elastic.co/downloads/elasticsearch/elasticsearch-6.1.2.tar.gz

#解压
tar -xzf elasticsearch-6.1.2.tar.gz
启动
es很方便,解压就可以直接用了,下面我们尝试运行一下。
[root@localhost elasticsearch-6.1.2]# ./bin/elasticsearch
[2018-01-28T22:00:31,358][WARN ][o.e.b.ElasticsearchUncaughtExceptionHandler] [] uncaught exception in thread [main]
org.elasticsearch.bootstrap.StartupException: java.lang.RuntimeException: can not run elasticsearch as root
	at org.elasticsearch.bootstrap.Elasticsearch.init(Elasticsearch.java:125) ~[elasticsearch-6.1.2.jar:6.1.2]
	at org.elasticsearch.bootstrap.Elasticsearch.execute(Elasticsearch.java:112) ~[elasticsearch-6.1.2.jar:6.1.2]
	at org.elasticsearch.cli.EnvironmentAwareCommand.execute(EnvironmentAwareCommand.java:86) ~[elasticsearch-6.1.2.jar:6.1.2]
	at org.elasticsearch.cli.Command.mainWithoutErrorHandling(Command.java:124) ~[elasticsearch-cli-6.1.2.jar:6.1.2]
	at org.elasticsearch.cli.Command.main(Command.java:90) ~[elasticsearch-cli-6.1.2.jar:6.1.2]
	at org.elasticsearch.bootstrap.Elasticsearch.main(Elasticsearch.java:92) ~[elasticsearch-6.1.2.jar:6.1.2]
	at org.elasticsearch.bootstrap.Elasticsearch.main(Elasticsearch.java:85) ~[elasticsearch-6.1.2.jar:6.1.2]
Caused by: java.lang.RuntimeException: can not run elasticsearch as root
	at org.elasticsearch.bootstrap.Bootstrap.initializeNatives(Bootstrap.java:104) ~[elasticsearch-6.1.2.jar:6.1.2]
	at org.elasticsearch.bootstrap.Bootstrap.setup(Bootstrap.java:171) ~[elasticsearch-6.1.2.jar:6.1.2]
	at org.elasticsearch.bootstrap.Bootstrap.init(Bootstrap.java:322) ~[elasticsearch-6.1.2.jar:6.1.2]
	at org.elasticsearch.bootstrap.Elasticsearch.init(Elasticsearch.java:121) ~[elasticsearch-6.1.2.jar:6.1.2]
	... 6 more
很不幸,启动报错了 can not run elasticsearch as root,看起来root不允许直接启动。因为这个原因,那我们需要新建一个用户来启动es,具体操作如下:
# 以root用户来创建新的用户 , groupadd 添加一个用户组
[root@localhost home]# groupadd elasticsearch
# 添加一个用户,-g是在用户组下 -p是密码
[root@localhost home]# useradd elasticsearch -g elasticsearch -p elasticsearch
# 进入es的安装目录
[root@localhost home]# cd /home/elasticsearch
# 给用户elasticsearch 授权
[root@localhost home]# chown -R elasticsearch:elasticsearch elasticsearch-6.1.2/
# 切换到 elasticsearch 用户
[root@localhost elasticsearch]# su elasticsearch
到这里新的用户也创建好了,也授权了,接下来我们重新启动一下
[elasticsearch@localhost elasticsearch-6.1.2]$ ./bin/elasticsearch
[2018-01-28T22:11:06,918][INFO ][o.e.n.Node               ] [] initializing ...
[2018-01-28T22:11:07,161][INFO ][o.e.e.NodeEnvironment    ] [qR5cyzh] using [1] data paths, mounts [[/ (rootfs)]], net usable_space [12.5gb], net total_space [17.6gb], types [rootfs]
[2018-01-28T22:11:07,162][INFO ][o.e.e.NodeEnvironment    ] [qR5cyzh] heap size [1015.6mb], compressed ordinary object pointers [true]
[2018-01-28T22:11:07,163][INFO ][o.e.n.Node               ] node name [qR5cyzh] derived from node ID [qR5cyzhRQUix7PbCNFViTw]; set [node.name] to override
[2018-01-28T22:11:07,163][INFO ][o.e.n.Node               ] version[6.1.2], pid[7200], build[5b1fea5/2018-01-10T02:35:59.208Z], OS[Linux/3.10.0-514.el7.x86_64/amd64], JVM[Oracle Corporation/Java HotSpot(TM) 64-Bit Server VM/1.8.0_141/25.141-b15]
[2018-01-28T22:11:07,163][INFO ][o.e.n.Node               ] JVM arguments [-Xms1g, -Xmx1g, -XX:+UseConcMarkSweepGC, -XX:CMSInitiatingOccupancyFraction=75, -XX:+UseCMSInitiatingOccupancyOnly, -XX:+AlwaysPreTouch, -Xss1m, -Djava.awt.headless=true, -Dfile.encoding=UTF-8, -Djna.nosys=true, -XX:-OmitStackTraceInFastThrow, -Dio.netty.noUnsafe=true, -Dio.netty.noKeySetOptimization=true, -Dio.netty.recycler.maxCapacityPerThread=0, -Dlog4j.shutdownHookEnabled=false, -Dlog4j2.disable.jmx=true, -XX:+HeapDumpOnOutOfMemoryError, -Des.path.home=/home/elasticsearch/elasticsearch-6.1.2, -Des.path.conf=/home/elasticsearch/elasticsearch-6.1.2/config]
[2018-01-28T22:11:09,295][INFO ][o.e.p.PluginsService     ] [qR5cyzh] loaded module [aggs-matrix-stats]
[2018-01-28T22:11:09,295][INFO ][o.e.p.PluginsService     ] [qR5cyzh] loaded module [analysis-common]
[2018-01-28T22:11:09,295][INFO ][o.e.p.PluginsService     ] [qR5cyzh] loaded module [ingest-common]
[2018-01-28T22:11:09,296][INFO ][o.e.p.PluginsService     ] [qR5cyzh] loaded module [lang-expression]
[2018-01-28T22:11:09,296][INFO ][o.e.p.PluginsService     ] [qR5cyzh] loaded module [lang-mustache]
[2018-01-28T22:11:09,296][INFO ][o.e.p.PluginsService     ] [qR5cyzh] loaded module [lang-painless]
[2018-01-28T22:11:09,296][INFO ][o.e.p.PluginsService     ] [qR5cyzh] loaded module [mapper-extras]
[2018-01-28T22:11:09,296][INFO ][o.e.p.PluginsService     ] [qR5cyzh] loaded module [parent-join]
[2018-01-28T22:11:09,296][INFO ][o.e.p.PluginsService     ] [qR5cyzh] loaded module [percolator]
[2018-01-28T22:11:09,296][INFO ][o.e.p.PluginsService     ] [qR5cyzh] loaded module [reindex]
[2018-01-28T22:11:09,296][INFO ][o.e.p.PluginsService     ] [qR5cyzh] loaded module [repository-url]
[2018-01-28T22:11:09,296][INFO ][o.e.p.PluginsService     ] [qR5cyzh] loaded module [transport-netty4]
[2018-01-28T22:11:09,296][INFO ][o.e.p.PluginsService     ] [qR5cyzh] loaded module [tribe]
[2018-01-28T22:11:09,297][INFO ][o.e.p.PluginsService     ] [qR5cyzh] no plugins loaded
[2018-01-28T22:11:13,791][INFO ][o.e.d.DiscoveryModule    ] [qR5cyzh] using discovery type [zen]
[2018-01-28T22:11:14,926][INFO ][o.e.n.Node               ] initialized
[2018-01-28T22:11:14,927][INFO ][o.e.n.Node               ] [qR5cyzh] starting ...
[2018-01-28T22:11:15,582][INFO ][o.e.t.TransportService   ] [qR5cyzh] publish_address {127.0.0.1:9300}, bound_addresses {[::1]:9300}, {127.0.0.1:9300}
[2018-01-28T22:11:15,598][WARN ][o.e.b.BootstrapChecks    ] [qR5cyzh] max file descriptors [4096] for elasticsearch process is too low, increase to at least [65536]
[2018-01-28T22:11:15,598][WARN ][o.e.b.BootstrapChecks    ] [qR5cyzh] max virtual memory areas vm.max_map_count [65530] is too low, increase to at least [262144]
[2018-01-28T22:11:18,915][INFO ][o.e.c.s.MasterService    ] [qR5cyzh] zen-disco-elected-as-master ([0] nodes joined), reason: new_master {qR5cyzh}{qR5cyzhRQUix7PbCNFViTw}{wRzc-CVaRmmdLNnPfT_LTA}{127.0.0.1}{127.0.0.1:9300}
[2018-01-28T22:11:18,920][INFO ][o.e.c.s.ClusterApplierService] [qR5cyzh] new_master {qR5cyzh}{qR5cyzhRQUix7PbCNFViTw}{wRzc-CVaRmmdLNnPfT_LTA}{127.0.0.1}{127.0.0.1:9300}, reason: apply cluster state (from master [master {qR5cyzh}{qR5cyzhRQUix7PbCNFViTw}{wRzc-CVaRmmdLNnPfT_LTA}{127.0.0.1}{127.0.0.1:9300} committed version [1] source [zen-disco-elected-as-master ([0] nodes joined)]])
[2018-01-28T22:11:19,028][INFO ][o.e.g.GatewayService     ] [qR5cyzh] recovered [0] indices into cluster_state
[2018-01-28T22:11:19,097][INFO ][o.e.h.n.Netty4HttpServerTransport] [qR5cyzh] publish_address {127.0.0.1:9200}, bound_addresses {[::1]:9200}, {127.0.0.1:9200}
[2018-01-28T22:11:19,097][INFO ][o.e.n.Node               ] [qR5cyzh] started
很顺利,启动成功了,我们curl来试一下
[yun@localhost ~]$ curl "127.0.0.1:9200"
{
  "name" : "qR5cyzh",
  "cluster_name" : "elasticsearch",
  "cluster_uuid" : "I52THkAwTU-oB8GQs_7jhQ",
  "version" : {
    "number" : "6.1.2",
    "build_hash" : "5b1fea5",
    "build_date" : "2018-01-10T02:35:59.208Z",
    "build_snapshot" : false,
    "lucene_version" : "7.1.0",
    "minimum_wire_compatibility_version" : "5.6.0",
    "minimum_index_compatibility_version" : "5.0.0"
  },
  "tagline" : "You Know, for Search"
}
没什么问题,我们再用浏览器来试一下
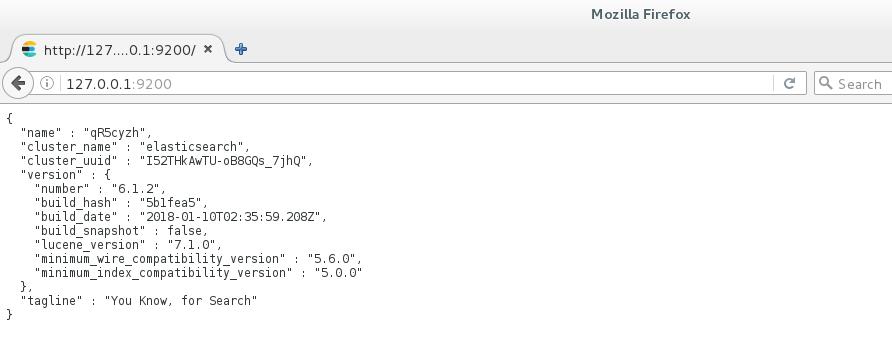
也没问题,好了,到现在为止我们的elasticsearch服务就搭建成功了,接下来我们来看配置
配置
先来看一下elasticsearch的配置文件:
# ======================== Elasticsearch Configuration =========================
#
# NOTE: Elasticsearch comes with reasonable defaults for most settings.
# Before you set out to tweak and tune the configuration, make sure you
# understand what are you trying to accomplish and the consequences.
#
# The primary way of configuring a node is via this file. This template lists
# the most important settings you may want to configure for a production cluster.
#
# Please consult the documentation for further information on configuration options:
# https://www.elastic.co/guide/en/elasticsearch/reference/index.html
#
# ---------------------------------- Cluster -----------------------------------
#
# Use a descriptive name for your cluster:
# 定义集群名称
#cluster.name: my-application
#
# ------------------------------------ Node ------------------------------------
#
# Use a descriptive name for the node:
# 定义该节点的名称,每个节点不可以重复
#node.name: node-1
#
# Add custom attributes to the node:
#
#node.attr.rack: r1
#
# ----------------------------------- Paths ------------------------------------
#
# Path to directory where to store the data (separate multiple locations by comma):
# 配置数据存放目录
#path.data: /path/to/data
#
# Path to log files:
# 配置日志目录
#path.logs: /path/to/logs
#
# ----------------------------------- Memory -----------------------------------
#
# Lock the memory on startup:
# 关闭锁定内存
#bootstrap.memory_lock: true
#
# Make sure that the heap size is set to about half the memory available
# on the system and that the owner of the process is allowed to use this
# limit.
#
# Elasticsearch performs poorly when the system is swapping the memory.
#
# ---------------------------------- Network -----------------------------------
#
# Set the bind address to a specific IP (IPv4 or IPv6):
# 指定本机IP地址
network.host: 172.19.26.110
#
# Set a custom port for HTTP:
# 指定http访问端口
http.port: 9200
#
# For more information, consult the network module documentation.
#
# --------------------------------- Discovery ----------------------------------
#
# Pass an initial list of hosts to perform discovery when new node is started:
# The default list of hosts is ["127.0.0.1", "[::1]"]
# 广播地址
#discovery.zen.ping.unicast.hosts: ["host1", "host2"]
#
# Prevent the "split brain" by configuring the majority of nodes (total number of master-eligible nodes / 2 + 1):
#
#discovery.zen.minimum_master_nodes:
#
# For more information, consult the zen discovery module documentation.
#
# ---------------------------------- Gateway -----------------------------------
#
# Block initial recovery after a full cluster restart until N nodes are started:
#
#gateway.recover_after_nodes: 3
#
# For more information, consult the gateway module documentation.
#
# ---------------------------------- Various -----------------------------------
#
# Require explicit names when deleting indices:
#
#action.destructive_requires_name: true
一、 配置Network部分
实现局域网内访问elasticsearch服务
在开始之前,我们首先得确保 宿主机和虚拟机的网络是互相可以ping通的,如果没有做过相关配置,建议先移步:《Centos下配置静态IP》完成配置,然后再继续往下走。
PS:注意关闭宿主机和虚拟机的防火墙哦,不然会遇到各种莫名其妙的问题,关闭防火墙命令可移步:《Linux下常用命令》 查找。
通过修改 elasticsearch.yml配置,我们来实现局域网内访问elasticsearch服务,将host和port相应配置修改成局域网的一个固定IP,然后重新启动。
# ---------------------------------- Network -----------------------------------
#
# Set the bind address to a specific IP (IPv4 or IPv6):
#
network.host: 172.19.26.110
#
# Set a custom port for HTTP:
#
http.port: 9200
#
# For more information, consult the network module documentation.
执行启动命令 ./bin/elasticsearch 启动后,会发现报2个错,如下:
[2018-01-28T23:51:35,180][INFO ][o.e.t.TransportService   ] [qR5cyzh] publish_address {172.19.26.110:9300}, bound_addresses {172.19.26.110:9300}
[2018-01-28T23:51:35,204][INFO ][o.e.b.BootstrapChecks    ] [qR5cyzh] bound or publishing to a non-loopback address, enforcing bootstrap checks
ERROR: [2] bootstrap checks failed
[1]: max file descriptors [4096] for elasticsearch process is too low, increase to at least [65536]
[2]: max virtual memory areas vm.max_map_count [65530] is too low, increase to at least [262144]
1、报错 max virtual memory areas vm.max_map_count [65530] is too low, increase to at least [262144]是因为操作系统vm.max_map_count参数设置太小导致的,至于设置多大的数值,我这里就直接参照报错信息的建议直接设置为262144
解决方案一:
切换到root用户下,执行以下命令:
sysctl -w vm.max_map_count=262144检查配置是否生效
[root@localhost elasticsearch-6.1.2]# sysctl -a | grep "vm.max_map_count"
vm.max_map_count = 262144
[root@localhost elasticsearch-6.1.2]#
如果正常输出262144,则说明修改成功,然后再次启动elasticsearch,输出如下:
[2018-01-29T00:24:36,619][INFO ][o.e.n.Node               ] initialized
[2018-01-29T00:24:36,619][INFO ][o.e.n.Node               ] [qR5cyzh] starting ...
[2018-01-29T00:24:36,949][INFO ][o.e.t.TransportService   ] [qR5cyzh] publish_address {172.19.26.110:9300}, bound_addresses {172.19.26.110:9300}
[2018-01-29T00:24:37,015][INFO ][o.e.b.BootstrapChecks    ] [qR5cyzh] bound or publishing to a non-loopback address, enforcing bootstrap checks
ERROR: [1] bootstrap checks failed
[1]: max file descriptors [4096] for elasticsearch process is too low, increase to at least [65536]
[2018-01-29T00:24:37,038][INFO ][o.e.n.Node               ] [qR5cyzh] stopping ...
[2018-01-29T00:24:37,089][INFO ][o.e.n.Node               ] [qR5cyzh] stopped
[2018-01-29T00:24:37,089][INFO ][o.e.n.Node               ] [qR5cyzh] closing ...
[2018-01-29T00:24:37,128][INFO ][o.e.n.Node               ] [qR5cyzh] closed
这时候会发现只有一个错了,说明以上配置处理成功。
解决方案二(推荐):永久性修改
- 切换到root用户,备份原有配置
[root@localhost elasticsearch-6.1.2]# cd /etc
[root@localhost etc]# cp sysctl.conf sysctl.conf.bak
- 编辑sysctl.conf,增加如下内容
[root@localhost etc]# vim sysctl.conf

# elasticsearch config start
vm.max_map_count=262144
# elasticsearch config end
下面我们来解决另一个问题
2、报错max file descriptors [4096] for elasticsearch process is too low, increase to at least [65536]是因为操作系统安全检测配置影响的,我们需要切换到root用户下做如下配置:
先做一个配置备份
[root@localhost elasticsearch-6.1.2]# cd /etc/security/
[root@localhost security]# cp limits.conf limits.conf.bak
然后编辑limits.conf增加如下配置:
# elasticsearch config start
* soft nofile 65536
* hard nofile 131072
* soft nproc 2048
* hard nproc 4096
# elasticsearch config end
执行启动命令 ./bin/elasticsearch ,会发现指定IP已经配置好了,也正常启动。
publish_address {172.19.26.110:9200}, bound_addresses {172.19.26.110:9200}
[2018-01-29T01:10:58,076][INFO ][o.e.d.DiscoveryModule    ] [qR5cyzh] using discovery type [zen]
[2018-01-29T01:10:59,124][INFO ][o.e.n.Node               ] initialized
[2018-01-29T01:10:59,125][INFO ][o.e.n.Node               ] [qR5cyzh] starting ...
[2018-01-29T01:10:59,441][INFO ][o.e.t.TransportService   ] [qR5cyzh] publish_address {172.19.26.110:9300}, bound_addresses {172.19.26.110:9300}
[2018-01-29T01:10:59,448][INFO ][o.e.b.BootstrapChecks    ] [qR5cyzh] bound or publishing to a non-loopback address, enforcing bootstrap checks
[2018-01-29T01:11:03,107][INFO ][o.e.c.s.MasterService    ] [qR5cyzh] zen-disco-elected-as-master ([0] nodes joined), reason: new_master {qR5cyzh}{qR5cyzhRQUix7PbCNFViTw}{gcZ8nEbmSAGsR8BrJ-f5rw}{172.19.26.110}{172.19.26.110:9300}
[2018-01-29T01:11:03,115][INFO ][o.e.c.s.ClusterApplierService] [qR5cyzh] new_master {qR5cyzh}{qR5cyzhRQUix7PbCNFViTw}{gcZ8nEbmSAGsR8BrJ-f5rw}{172.19.26.110}{172.19.26.110:9300}, reason: apply cluster state (from master [master {qR5cyzh}{qR5cyzhRQUix7PbCNFViTw}{gcZ8nEbmSAGsR8BrJ-f5rw}{172.19.26.110}{172.19.26.110:9300} committed version [1] source [zen-disco-elected-as-master ([0] nodes joined)]])
[2018-01-29T01:11:03,162][INFO ][o.e.h.n.Netty4HttpServerTransport] [qR5cyzh] publish_address {172.19.26.110:9200}, bound_addresses {172.19.26.110:9200}
[2018-01-29T01:11:03,162][INFO ][o.e.n.Node               ] [qR5cyzh] started
[2018-01-29T01:11:03,242][INFO ][o.e.g.GatewayService     ] [qR5cyzh] recovered [0] indices into cluster_state
那我们先利用curl在虚拟机本地测试一下,结果如下:
[elasticsearch@localhost ~]$ curl "172.19.26.110:9200"
{
  "name" : "qR5cyzh",
  "cluster_name" : "elasticsearch",
  "cluster_uuid" : "I52THkAwTU-oB8GQs_7jhQ",
  "version" : {
    "number" : "6.1.2",
    "build_hash" : "5b1fea5",
    "build_date" : "2018-01-10T02:35:59.208Z",
    "build_snapshot" : false,
    "lucene_version" : "7.1.0",
    "minimum_wire_compatibility_version" : "5.6.0",
    "minimum_index_compatibility_version" : "5.0.0"
  },
  "tagline" : "You Know, for Search"
}
[elasticsearch@localhost ~]$
虚拟机本地没问题,我们再用宿主机浏览器来一下,没问题!

好了,到此为止我们的network模块的配置就完成了。
二、 配置Cluster 部分
待更新。。。
参考文档
https://zhuanlan.zhihu.com/p/22241634?refer=dataeye
http://www.chepoo.com/elasticsearch-installation-parameters-configuration-considerations.html


 8516
8516

 被折叠的 条评论
为什么被折叠?
被折叠的 条评论
为什么被折叠?
 到【灌水乐园】发言


