


Introduction
This article is all about configuring and starting an Apache Kafka server on a Windows OS. This guide will also provide instructions to set up Java and Apache Zookeeper.
Apache Kafka is a fast and scalable messaging queue, capable of handeling heavy loads in context of read and write, i.e. IO-related stuff. You can find more about Kafka on http://kafka.apache.org/. Apache Kafka requires a running Zookeeper instance, which is used for reliable distributed cordination. Please find more about Zookeeper on https://zookeeper.apache.org/.
You can find help from this video for setting up Kafka on Windows.
Downloading the Required Files
- Download Server JRE according to your OS and CPU architecture fromhttp://www.oracle.com/technetwork/java/javase/downloads/jre8-downloads-2133155.html
- Download and install 7-zip from http://www.7-zip.org/download.html
- Download and extract Zookeeper using 7-zip from http://zookeeper.apache.org/releases.html
- Download and extract Kafka using 7-zip from http://kafka.apache.org/downloads.html
For this tutorial we are assuming that Zookeeper and Kafka are unzipped in C: drive, but you can unzip them in any location.
Here we are using full-fledged zookeeper and not the one packaged with Kafka because it will be single-node Zookeeper instance. If you want you can run Kafka with packaged zookeeper located in Kafka package inside \kafka\bin\windows directory.
Installation
A. JDK Setup
1. Start JRE installation and hit the check box “Change destination folder”, then click install.

2. Change the installation directory to any path without spaces in folder name. E.g. C:\Java\jre1.8.0_xx\. (By default it will be C:\Program Files\Java\jre1.8.0_xx) then click Next.
3. Now open the system environment variables dialogue by opening Control Panel -> System -> Advanced system settings -> Environment Variables.
4. Hit the New User Variable button in User variables section then type JAVA_HOME inVariable name and give your jre path in Variable value. It should look like:
 (Java path and version may change according to the version of Kafka you are using)
5. Now click OK.
6. Search for a Path variable in the “System Variable” section in “Environment Variables” dialogue box you just opened.
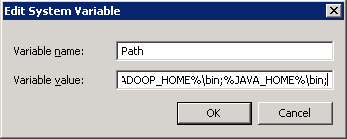
7. Edit the path and type “;%JAVA_HOME%\bin” at the end of the text already written there just like image below
8. To confirm the Java installation just open cmd and type “java –version”, you should be able to see version of the java you just installed.

If your command prompt somewhat looks like the image above, you are good to go. Otherwise you need to recheck whether your setup version is matching with the correct OS architecture (x86, x64), or if the environment variables path is correct.
B. Zookeeper Installation
1. Goto your Zookeeper config directory. For me its C:\zookeeper-3.4.7\conf
2. Rename file “zoo_sample.cfg” to “zoo.cfg”
3. Open zoo.cfg in any text editor like notepad but I prefer notepad++.
4. Find & edit dataDir=/tmp/zookeeper to :\zookeeper-3.4.7\data
5. Add entry in System Environment Variables as we did for Java
a. Add in System Variables ZOOKEEPER_HOME = C:\zookeeper-3.4.7
b. Edit System Variable named “Path” add ;%ZOOKEEPER_HOME%\bin;
6. You can change the default Zookeeper port in zoo.cfg file (Default port 2181).
7. Run Zookeeper by opening a new cmd and type zkserver.
8. You will see the command prompt with some details like the image below.
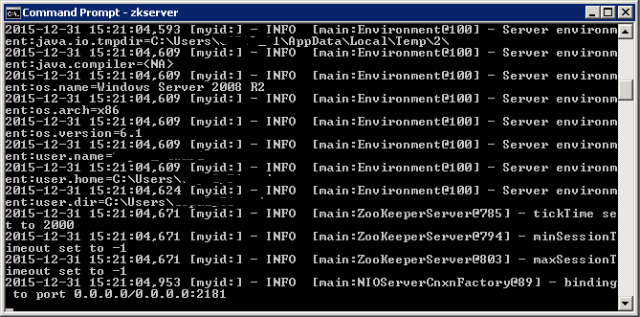
Congratulations, your Zookeeper is up and running on port 2181!
C. Setting Up Kafka
1. Go to your Kafka config directory. For me its C:\kafka_2.11-0.9.0.0\config
2. Edit file “server.properties”
3. Find & edit line “log.dirs=/tmp/kafka-logs” to “log.dir= C:\kafka_2.11-0.9.0.0\kafka-logs”.
4. If your Zookeeper is running on some other machine or cluster you can edit“zookeeper.connect:2181” to your custom IP and port. For this demo we are using same machine so no need to change. Also Kafka port & broker.id are configurable in this file. Leave other settings as it is.
5. Your Kafka will run on default port 9092 & connect to zookeeper’s default port which is 2181.
D. Running Kafka Server
Important: Please ensure that your Zookeeper instance is up and running before starting a Kafka server.
1. Go to your Kafka installation directory C:\kafka_2.11-0.9.0.0\
2. Open a command prompt here by pressing Shift + right click and choose“Open command window here” option)
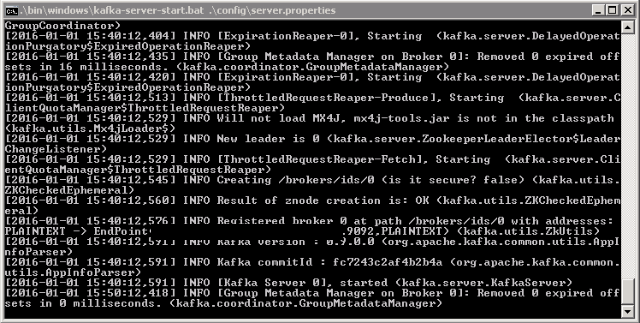
3. Now type .\bin\windows\kafka-server-start.bat .\config\server.properties and press Enter.
.\bin\windows\kafka-server-start.bat .\config\server.properties

4. If everything went fine, your command prompt will look like this one:
5. Now your Kafka is up and running, you can create topics to store messages. Also we can produce or consume data from Java or Scala code or directly from the command prompt.
E. Creating topics
1. Now create a topic with name “test” and replication factor 1, as we have only one Kafka server running. If you have a cluster with more than 1 Kafka server running, you can increase the replication-factor accordingly which will increase the data availability and act like a fault-tolerant system.
2. Open a new command prompt in the location C:\kafka_2.11-0.9.0.0\bin\windows
3. Type following command and hit Enter:
kafka-topics.bat --create --zookeeper localhost:2181 --replication-factor 1 --partitions 1 --topic test

F. Creating a Producer and Consumer to Test Server
1. Open a new command prompt in the location C:\kafka_2.11-0.9.0.0\bin\windows
2. To start a producer type the following command:
kafka-console-producer.bat --broker-list localhost:9092 --topic test
3. Again open a new command prompt in the same location as C:\kafka_2.11-0.9.0.0\bin\windows
4. Now start a consumer by typing the following command:
kafka-console-consumer.bat --zookeeper localhost:2181 --topic test
5. Now you will have two command prompts like the image below:
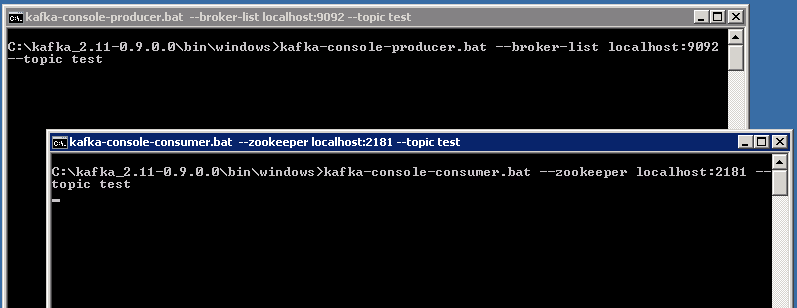
6. Now type anything in the producer command prompt and press Enter, and you should be able to see the message in the other consumer command prompt.

7. If you are able to push & see your messages in the consumer side, you are done with Kafka setup.
Some Other Useful Commands
- List Topics: kafka-topics.bat --list --zookeeper localhost:2181
- Describe Topic: kafka-topics.bat --describe --zookeeper localhost:2181 --topic [Topic Name]
- Read messages from beginning: kafka-console-consumer.bat --zookeeper localhost:2181 --topic [Topic Name] --from-beginning
- Delete Topic: kafka-run-class.bat kafka.admin.TopicCommand --delete --topic [topic_to_delete] --zookeeper localhost:2181


 181
181

 被折叠的 条评论
为什么被折叠?
被折叠的 条评论
为什么被折叠?
 到【灌水乐园】发言


