1.1. Cisco Aironet 1260 Series Access Point

1.2.
Reliable 802.11n Indoor Wireless
Provide reliable and predictable 802.11n wireless coverage for indoor environments. Cisco Aironet 1260 Series wireless access point deliver up to nine times the throughput of 802.11a/g network for multimedia application. Designed specifically for challenging environments, the 1260 Series supports external antennas and a broad operating temperature range.
Rugged Design
These enterprise-class wireless access points deliver a sleek design with rugged metal housing and durable components:
l Standard 802.3af Power over Ethernet
l Extended operating temperature and rugged components for deployment in extreme environmental conditions
l UL 2043 plenum-rated for above ceiling installation options or suspension from drop ceilings
l Mounting hardware that easily retrofits to existing 1130 and 1240 Series mounting brackets to simplify 802.11n migration
High Performance
The Cisco M-Drive technology provides industry-leading 802.11n performance:
l ClientLink improves reliability and coverage for legacy clients
l BandSelect improves 5 GHz client connections in mixed client environments
l VideoStream uses multicast to improve multimedia applications
More content, please consult:
2.
The configuration of detail
2.1.
Initial of CLI & prepare
1. First when you get the AP-1262N. You need to console the AP use CLI to do initial configure. Like the POST to check the devices whether have any problem; Use the CLI to configure the IP address in interface BVI , open the port. And configure a default-gateway in AP and so on.
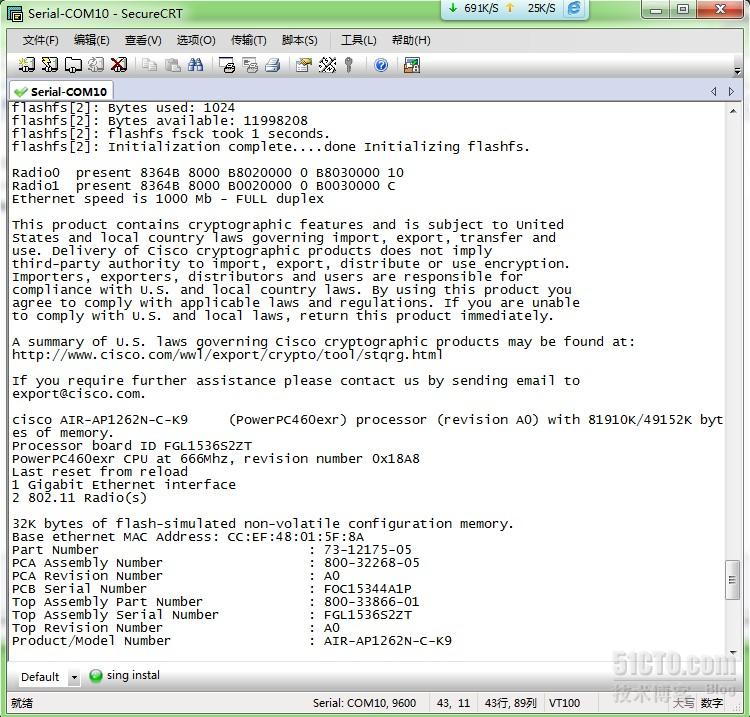
The boot picture below:
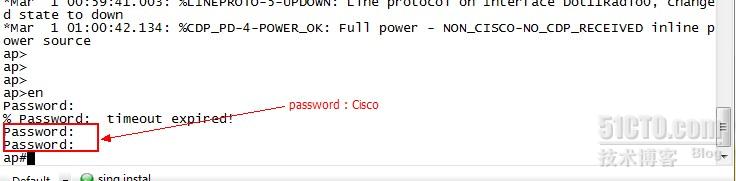
2. When it completed the POST & read the p_w_picpath & configure. You will see a picture of below:
However when you enter “enable” to login
to the privileged mode. The system will prompt you to enter a password that you can login.
The password is “
Cisco”,
is case sens
itive distinguish.
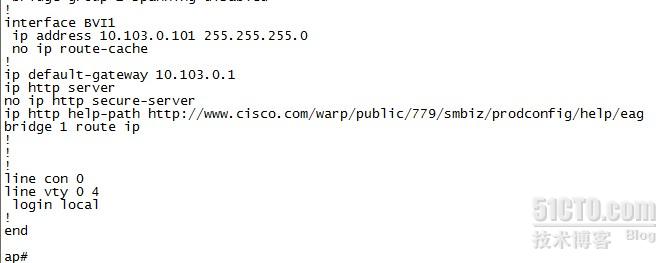
3. When you login to the privileged mode. Then you can begin to configure the IP address in interface BVI & default-gateway. Like the same as picture below:
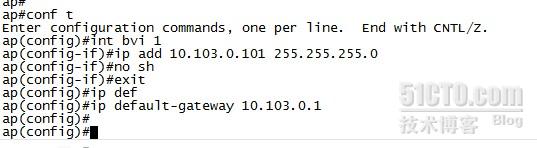
The interface BVI usually used IP DHCP in default to get IP address. But you need a controller or router or layer 3 Switch to configure a DHCP to assign the IP address to the AP’s interface BVI. So i suggest configure a static IP address to the interface BVI.
The configuration picture below:
4. The pc which connected to AP must configure a same network segment.
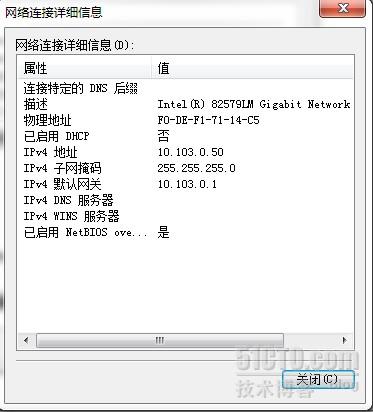
Then when you completed it, you can visit the web UI in IE.
2.2.
Login the Web UI & initial Set-up
1. Enter the IP address of interface BVI: 10.103.0.101. Wait a second you will see a logon window. You need to enter a username & password to login.
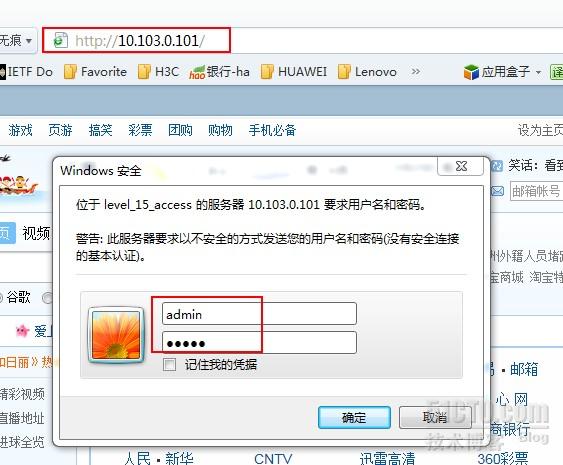
Username : admin
Password : Cisco (is case sensitive distinguish)
2. The picture below is when you success to login in the web UI.

3. Click the Express Set-up to set the host name, configure server protocol and so on.
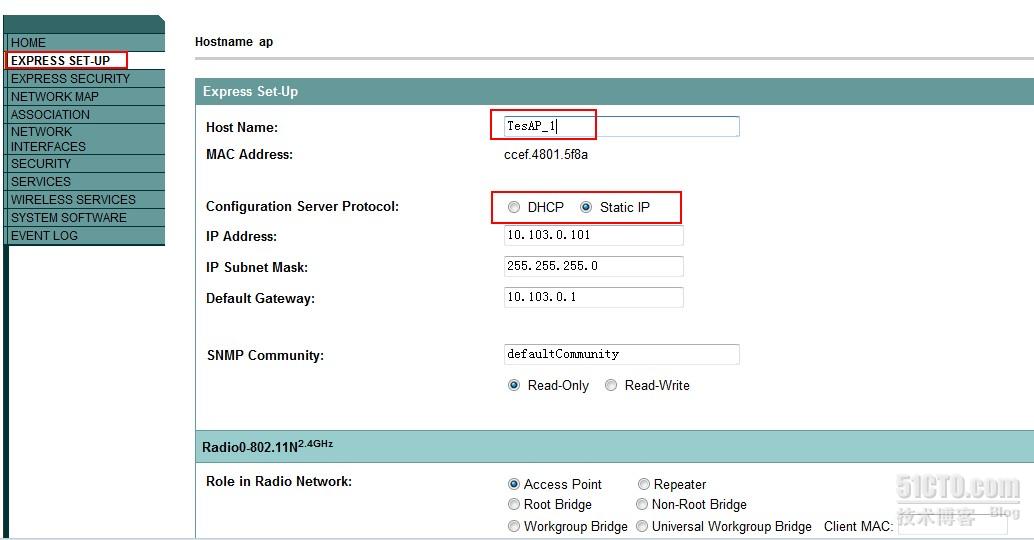
Also you can modify the radio role property in Express Set-up
Each time you completed the configuration. Don’t forget click the Apply button to save the configuration.

2.3.
Enable the radio signal
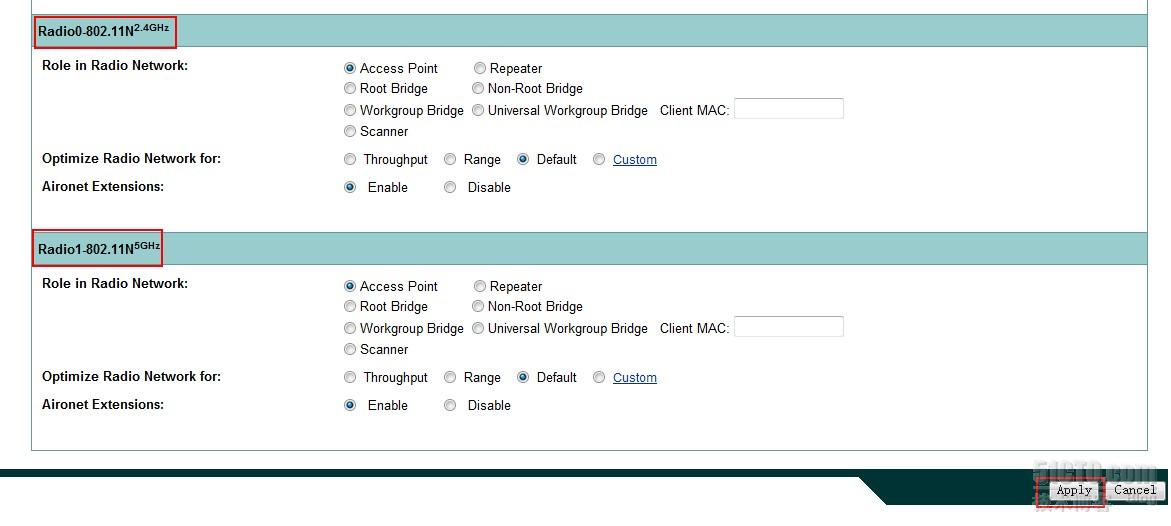
1. Now we begin to set the radio property. AP-1262N support Dual-band Standalone 802.11 a/g/n. It means that you can set two way radio signals in the same time.
Usually at the production environment use 802.11g/n 2.4Ghz will more.
The setting the radio property of detail below:
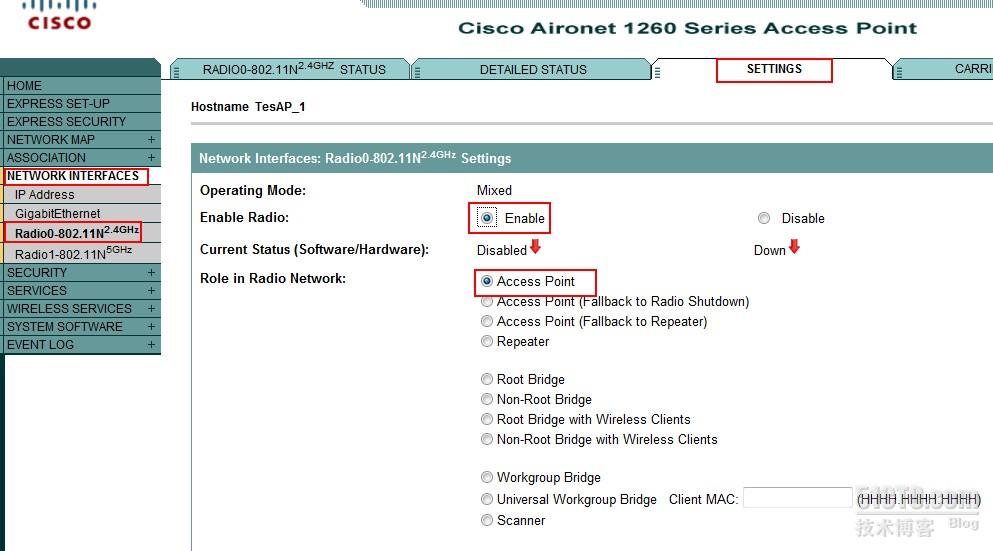
Select the Radio-802.11N 2.4Ghz. Enable the radio. Set the role for radio network with Access Point. If need to let the APs can redundancy when they power-off or broken network. You can select the Access Point (Fallback to Radio Shutdown)’ to do it that. Remember all of APs need to select it then they will work in this feature.
2. Adjust the Data Rates
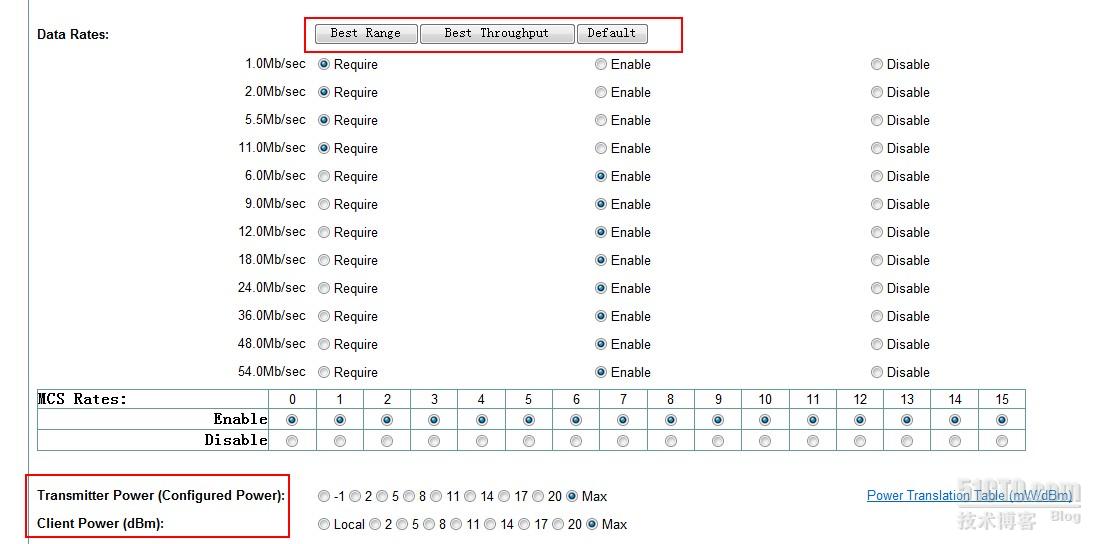
There are three ways to set the rates:
Best Range: use the most optimal cover range.
Best throughput: use the most optimal bandwidth.
Default: The system will take average
3. Configure the radio channel:
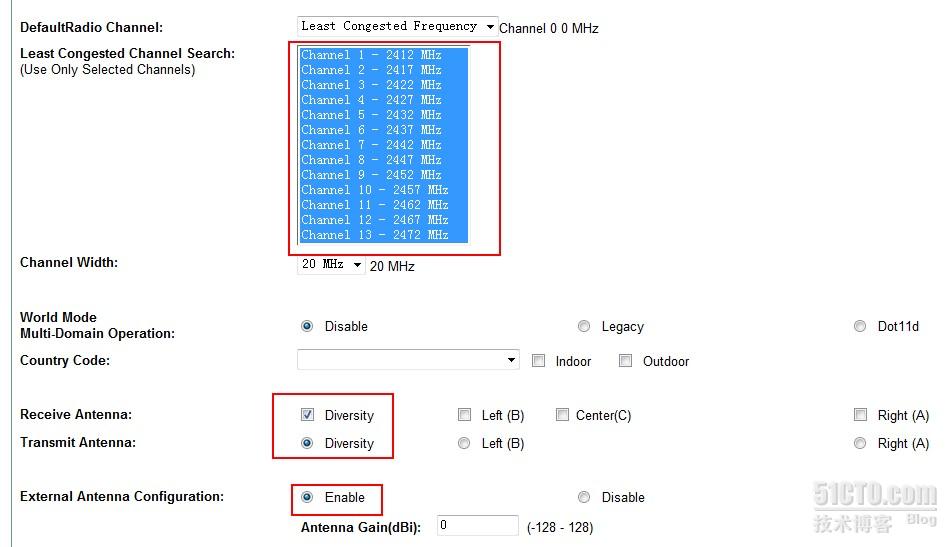
I suggest use the Least Congested Frequency. The AP will select optimal channel to client. The property like the Receive.
Antenna
, Transmit Antenna, External Antenna configuration and so on are use the default that should do it.
Don’t forget click the Apply to save the configuration.
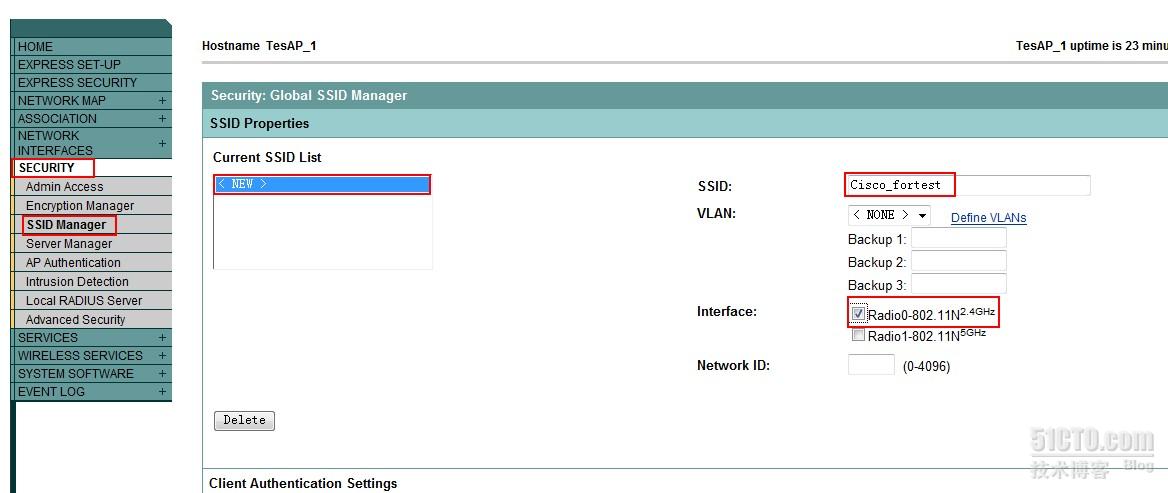
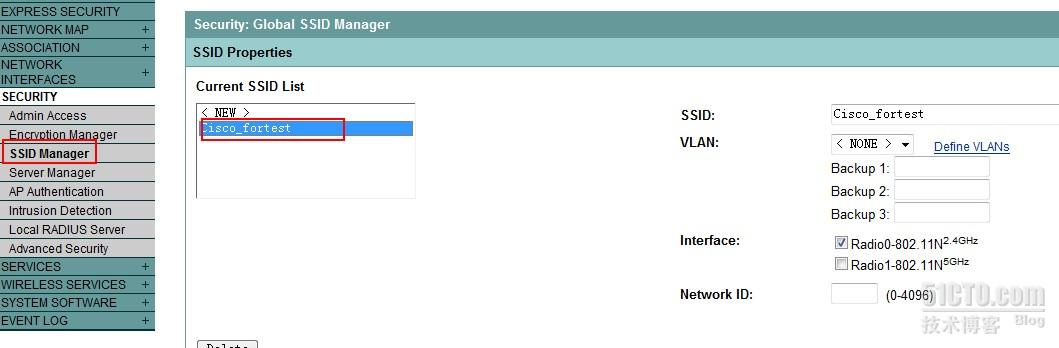
2.4. Create a SSID
1. Of course, when you completed to enable the radio signal. You also need to create a SSID. Use this SSID add to the radio interface. Then you can see the SSID in wireless.
2.5.
Create the Client Authentication—WPA-PSK
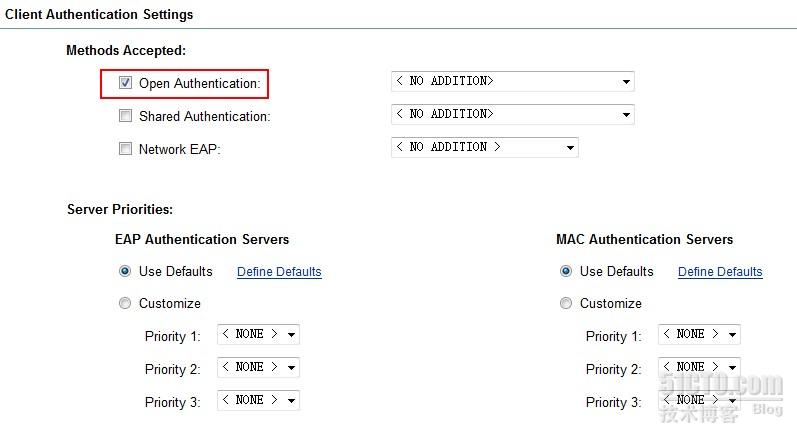
1. When the clients connect to SSID of specified. You may not want to all people can log on to the SSID. But first you should select the open Authentication.
2. The next step is to enable the WPA. But you will see the error below:

3. OK, I according to the tips to configure to the Mandatory. But there is another error to appear.
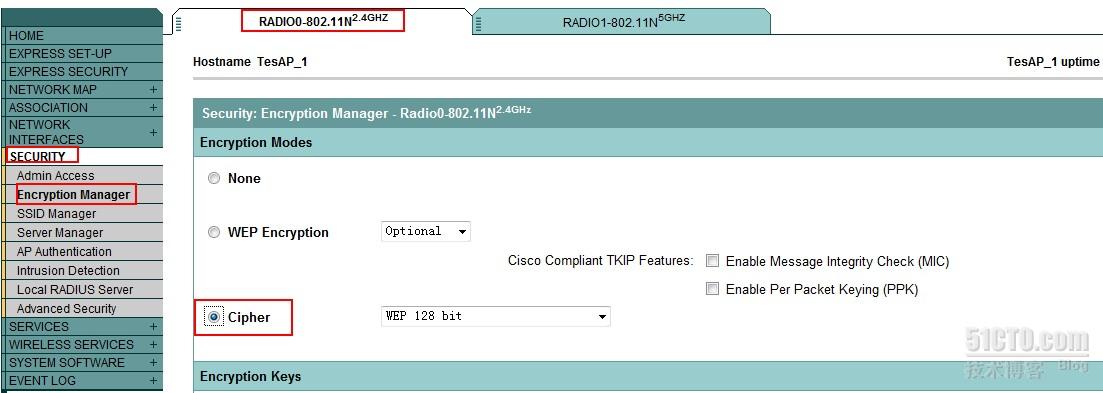
The tip said you need to set a cipher in the Encryption Manager when you enable the WPA.
4. But when you change to
Encryption Manager. Please don’t forget click Apply to save the configuration. Otherwise you will miss the configuration of SSID.

5. Change to
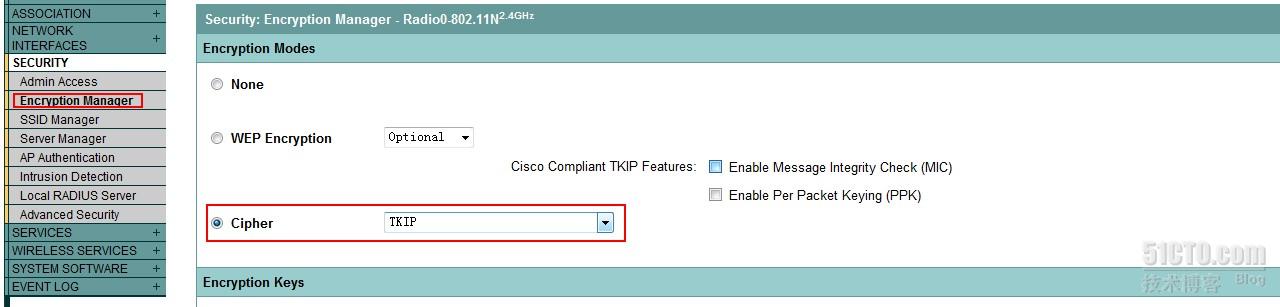
Encryption Manager and configure the cipher.
6. Select the cipher to the TKIP encryption
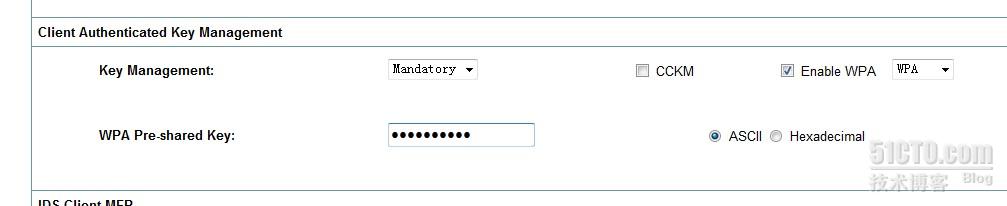
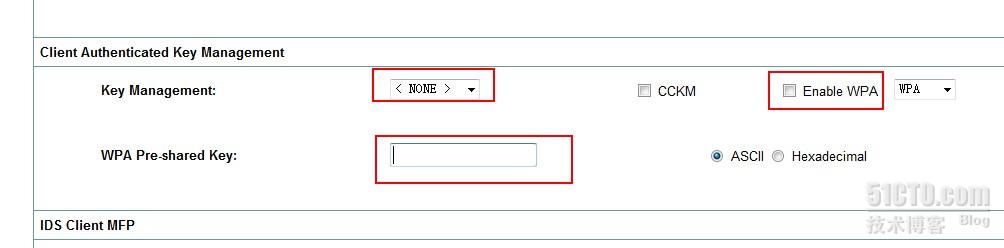
7. Fall back to the SSID manager. Enable WPA. Select the Key Management to the Mandatory. And create a new password .
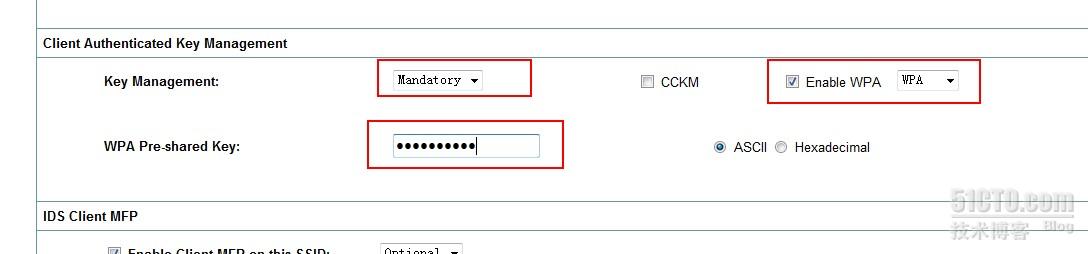
8. Click the Apply to save configuration.

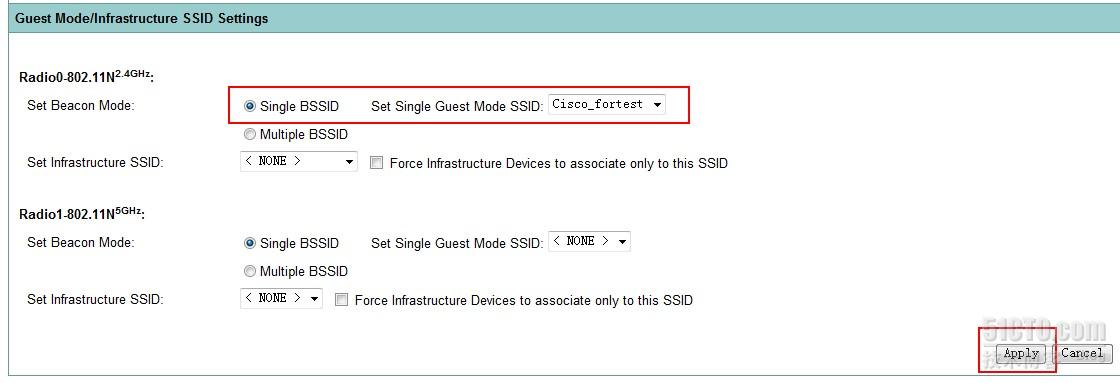
9. Assign the SSID profile to the 802.11N 2.4Ghz. Also don’t forget to save.
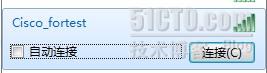
10. Test the SSID.

11. Enter the password then you can connected.
2.6. Create the Client Authentication—WPA-ASE
1. Select the cipher to the AES OCMP in the Encryption Manager and save it. The Encryption Keys for none.

2. Select the SSID: Cisco_fortest to use the cipher.
3. Create a password for the WPA.
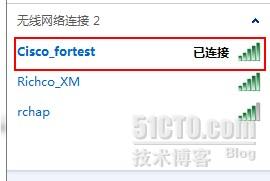
4. Test the SSID.
5. Also you can connect to the SSID.
2.7.
Create the Client Authentication—WPE
1. The Key Management for none & not enable the
WPA.
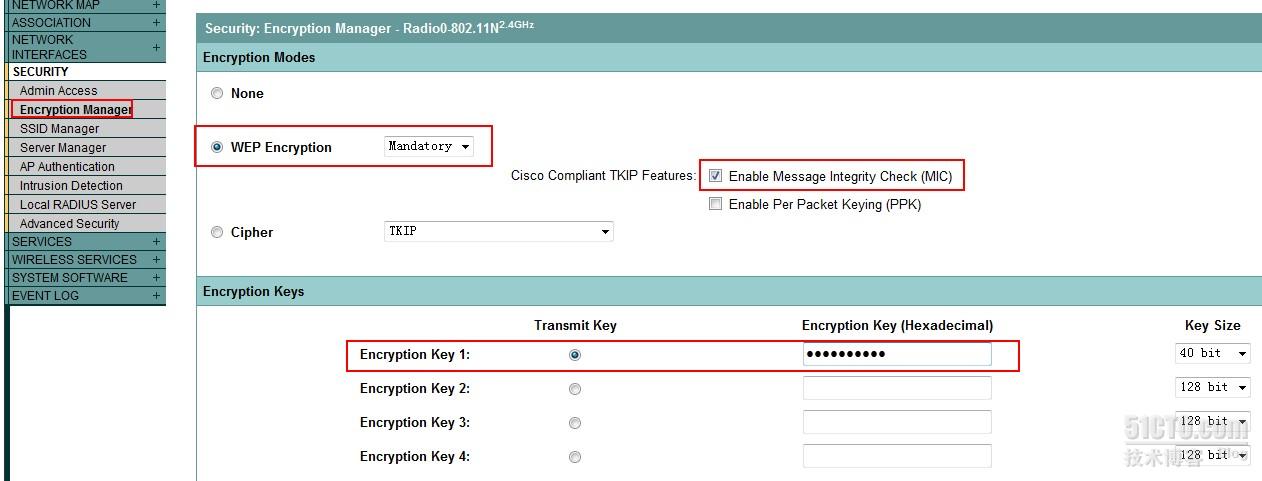
2. Select WEP Encryption for Mandatory & enable MIC. Create a new password to
hexadecimal
.
3. Test the SSID.
4. Also you can connect to the SSID.
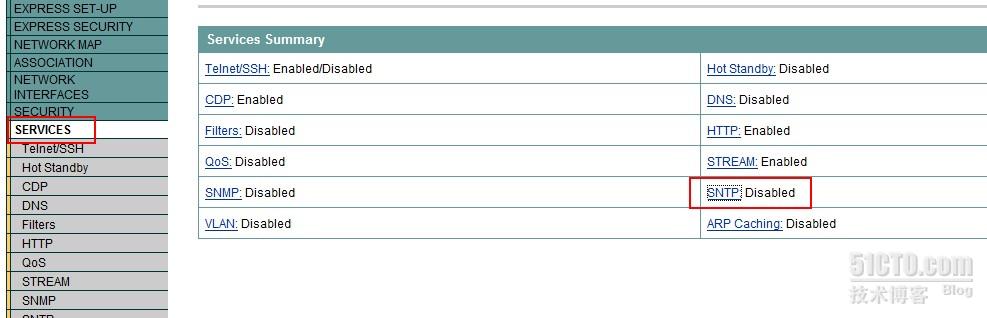
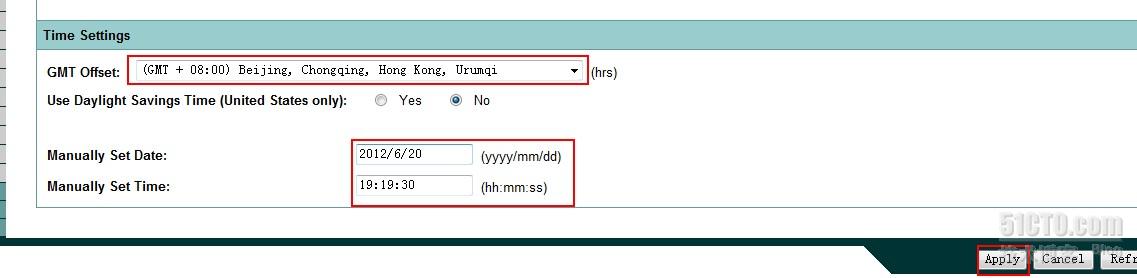
2.8.
Configure the SNTP
1. Change to the SERVICES, select the SNTP and enable this function.
2. Configure the local time to GMT + 8:00 and modify correct time.


 801
801

 被折叠的 条评论
为什么被折叠?
被折叠的 条评论
为什么被折叠?
 到【灌水乐园】发言


