![7ff96ea11f98ebf2514cfb6e13acc0a0.png](https://img-blog.csdnimg.cn/img_convert/7ff96ea11f98ebf2514cfb6e13acc0a0.png)
![d1c08746f5bbbc48bd25705fe41c0d02.png](https://img-blog.csdnimg.cn/img_convert/d1c08746f5bbbc48bd25705fe41c0d02.png)
大家好,今天给大家带来环形百叶窗钣金建模教程
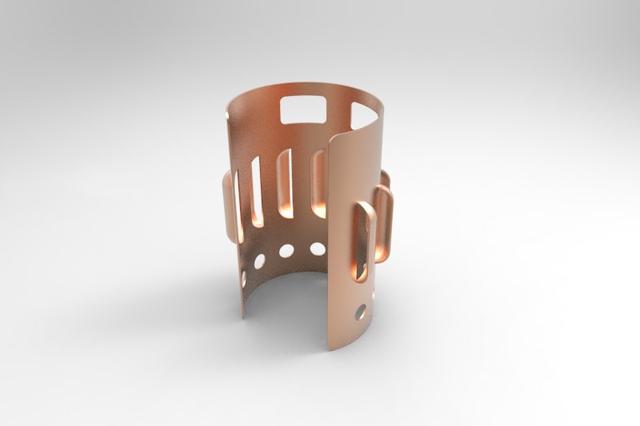
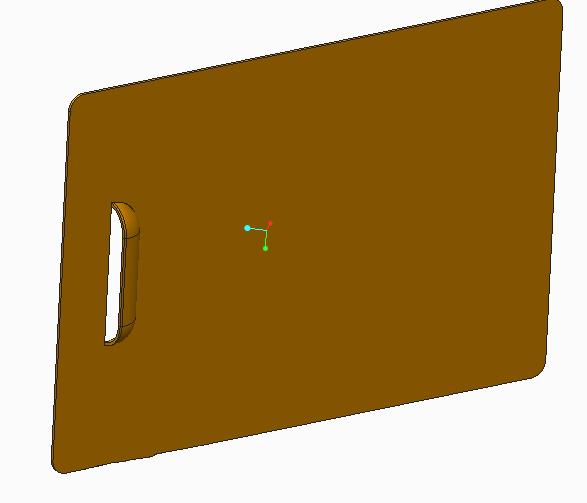
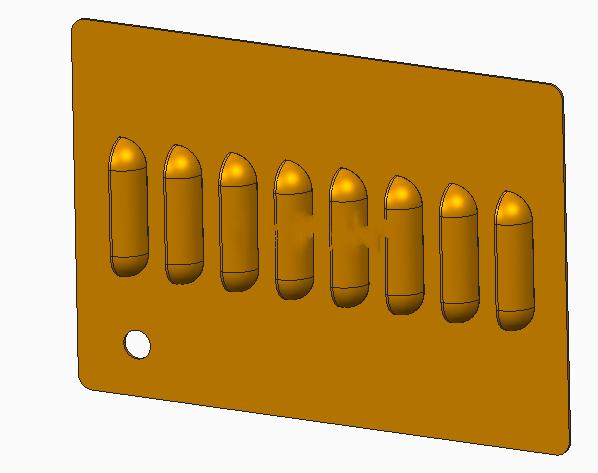
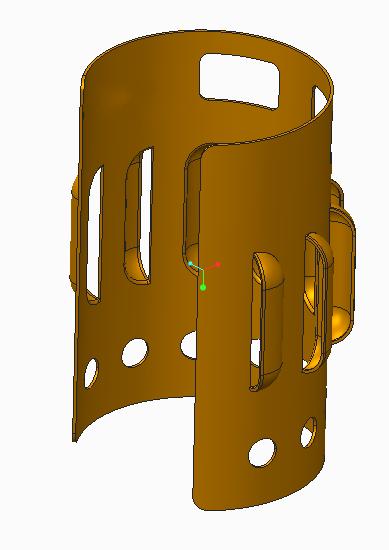
1、按照惯例,首先上传两张渲染效果图,如图所示。
![f32e74ebafacb494a68325695e1a93a8.png](https://img-blog.csdnimg.cn/img_convert/f32e74ebafacb494a68325695e1a93a8.png)
![52b4368c4d8612a879617a114501165f.png](https://img-blog.csdnimg.cn/img_convert/52b4368c4d8612a879617a114501165f.png)
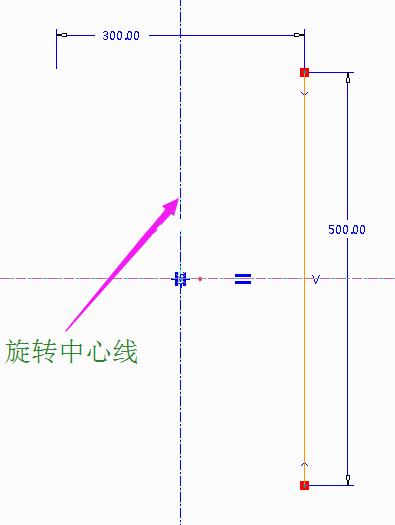
2、打开creo软件,以名称“huan-xing-bai-ye-chuang”新建一个钣金零件,点击“旋转”,选择front平面,绘制如图所示的草图,注意绘制旋转用的中心线,如图所示。
![5afba80b335917d05fc94c707e3abf9e.png](https://img-blog.csdnimg.cn/img_convert/5afba80b335917d05fc94c707e3abf9e.png)
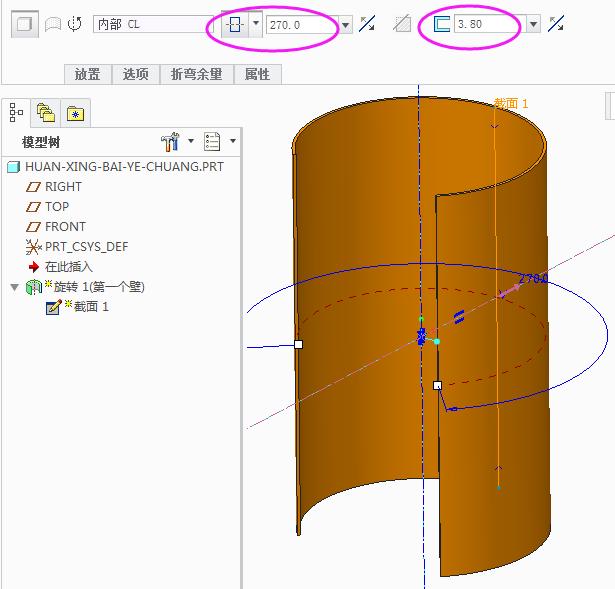
3、完成草绘后,设置旋转角度为270°,钣金厚度为3.8mm,如图所示。
![5a16f3537a450cd102252d2e67afdafa.png](https://img-blog.csdnimg.cn/img_convert/5a16f3537a450cd102252d2e67afdafa.png)
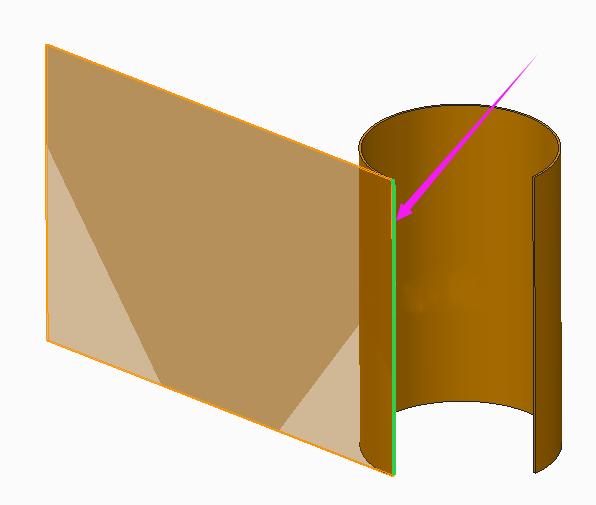
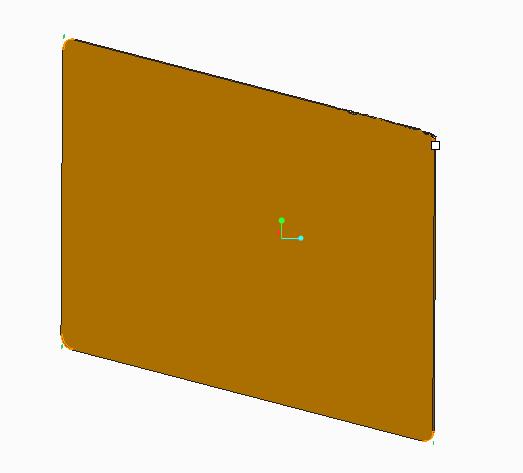
4、点击“展平”命令,选择如图所示的高亮边,完成钣金展开。
![c2b2a56d3e7ad8b5fd34ac8692727339.png](https://img-blog.csdnimg.cn/img_convert/c2b2a56d3e7ad8b5fd34ac8692727339.png)
5、点击“倒圆角”命令,设置倒角为R20,完成如图所示的四个圆角。
![5bea4e41864376fa22564c7b5fd6b9ca.png](https://img-blog.csdnimg.cn/img_convert/5bea4e41864376fa22564c7b5fd6b9ca.png)
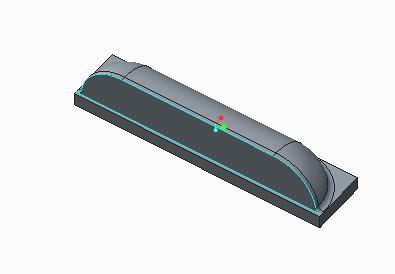
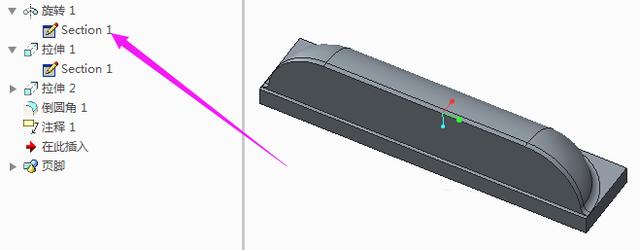
6、接下来开始创建百叶窗特征,采用凸模工具,点击“成型--凸模”命令,选择自带模版的最后一个,可以通过预览选择正确的凸模,如图所示。
![044f59e35977319c751b4f7989763d9b.png](https://img-blog.csdnimg.cn/img_convert/044f59e35977319c751b4f7989763d9b.png)
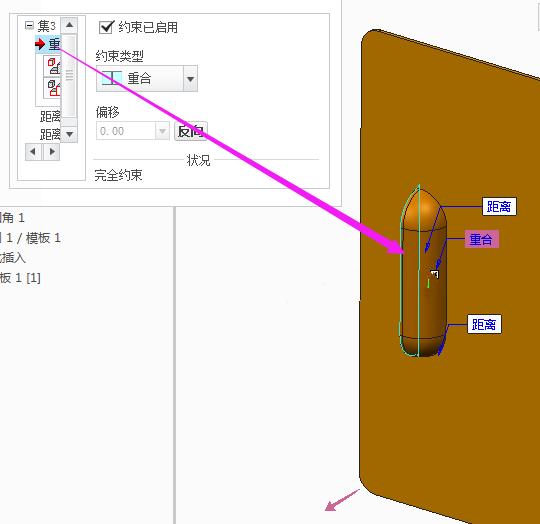
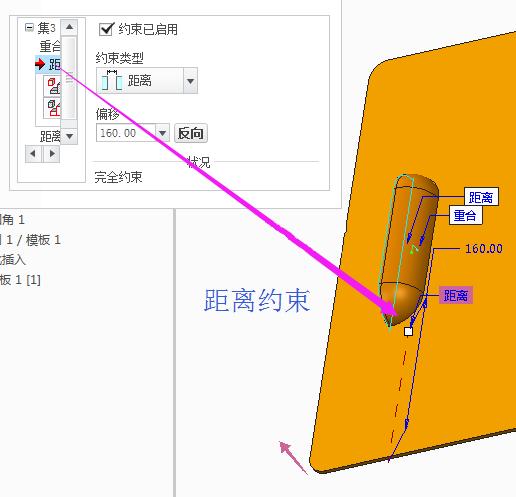
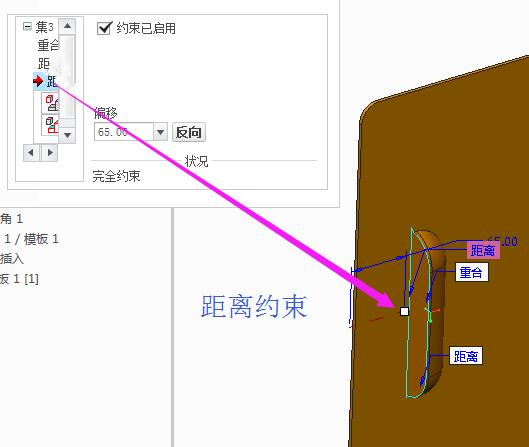
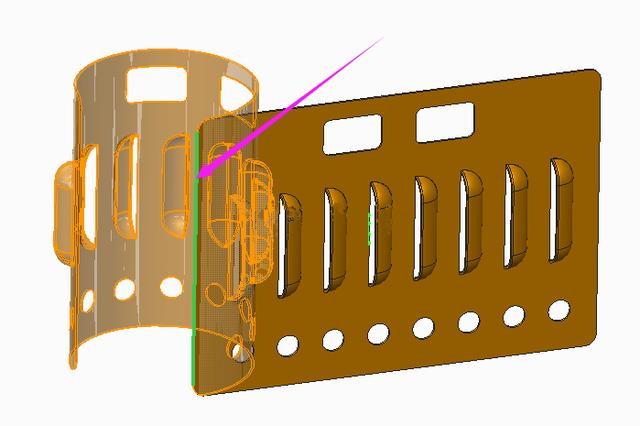
7、选择正确的凸模后,接下来开始将其装配到展平钣金件的正确位置,采用“手动放置”,约束重合、距离完成正确装配,如图所示,注意凸模成型方向。
![45d1ca91112acc7217f9bcae1c9f6be6.png](https://img-blog.csdnimg.cn/img_convert/45d1ca91112acc7217f9bcae1c9f6be6.png)
![552ee7186ea966fed9dab023b0012ada.png](https://img-blog.csdnimg.cn/img_convert/552ee7186ea966fed9dab023b0012ada.png)
![e4b2fac7022e5a110cb79e2ed5b05ab4.png](https://img-blog.csdnimg.cn/img_convert/e4b2fac7022e5a110cb79e2ed5b05ab4.png)
![a02481ec409d842b69cd7ee57a9b5407.png](https://img-blog.csdnimg.cn/img_convert/a02481ec409d842b69cd7ee57a9b5407.png)
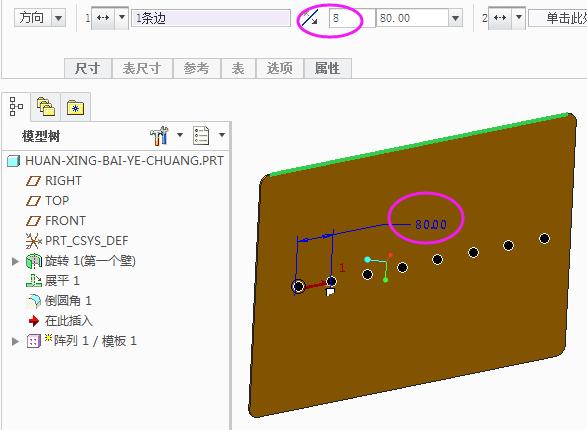
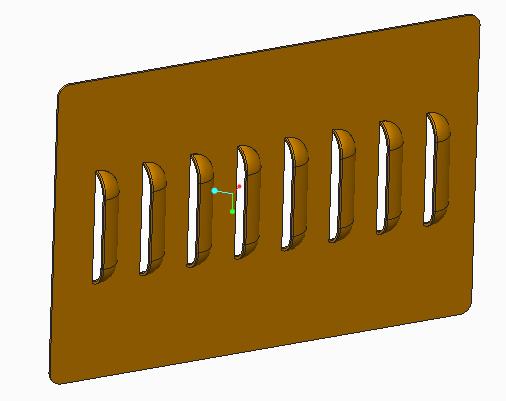
8、选中刚刚创建的百叶窗特征,点击“编辑--阵列”,设置为方向阵列,阵列个数为8个,间距为80mm,完成如图所示的阵列。
![e17a6ce4d2b100de19bd844a881c1574.png](https://img-blog.csdnimg.cn/img_convert/e17a6ce4d2b100de19bd844a881c1574.png)
![b1d85dc0ac757cf8e224bef7e3cbe181.png](https://img-blog.csdnimg.cn/img_convert/b1d85dc0ac757cf8e224bef7e3cbe181.png)
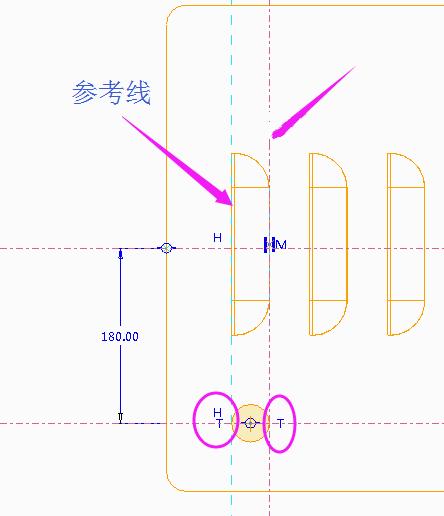
9、点击“拉伸”命令,绘制如图所示的草图,注意参考线的选取,草图与参考线的相切约束,设置拉伸深度为完全贯穿,如图所示。
![8d42f81a4f9e953df58a4ccf23004fcc.png](https://img-blog.csdnimg.cn/img_convert/8d42f81a4f9e953df58a4ccf23004fcc.png)
![88fe16c3fb2eece662ffdc69404d57e6.png](https://img-blog.csdnimg.cn/img_convert/88fe16c3fb2eece662ffdc69404d57e6.png)
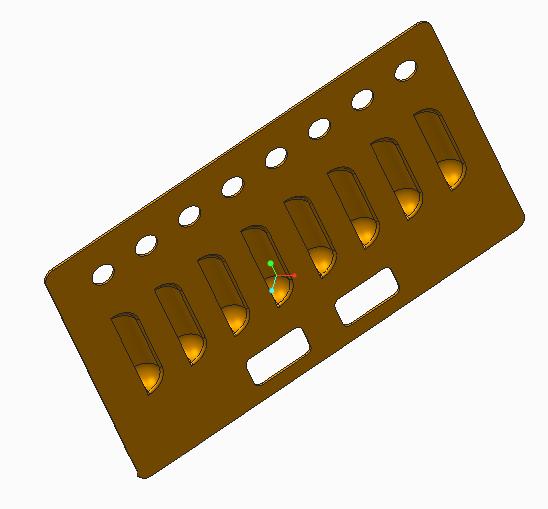
10、选中刚刚创建的拉伸特征,点击“阵列”,选择参考阵列,完成如图所示的阵列创建。
![f7f6cbda9bd1f29a3d47b15ad7fb0690.png](https://img-blog.csdnimg.cn/img_convert/f7f6cbda9bd1f29a3d47b15ad7fb0690.png)
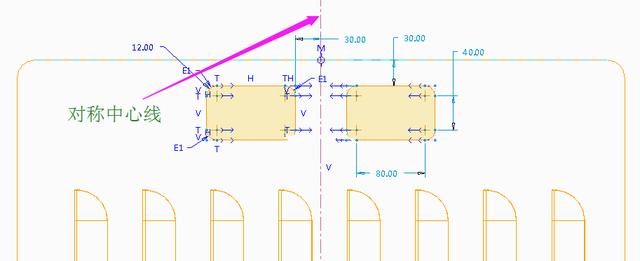
11、同步骤9,点击“拉伸”命令,绘制如图所示的草图。
![660c55058f1331b572c6bced3e24c978.png](https://img-blog.csdnimg.cn/img_convert/660c55058f1331b572c6bced3e24c978.png)
12、设置拉伸深度为完全贯穿,如图所示。
![f717dac1b1e95670f28b9eb4c3a96f21.png](https://img-blog.csdnimg.cn/img_convert/f717dac1b1e95670f28b9eb4c3a96f21.png)
13、点击“折弯回去”命令,选中如图所示的高亮边,完成环形折弯。
![46cc76f72cd06e527ecb05fab6b25ffb.png](https://img-blog.csdnimg.cn/img_convert/46cc76f72cd06e527ecb05fab6b25ffb.png)
![233a42e3528aa9a9fda992373c1c7ace.png](https://img-blog.csdnimg.cn/img_convert/233a42e3528aa9a9fda992373c1c7ace.png)
14、在制作百叶窗特征过程中,系统自带的凸模模版可能尺寸大小方面不适合我们所需的百叶窗大小,此时便需要我们单独打开该凸模特征,重新定义修改到合适的尺寸即可。
![222ced107068c382e8473f3fea881b36.png](https://img-blog.csdnimg.cn/img_convert/222ced107068c382e8473f3fea881b36.png)
END
![aa50be19928f477e95de028602eb50f8.gif](https://img-blog.csdnimg.cn/img_convert/aa50be19928f477e95de028602eb50f8.gif)