


以前我们使用JavaMail发送邮件,步骤挺多的。现在的项目跟Spring整合的比较多。所以这里主要谈谈SpringMail发送。
导入jar包。
配置applicationContext-email.xml。
编写代码。
Maven地址如下
org.springframework
spring-context-support
4.2.6.RELEASE
javax.mail
1.4.5
配置applicationContext-email.xml
xmlns:xsi="http://www.w3.org/2001/XMLSchema-instance" xmlns:context="http://www.springframework.org/schema/context"
xmlns:tx="http://www.springframework.org/schema/tx"
xsi:schemaLocation="http://www.springframework.org/schema/beans http://www.springframework.org/schema/beans/spring-beans-2.5.xsd
http://www.springframework.org/schema/context http://www.springframework.org/schema/context/spring-context-2.5.xsd
http://www.springframework.org/schema/tx http://www.springframework.org/schema/tx/spring-tx-2.5.xsd">
//
true
true
25000
在这里,要注意一下:
个人邮箱使用的主机是:
-->
企业邮箱使用的主机是:
关于qq邮箱的授权码,如果是企业邮箱,则使用登录密码,否则要去获取授权码,要不然会报异常
Exception in thread "main" org.springframework.mail.MailAuthenticationException: Authentication failed; nested exception is javax.mail.AuthenticationFailedException
当然,我们可以使用163邮箱发送,步骤也是一样,要去申请授权码,只是有点奇怪的是,163发送会被当成垃圾邮箱处理。所以这里建议不要使用163邮箱发送邮件。
详细代码如下
public class EmailUtil {
public void sendMsg() {
ApplicationContext ac = new ClassPathXmlApplicationContext("applicationContext.xml",
"applicationContext-email.xml");
MailSender ms = (MailSender) ac.getBean("mailSender");
SimpleMailMessage smm = new SimpleMailMessage();
// 发送
smm.setFrom("11--@qq.com");//此处省略邮箱
// 接收
smm.setTo("18----@163.com");
// 主题
smm.setSubject("库存预警" + System.currentTimeMillis());
// 内容
smm.setText("库存预警");
//
smm.setSentDate(new Date());
ms.send(smm);
System.out.println("end");
}
public static void main(String[] args) {
EmailUtil emailUtil = new EmailUtil();
emailUtil.sendMsg();
}
}
发送成功截图如下:
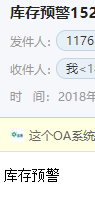
好了,Spring整合email到此结束。


 2万+
2万+


 被折叠的 条评论
为什么被折叠?
被折叠的 条评论
为什么被折叠?
 到【灌水乐园】发言


