只需5分钟,水灵灵地实现网站复刻!_计算机

作为前端开发者,我们的日常工作中总是有各种各样的 UI 布局任务。从设计稿到代码实现,往往需要花费大量时间去调整布局、优化细节,这种重复性的工作不仅浪费时间资源,还无形中加重了我们的工作负荷,让人感到疲惫。

前段时间,我在 GitHub 上偶然发现了一个热门的开源项目 Screenshot-to-Code,它能够通过 AI 自动生成前端代码,并且支持生成多种不同技术栈的代码,如 HTML + Tailwind、React + Tailwind 等等。

只需5分钟,水灵灵地实现网站复刻!_ai_02

想到可以借助 AI 来帮助我开发复杂的页面,我立刻决定尝试一下。


环境搭建

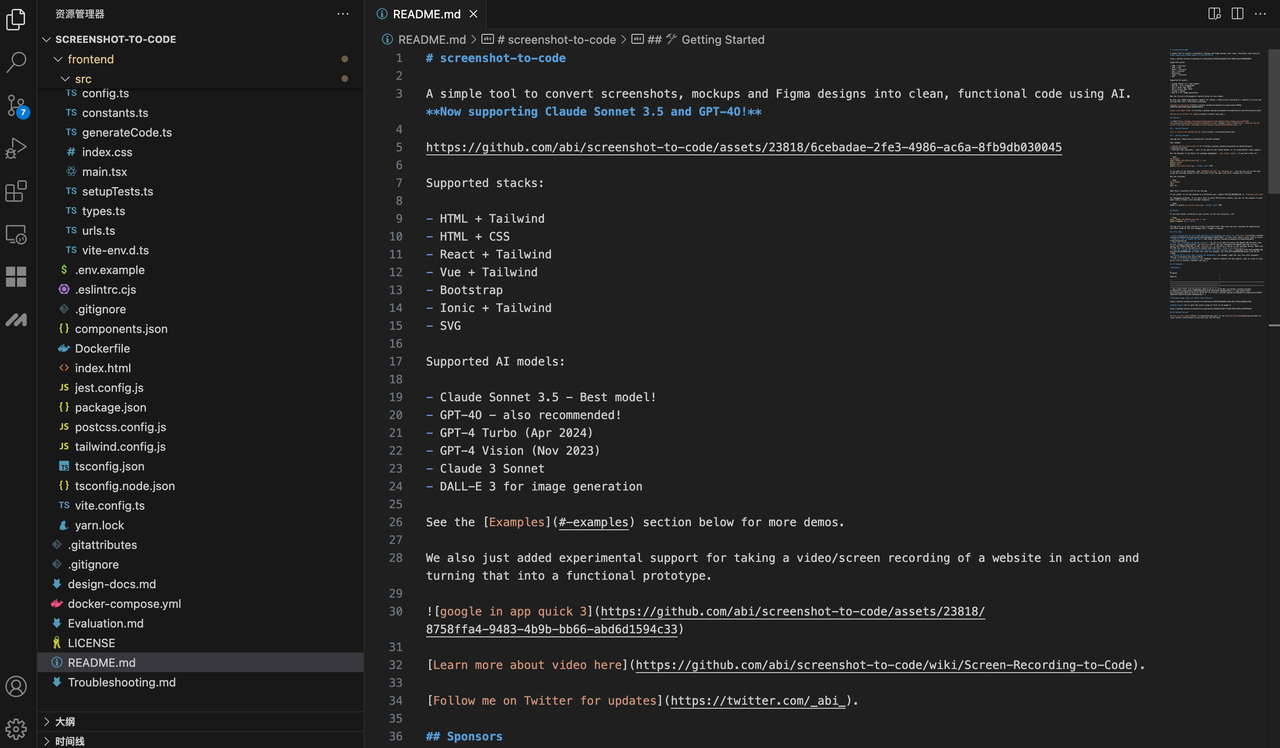
首先,我们可以将项目 Clone 到本地并用 IDE 打开,准备本地部署启动。然而,面对冗长的项目 Readme 文档,直接阅读可能会带来很重的视觉负担。

只需5分钟,水灵灵地实现网站复刻!_计算机_03

这个时候我想到,我刚好有安装 豆包MarsCode 编程助手插件,决定尝试下能否让 AI 告诉我该如何进行部署。在向 AI 助手提问之后,它立刻按照步骤指引我,需要先进入后端目录执行哪些命令,再进入前端目录执行哪些命令。

只需5分钟,水灵灵地实现网站复刻!_ai_04

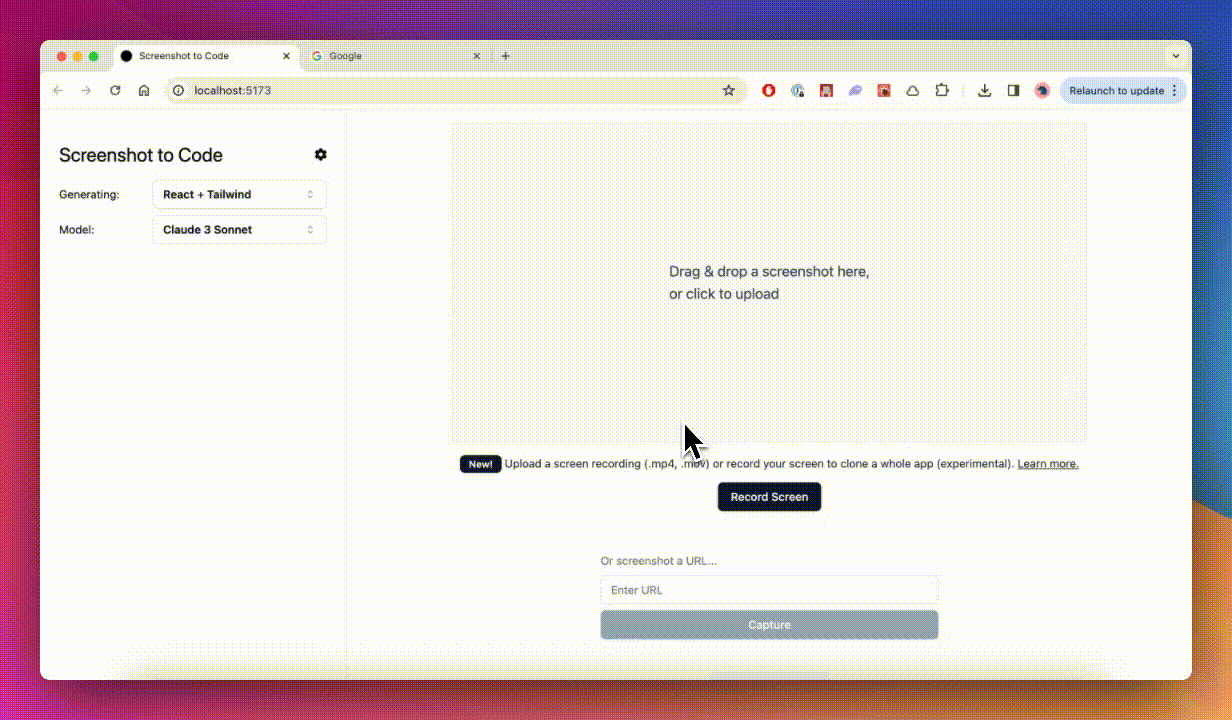
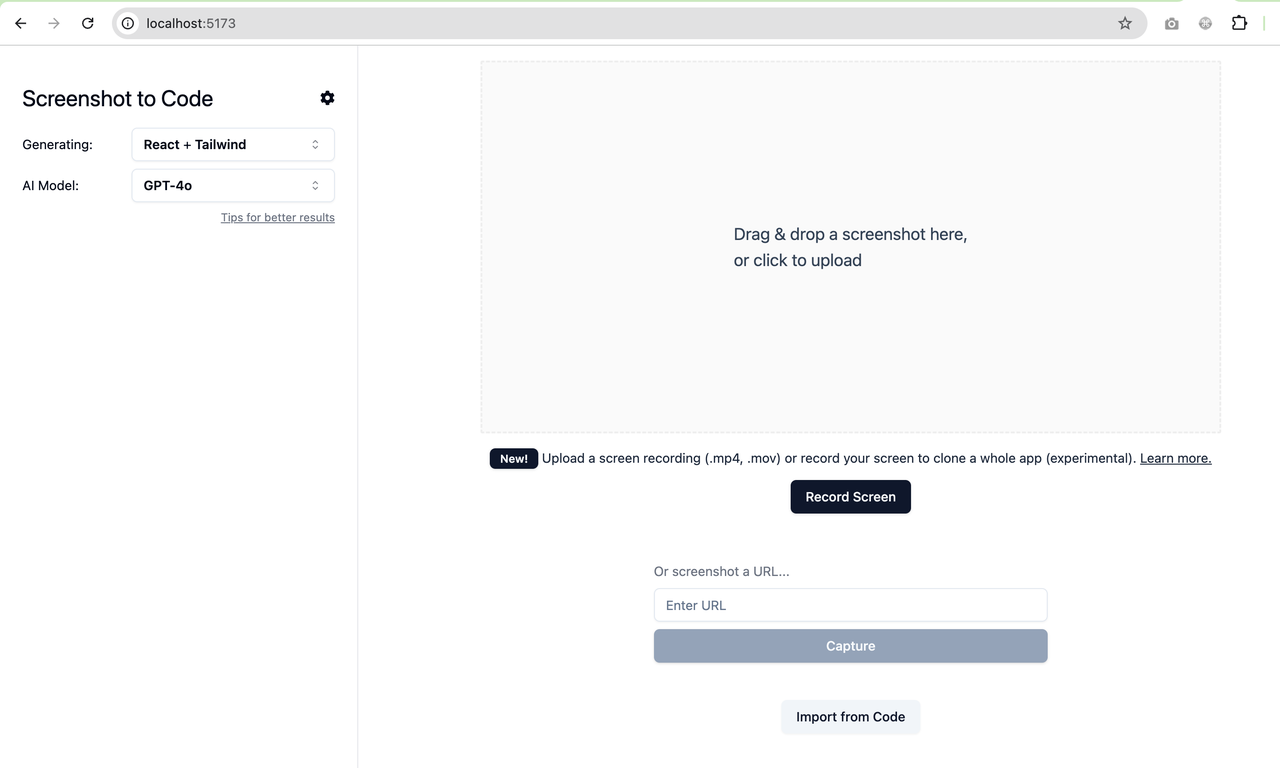
按照它给到的命令执行后,我成功地启动了项目:

只需5分钟,水灵灵地实现网站复刻!_网页设计_05

但项目只支持 GPT 和 Claude 的 API,这些 API 都要收费,我只想用免费的 Gemini 模型,要怎么修改呢?


使用编程助手增加 Gemini 模型

首先,我找到模型配置的代码 model.ts,当我在注释上写了需要增加 Gemini 模型后,编程助手立刻就帮我生成了代码,我只需要按下 TAB 键采纳即可。

只需5分钟,水灵灵地实现网站复刻!_ai_06

只需5分钟,水灵灵地实现网站复刻!_ai_07

接着在 backend/.envbackend/config.py 增加 Gemini 的 API KEY:

#.env增加key
GEMINI_API_KEY=xxxxxx

#config.py增加获取key
GEMINI_API_KEY = os.environ.get("GEMINI_API_KEY", None)
  • 1.
  • 2.
  • 3.
  • 4.
  • 5.

然后可以在  Llm.py 中增加 Gemini 模型以及调用 Gemini 的代码。这时我发现有一个 stream_claude_response_native  方法,看起来是在调用 Claude,我们让豆包MarsCode 编程助手解释一下:

只需5分钟,水灵灵地实现网站复刻!_ai_08

通过豆包MarsCode 编程助手的解释,确认是在调用 Claude。那我们需要增加调用 Gemini 的代码。编写代码过程中,通过编程助手提供的代码补全功能,效率获得了显著的提升。

class Llm(Enum):
    GPT_4_VISION = "gpt-4-vision-preview"
    GPT_4_TURBO_2024_04_09 = "gpt-4-turbo-2024-04-09"
    GPT_4O_2024_05_13 = "gpt-4o-2024-05-13"
    CLAUDE_3_SONNET = "claude-3-sonnet-20240229"
    CLAUDE_3_OPUS = "claude-3-opus-20240229"
    CLAUDE_3_HAIKU = "claude-3-haiku-20240307"
    CLAUDE_3_5_SONNET_2024_06_20 = "claude-3-5-sonnet-20240620"
    //新增gemini
    GEMINI_1_5_PRO_LATEST = "gemini-1.5-pro-latest"
    
    
async def stream_gemini_response(
    messages: List[ChatCompletionMessageParam],
    api_key: str,
    callback: Callable[[str], Awaitable[None]],
) -> str:
  genai.configure(api_key=api_key)
  
  generation_config = genai.GenerationConfig(
    temperature = 0.0
  )
  model = genai.GenerativeModel(
    model_name = "gemini-1.5-pro-latest",
    generation_config = generation_config
  )
  contents = parse_openai_to_gemini_prompt(messages);
  
  response = model.generate_content(
    contents = contents,
    #Support streaming
    stream = True,
   )
   
  for chunk in response:
    content = chunk.text or ""
    await callback(content)

  if not response:
    raise Exception("No HTML response found in AI response")
  else:
    return response.text;

def parse_openai_to_gemini_prompt(prompts):
    messages = []
    for prompt in prompts:
        message = {}
        message['role'] = prompt['role']
        if prompt['role'] == 'system':
            message['role'] = 'user'
        if prompt['role'] == 'assistant':
            message['role'] = 'model'
        message['parts'] = []
        content = prompt['content']
        if isinstance(content, list):
            for content in prompt['content']:
                part = {}
                if content['type'] == 'image_url':
                    base64 = content['image_url']['url']
                    part['inline_data'] = {
                        'data': base64.split(",")[1],
                        'mime_type': base64.split(";")[0].split(":")[1]
                    }
                elif content['type'] == 'text':
                    part['text'] = content['text']
                message['parts'].append(part)
        else:
            message['parts'] = [content]
        messages.append(message)
    return messages
  • 1.
  • 2.
  • 3.
  • 4.
  • 5.
  • 6.
  • 7.
  • 8.
  • 9.
  • 10.
  • 11.
  • 12.
  • 13.
  • 14.
  • 15.
  • 16.
  • 17.
  • 18.
  • 19.
  • 20.
  • 21.
  • 22.
  • 23.
  • 24.
  • 25.
  • 26.
  • 27.
  • 28.
  • 29.
  • 30.
  • 31.
  • 32.
  • 33.
  • 34.
  • 35.
  • 36.
  • 37.
  • 38.
  • 39.
  • 40.
  • 41.
  • 42.
  • 43.
  • 44.
  • 45.
  • 46.
  • 47.
  • 48.
  • 49.
  • 50.
  • 51.
  • 52.
  • 53.
  • 54.
  • 55.
  • 56.
  • 57.
  • 58.
  • 59.
  • 60.
  • 61.
  • 62.
  • 63.
  • 64.
  • 65.
  • 66.
  • 67.
  • 68.
  • 69.
  • 70.

写完代码之后,我们可以使用【注释代码】功能给代码加上注释,让代码更加规范:

只需5分钟,水灵灵地实现网站复刻!_计算机_09

之后,我们还需要在 generate_code 增加调用前面写的 Gemini 方法:

if validated_input_mode == "video":
                if not anthropic_api_key:
                    await throw_error(
                        "Video only works with Anthropic models. No Anthropic API key found. Please add the environment variable ANTHROPIC_API_KEY to backend/.env or in the settings dialog"
                    )
                    raise Exception("No Anthropic key")

                completion = await stream_claude_response_native(
                    system_prompt=VIDEO_PROMPT,
                    messages=prompt_messages,  # type: ignore
                    api_key=anthropic_api_key,
                    callback=lambda x: process_chunk(x),
                    model=Llm.CLAUDE_3_OPUS,
                    include_thinking=True,
                )
                exact_llm_version = Llm.CLAUDE_3_OPUS
            elif (
                code_generation_model == Llm.CLAUDE_3_SONNET
                or code_generation_model == Llm.CLAUDE_3_5_SONNET_2024_06_20
            ):
                if not anthropic_api_key:
                    await throw_error(
                        "No Anthropic API key found. Please add the environment variable ANTHROPIC_API_KEY to backend/.env or in the settings dialog"
                    )
                    raise Exception("No Anthropic key")

                completion = await stream_claude_response(
                    prompt_messages,  # type: ignore
                    api_key=anthropic_api_key,
                    callback=lambda x: process_chunk(x),
                    model=code_generation_model,
                )
                exact_llm_version = code_generation_model
            # 增加调用gemini
            elif (           
                code_generation_model == Llm.GEMINI_1_5_PRO_LATEST
            ):
                if not GEMINI_API_KEY:
                    await throw_error(
                        "No GEMINI API key found. Please add the environment variable ANTHROPIC_API_KEY to backend/.env or in the settings dialog"
                    )
                    raise Exception("No GEMINI key")

                completion = await stream_gemini_response(
                    prompt_messages,  # type: ignore
                    api_key=GEMINI_API_KEY,
                    callback=lambda x: process_chunk(x),
                )
                exact_llm_version = code_generation_model
            
            else:
                completion = await stream_openai_response(
                    prompt_messages,  # type: ignore
                    api_key=openai_api_key,
                    base_url=openai_base_url,
                    callback=lambda x: process_chunk(x),
                    model=code_generation_model,
                )
                exact_llm_version = code_generation_model
  • 1.
  • 2.
  • 3.
  • 4.
  • 5.
  • 6.
  • 7.
  • 8.
  • 9.
  • 10.
  • 11.
  • 12.
  • 13.
  • 14.
  • 15.
  • 16.
  • 17.
  • 18.
  • 19.
  • 20.
  • 21.
  • 22.
  • 23.
  • 24.
  • 25.
  • 26.
  • 27.
  • 28.
  • 29.
  • 30.
  • 31.
  • 32.
  • 33.
  • 34.
  • 35.
  • 36.
  • 37.
  • 38.
  • 39.
  • 40.
  • 41.
  • 42.
  • 43.
  • 44.
  • 45.
  • 46.
  • 47.
  • 48.
  • 49.
  • 50.
  • 51.
  • 52.
  • 53.
  • 54.
  • 55.
  • 56.
  • 57.
  • 58.
  • 59.

最后安装 Gemini SDK:

cd backend
poetry add google-generativeai
  • 1.
  • 2.

效果呈现

改完所有代码再启动项目后,就可以看到已经有 Gemini 模型啦,让我们来试试效果:

我们上传豆包MarsCode 官网截图,点击生成后,右侧即为 AI 生成的效果,可以看到还原度还不错。

只需5分钟,水灵灵地实现网站复刻!_计算机_10

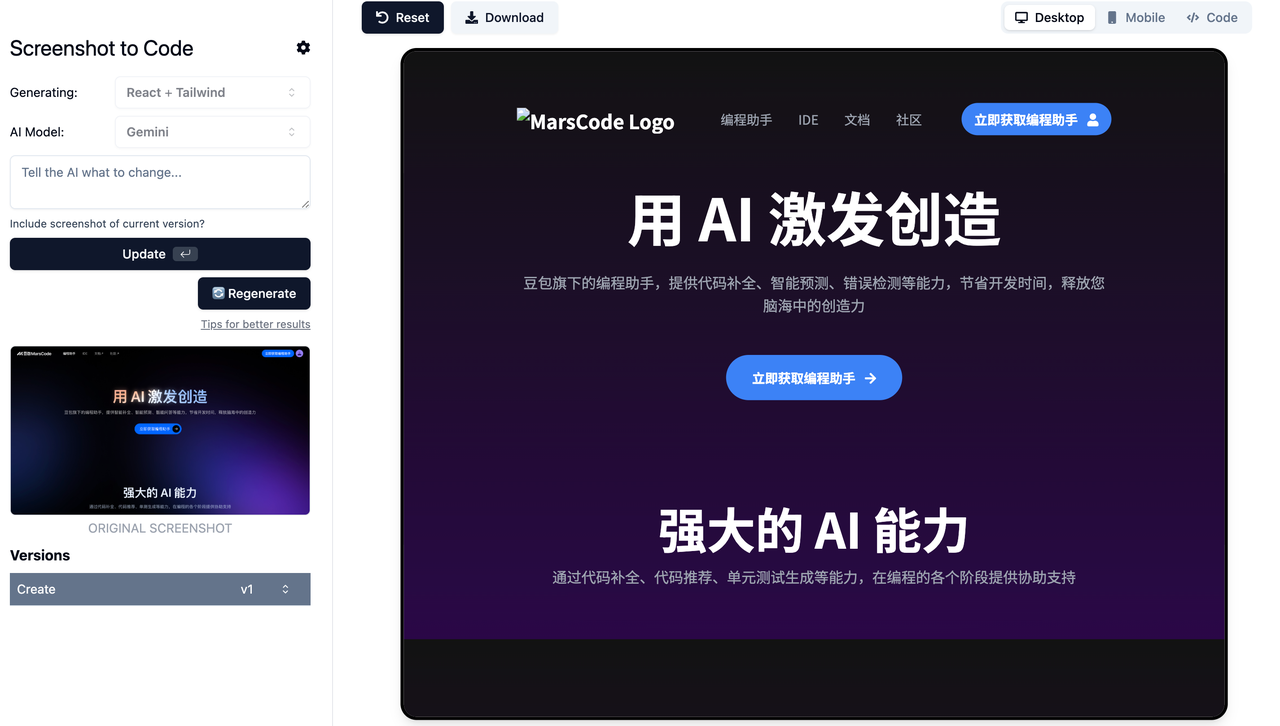
由于自动生成的字体没有渐变色的效果,我们可以通过给 AI 提要求,增加渐变色效果,可以明显看到,在渐变色字体的设计下页面的视觉效果更加高级了!

只需5分钟,水灵灵地实现网站复刻!_计算机_11

 豆包MarsCode 编程助手的帮助下,我们在项目上增加了免费了 Gemini 模型。有了它,项目开发更加高效便捷了,官网复刻,轻松拿下!

大家赶快来尝试一下吧!