


一、引入Setup
1、Person.Vue
与Vue3编写简单的App组件(二) 中的区别是:取消data、methods等方法,而是将数据和方法定义全部放进setup中。
<template>
    <div class="person">
        <h1>姓名:{{name}}</h1>
        <h1>年龄:{{age}}</h1>
        <button :onclick="changeName">修改姓名</button>
        <button :onclick="changeAge">修改年龄</button>
        <button :onclick="showTel">查看电话</button>
    </div>


</template>

<script lang="ts">
    export default {
        name: 'Person',
        setup() {
            console.log(this) //setup中的this是undefined,vue3中弱化了this
            let name = "Maple" //变量还不是响应式,所以变量值变更并不会使页面发生同步变化
            let age = 28
            let tel = 13943232232

            function changeName() {//注意:这样修改,虽然name值确实修改了,但页面不会有变化(下同)
                name = "Kelly" //此时Kelly
            }

            function changeAge() {
                age += 1
            }

            function showTel() {
                alert(tel)
            }
            // 需要返回,template中才能够读取到数据
            return { name, age, tel, changeName, changeAge, showTel }
        }
    }
</script>

<style scoped>
    .person {
        background-color: skyblue;
        box-shadow: 0 0 10px;
        border-radius: 10px;
        padding: 20px;
    }

    button {
        margin: 0 50px;
    }
</style>
2、App.Vue
<template>
    <!-- 写html -->
    <h1>我是Maple:</h1>
    <div class="app">
        <Person />
    </div>

</template>

<script lang="ts">

    import Person from './components/Person.vue'
    // 写js或者ts
    export default {
        name: 'App', //组件名
        components: { Person }
    }
</script>

<style>
    /* 写样式 */
    .app {
        background-color: #ddd;
        box-shadow: 0 0 10px;
        border-radius: 10px;
        padding: 20px;
    }
</style>
3、页面效果
 注意:此时`修改姓名`和`修改年龄`按钮并不会生效,因为数据还不是响应式的。
二、Setup语法糖
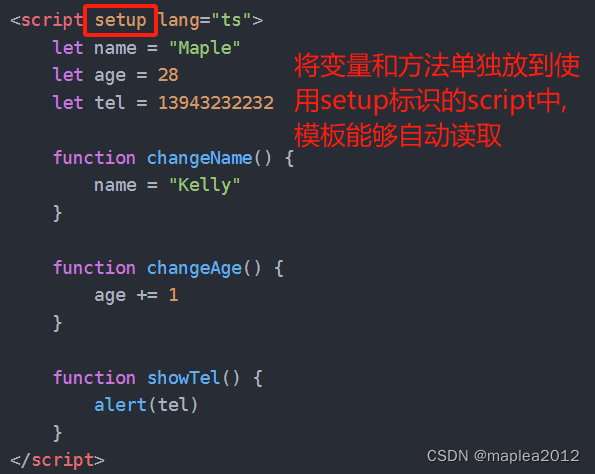
以上方式中,在Setup中定义的变量和方法需要return出去,才能够被模板引用,如果变量和方法过多,就会比较繁琐,由此引入setup语法糖。
Person.vue文件完整源码
<template>
    <div class="person">
        <h1>姓名:{{name}}</h1>
        <h1>年龄:{{age}}</h1>
        <button :onclick="changeName">修改姓名</button>
        <button :onclick="changeAge">修改年龄</button>
        <button :onclick="showTel">查看电话</button>
    </div>
</template>

<script lang="ts">
    export default {
        name: 'Person'
    }
</script>

<script setup lang="ts">
    let name = "Maple"
    let age = 28
    let tel = 13943232232

    function changeName() {
        name = "Kelly"
    }

    function changeAge() {
        age += 1
    }

    function showTel() {
        alert(tel)
    }
</script>

<style scoped>
    .person {
        background-color: skyblue;
        box-shadow: 0 0 10px;
        border-radius: 10px;
        padding: 20px;
    }

    button {
        margin: 0 50px;
    }
</style>
三、ref和reactive实现响应式数据
1、ref基本类型响应式数据使用
适用对象:基本数据类型,使用步骤如下:
(1) 引入ref
import {ref} from 'vue'(2) 使用ref修饰数据
let name = ref('Maple')(3) 调用变量并修改数据
# 注意要加value,才能够获取变量(被包装之后的)对应的值
name.value == 'Maple'
Person.vue完整代码如下:
<template>
    <div class="person">
        <h1>姓名:{{name}}</h1>
        <h1>年龄:{{age}}</h1>
        <button :onclick="changeName">修改姓名</button>
        <button :onclick="changeAge">修改年龄</button>
        <button :onclick="showTel">查看电话</button>
    </div>
</template>

<script lang="ts">
    export default {
        name: 'Person'
    }
</script>

<script setup lang="ts">
    //1. 首先从vue引入ref
    import { ref } from 'vue'

    //2.然后使用ref
    let name = ref('Maple')
    let age = ref(28)
    let tel = 13943232232

    function changeName() {
        //3.注意要加value,才能够获取变量(被包装之后的)对应的值
        if (name.value == 'Maple') {
            name.value = 'Kelly'
        } else {
            name.value = 'Maple'
        }

    }

    function changeAge() {
        age.value += 1
    }

    function showTel() {
        alert(tel)
    }
</script>

<style scoped>
    .person {
        background-color: skyblue;
        box-shadow: 0 0 10px;
        border-radius: 10px;
        padding: 20px;
    }

    button {
        margin: 0 50px;
    }
</style>
2、ref对象类型响应式数据使用
适用对象:ref同时支持对象类型的响应式
<template>
    <div class="person">
        <h1>电脑信息:</h1>
        <h1>电脑品牌:{{computer.brand}}</h1>
        <h1>电脑价格:{{computer.price}}</h1>

        <h1>学生信息:</h1>
        <ul>
            <li v-for="item in students" :key="item.name">{{item.age}}</li>
        </ul>
        <!-- 修改电脑价格 -->
        <button :onclick="changePrice">修改电脑价格</button>
        <!-- 修改第一个学生的年龄 -->
        <button :onclick="changeAge">修改学生年龄</button>

    </div>
</template>

<script lang="ts">
    export default {
        name: 'Person'
    }
</script>

<script setup lang="ts">
    //1. 首先从vue引入ref
    import { ref } from 'vue'

    //2.然后使用ref
    let computer = ref({ brand: 'hp', price: 5500 })
    let students = ref([
        { name: 'Maple', age: 30 },
        { name: 'Kelly', age: 35 },
        { name: 'Max', age: 12 }
    ])


    function changePrice() {
        //需要通过value取值
        computer.value.price = 5000
    }

    function changeAge() {
        //需要通过value取值
        students.value[0].age = 44
    }


</script>

<style scoped>
    .person {
        background-color: skyblue;
        box-shadow: 0 0 10px;
        border-radius: 10px;
        padding: 20px;
    }

    button {
        margin: 0 50px;
    }
</style>
3、reactive使用
适用对象:只支持对象类型数据,使用步骤如下:
(1) 引入reactive
import { reactive } from 'vue'(2) 使用reactive修饰数据
let computer = reactive({ brand: 'hp', price: 5500 })(3) 修改数据
computer.price = 5000Person.vue文件完整源码
<template>
    <div class="person">
        <h1>电脑品牌:{{computer.brand}}</h1>
        <h1>电脑价格:{{computer.price}}</h1>
        <ul>
            <li v-for="item in students" :key="item.name">{{item.age}}</li>
        </ul>
        <!-- 修改电脑价格 -->
        <button :onclick="changePrice">修改电脑价格</button>
        <!-- 修改第一个学生的年龄 -->
        <button :onclick="changeAge">修改学生年龄</button>
        <!-- 修改歌手姓名 -->
        <button :onclick="ChangeSinger">修改歌手姓名</button>
    </div>
</template>

<script lang="ts">
    export default {
        name: 'Person'
    }
</script>

<script setup lang="ts">
    //1. 首先从vue引入ref
    import { reactive } from 'vue'

    //2.然后使用ref
    let computer = reactive({ brand: 'hp', price: 5500 })
    let students = reactive([
        { name: 'Maple', age: 30 },
        { name: 'Kelly', age: 35 },
        { name: 'Max', age: 12 }
    ])

    let singer = {
        a: {
            b: {
                c: 'Jay'
            }
        }
    }


    function changePrice() {
        computer.price = 5000
    }

    function changeAge() {
        students[0].age = 44
    }

    function ChangeSinger() {
        singer.a.b.c = '毛不易'
    }
</script>

<style scoped>
    .person {
        background-color: skyblue;
        box-shadow: 0 0 10px;
        border-radius: 10px;
        padding: 20px;
    }

    button {
        margin: 0 50px;
    }
</style>
4、ref和reactive的区别
(1)ref支持基本类型和对象类型数据;reactive仅支持对象类型数据
(2)ref获取变量值需要使用.value,而reactive直接通过变量获取
(3)针对对象的一次性修改,两者方式不一样,具体可参照如下案例:
<template>
    <div class="person">
        <h1>电脑信息:</h1>
        <h1>电脑品牌:{{computer.brand}}</h1>
        <h1>电脑价格:{{computer.price}}</h1>

        <h1>学生信息:</h1>
        <ul>
            <li v-for="item in students" :key="item.name">{{item.name}}:{{item.age}}</li>
        </ul>
        <!-- 修改电脑 -->
        <button :onclick="changeComputer">修改电脑</button>
        <!-- 修改学生 -->
        <button :onclick="changeStudents">修改学生</button>

    </div>
</template>

<script lang="ts">
    export default {
        name: 'Person'
    }
</script>

<script setup lang="ts">
    //1. 首先从vue引入ref
    import { ref, reactive } from 'vue'

    //2.然后使用ref和reactive
    let computer = ref({ brand: 'hp', price: 5500 })
    let students = reactive([
        { name: 'Maple', age: 30 },
        { name: 'Kelly', age: 35 },
        { name: 'Max', age: 12 }
    ])


    function changeComputer() {

        //ref修饰对象,可以通过以下方式直接替换computer
        computer.value = { brand: 'HTC', price: 600 }
    }

    function changeStudents() {
        // students = {name:'Jacky',age:50} //这么写页面不更新的
        // students = reactive({name:'Jacky',age:50}) //这么写页面不更新的,因为此时students已经是一个新对象

        // reactive 修饰对象,下面这个写法页面可以实现更新
        Object.assign(students, [{ name: 'Jacky', age: 50 }, { name: 'Kitty', age: 20 },
        { name: 'Lily', age: 22 }])
    }

</script>

<style scoped>
    .person {
        background-color: skyblue;
        box-shadow: 0 0 10px;
        border-radius: 10px;
        padding: 20px;
    }

    button {
        margin: 0 50px;
    }
</style>
5、to_refs和to_ref
<template>
    <div class="person">
        <h1>电脑信息:</h1>
        <h1>电脑品牌:{{computer.brand}}</h1>
        <h1>电脑价格:{{computer.price}}</h1>

        <h1>个体信息</h1>
        <h1>姓名:{{person.name}}</h1>
        <h1>年龄{{person.age}}</h1>

        <!-- 修改电脑 -->
        <button :onclick="changeComputer">修改电脑</button>
        <!-- 修改姓名 -->
        <button :onclick="changeName">修改学生姓名</button>


    </div>
</template>

<script lang="ts">
    export default {
        name: 'Person'
    }
</script>

<script setup lang="ts">
    //1. 首先从vue引入ref
    import { reactive, toRefs, toRef } from 'vue'

    //2.然后使用reactive
    let computer = reactive({ brand: 'hp', price: 5500 })

    // 使用toRefs从computer这个响应式对象中,解构出brand、price,且brand和price依然是响应式的
    // brand和price的值是ref类型,其value值指向的是computer.brand和computer.price
    let { brand, price } = toRefs(computer)
    let person = reactive({ name: 'maple', age: 30 })

    // 使用toRef从person这个响应式对象中,解构出name,且name依然是响应式的
    let name = toRef(person, 'name')


    // 修改电脑信息
    function changeComputer() {
        brand.value = 'HTC'
        price.value = '8000'
    }

    // 修改个人姓名
    function changeName() {
        name.value = 'Avery'
    }
</script>

<style scoped>
    .person {
        background-color: skyblue;
        box-shadow: 0 0 10px;
        border-radius: 10px;
        padding: 20px;
    }

    button {
        margin: 0 50px;
    }
</style>


 5161
5161


 被折叠的 条评论
为什么被折叠?
被折叠的 条评论
为什么被折叠?
 到【灌水乐园】发言


