


 本文详细介绍如何在Ubuntu服务器上安装并配置JupyterHub,包括Anaconda、pip、Node.js等依赖的安装过程,以及配置文件的修改和启动服务的方法。
服务器操作系统:Ubuntu server
最终效果(服务器上没有浏览器,在本地浏览器进入Jupyter):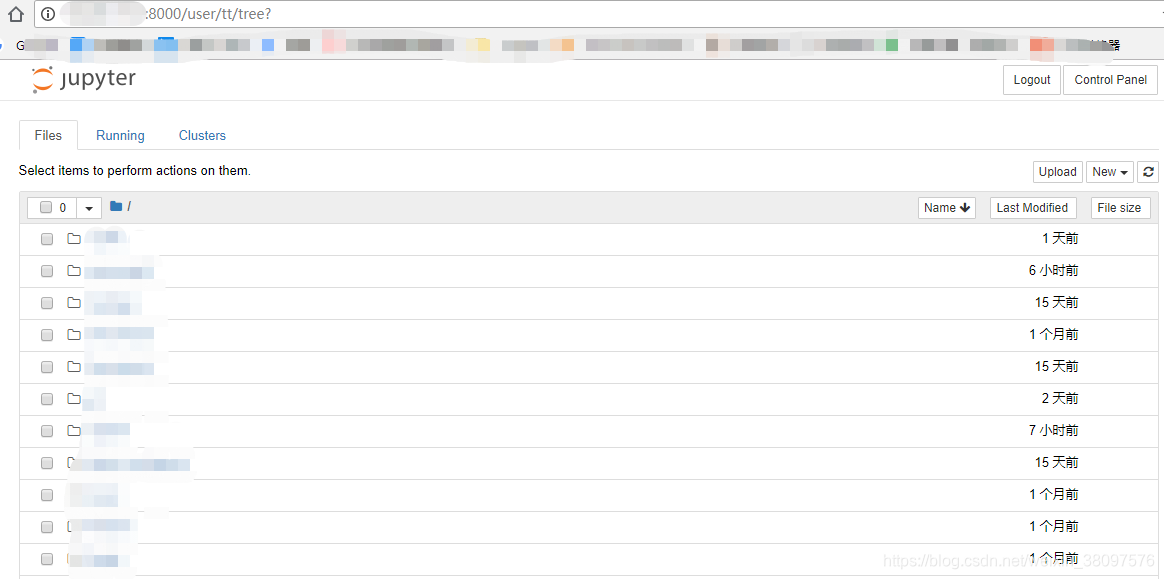
参考资料:
安装anaconda、pip、jupyterhub
-
1.wget https://repo.continuum.io/archive/Anaconda2-2018.12-Linux-x86_64.sh
bash Anaconda2-2018.12-Linux-x86_64.sh
source ~/.bashrc
上面三条命令依次执行,记得在执行安装命令(bash Anaconda2-2018.12-Linux-x86_64.sh)的过程中选择配置好环境变量

-
2.conda list
检测anaconda是否安装成功 -
3.sudo apt-get install python3-pip
安装python3
说明:使用conda也是可以安装 jupyterhub,奈何我执行“conda install -c conda-forge jupyterhub”后一直在那检测环境、转圈圈,我就放弃了,使用pip -
4.更新(可以跳过这一步;第5步可能会报错,报错了再回来,我就报错了):
sudo rm -fR /var/lib/apt/lists/*
sudo mkdir /var/lib/apt/lists/partial
sudo apt-get update更新的这三步操作参考的资料:安装nodejs环境时遇到的那些坑
-
5.apt-get install nodejs
-
6.apt-get install npm
-
7.sudo npm install -g configurable-http-proxy

-
8.python3 -m pip install jupyterhub
-
9.上面那步如果报错:
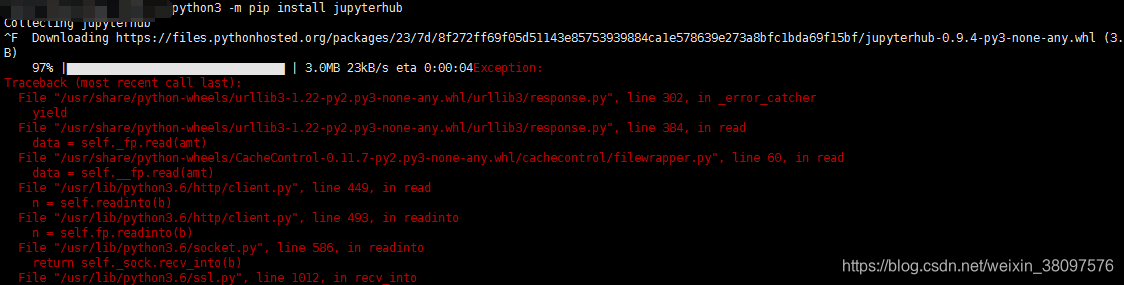 需要对pip做些操作,参考这篇博客即可解决(按照博客里的步骤走就可以,亲测有效):pip install xxxx报错(一大堆红色exception)【解决】
 -
-10. python3 -m pip install jupyterhub
(耗时20多分钟大概)
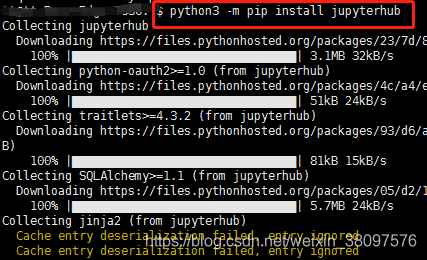
安装结果:
Successfully built python-oauth2 SQLAlchemy prometheus-client alembic tornado Mako python-editor
Installing collected packages: python-oauth2, ipython-genutils, decorator, six, traitlets, SQLAlchemy, MarkupSafe, jinja2, python-dateutil, prometheus-client, Mako, python-editor, alembic, tornado, pamela, idna, chardet, urllib3, certifi, requests, async-generator, jupyterhub
Successfully installed Mako-1.0.7 MarkupSafe-1.1.0 SQLAlchemy-1.2.16 alembic-1.0.6 async-generator-1.10 certifi-2018.11.29 chardet-3.0.4 decorator-4.3.0 idna-2.8 ipython-genutils-0.2.0 jinja2-2.10 jupyterhub-0.9.4 pamela-0.3.0 prometheus-client-0.5.0 python-dateutil-2.7.5 python-editor-1.0.3 python-oauth2-1.1.0 requests-2.21.0 six-1.12.0 tornado-5.1.1 traitlets-4.3.2 urllib3-1.24.1

-
-11. jupyterhub -h
检测jupyterhub安装是否成功
配置
- 12.jupyterhub --generate-config
生成配置文件

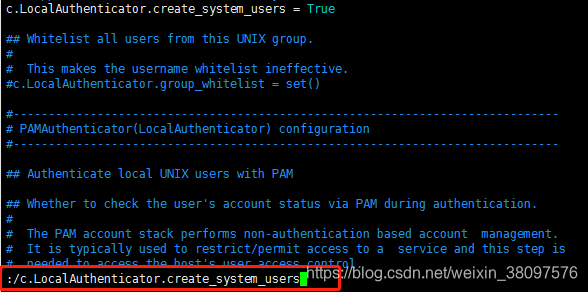
- 13.vim jupyterhub_config.py
参考:Jupyterhub安装流程
这里我就粘过来了:
c.JupyterHub.ip = ‘你的IP地址’
c.JupyterHub.port = 所使用的端口
c.PAMAuthenticator.encoding = ‘utf8’
//白名单
c.Authenticator.whitelist = {‘jupyter1’, ‘jupyter2’, ‘jupyter3’}
//管理用户
c.LocalAuthenticator.create_system_users = True
c.Authenticator.admin_users = {‘jupyter1’}
c.Spawner.cmd=[‘jupyterhub-singleuser’]
c.JupyterHub.statsd_prefix = ‘jupyterhub’
小 tip:如果一个个修改找费劲的话,这样搜索,按回车即可定位(Esc+冒号+斜杠+要搜素的内容+回车):
-
14.jupyterhub --config=/etc/jupyterhub/jupyterhub.py --no-ssl
开启服务 -
15.测试
如果服务器上有浏览器,打开浏览器输入IP+jupyter端口(默认是8000,第13步也可以修改成其他端口),输入用户名+密码即可我是在本地Windows上测试的:
测试效果见本博客开始处


 被折叠的 条评论
为什么被折叠?
被折叠的 条评论
为什么被折叠?
 到【灌水乐园】发言


