


安装 git
- ssh 配置
生成: ssh-keygen -t rsa -C"you_email"
添加:ssh-add ~/.ssh/id_rsa
-username email
git config --global user.name "username"
git config --global user.email useremail@mail.com
安装 zsh
-安装命令:curl -L https://raw.github.com/robbyrussell/oh-my-zsh/master/tools/install.sh | sh
-设置默认使用zsh Mac终端神器zsh - 掘金
-插件 ()
新建文件夹 “~/.oh-my-zsh/myPlugins/" 并切到这里
git clone https://github.com/zsh-users/zsh-syntax-highlighting.git
git clone https://github.com/zsh-users/zsh-autosuggestion
-.zshrc
ZSH_THEME="ys"
source  ~/.bash_profile
source $ZSH/oh-my-zsh.sh
source ~/.oh-my-zsh/myPlugins/zsh-syntax-highlighting/zsh-syntax-highlighting.zsh
source ~/.oh-my-zsh/myPlugins/zsh-autosuggestions/zsh-autosuggestions.zsh
plugins=(
    git
    zsh-syntax-highlighting
    zsh-autosuggestions
)


# Load Angular CLI autocompletion.
# source <(ng completion script)


# >>> conda initialize >>>
# !! Contents within this block are managed by 'conda init' !!
__conda_setup="$('/opt/homebrew/Caskroom/miniconda/base/bin/conda' 'shell.bash' 'hook' 2> /dev/null)"
if [ $? -eq 0 ]; then
    eval "$__conda_setup"
else
    if [ -f "/opt/homebrew/Caskroom/miniconda/base/etc/profile.d/conda.sh" ]; then
        . "/opt/homebrew/Caskroom/miniconda/base/etc/profile.d/conda.sh"
    else
        export PATH="/opt/homebrew/Caskroom/miniconda/base/bin:$PATH"
    fi
fi
unset __conda_setup
# <<< conda initialize <<<


conda activate py39


# pnpm
export PNPM_HOME="/Users/chencyn/Library/pnpm"
case ":$PATH:" in
  *":$PNPM_HOME:"*) ;;
  *) export PATH="$PNPM_HOME:$PATH" ;;
esac
# pnpm end
-.bash_profile
[[ -s "$HOME/.profile" ]] && source "$HOME/.profile"


# java
JAVA_HOME=/Library/Java/JavaVirtualMachines/jdk-17.jdk/Contents/Home/
CLASSPAHT=.:$JAVA_HOME/lib/dt.jar:$JAVA_HOME/lib/tools.jar
PATH=$JAVA_HOME/bin:$PATH:
export JAVA_HOME
export CLASSPATH
export PATH


# neil
export PUPPETEER_SKIP_CHROMIUM_DOWNLOAD='true'
export PUPPETEER_SKIP_DOWNLOAD='true'

# python
export PATH=$PATH:/Users/chencyn/software
#将"Google\ Chrome"添加到环境变量中
export PATH="/Applications/Google Chrome.app/Contents/MacOS":$PATH
#给命令"Google\ Chrome"起别名chrome
alias chrome="Google\ Chrome"

# mongdb
export PATH=$PATH:/opt/homebrew/Cellar/mongodb-community/6.0.6/bin

# brew
export PATH=$PATH:/opt/homebrew/bin
export PATH=$PATH:/opt/homebrew/sbin
export HOMEBREW_NO_AUTO_UPDATE=true


# python
export PATH=$PATH:/opt/homebrew/Caskroom/miniconda/base/bin/python3

# >>> zsh
export ZSH="/Users/chencyn/.oh-my-zsh"


# >>> flutter
export PATH=$PATH:/Users/chencyn/software/flutter-macos/bin


# >>> vscose
alias code="/Applications/Visual\ Studio\ Code.app//Contents/Resources/app/bin/code"


export NVM_DIR="$HOME/.nvm"
[ -s "$NVM_DIR/nvm.sh" ] && \. "$NVM_DIR/nvm.sh"  # This loads nvm
[ -s "$NVM_DIR/bash_completion" ] && \. "$NVM_DIR/bash_completion"  # This loads nvm bash_completion

# fix: unable to get local issuer certificate
export NODE_TLS_REJECT_UNAUTHORIZED=0

# >>> conda initialize >>>
# !! Contents within this block are managed by 'conda init' !!
__conda_setup="$('/opt/homebrew/Caskroom/miniconda/base/bin/conda' 'shell.bash' 'hook' 2> /dev/null)"
if [ $? -eq 0 ]; then
    eval "$__conda_setup"
else
    if [ -f "/opt/homebrew/Caskroom/miniconda/base/etc/profile.d/conda.sh" ]; then
        . "/opt/homebrew/Caskroom/miniconda/base/etc/profile.d/conda.sh"
    else
        export PATH="/opt/homebrew/Caskroom/miniconda/base/bin:$PATH"
    fi
fi
unset __conda_setup
# <<< conda initialize <<<
安装brew
安装指南:The Missing Package Manager for macOS (or Linux) — Homebrew
- 必备软件
brew install nginx
brew install minicoda (Miniconda安装及使用--小白上路 - 知乎)
brew install wget
-修改nginx 默认的nginx.conf位置。因为默认的位置藏得有点深,每次更改不好找。
// 在用户文件夹下新建一个用来放nginx相关的东西的文件夹,比如~/software/nginx

// 1、
 mv /opt/homebrew/etc/nginx/nginx.conf /Users/xxx/software/nginx

//2
 ln -s /Users/xxx/software/nginx/nginx.conf /opt/homebrew/etc/nginx/
- 权限
cd /opt
sudo chmod -R 777 ./homebrew
-conda
// 之前
$ which python3
/usr/bin/python3

$ which conda (结果1)

$ /path结果1 shell.bash hook >> ~.bash_profile

$ source ~/.bash_profile

$ conda create -n py39 python=3.9.6

$ conda activate py39

// 然后
$ which python3
/opt/homebrew/Caskroom/miniconda/base/envs/py39/bin/python3

// 然后就pip3 install 就没有这样那样的问题了
安装nvm
curl -o- https://raw.githubusercontent.com/nvm-sh/nvm/v0.39.2/install.sh | bash
- 全局插件必备
npm install -g @angular/cli http-server @vue/cli create-react-app conventional-changelog-cli pm2 sinopia
- 设置一下
npm config set strict-ssl false
VScode
-settings.json
{
    //
    "editor.detectIndentation": false,
    "editor.renderWhitespace": "none",
    "editor.fontSize": 14,
    "editor.fontFamily": "'Courier New', Monaco, monospace, Menlo ",
    "editor.tabSize": 2,
    //这里是系统界面字体大小
    "window.zoomLevel": 0.7,
    "workbench.iconTheme": "vscode-icons",
    "js/ts.implicitProjectConfig.strictNullChecks": true,
    "js/ts.implicitProjectConfig.experimentalDecorators": true,
    // 取消自动格式化
    "editor.formatOnType": false,
    "editor.formatOnSave": false,
    "json.format.enable": false,
    "html.format.enable": false,
    "typescript.format.enable": false,
    "javascript.format.enable": false,
    "editor.suggestSelection": "first",
    "vsintellicode.modify.editor.suggestSelection": "automaticallyOverrodeDefaultValue",
    "workbench.editorAssociations": {
      "*.ipynb": "jupyter-notebook"
    },
    "notebook.cellToolbarLocation": {
      "default": "right",
      "jupyter-notebook": "left"
    },
    "vsicons.dontShowNewVersionMessage": true,
    // 同源策略
    "http.proxyAuthorization": "false",
    "git.autofetch": true,
    "[html]": {
      "editor.defaultFormatter": "esbenp.prettier-vscode"
    },
    "update.mode": "none",
    "breadcrumbs.enabled": false,
    "[typescript]": {
      "editor.defaultFormatter": "esbenp.prettier-vscode"
    },
    "typescript.updateImportsOnFileMove.enabled": "always",
    "javascript.updateImportsOnFileMove.enabled": "always",
    "[scss]": {
      "editor.defaultFormatter": "rvest.vs-code-prettier-eslint"
    }
}
-插件:
angualr files , angular language service, angulr support , auto close tag , auto import , git graph, git history, gitlens, html css support, html snippets, npm intellisense, open in browser, prettier, prettier eslint, tslint, to do hilight, vscode-icons.
macos 截屏设置
// 设置默认保存位置
defaults write com.apple.screencapture location /Users/xx/ScreenShot

// 设置名字
defaults write com.apple.screencapture name screen_shot

// 去掉日期后缀
defaults write com.apple.screencapture "include-date" 0

killall SystemUIServer
Python
requests, pillow , ImageHash , opencv-python
xlwt, xlrd, pygit2, py2app,
(opencv-python, https://www.geeksforgeeks.org/how-to-install-opencv-4-on-macos/)
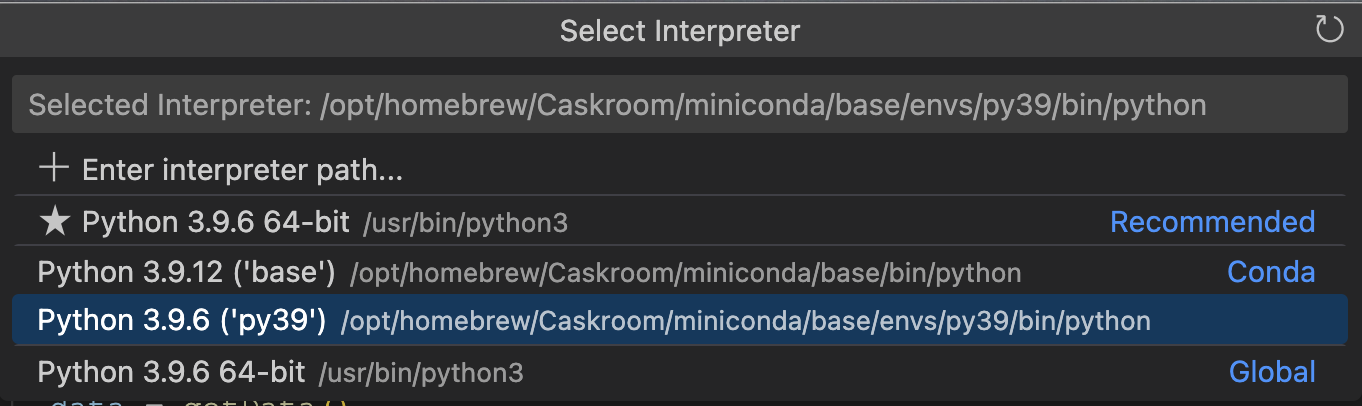
-vscode配置一下
选择一个python文件,然后会看到底部有python版本信息,点击它,接着在弹开的选项里面选正在用的正确的版本。
Maven
1、获取 apache-maven-xxx.zip
2、解压,然后 把文件夹的bin path 放到 系统path里面去
// .bash_profile
export PATH=$PATH:/xxx/apache-maven/bin
- 设置settings.json : 如果是公司内网的话


 648
648

 被折叠的 条评论
为什么被折叠?
被折叠的 条评论
为什么被折叠?
 到【灌水乐园】发言


