


1.安装依赖
sudo apt-get install -y git build-essential libpcre3 libpcre3-dev libssl-dev libtool autoconf apache2-dev libxml2-dev libcurl4-openssl-dev automake pkgconf
2.编译ModSecurity
-
由于ModSecurity for Nginx主分支上报告了几个不稳定性问题,目前正式推荐使用nginx_refactoring分支的最新版本。
-
下载Nginx的ModSecurity的nginx_refactoring分支:
cd /usr/src git clone -b nginx_refactoring https://github.com/SpiderLabs/ModSecurity.git -
编译ModSecurity
发现之前没用登root不太对:sudo -s先登上root
cd ModSecurity
 ./autogen.sh
 ./configure --enable-standalone-module --disable-mlogc
 make
 make install
3.编译Nginx
-
下载包
cd /usr/src wget https://nginx.org/download/nginx-1.10.3.tar.gz tar -zxvf nginx-1.10.3.tar.gz && rm -f nginx-1.10.3.tar.gz -
编译
cd nginx-1.10.3/ ./configure --user=www-data --group=www-data --add-module=/usr/src/ModSecurity/nginx/modsecurity --with-http_ssl_module make make install- 其中www-date为用户,www-data为用户组
-
配置用户`sed -i ‘s/#user nobody;/user vanlyy vanlyy;/’ /usr/local/nginx/conf/nginx.conf
-
为Nginx设置systemd单元文件
cat <<EOF>> /lib/systemd/system/nginx.service
[Service]
Type=forking
ExecStartPre=/usr/local/nginx/sbin/nginx -t -c /usr/local/nginx/conf/nginx.conf
ExecStart=/usr/local/nginx/sbin/nginx -c /usr/local/nginx/conf/nginx.conf
ExecReload=/usr/local/nginx/sbin/nginx -s reload
KillStop=/usr/local/nginx/sbin/nginx -s stop

KillMode=process
Restart=on-failure
RestartSec=42s

PrivateTmp=true
LimitNOFILE=200000

[Install]
WantedBy=multi-user.target
EOF
- 你可以按如下所示start/stop/restart Nginx :
systemctl start nginx.service
systemctl stop nginx.service
systemctl restart nginx.service
/usr/local/nginx/sbin/nginx -t检查安装情况:
4.配置ModSecurity和Nginx
-
配置nginx
vi /usr/local/nginx/conf/nginx.conf- 将http{}字段改为:
location / { ModSecurityEnabled on; ModSecurityConfig modsec_includes.conf; #proxy_pass http://localhost:8011; #proxy_read_timeout 180s; root html; index index.html index.htm; }- 注:此处是配置nginx的 web 反向代理需要配置##两行
-
配置ModSecuriy的OWASP核心规则
cat <<EOF>> /usr/local/nginx/conf/modsec_includes.conf- 输入:
include modsecurity.conf include owasp-modsecurity-crs/crs-setup.conf include owasp-modsecurity-crs/rules/*.conf EOF- 注意:上面的配置将应用owasp-modsecurity-crs/rules/目录中的所有OWASP ModSecurity核心规则,如果只希望应用选择性规则,则应删除,include owasp-modsecurity-crs/rules/*.conf 行
- 此处可以根据需求配置漏洞规则
-
导入ModSecurity配置文件:
cp /usr/src/ModSecurity/modsecurity.conf-recommended /usr/local/nginx/conf/modsecurity.conf cp /usr/src/ModSecurity/unicode.mapping /usr/local/nginx/conf/ -
修改 /usr/local/nginx/conf/modsecurity.conf 文件:
sed -i "s/SecRuleEngine DetectionOnly/SecRuleEngine On/" /usr/local/nginx/conf/modsecurity.conf
-
添加OWASP ModSecurity CRS核心规则集文件:
cd /usr/local/nginx/conf
git clone https://github.com/SpiderLabs/owasp-modsecurity-crs.git
cd owasp-modsecurity-crs
mv crs-setup.conf.example crs-setup.conf
cd rules
mv REQUEST-900-EXCLUSION-RULES-BEFORE-CRS.conf.example REQUEST-900-EXCLUSION-RULES-BEFORE-CRS.conf
mv RESPONSE-999-EXCLUSION-RULES-AFTER-CRS.conf.example RESPONSE-999-EXCLUSION-RULES-AFTER-CRS.conf
6.配置命令行启动
- 按照上文配置,但是却
-


journalctl -f -u nginx.service
7.测试Nginx
-
启动Nginx :
systemctl start nginx.service -
打开端口80以允许外部访问:
ufw allow OpenSSH
ufw allow 80
ufw default deny
ufw enable
-
这几句在哪里配置?:答:先安装ufw
apt-get install ufw即可 -
简单SQL注入:
curl 'http://localhost/?id=1 AND 1=1' -I -
使用grep按如下方式获取错误消息:
grep error /usr/local/nginx/logs/error.log -
输出应包括几个类似于以下的错误消息:
-
为何我返回的报文是正常的,但是查log日志确实捕获了,感觉是哪里没有设置的问题。。。
2017/02/15 14:07:54 [error] 10776#0: [client 104.20.23.240] ModSecurity: Warning. detected XSS using libinjection. [file"/usr/local/nginx/conf/owasp-modsecurity-crs/rules/REQUEST-941-APPLICATION-ATTACK-XSS.conf"] [line"56"] [id"941100"] [rev"2"] [msg"XSS Attack Detected via libinjection"] [data"Matched Data: found within ARGS:param: x22><script>alert(1);</script>"] [severity"CRITICAL"] [ver"OWASP_CRS/3.0.0"] [maturity"1"] [accuracy"9"] [tag"application-multi"] [tag"language-multi"] [tag"platform-multi"] [tag"attack-xss"] [tag"OWASP_CRS/WEB_ATTACK/XSS"] [tag"WASCTC/WASC-8"] [tag"WASCTC/WASC-22"] [tag"OWASP_TOP_10/A3"] [tag"OWASP_AppSensor/IE1"] [tag"CAPEC-242"] [hostname""] [uri"/index.html"] [unique_id"ATAcAcAkucAchGAcPLAcAcAY"]
遇到问题
遇到问题git clone 过慢
- git clone特别慢是因为github.global.ssl.fastly.net域名被限制了。只要找到这个域名对应的ip地址,然后在hosts文件中加上ip–>域名的映射,刷新DNS缓存便可。
- 查找域名对应的ip地址,并修改hosts文件:
nslookup github.global.ssl.fastly.Net;nslookup github.com 
- 修改hosts:
sudo vim /etc/hosts - 添加上面的域名和IP

- 重启DNS
/etc/init.d/networking restart 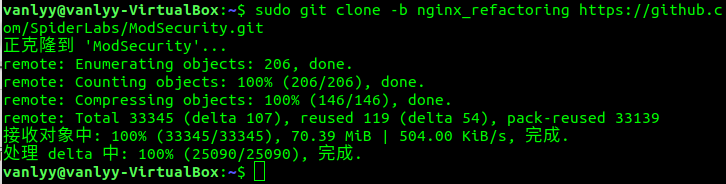
- 速度快了,如果不变的话 ,重启一个终端
- 查找域名对应的ip地址,并修改hosts文件:
github.com cannot be resolve
- 通过
nslookup github.com查看ip,然后去vim /etc/hosts,修改对应的ip
Makefile遇到recipe for target ‘objs/src/core/ngx_murmurhash.o’ failed
第三步 编译ModSecurity时
- 遇到问题:
recipe for target 'objs/src/core/ngx_murmurhash.o' failed - 解决:找到对应的Makefile文件,将gcc参数中的-Werror去掉。

- 去objs/Makefile:

- 改完make 成功
遇到:安装libssl-dev的依赖问题
https://blog.csdn.net/Javin_L/article/details/94740996
下列软件包有未满足的依赖关系:
libssl-dev : 依赖: libssl1.0.0 (= 1.0.1f-1ubuntu2.18) 但是 1.0.1f-1ubuntu9.8 正要被安装
推荐: libssl-doc 但是它将不会被安装
E: 无法修正错误,因为您要求某些软件包保持现状,就是它们破坏了软件包间的依赖关系。
- 原因: A依赖B,要安装的C也依赖B,但是依赖B的版本不同,导致发生了冲突,所以需要让依赖的包,降级到一个合适的版本
- 使用aptitude软件包管理器
$sudo apt-get install aptitude - 降级:
$ sudo aptitude install libssl-dev
列“新”软件包将被安装。
  libssl-dev{b} libssl-doc{a}
0 个软件包被升级,新安装 2 个, 0 个将被删除, 同时 74 个将不升级。
需要获取 2,036 kB 的存档。 解包后将要使用 7,819 kB。
下列软件包存在未满足的依赖关系:
libssl-dev : 依赖: libssl1.0.0 (= 1.0.1f-1ubuntu2.18) 但是 1.0.1f-1ubuntu9.8 已安装。
下列动作将解决这些依赖关系:

     保持 下列软件包于其当前版本:
1)     libssl-dev [未安装的]

是否接受该解决方案?[Y/n/q/?] n
下列动作将解决这些依赖关系:

     降级 下列软件包:
1)     libssl1.0.0 [1.0.1f-1ubuntu9.8 (now) -> 1.0.1f-1ubuntu2.18 (trusty-securi

是否接受该解决方案?[Y/n/q/?] y
下列软件包将被“降级”:
  libssl1.0.0
下列“新”软件包将被安装。
  libssl-dev libssl-doc{a}
0 个软件包被升级,新安装 2 个, 1 个被降级, 0 个将被删除, 同时 74 个将不升级。
需要获取 2,866 kB 的存档。 解包后将要使用 7,783 kB。
您要继续吗?[Y/n/?] y


----(验证libssl-dev包安装情况_: raini@biyuzhe:~$ dpkg -l *libssl*

期望状态=未知(u)/安装(i)/删除(r)/清除(p)/保持(h)
| 状态=未安装(n)/已安装(i)/仅存配置(c)/仅解压缩(U)/配置失败(F)/不完全安装(H)/触发器等待(W)/触发器未决(T)
|/ 错误?=(无)/须重装(R) (状态,错误:大写=故障)
||/ 名称           版本         架构:       描述
+++-==============-============-============-=================================
ii  libssl-dev:amd 1.0.1f-1ubun amd64        Secure Sockets Layer toolkit - de
ii  libssl-doc     1.0.1f-1ubun all          Secure Sockets Layer toolkit - de
ii  libssl1.0.0:am 1.0.1f-1ubun amd64        Secure Sockets Layer toolkit - sh


-----(重新安装libssl-dev)------raini@biyuzhe:~$ sudo apt-get install libssl-dev

正在读取软件包列表... 完成
正在分析软件包的依赖关系树
正在读取状态信息... 完成
libssl-dev 已经是最新的版本了。
升级了 0 个软件包,新安装了 0 个软件包,要卸载 0 个软件包,有 74 个软件包未被升级。
验证libssl-dev包安装情况_: raini@biyuzhe:~$ dpkg -l *libssl*
编译nginx报错libcrypto.so.1.0.2 may be confilict with libcrypto.so.1.1

- 我利用命令
grep -R -n --color --include="*.c" ngx_inet_get_port /root/modsecurity-nginx/src/去搜有没有这个函数:
只有再原来的定义中有; - 再nginx目录下:

- 也没有搜到…所以我不会改了
nginx不识别modsecurity

配置nginx启动命令
- 配置完执行
systemctl start nginx.service - 出现:

- 查看日志:
journalctl -f -u nginx.service 
- whic is only allowed ,看下配置的service:
vim /lib/systemd/system/nginx.service: - 发现我多cat了一遍内容,导致不知道配置的是哪个,删除重复即可
systemctl start nginx.service成功
关于systemd的科普


 514
514


 被折叠的 条评论
为什么被折叠?
被折叠的 条评论
为什么被折叠?
 到【灌水乐园】发言


