


目前流行的两种方案如下:
1. 注册易微联的账号关联对应sonoff basic ,通过ha 插件自动拉取易微联下的设备信息
智能家居:第二篇 Homeassistant接入易微联sonoff设备 - 简书
2. 配置esphome,直接烧录
鉴于目前的esphome做的比较好 采用方案2
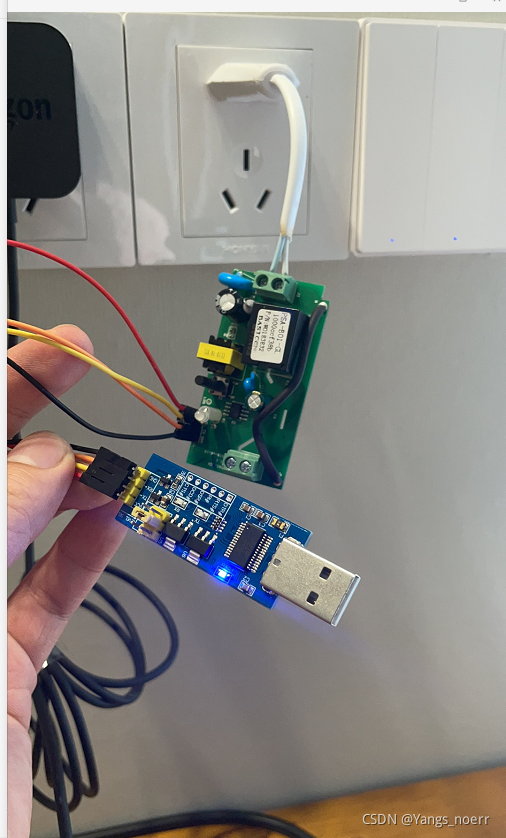
1. 硬件准备 sonoff basic 一个 串口烧录器一个 测试电线一根 WiFi环境
2. HA接入esphome插件
(1)在surpervisor / add-on 搜索ESPHome,部分找不到改插件的系统,则需要额外添加仓库,点击右上角添加仓库
#homeassistant官方仓库
https://github.com/home-assistant/addons
#hassio仓库
https://github.com/hassio-addons/repository
(2)启动即可
(3)按照界面内容开始添加设备信息,直到出现以下界面
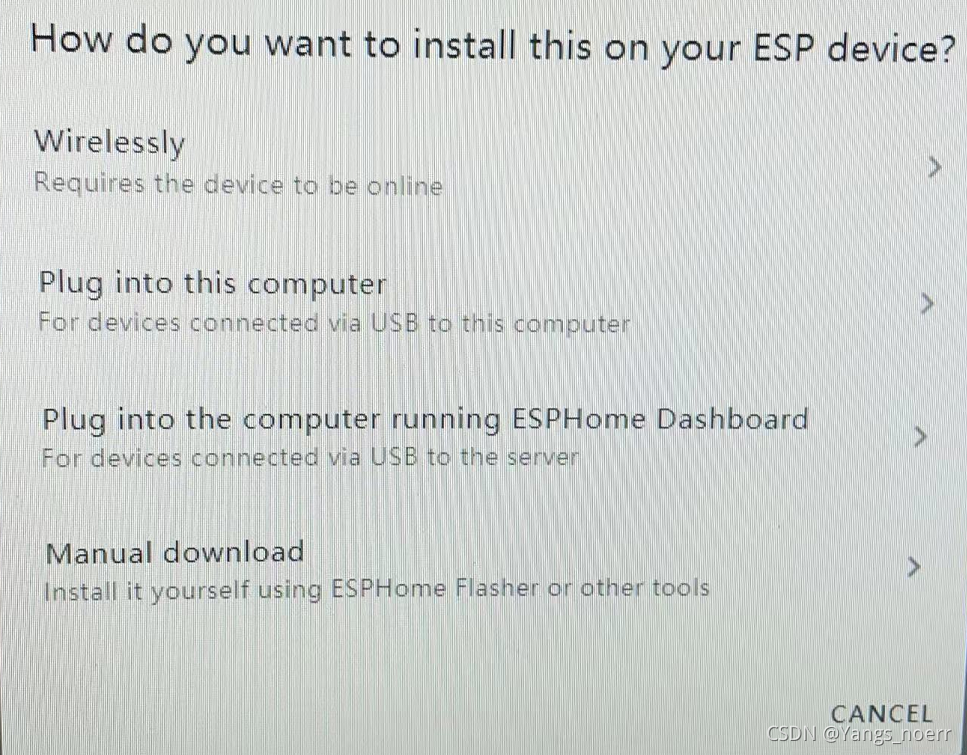
(4)串口烧录器跟sonoff basic 连接,VCC对VCC RX对TX TX对RX GND对GND,千万不要搞错了不然烧录会失败还找不到原因
(5) 按住sonoff basic 复位开关,同时插入电脑
(6)选择 plug into this computer 按要求继续即可
(7)接入编辑界面,把以下信息按自己家配置写入即可:
#配置信息
#定义gpio14为物理开关引脚:
esphome:
  name: sonoff_basic
  platform: ESP8266
  board: esp01_1m
wifi:
  ssid: '你家wifi名字'
  password: '你家wifi密码'
  manual_ip:
    static_ip: 192.168.123.9#根据路由器IP段固定IP地址
    gateway: 192.168.123.1#填写自己的IP信息
    subnet: 255.255.255.0#填写自己的IP信息
api:
logger:
ota:
web_server:
  port: 80
sensor:
  - platform: wifi_signal
    name: "sonoff_basic WiFi"
    update_interval: 10s
binary_sensor:
  - platform: gpio
    pin:
      number: GPIO0
      mode: INPUT_PULLUP
      inverted: true
    name: "sonoff_basic Button1"
    on_press:
      - switch.toggle: fakebutton
  - platform: gpio
    pin:
      number: GPIO14
      mode: INPUT_PULLUP
    name: "sonoff_basic Button2"
    on_press:
      then:
        - switch.toggle: fakebutton
    on_release:
      then:
        - switch.toggle: fakebutton
switch:
  - platform: template
    name: "sonoff_basic Relay"
    optimistic: true
    id: fakebutton
    turn_on_action:
    - switch.turn_on: relay
    - light.turn_on: led
    turn_off_action:
    - switch.turn_off: relay
    - light.turn_off: led
  - platform: gpio
    pin: GPIO12
    id: relay
output:
  - platform: esp8266_pwm
    id: basic_green_led
    pin: GPIO13
    inverted: true
light:
  - platform: monochromatic
    name: "sonoff_basic Green led"
    output: basic_green_led
    id: led
直接install 就可完成
(8)测试 如图所示简易测试设备
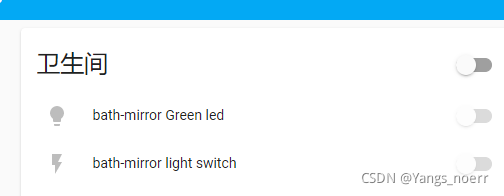
(9)界面展示


 5731
5731

 被折叠的 条评论
为什么被折叠?
被折叠的 条评论
为什么被折叠?
 到【灌水乐园】发言


