


渲染函数
开头
之前习惯 React 的编程习惯,有时候感觉 函数式编程 真的好用 , 这章就讲讲 Vue 怎么实现用 渲染函数 怎么实现类似的 组件
渲染函数一般指的是 Vue2的render函数 和 Vue3的h函数
如果你喜欢或者习惯 函数式编程 , 那可以学习下怎么 函数式编程
具体实现我会出一个题目,然后通过各种方式进行实现
题目
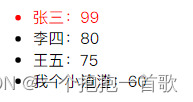
实现一个列表,通过父组件传递值给子组件一个数组,子组件通过渲染列表并且实现点击列表相关项后对该项进行颜色改变(红色)
Vue2 的渲染函数 (Render)
父组件
<template>
  <div class="home">
    <h2>函数组件</h2>
    <el-list :list="list" @list-click="onClick"> </el-list>
  </div>
</template>
<script>
// @ is an alias to /src
import ElList from "@/components/list.js";
export default {
  name: "Home",
  components: {
    [ElList.name]: ElList,
  },
  data() {
    return {
      index: 0,
      list: [
        {
          name: "张三",
          score: 99,
        },
        {
          name: "李四",
          score: 80,
        },
        {
          name: "王五",
          score: 75,
        },
        {
          name: "我个小渣渣",
          score: 60,
        },
      ],
    };
  },
  methods: {
    onClick(index) {
      this.index = index;
      console.log("触发父亲的方法", index);
    },
  },
};
</script>
子组件
// list.js
// vue 渲染函数
const ElButton = {
  name: "el-list",
  props: {
    list: {
      type: Array,
      default: () => {
        return [];
      },
    },
  },
  data() {
    return {
      index: 0,
    };
  },
  methods: {
    click(i) {
      this.index = i;
    },
  },
  render(h) {
    // const { $parent } = this;
    const { list, index } = this;
    const listMap = list.map((item, i) => {
      return h(
        "li",
        {
          style: {
            color: index === i ? "red" : "",
          },
          on: {
            click: this.click.bind(this, i),
          },
        },
        [item.name, ":", item.score]
      );
    });
    return h(
      "ul",
      {
        on: {
          // 三种方法
          //   click: $parent.onClick.bind(this,index),
          //   click: () => this.$emit("list-click", index),
          click: this.$emit.bind(this, "list-click", index),
        },
      },
      listMap
    );
  },
};
export default ElButton;
Vue3 的渲染函数 (h)
父组件
<template>
  <div>
    <h2>渲染函数</h2>
    <list-component :list="List" @change="onChange"></list-component>
  </div>
</template>
<script setup lang="ts">
import { ref } from "vue";
import listComponent from "@/components/List.ts";
const List = ref([
  {
    name: "张三",
    score: 99,
  },
  {
    name: "李四",
    score: 80,
  },
  {
    name: "王五",
    score: 75,
  },
  {
    name: "我个小渣渣",
    score: 60,
  },
]);
const selectLi = ref(0);
function onChange(index) {
  console.log("觸發了父親的方法", index);
  selectLi.value = index;
}
</script>
Vue3 和 Vue2 的 渲染函数还是有点区别的
子组件
// List.ts
import { h } from "vue";

const ListComponent = {
  data() {
    return {
      index: 0,
    };
  },
  props: {
    list: {
      type: Array,
      default: () => {
        return [];
      },
    },
  },
  methods: {},
  render({ $data, $props, $emit }) {
    // let {list , index}  = this  也可以这么写
    let { list } = $props;
    let { index } = $data;
    const listMap = list.map((item, i) => {
      return h(
        "li",
        {
          style: {
            color: index === i ? "red" : "",
          },
          onClick: () => {
            this.index = i;
            $emit("change", i);
          },
        },
        [item.name, ":", item.score]
      );
    });
    return h("ul", {}, [listMap]);
  },
};
export default ListComponent;
函数式组件
函数式组件 我的理解是类似 纯函数 , 他没有自己的状态 , 全部 状态 都是由 父组件 传递
Vue2 的 函数式组件 (Functional)
父组件
<template>
  <div class="home">
    <h2>纯函数组件</h2>
    <el-list-fun :current="index" :list="list" @listClickFun="onClick">
    </el-list-fun>
  </div>
</template>

<script>
// @ is an alias to /src
import ElListFun from "@/components/listFun.js";

export default {
  name: "Home",
  components: {
    [ElListFun.name]: ElListFun,
  },
  data() {
    return {
      index: 0,
      list: [
        {
          name: "张三",
          score: 99,
        },
        {
          name: "李四",
          score: 80,
        },
        {
          name: "王五",
          score: 75,
        },
        {
          name: "我个小渣渣",
          score: 60,
        },
      ],
    };
  },
  methods: {
    onClick(index) {
      this.index = index;
      console.log("触发父亲的方法", index);
    },
  },
};
</script>
子组件
// vue2 纯函数组件
// 纯函数没有自己的状态 也就是他的值只能通过父组件传给他
const ElButton = {
  // 开启函数式变成
  functional: true,
  name: "el-list-fun",
  props: {
    list: {
      type: Array,
      default: () => {
        return [];
      },
    },
    current: Number,
  },
  render(h, { props, data, ...args }) {
    console.log(data, args);
    let { listClickFun } = data.on;
    let { list, current } = props;
    const listMap = list.map((item, i) => {
      return h(
        "li",
        {
          style: {
            color: current === i ? "red" : "",
          },
          on: {
            // 这里可以直接调用父组件的emit进行更改,并没有在组件维护一个叫index的值
            click: listClickFun.bind(null, i),
          },
        },
        [item.name, ":", item.score]
      );
    });
    return h("ul", {}, listMap);
  },
};

export default ElButton;
Vue3 的 函数时组件 (Function)
区别于 Vue2 的
1. 在 3.x 中,函数式组件 2.x 的性能提升可以忽略不计,因此我们建议只使用有状态的组件
2. 函数式组件只能使用接收 props 和 context 的普通函数创建 (即:slots,attrs,emit)。
3. 非兼容变更:functional attribute 在单文件组件 (SFC) 已被移除
4. 非兼容变更:{ functional: true } 选项在通过函数创建组件已被移除
父组件
<template>
  <div>
    <list-functional-component
      :list="List"
      :selectLi="selectLi"
      @change="onChange"
    ></list-functional-component>
  </div>
</template>
<script setup lang="ts">
import { ref } from "vue";
import listFunctionalComponent from "@/components/ListFunctional.ts";
const List = ref([
  {
    name: "张三",
    score: 99,
  },
  {
    name: "李四",
    score: 80,
  },
  {
    name: "王五",
    score: 75,
  },
  {
    name: "我个小渣渣",
    score: 60,
  },
]);
const selectLi = ref(0);
function onChange(index) {
  console.log("觸發了父親的方法", index);
  selectLi.value = index;
}
</script>
子组件
// list-functional-component.ts
import { h } from "vue";

function FunctionComponent(props, { emit, slots }) {
  let { list, selectLi } = props;
  let listMap = list.map((item, i) => {
    return h(
      "li",
      {
        onClick: emit.bind(null, "change", i),
        style:{
          color:selectLi === i ? 'red':''
        }
      },
      [item.name, ":", item.score]
    );
  });
  return h("ul", {}, listMap);
}
// 维护props和emits
FunctionComponent.props = ["list",'select-li'];
FunctionComponent.emits = ["change"];

export default FunctionComponent;


 6042
6042


 被折叠的 条评论
为什么被折叠?
被折叠的 条评论
为什么被折叠?
 到【灌水乐园】发言


