


更新于:2023年11月16日
次文档已全部脱敏!
实战:给docusaurus文档网站配置Algolia 实现全站内容搜索功能-2023.11.16==(已解决)==
目录
前提条件
🍀
前提条件
具备docker环境
具有自己的网站
🍀
实验软件(包含在此文档里)
🍀
实验环境
docusaurus 3.0.0
node v18.18.0
npm 9.1.2
win10
前言
什么是Algolia
这个配置过程挺简单的,按文档操作,就OK的。
docusaurus搭建的静态网站,默认是不具有全站内容搜索功能的,因此这里配置Algolia 实现内容搜索。
Algolia 是一个搜索、推荐服务平台,可以通过简单的配置来为站点添加全文检索功能。
基本原理:
通过爬虫对目标网站的内容创建 Records (记录), 在用户搜索时调用接口返回相关内容。
为网站添加 实时搜索, 采用 Docusaurus2 官方支持的 Algolia DocSearch
Docsearch 每周一次爬取网站 (可在网页界面上配置具体时间), 并将所有内容汇总到一个 Algolia 索引中
随后,前端页面会调用 Algolia API 来直接查询这些内容。
1、Docsearch 官网申请
一定要先向Docsearch 官网申请成功后,再创建自己的数据源才行,不然可能会测试失败的。
前置条件:
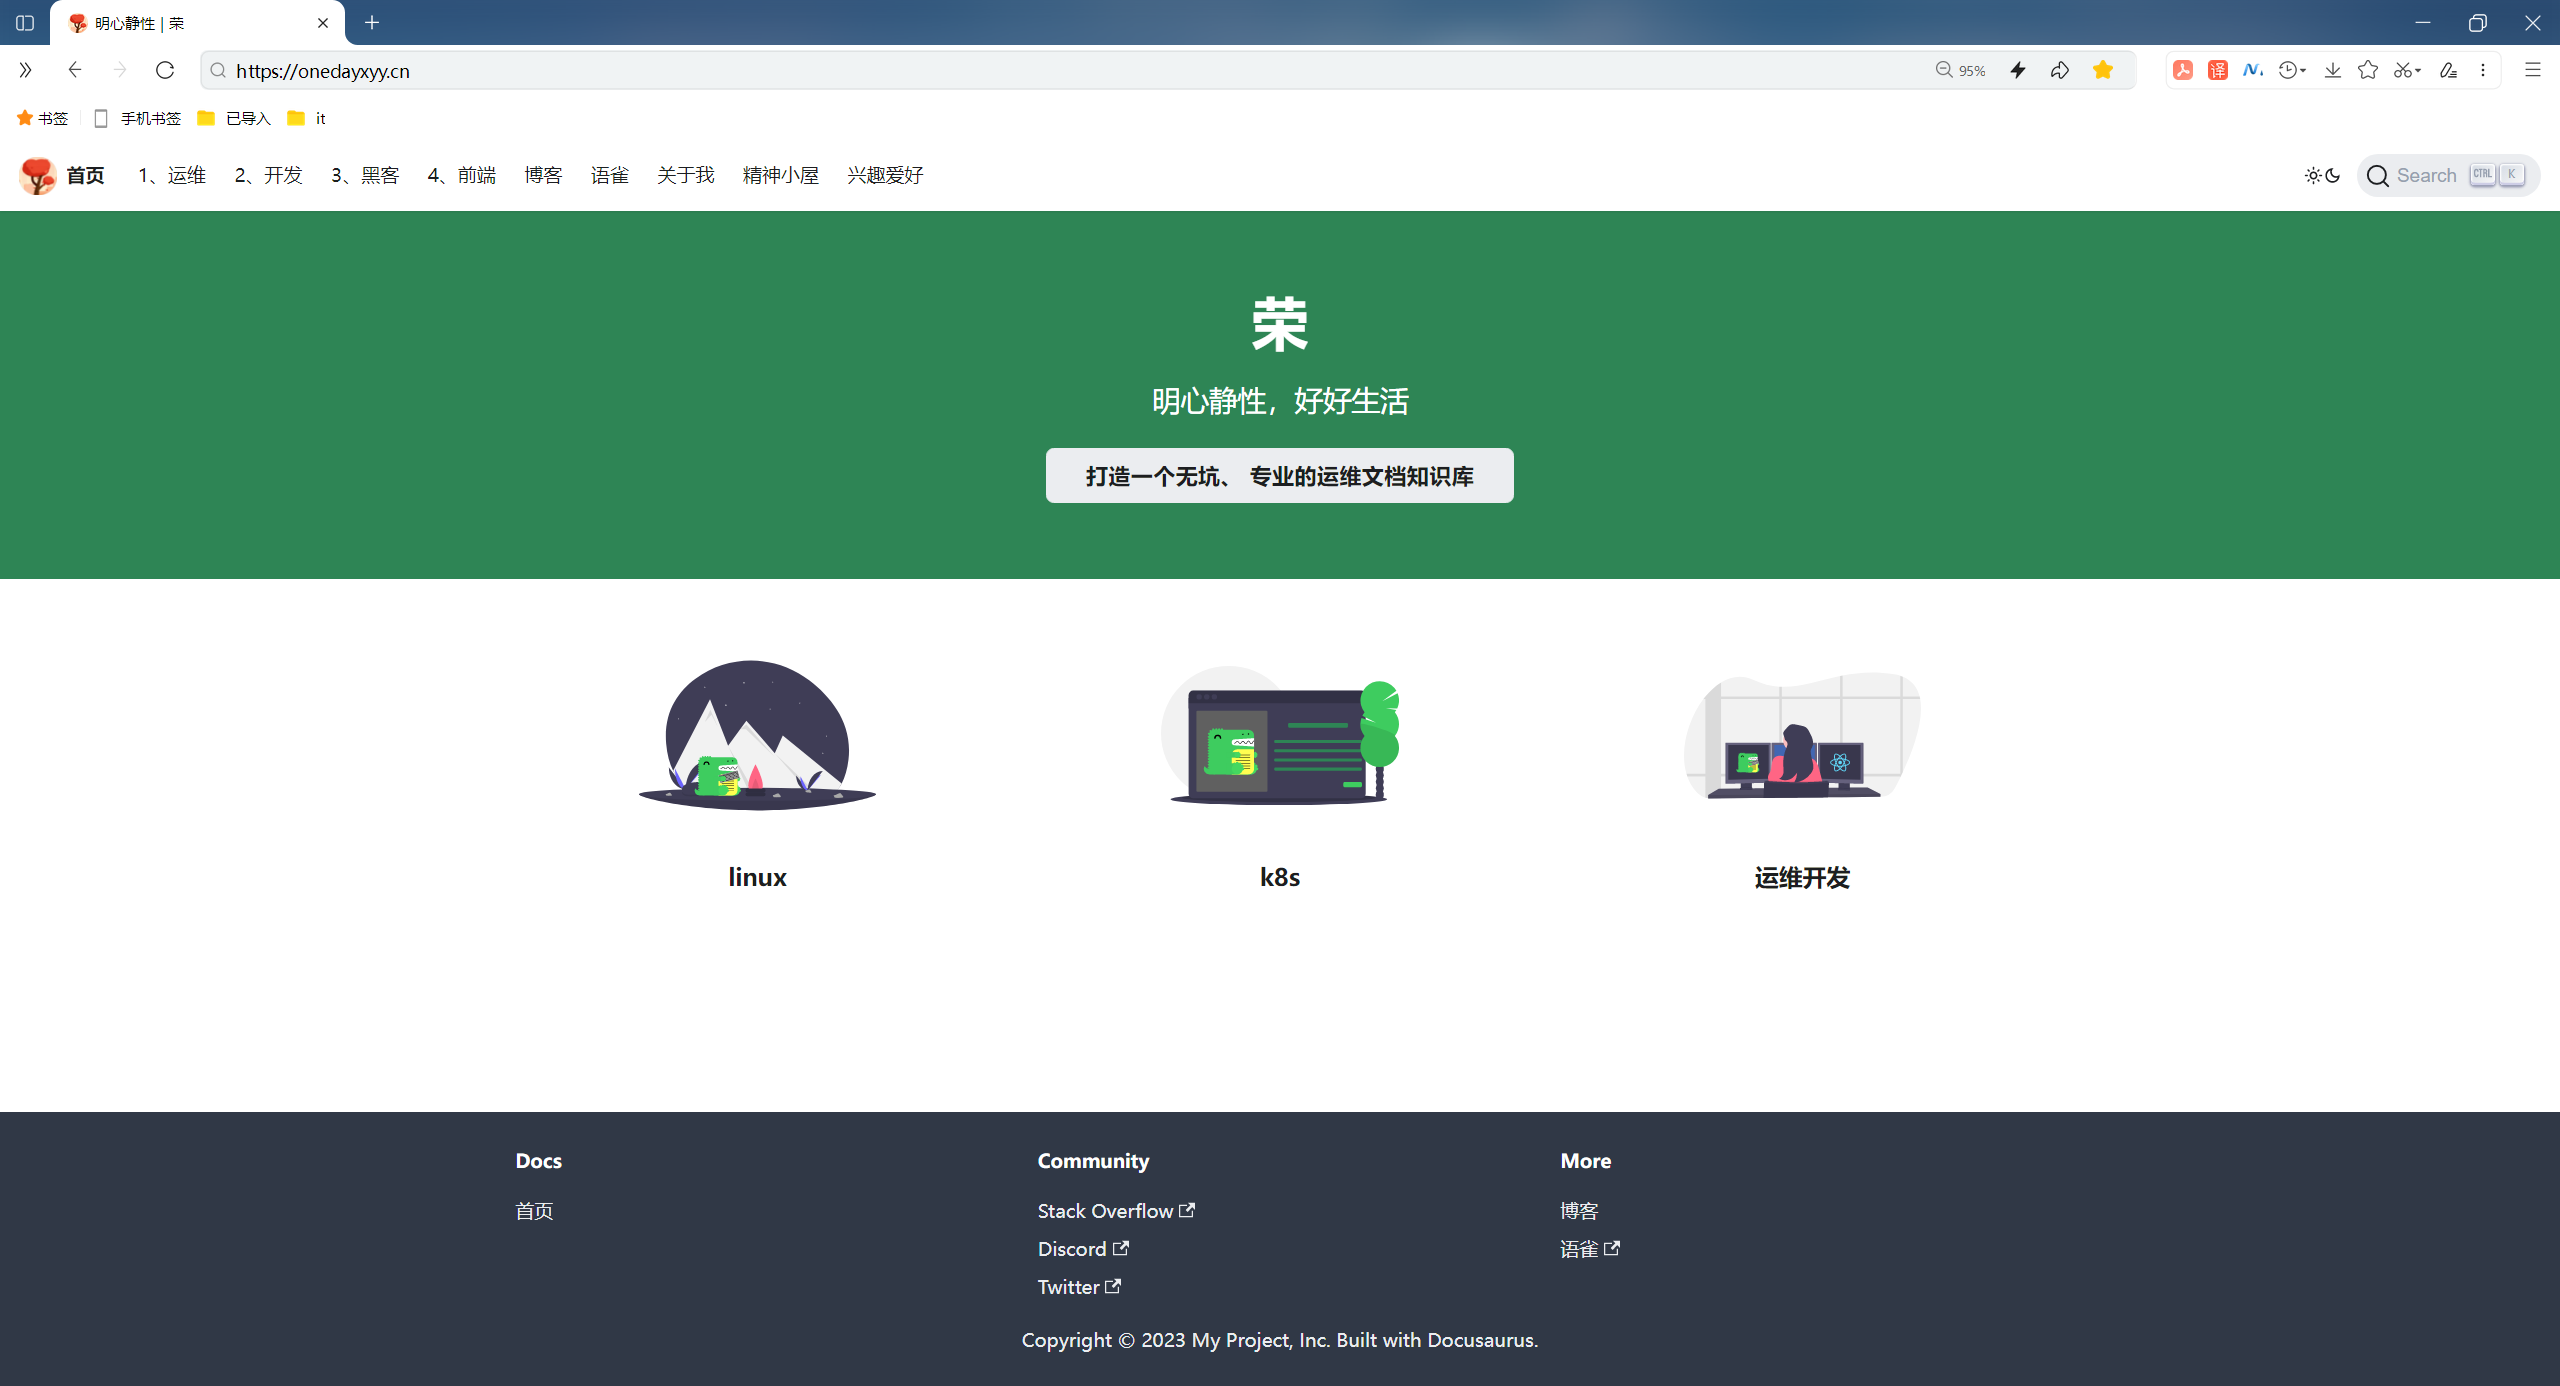
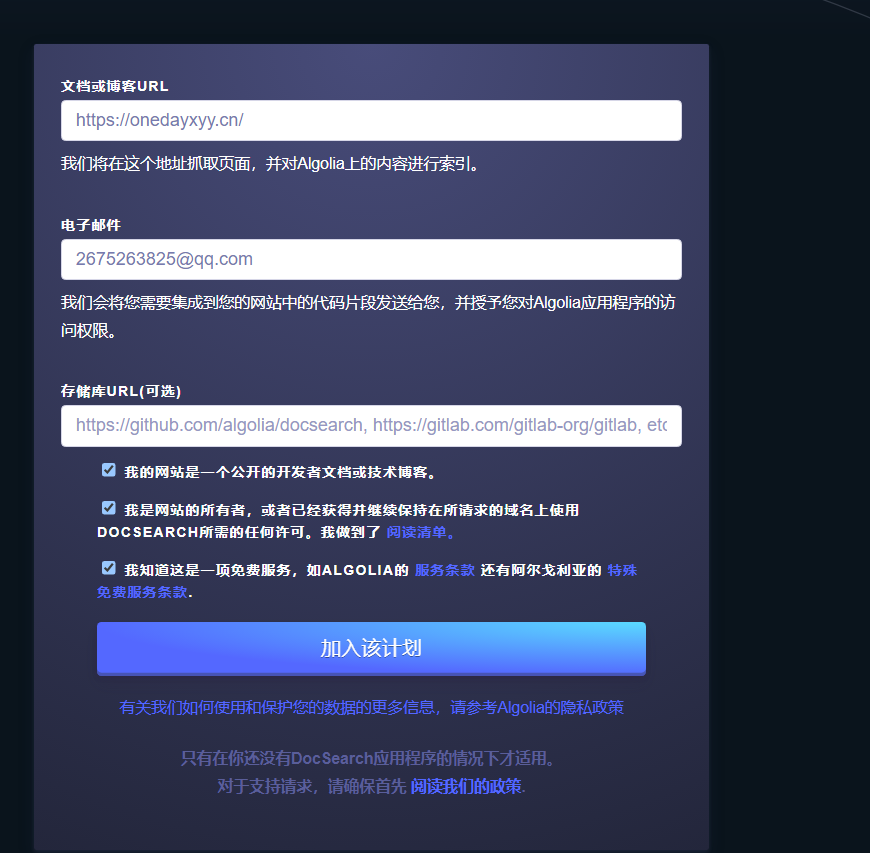
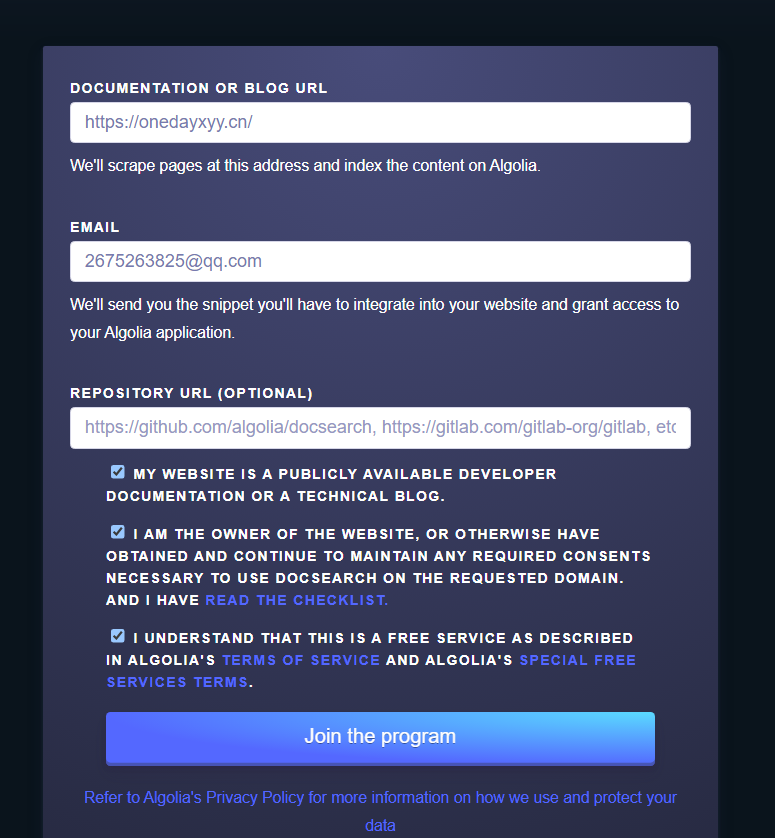
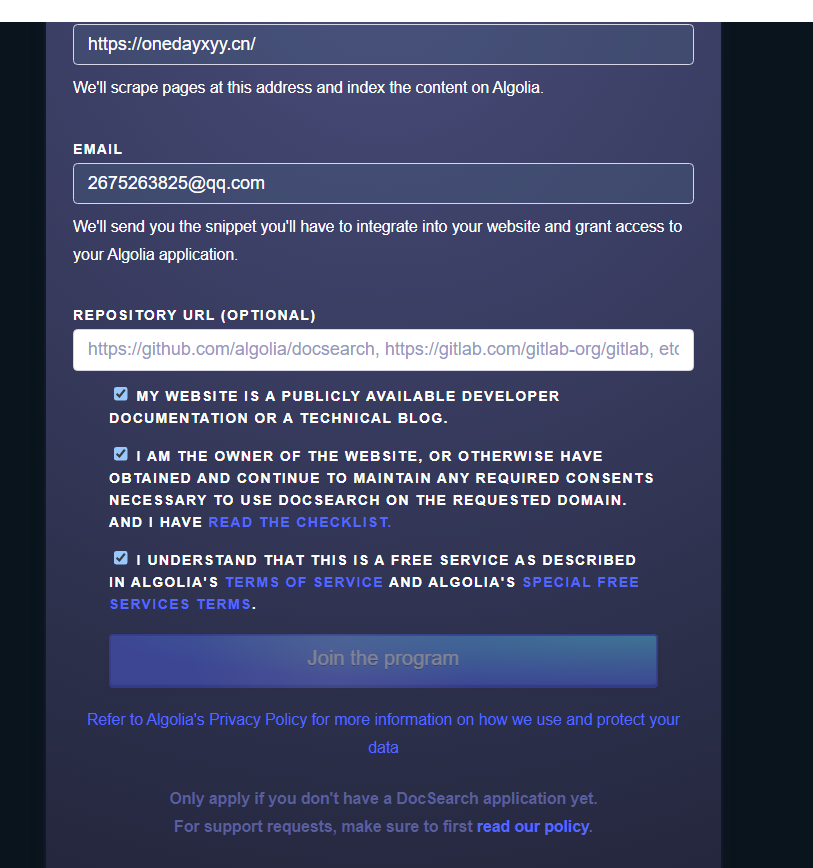
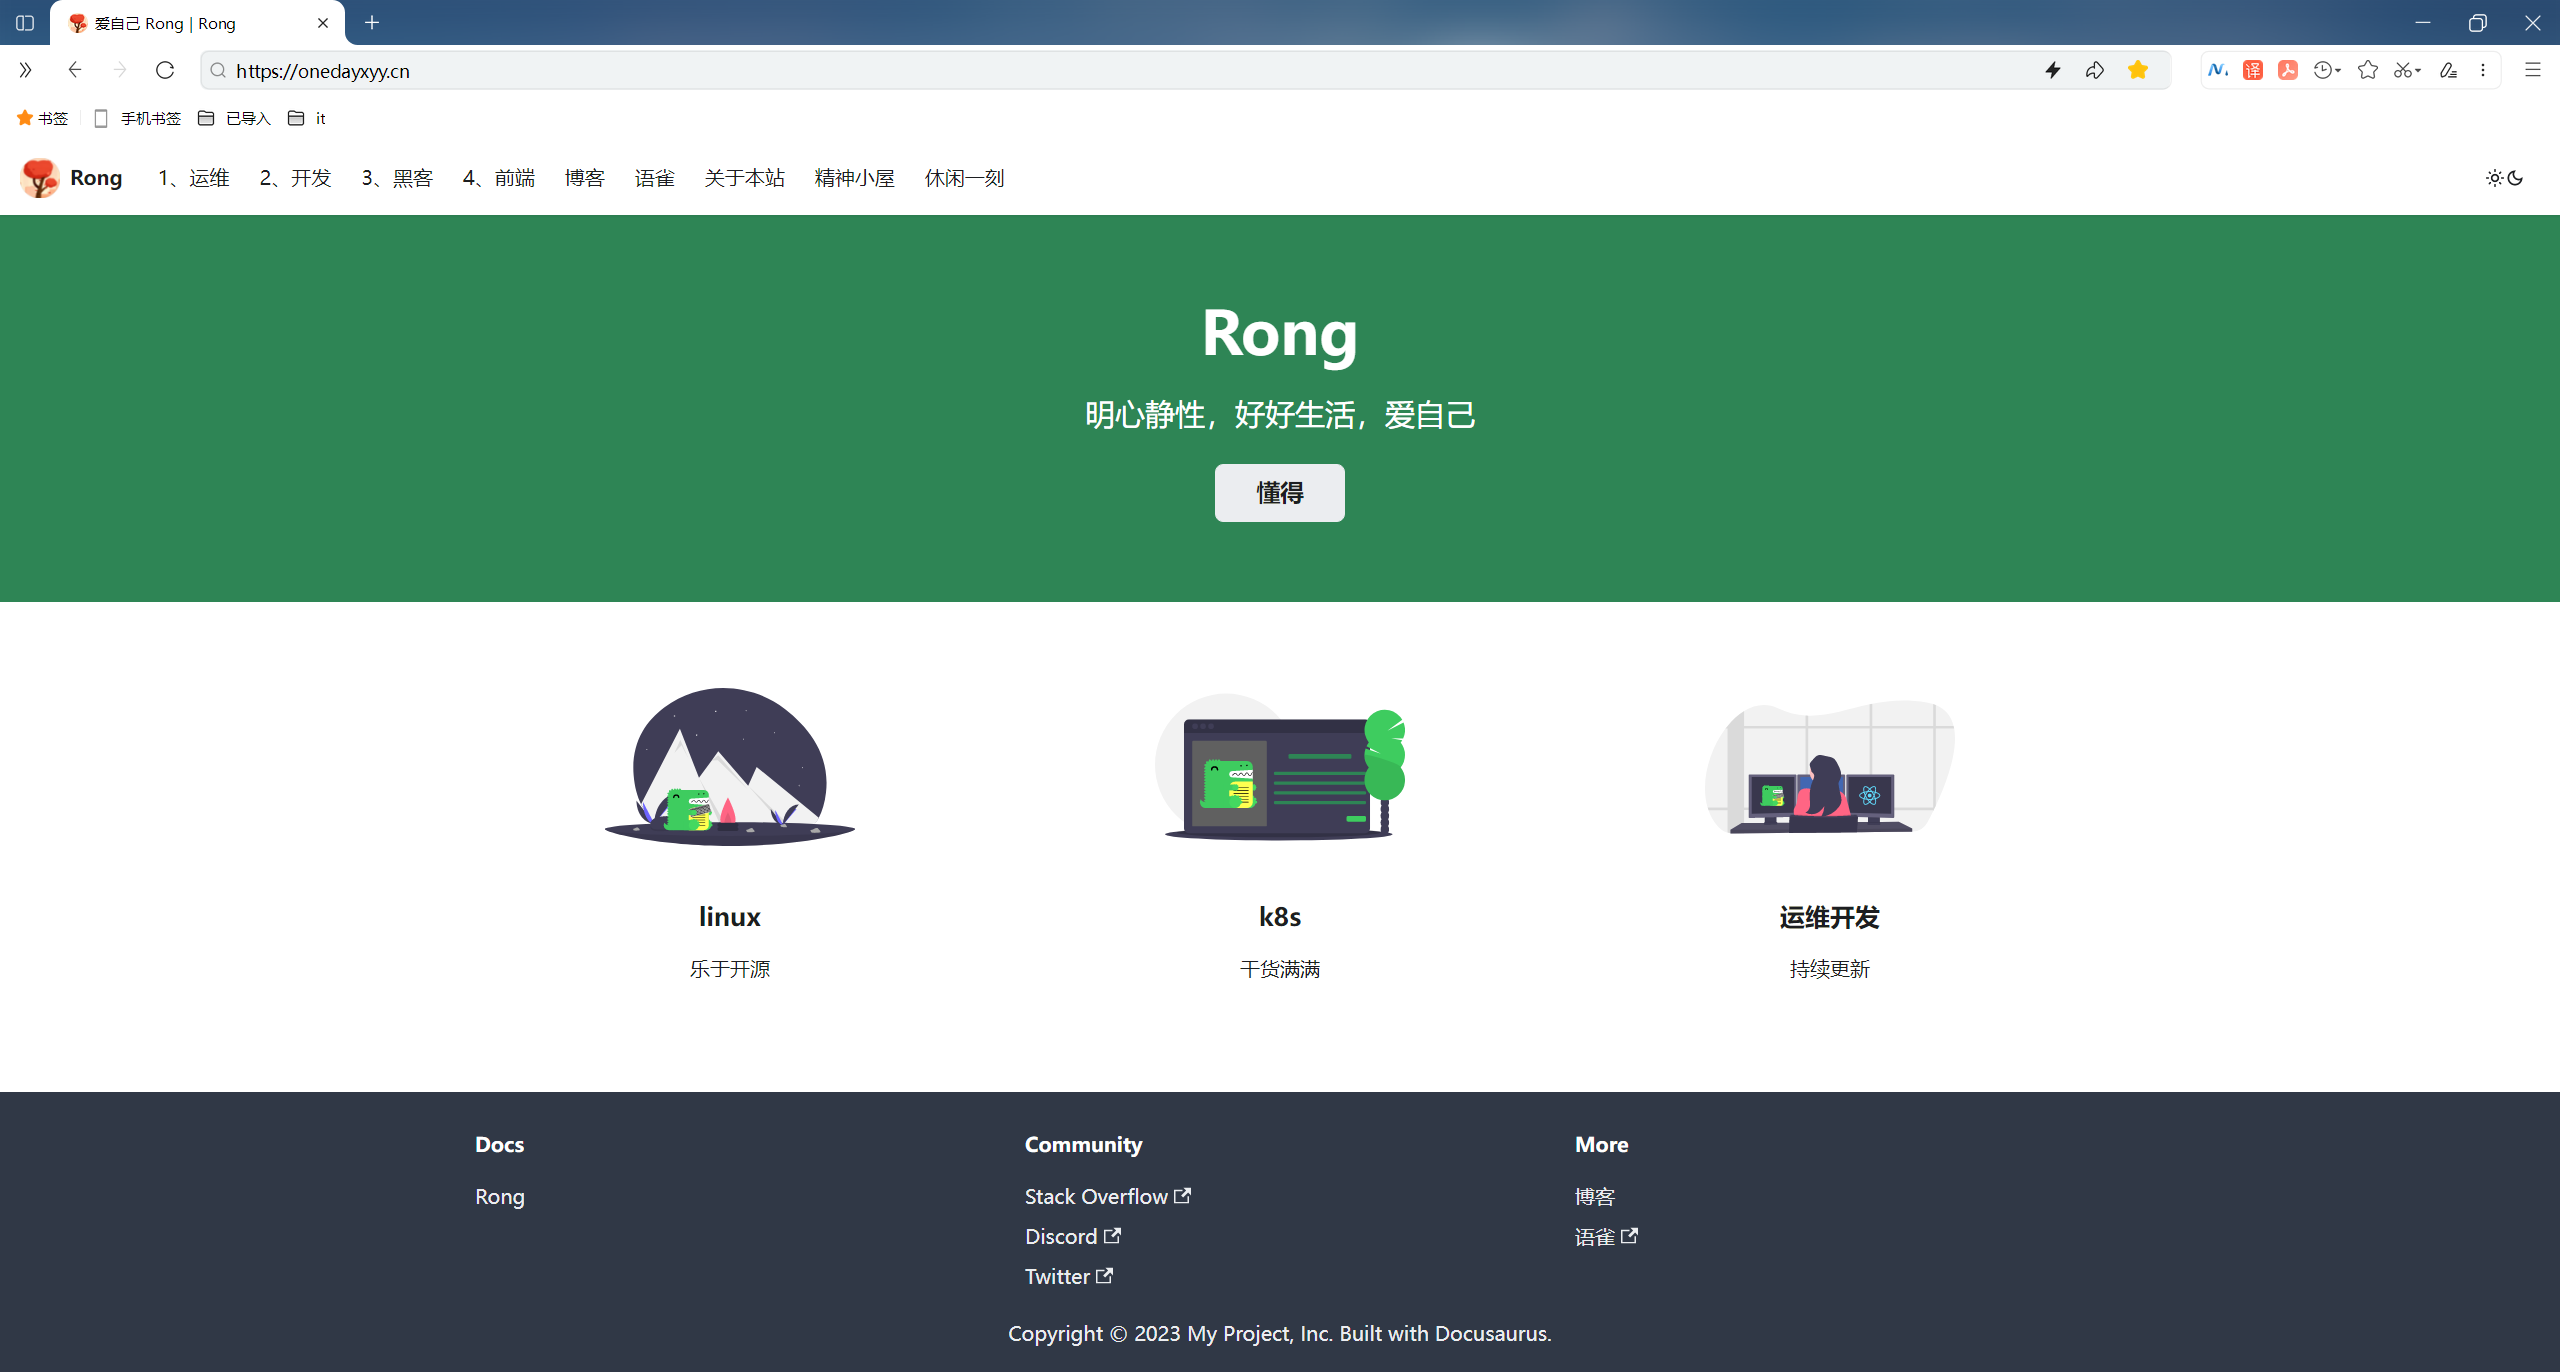
- 准备好自己的域名地址 - 本案例: https://onedayxyy.cn/
这个是自己的docusaurus文档网站。
- 前置条件准备完成后, 就可到 Docsearch 注册
https://docsearch.algolia.com/apply/
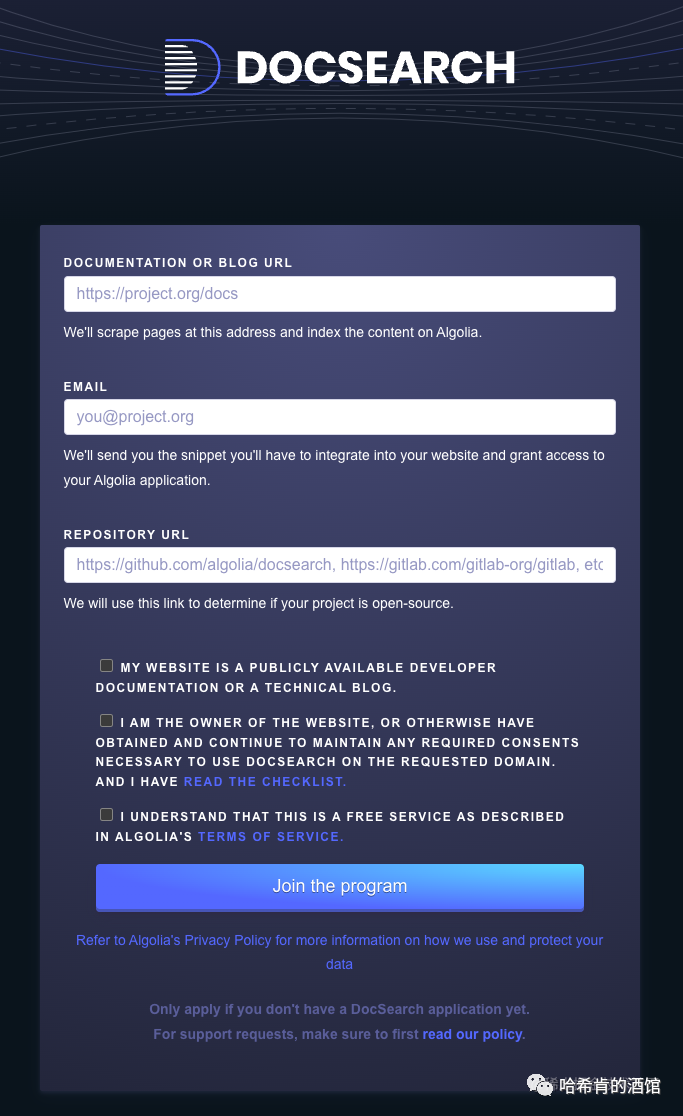
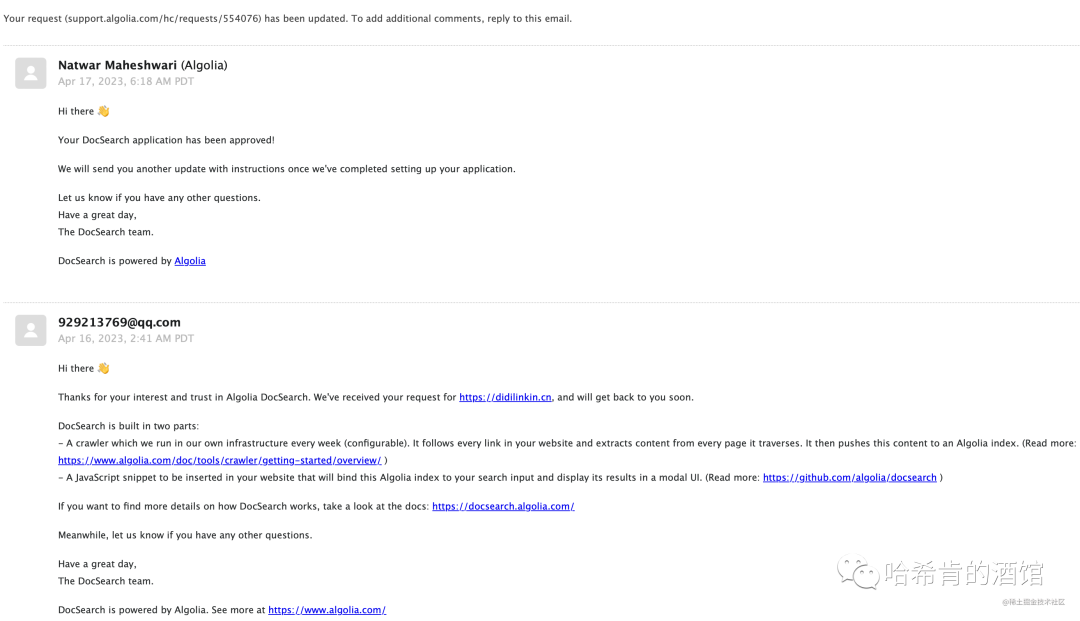
提交后大约 2 天内会收到 反馈邮件, 通知注册成功:
自己的测试过程如下:
https://docsearch.algolia.com/apply/
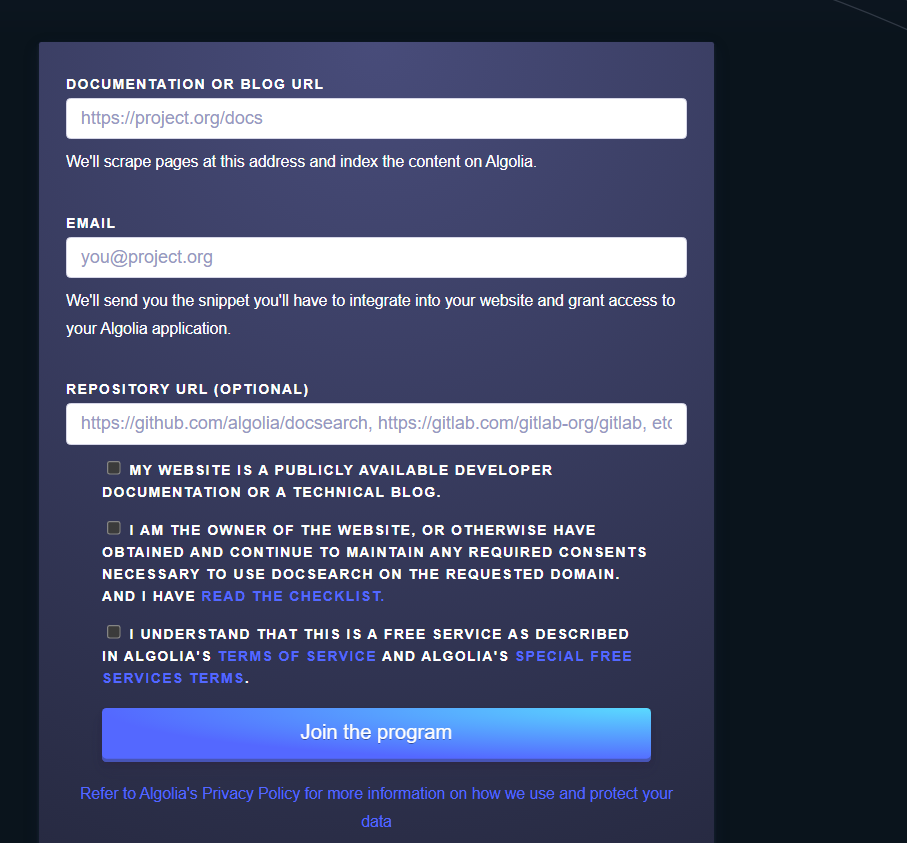
点击Join后,怎么没有反应呢?奇怪。。。(点击后,就自动提交了,我们只需要耐心等待即可)
看下后续是否会收到邮件吧?
当前操作时间为:2023年11月15日14:25:55
- 哦,后面收到邮件了
(几个小时就会得到回复了)
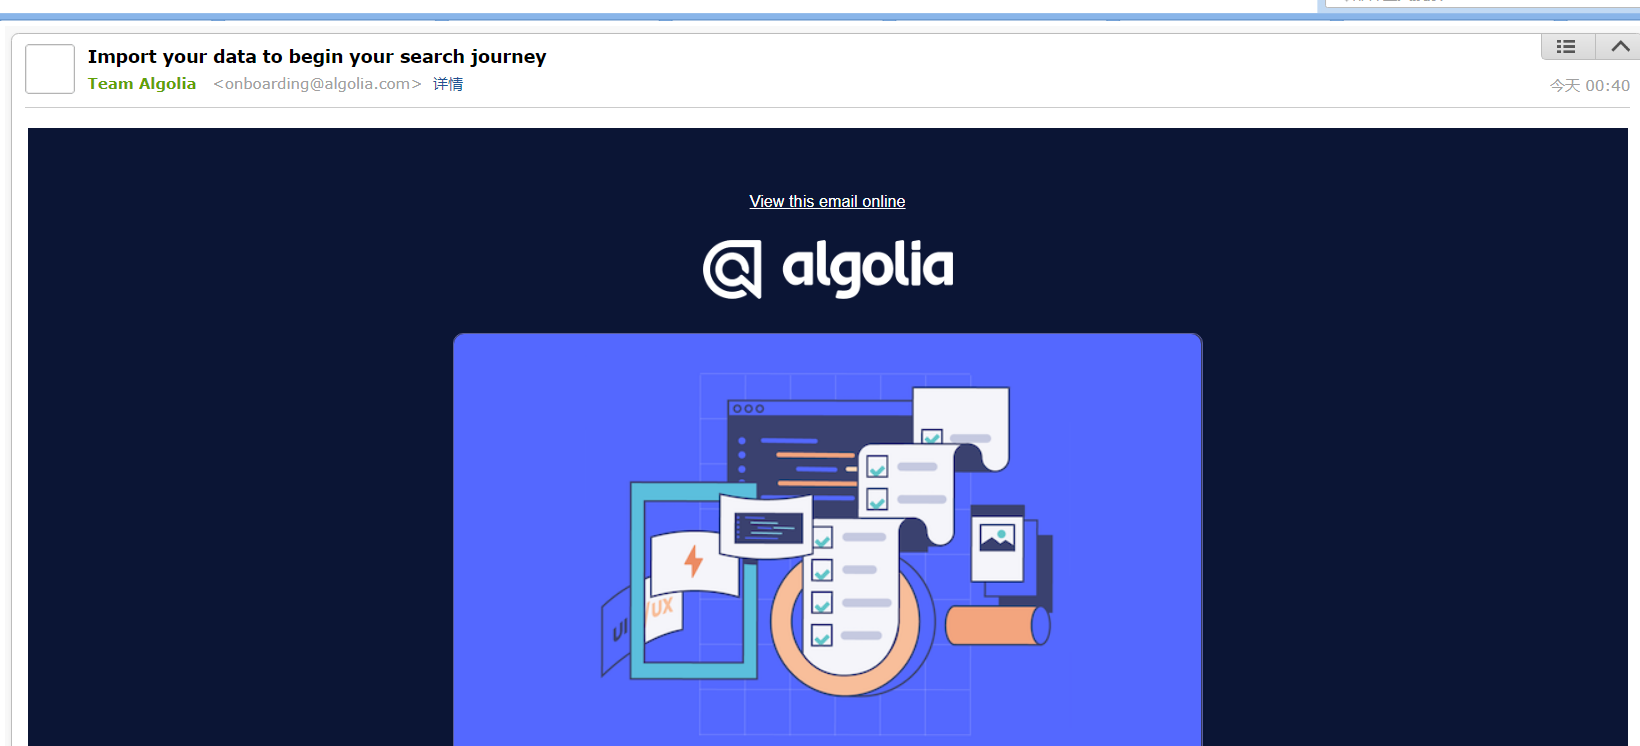
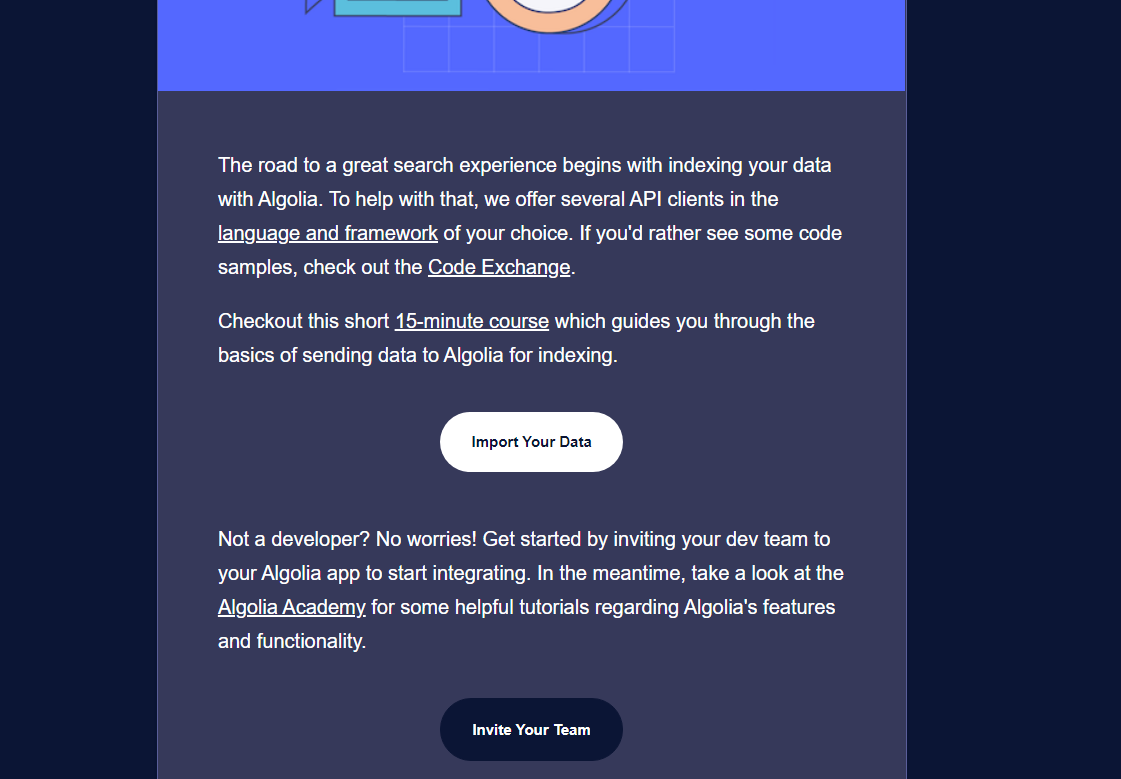
注意:等到官方回复后,这里点击import your data后,就到了具体的配置步骤,我们不用管,按我的文档往下走即可。
https://info.algolia.com/NzQ2LVJPVS0zNjEAAAGPctQLIfgrI3cY5lI2PlJRPBj5GdQRSoaEu03a3Yb65nWoUcB1tBCmT1mdaASw-mRRgUgSo0A=
2、注册账号&创建 Application
获取 Application ID & API Keys
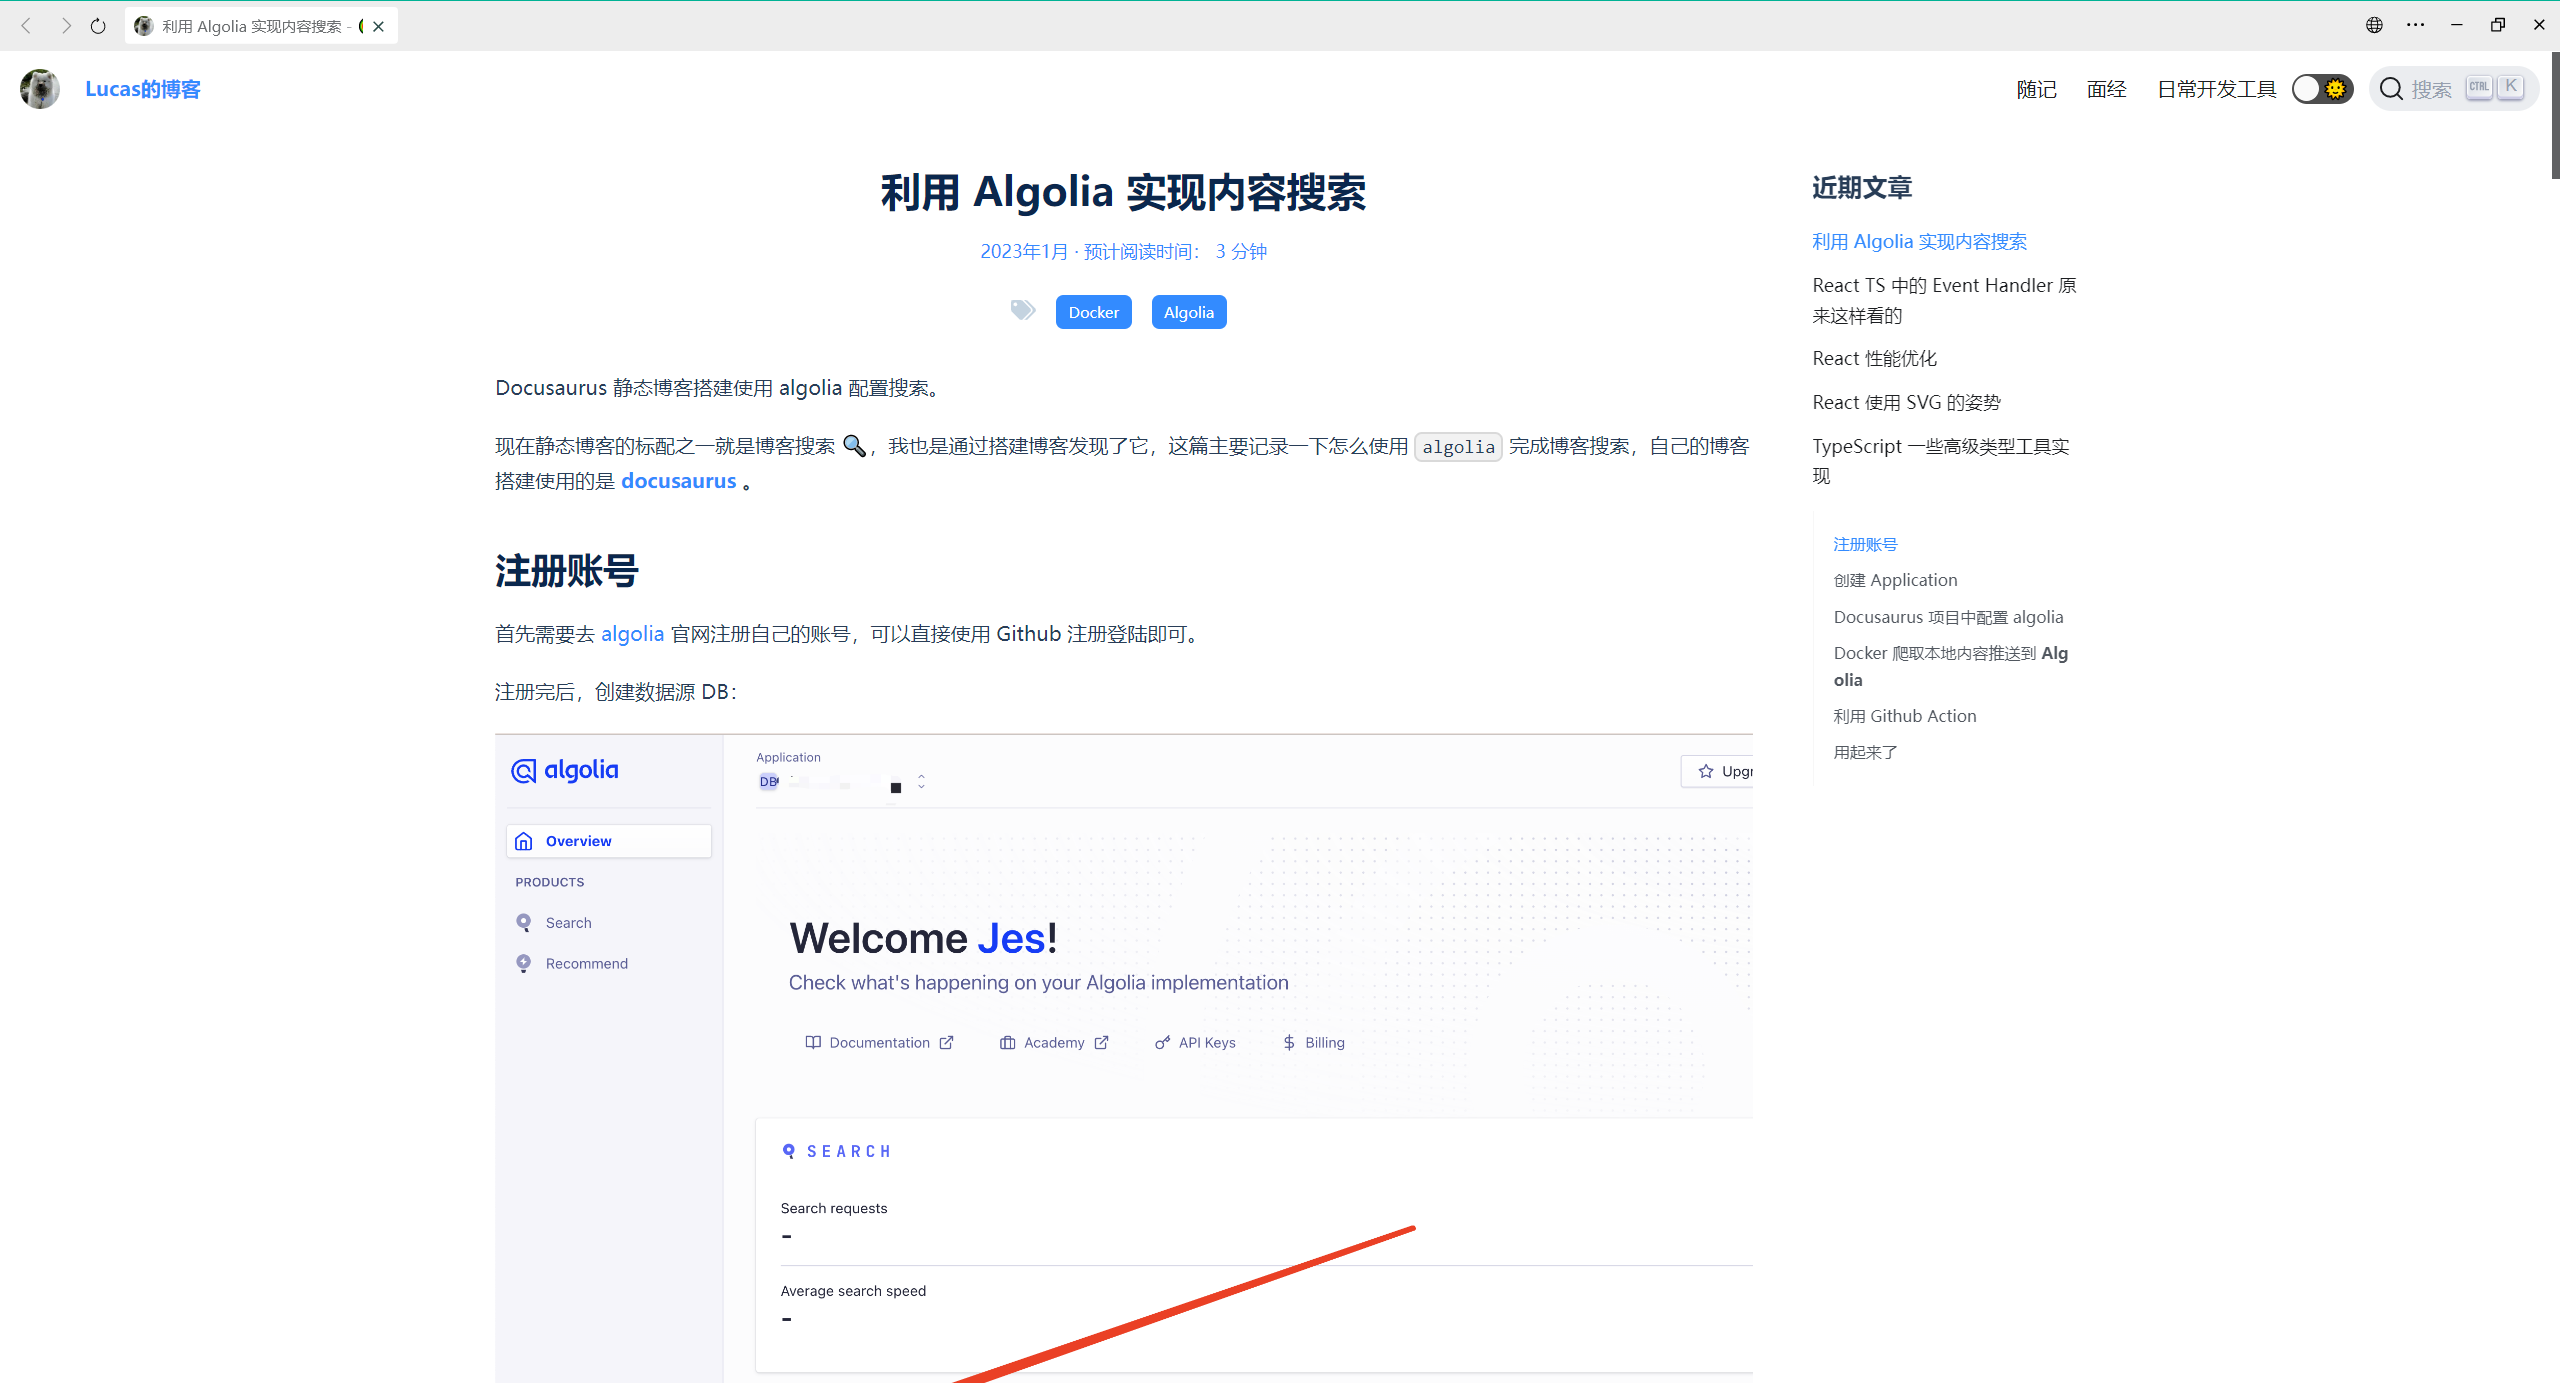
首先需要去 algolia 官网注册自己的账号,可以直接使用 Github 注册登陆即可。
注册完后,创建数据源 DB:
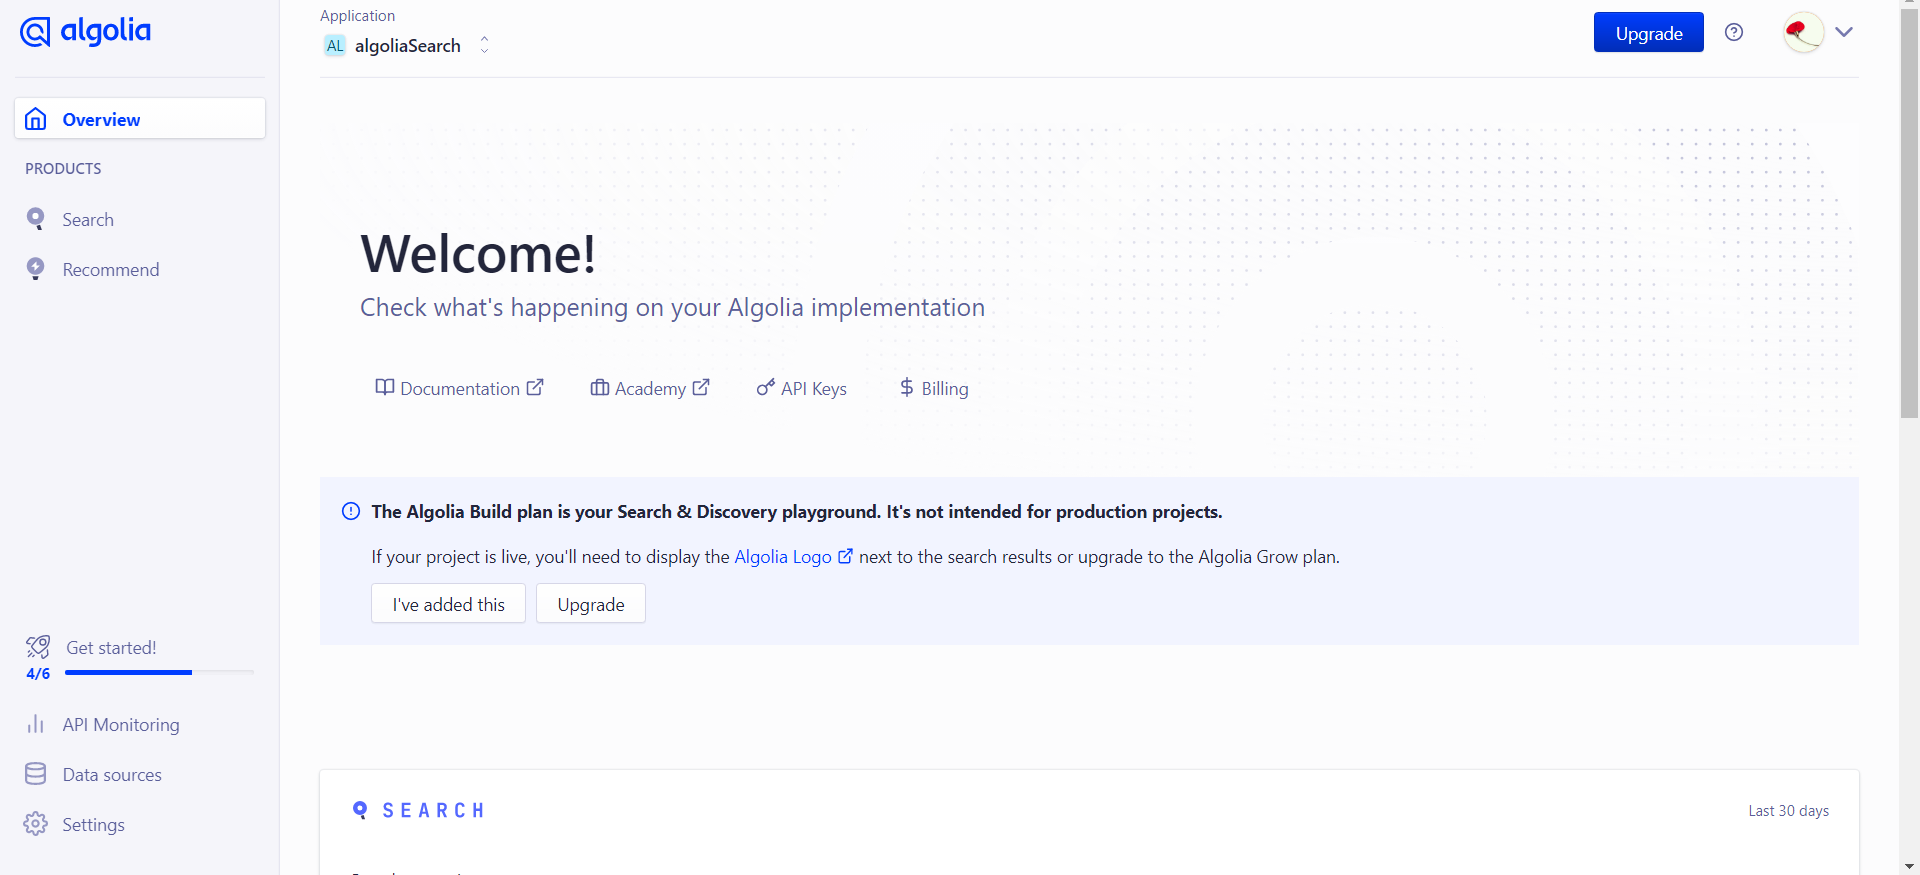
- 前往 Algolia 官网, 登录账户 创建 Application
https://dashboard.algolia.com/apps/EW7M8KMAOC/dashboard
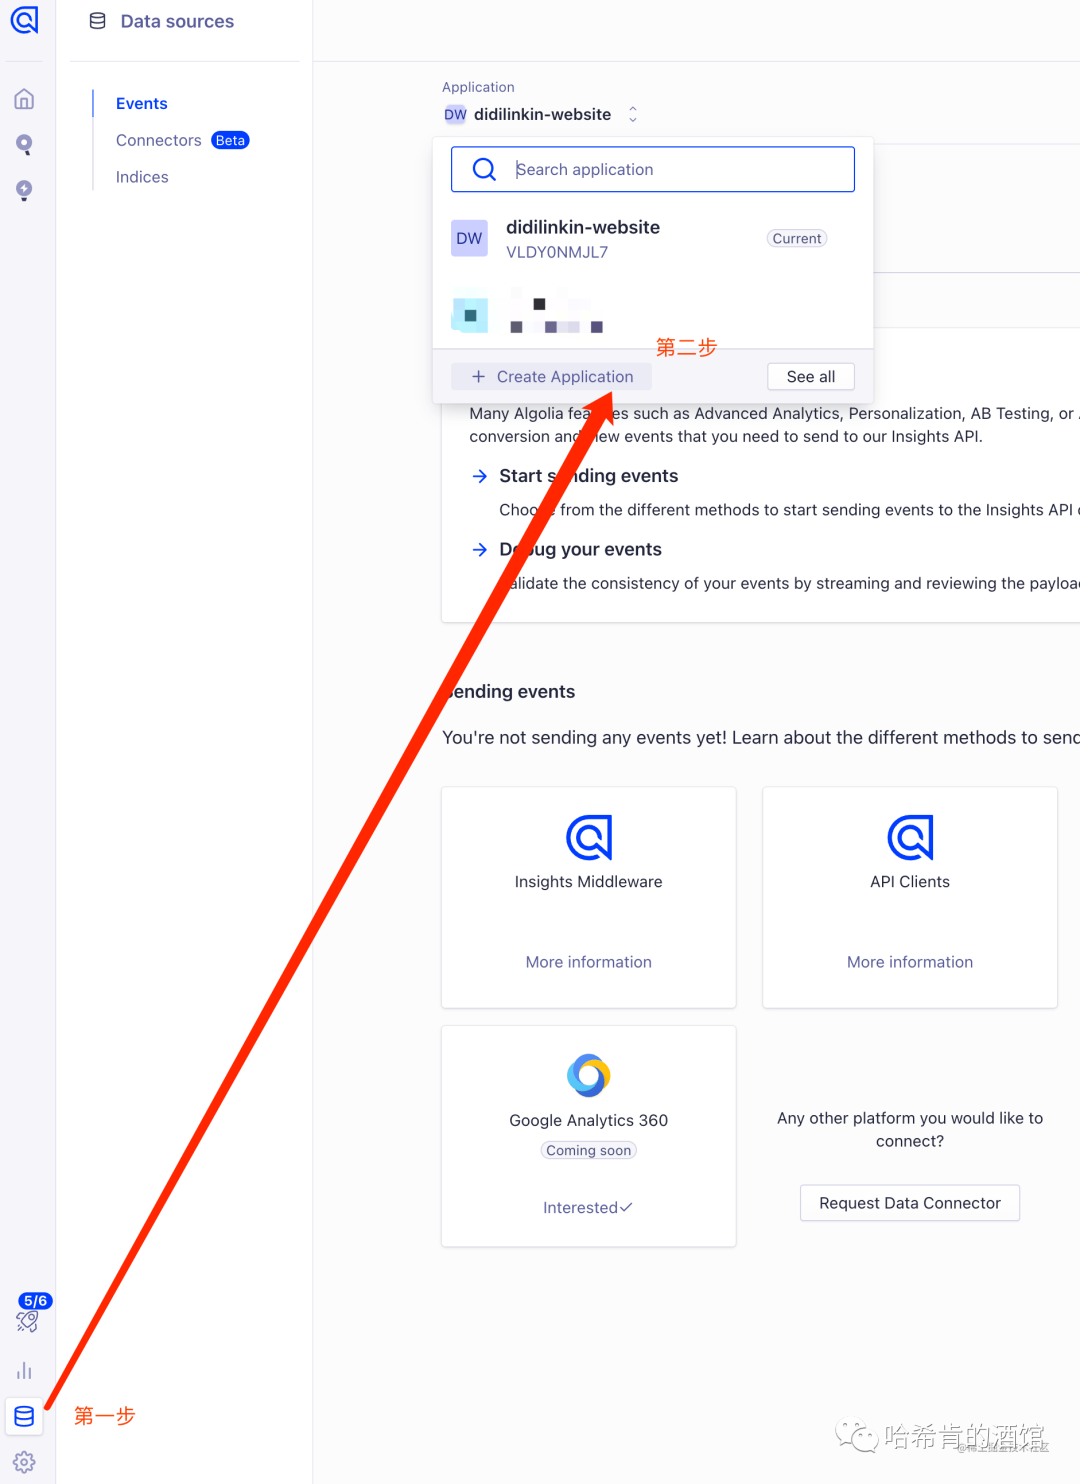
设置 Application 名称, 选择免费计划
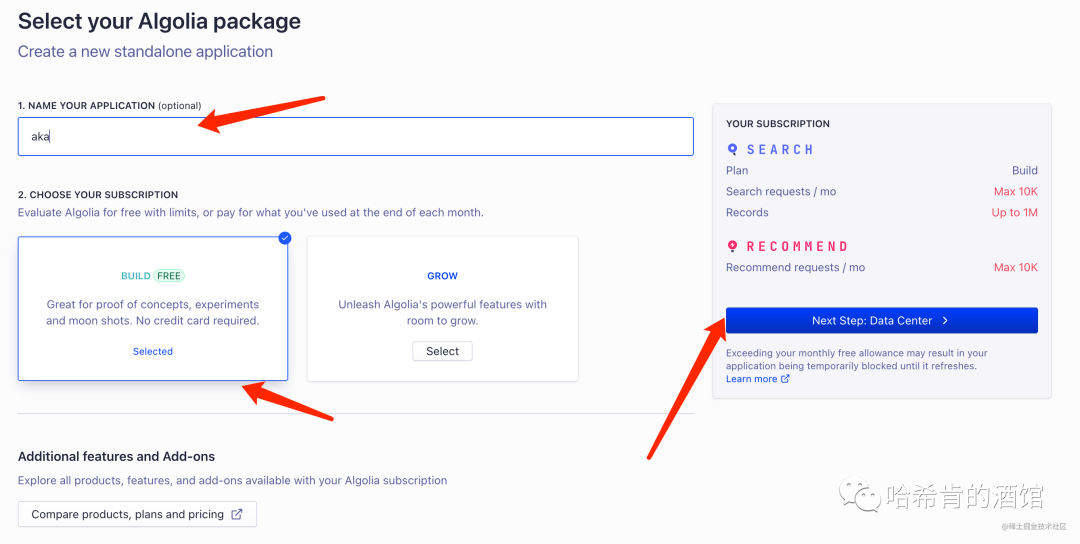
最后选择响应速度快的服务后, 创建成功✅
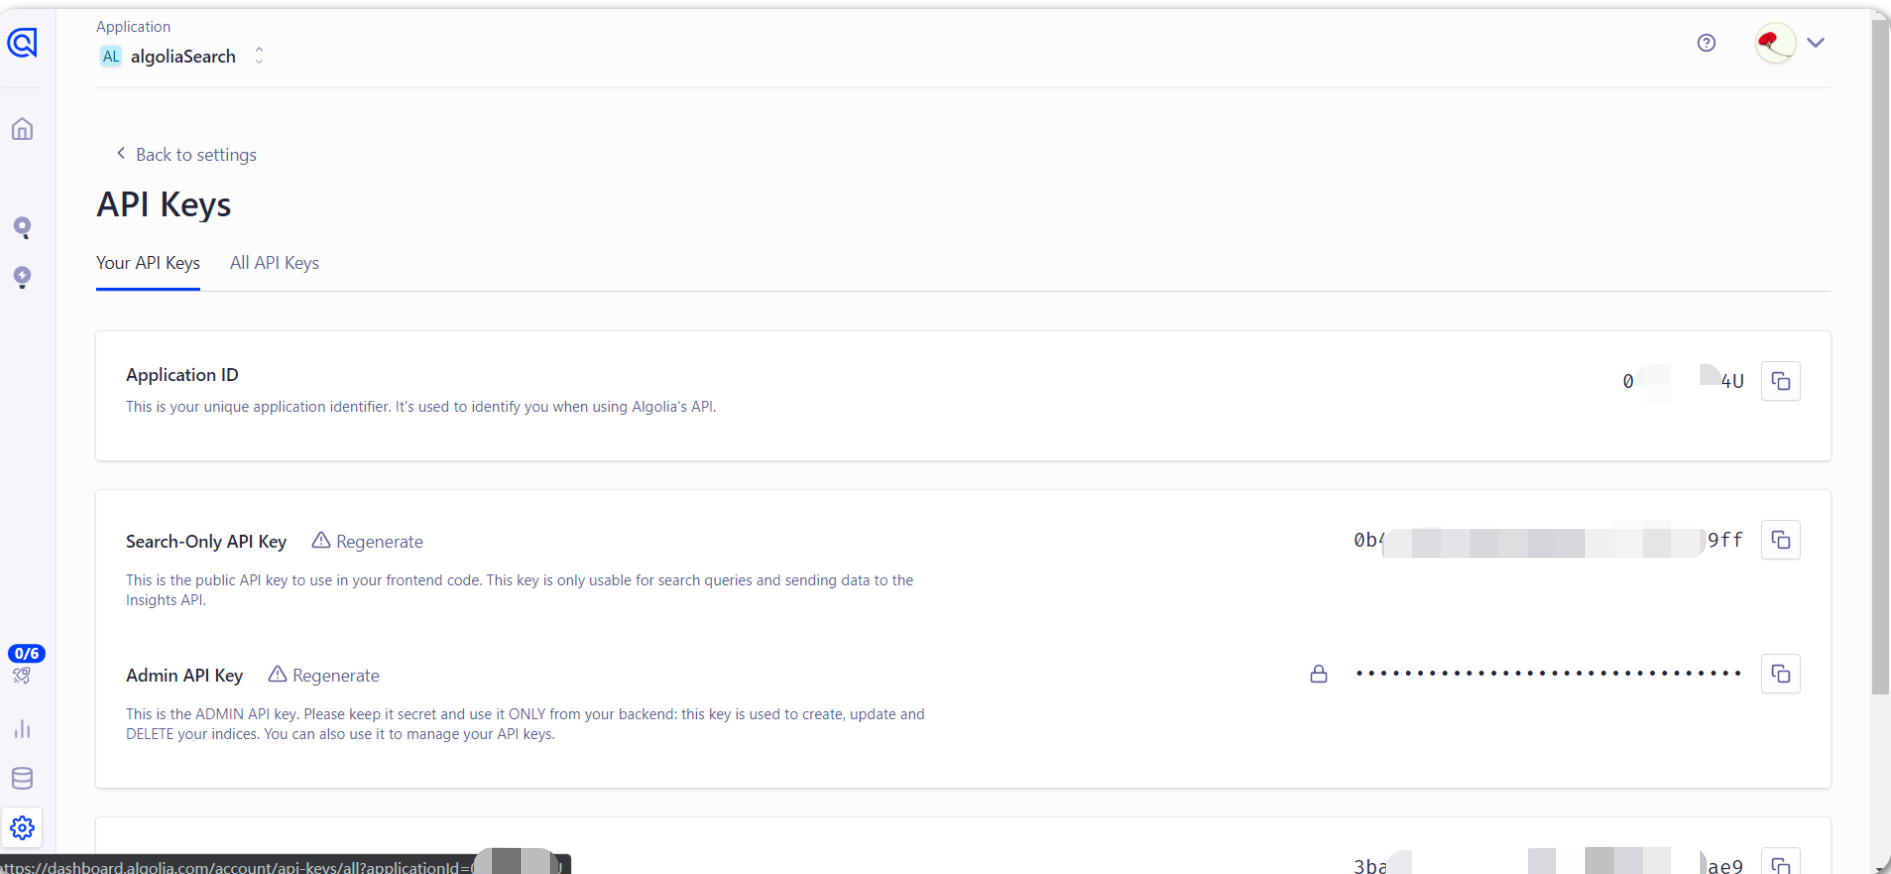
控制台打开 设置页面,点击 API keys
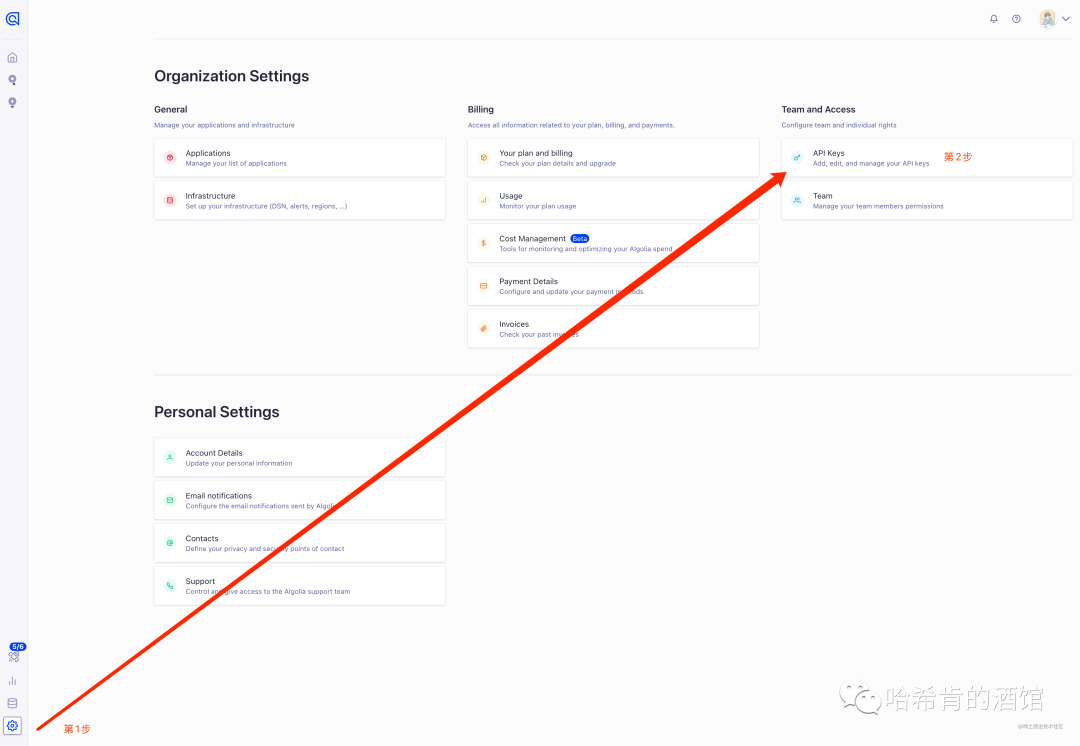
找到 接下来本地配置需要的数据
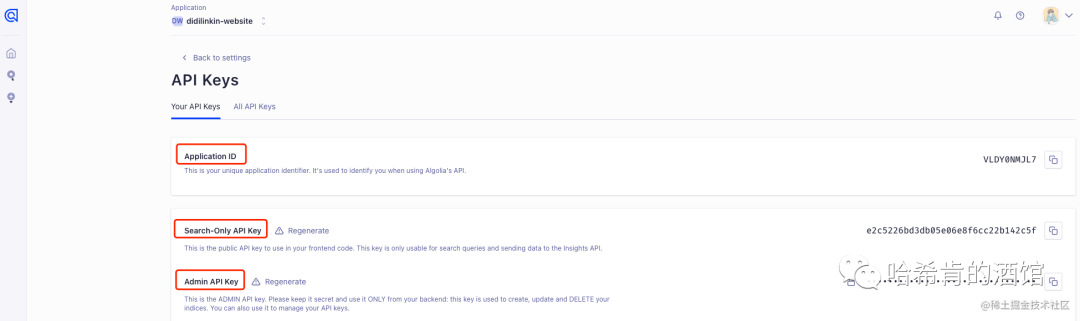
这里记录好需要用到的数据。
3、Docusaurus 项目中配置 algolia
Docusaurus 官方已经支持了 algolia 搜索,直接去 docusaurus.config.js 文件配置即可:
来到自己Docusaurus项目仓库,配置docusaurus.config.js文件:
themeConfig: {
        // ...
    algolia: {
      apiKey: "Admin API Key",
      indexName: "刚才创建索引的 name,不是数据源的 name",
      appId: "Application ID",
    },
}
        algolia: {
            apiKey: "0b438cb1xxxxx84d79ff",
            indexName: "algoliaSearch",
            appId: "0Rxxxxxxxx4U",
        },

如果是用其他搭建的比如 Hexo,VuePress/ VitePres,也类似,在对应在 config 文件配置就好。
上面 apiKey、appId 可以在 API Keys 里面查看:
运行项目,就可以看到出现搜索功能,这时候还不能用,因为 algolia 还没有爬取自己网站的内容。
提交docusaurus本地数据到服务器端。
4、执行爬虫程序 - docsearch-scraper
_以下两种 爬虫方式任选其一即可 (推荐使用 GitHub Actions)
_
1. Docker 爬取本地内容推送到 Algolia
自己本次选择的方式。
由于 Algolia 限制开源项目才可以免费试用爬虫,所以我们要自己推送数据。需要如下环境:
- Docker(我的是 mac ,下载安装即可)
- jq(
brew install jq)—— 解析 json 文件用
yum install -y epel-release
yum install -y jq
爬取环境创建后,完成以下步骤
创建如下2个配置文件
(1)创建 .env 文件存放环境变量
.env
ALGOLIA_APP_ID=0xxxxxxU
ALGOLIA_API_KEY=a5xxxxxxxxxxxxxxx01 ## 务必确认, 这是坑点 不要用 'Write API Key' 或者 'Search API Key',一定要用Admin API Key才行。
(2)创建一个docsearch.json文件
docsearch.json
-
docsearch-config.json (爬虫配置文件)
需修改 3 处:
-
index_name
-
start_urls
-
sitemap_urls
参考文章:
{
  // 修改部分 修改1:
  "index_name": "对应上config文件里面的indexName,也是创建的索引名",
  "start_urls": ["https://www.website.com/"], // 自己的域名网站地址 修改2:
  // 更换自己的域名地址,Docusaurus 官方会有配置生成 sitemap.xml 的方式 修改3:
  "sitemap_urls": ["https://www.website.com/sitemap.xml"],
  // end
  "stop_urls": ["/search"], // 排除不需要爬取页面的路由地址
  "selectors": {
    "lvl0": {
      "selector": "(//ul[contains(@class,'menu__list')]//a[contains(@class, 'menu__link menu__link--sublist menu__link--active')]/text() | //nav[contains(@class, 'navbar')]//a[contains(@class, 'navbar__link--active')]/text())[last()]",
      "type": "xpath",
      "global": true,
      "default_value": "Documentation"
    },
    "lvl1": "header h1, article h1",
    "lvl2": "article h2",
    "lvl3": "article h3",
    "lvl4": "article h4",
    "lvl5": "article h5, article td:first-child",
    "lvl6": "article h6",
    "text": "article p, article li, article td:last-child"
  },
  "custom_settings": {
    "attributesForFaceting": [
      "type",
      "lang",
      "language",
      "version",
      "docusaurus_tag"
    ],
    "attributesToRetrieve": [
      "hierarchy",
      "content",
      "anchor",
      "url",
      "url_without_anchor",
      "type"
    ],
    "attributesToHighlight": ["hierarchy", "content"],
    "attributesToSnippet": ["content:10"],
    "camelCaseAttributes": ["hierarchy", "content"],
    "searchableAttributes": [
      "unordered(hierarchy.lvl0)",
      "unordered(hierarchy.lvl1)",
      "unordered(hierarchy.lvl2)",
      "unordered(hierarchy.lvl3)",
      "unordered(hierarchy.lvl4)",
      "unordered(hierarchy.lvl5)",
      "unordered(hierarchy.lvl6)",
      "content"
    ],
    "distinct": true,
    "attributeForDistinct": "url",
    "customRanking": [
      "desc(weight.pageRank)",
      "desc(weight.level)",
      "asc(weight.position)"
    ],
    "ranking": [
      "words",
      "filters",
      "typo",
      "attribute",
      "proximity",
      "exact",
      "custom"
    ],
    "highlightPreTag": "<span class='algolia-docsearch-suggestion--highlight'>",
    "highlightPostTag": "</span>",
    "minWordSizefor1Typo": 3,
    "minWordSizefor2Typos": 7,
    "allowTyposOnNumericTokens": false,
    "minProximity": 1,
    "ignorePlurals": true,
    "advancedSyntax": true,
    "attributeCriteriaComputedByMinProximity": true,
    "removeWordsIfNoResults": "allOptional",
    "separatorsToIndex": "_",
    "synonyms": [
      ["js", "javascript"],
      ["ts", "typescript"]
    ]
  }
}
自己本次最终版:
{
  "index_name": "algoliaSearch",
  "start_urls": ["https://www.onedayxyy.cn/"],
  "sitemap_urls": ["https://www.onedayxyy.cn/sitemap.xml"],
  "stop_urls": ["/search"],
  "selectors": {
    "lvl0": {
      "selector": "(//ul[contains(@class,'menu__list')]//a[contains(@class, 'menu__link menu__link--sublist menu__link--active')]/text() | //nav[contains(@class, 'navbar')]//a[contains(@class, 'navbar__link--active')]/text())[last()]",
      "type": "xpath",
      "global": true,
      "default_value": "Documentation"
    },
    "lvl1": "header h1, article h1",
    "lvl2": "article h2",
    "lvl3": "article h3",
    "lvl4": "article h4",
    "lvl5": "article h5, article td:first-child",
    "lvl6": "article h6",
    "text": "article p, article li, article td:last-child"
  },
  "custom_settings": {
    "attributesForFaceting": [
      "type",
      "lang",
      "language",
      "version",
      "docusaurus_tag"
    ],
    "attributesToRetrieve": [
      "hierarchy",
      "content",
      "anchor",
      "url",
      "url_without_anchor",
      "type"
    ],
    "attributesToHighlight": ["hierarchy", "content"],
    "attributesToSnippet": ["content:10"],
    "camelCaseAttributes": ["hierarchy", "content"],
    "searchableAttributes": [
      "unordered(hierarchy.lvl0)",
      "unordered(hierarchy.lvl1)",
      "unordered(hierarchy.lvl2)",
      "unordered(hierarchy.lvl3)",
      "unordered(hierarchy.lvl4)",
      "unordered(hierarchy.lvl5)",
      "unordered(hierarchy.lvl6)",
      "content"
    ],
    "distinct": true,
    "attributeForDistinct": "url",
    "customRanking": [
      "desc(weight.pageRank)",
      "desc(weight.level)",
      "asc(weight.position)"
    ],
    "ranking": [
      "words",
      "filters",
      "typo",
      "attribute",
      "proximity",
      "exact",
      "custom"
    ],
    "highlightPreTag": "<span class='algolia-docsearch-suggestion--highlight'>",
    "highlightPostTag": "</span>",
    "minWordSizefor1Typo": 3,
    "minWordSizefor2Typos": 7,
    "allowTyposOnNumericTokens": false,
    "minProximity": 1,
    "ignorePlurals": true,
    "advancedSyntax": true,
    "attributeCriteriaComputedByMinProximity": true,
    "removeWordsIfNoResults": "allOptional",
    "separatorsToIndex": "_",
    "synonyms": [
      ["js", "javascript"],
      ["ts", "typescript"]
    ]
  }
}
- jq 安装完成后, 在命令行执行 爬虫脚本
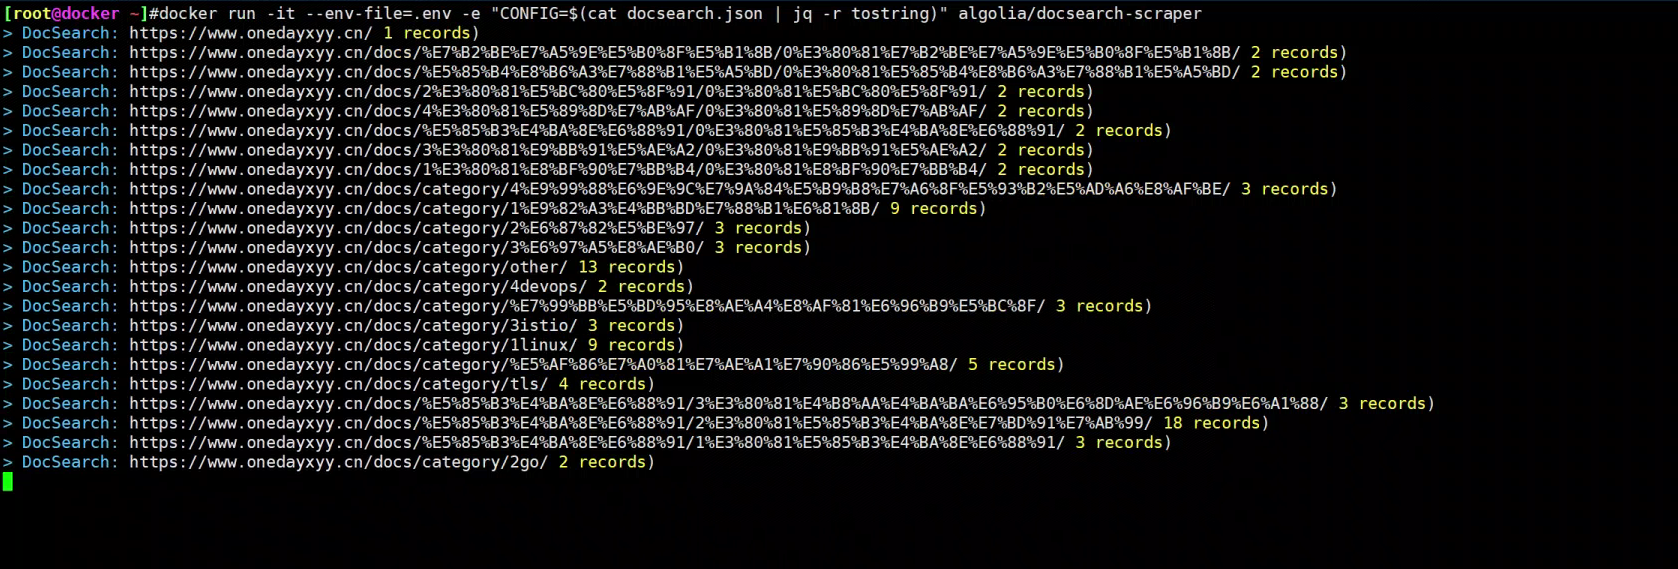
控制台执行 docker 爬去推送命令:
docker run -it --env-file=.env -e "CONFIG=$(cat docsearch.json | jq -r tostring)" algolia/docsearch-scraper
- 等待 容器运行完成, 如下即可
接下来就是等待阶段,这里需要点时间 download docker 内置的东西。
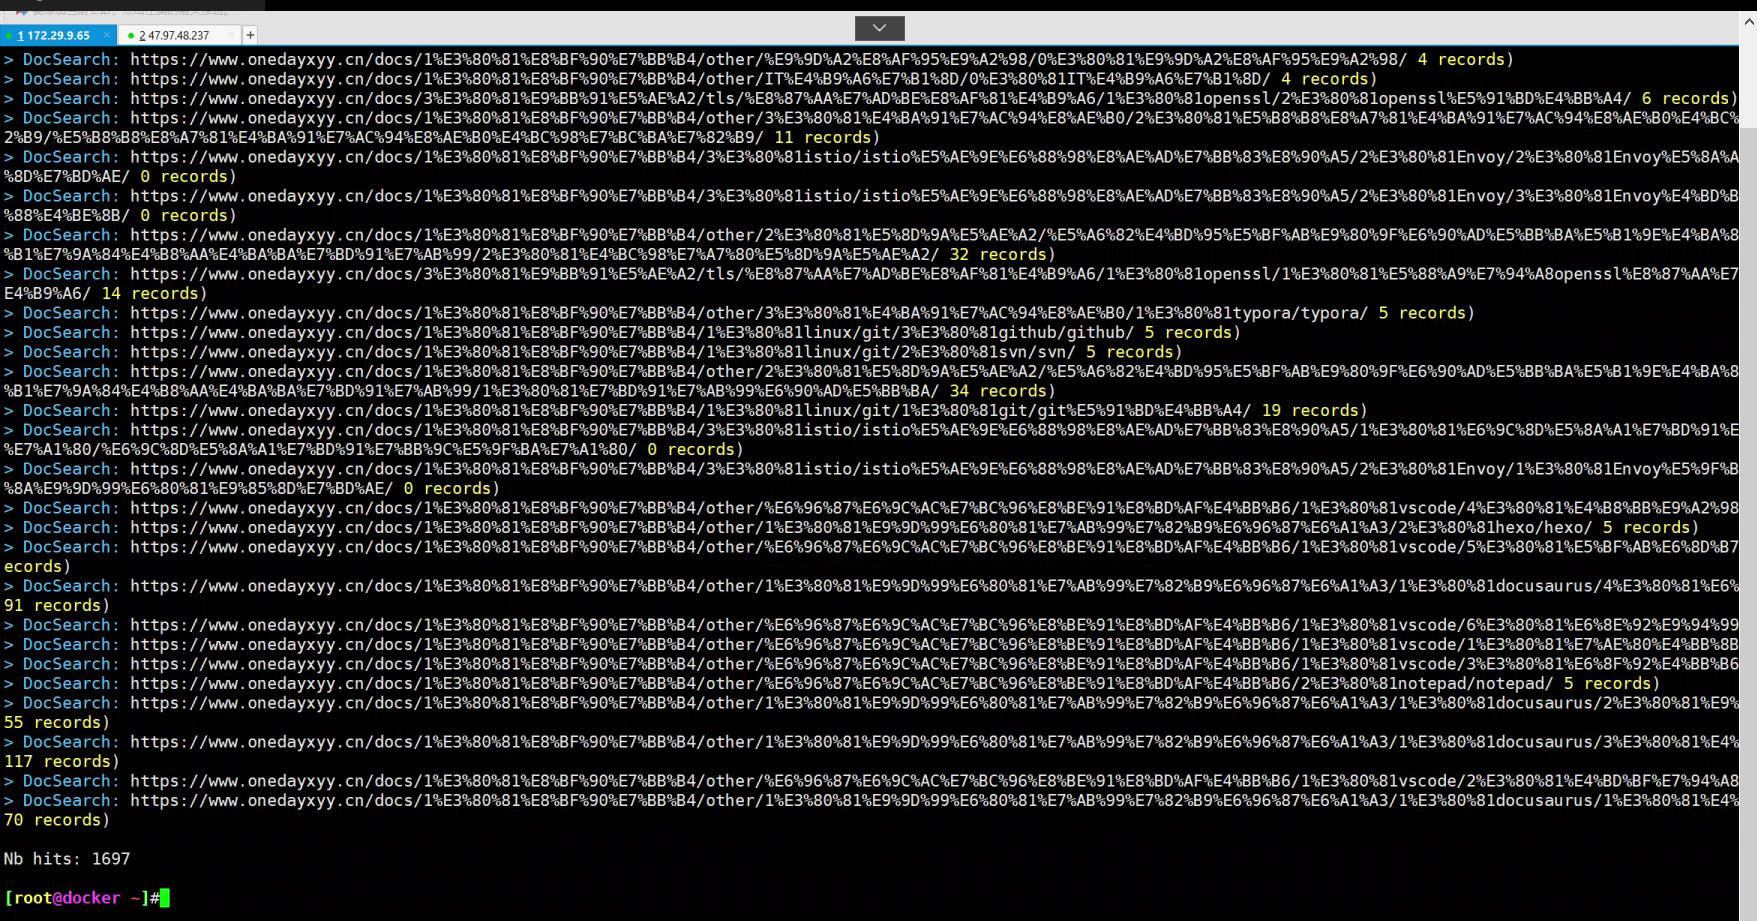
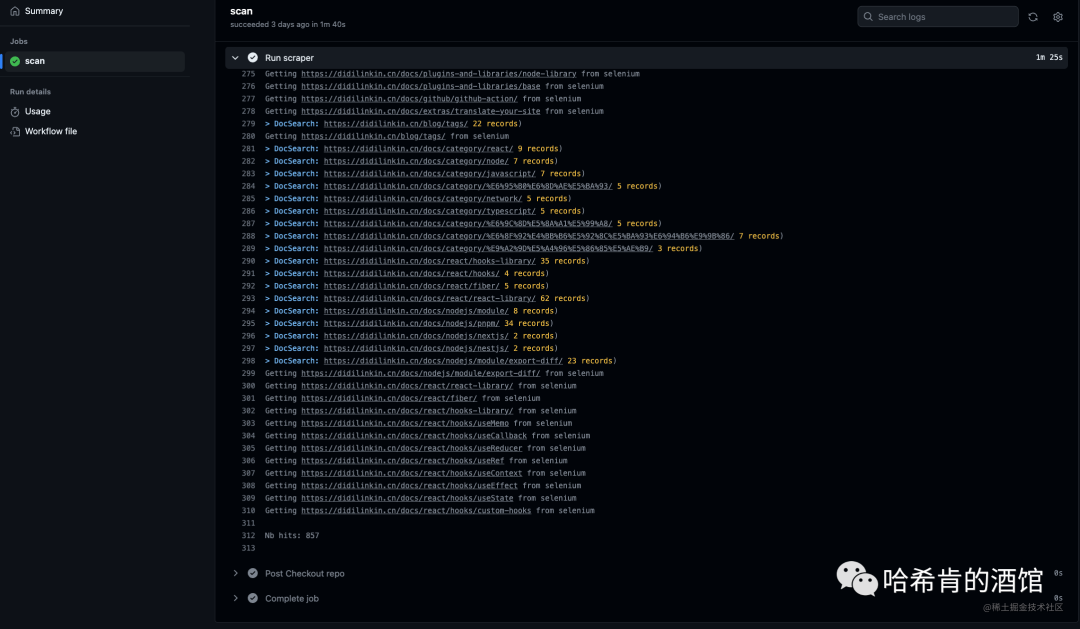
最后控制台出现:
...
Getting https://didilinkin.cn/docs/react/hooks/custom-hooks from selenium
Getting https://didilinkin.cn/docs/react/hooks/useMemo from selenium
Getting https://didilinkin.cn/docs/react/hooks/useCallback from selenium
Getting https://didilinkin.cn/docs/javascript/versions/es-2016 from selenium
Getting https://didilinkin.cn/docs/javascript/versions/es-2015 from selenium
> DocSearch: https://didilinkin.cn/docs/plugins-and-libraries/big-screen/ 17 records)
> DocSearch: https://didilinkin.cn/docs/server/nginx/nginx-forward-proxy-vs-reverse-proxy/ 8 records)
> DocSearch: https://didilinkin.cn/docs/category/caddy/ 3 records)
> DocSearch: https://didilinkin.cn/docs/category/nginx/ 5 records)

Nb hits: 1369
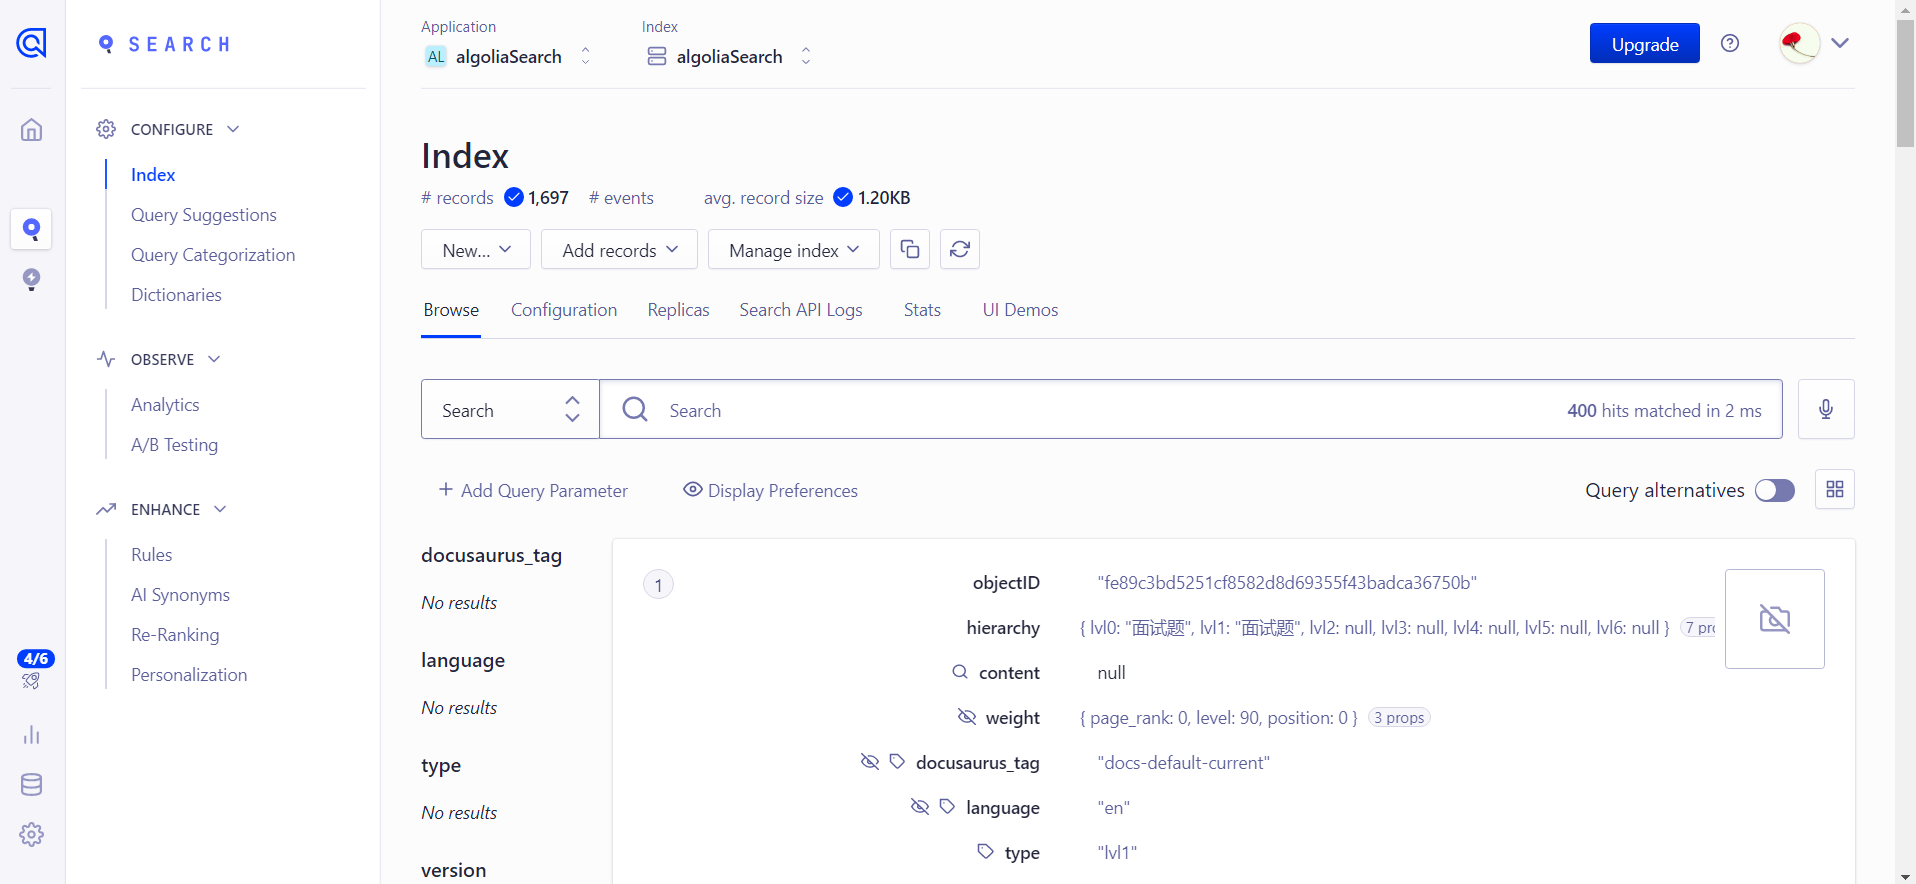
自己执行后效果:
到自己的algolia账户下看下数据情况:
2. GitHub Actions 执行爬虫
仅做记录,待测试。
v1参考:
在 .github/workflows/ 文件夹下 创建 docsearch-scraper.yml, 用来定义 GitHub Actions 工作流
name: 索引爬虫 docsearch-scraper

on:
  push:
    branches: [master]
  pull_request:
    branches: [master]

jobs:
  scan:
    runs-on: ubuntu-latest

    steps:
      - name: Sleep for 10 seconds
        run: sleep 10s
        shell: bash

      - name: Checkout repo
        uses: actions/checkout@v3

      - name: Run scraper
        env:
          APPLICATION_ID: ${{ secrets.APPLICATION_ID }}
          API_KEY: ${{ secrets.API_KEY }}
        run: |
          CONFIG="$(cat docsearch-config.json)"
          docker run -i --rm \
                  -e APPLICATION_ID=$APPLICATION_ID \
                  -e API_KEY=$API_KEY \
                  -e CONFIG="${CONFIG}" \
                  algolia/docsearch-scraper
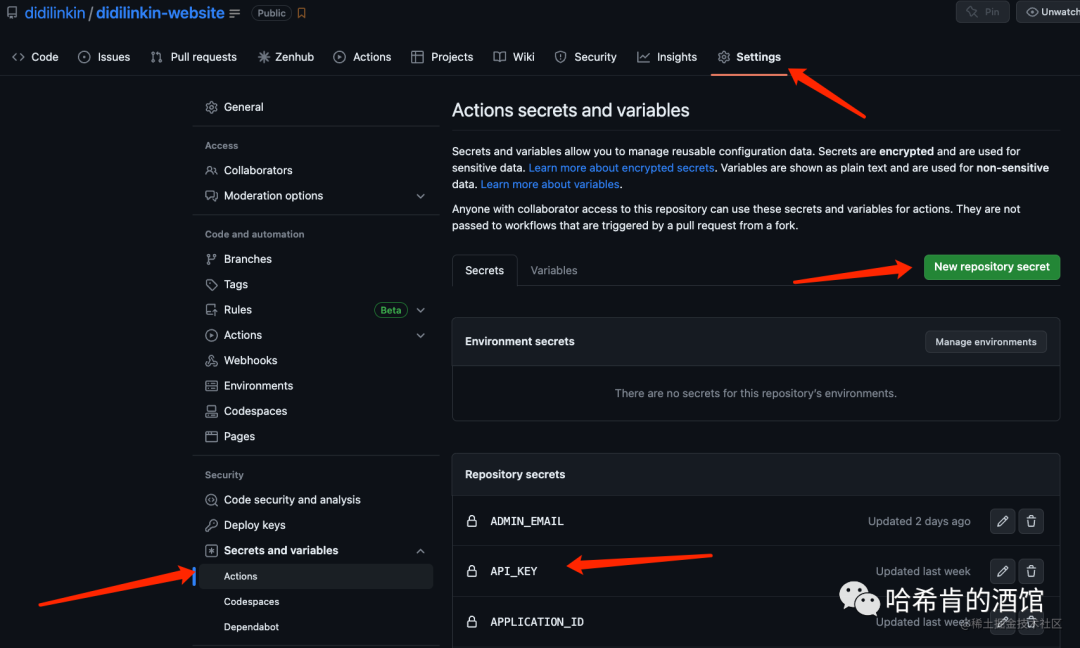
然后在 GitHub 的 Secrets 创建
-
APPLICATION_ID
-
API_KEY — Admin API Key
当使用 Git 推送项目到 GitHub 时, Actions 就会自动执行 爬虫任务
v2 参考
可以利用 github 的 Action 帮我们跑这个阶段的内容,这个还是比较方便的。
项目根目录创建 .github/workflows/docsearch.yml 文件
内容:
name: docsearch
on:  push:    branches:      - masterjobs:  algolia:    runs-on: ubuntu-latest    steps:      - uses: actions/checkout@v2
      - name: Get the content of docsearch.json as config        id: algolia_config        run: echo "::set-output name=config::$(cat docsearch.json | jq -r tostring)"
      - name: Run algolia/docsearch-scraper image        env:          ALGOLIA_APP_ID: ${{ secrets.ALGOLIA_APP_ID }}          ALGOLIA_API_KEY: ${{ secrets.ALGOLIA_API_KEY }}          CONFIG: ${{ steps.algolia_config.outputs.config }}        run: |          docker run \            --env APPLICATION_ID=${ALGOLIA_APP_ID} \            --env API_KEY=${ALGOLIA_API_KEY} \            --env "CONFIG=${CONFIG}" \            algolia/docsearch-scraper
Copy
这里说一下设置 github action 触发的条件
- 这个是 push 到 master 分支时触发。
on: push: branches: - master
Copy
- 发布成功后触发
on: deployment
Copy
- 定时触发
on: schedule: # 约每天早上8点触发(UTC时间0点) - cron: "0 0 * * *"
Copy
- 手动触发
on: workflow_dispatch:
Copy
⚠️ 注意:
需要注意的是:免费的创建的 algolia 限制文件 records 1000,如果超过的话,Github Action 会跑失败,所以也就是爬取推送不成功。导致搜索用不了。暂时还不知道怎么解决,所以我都是本地用 docker 的。
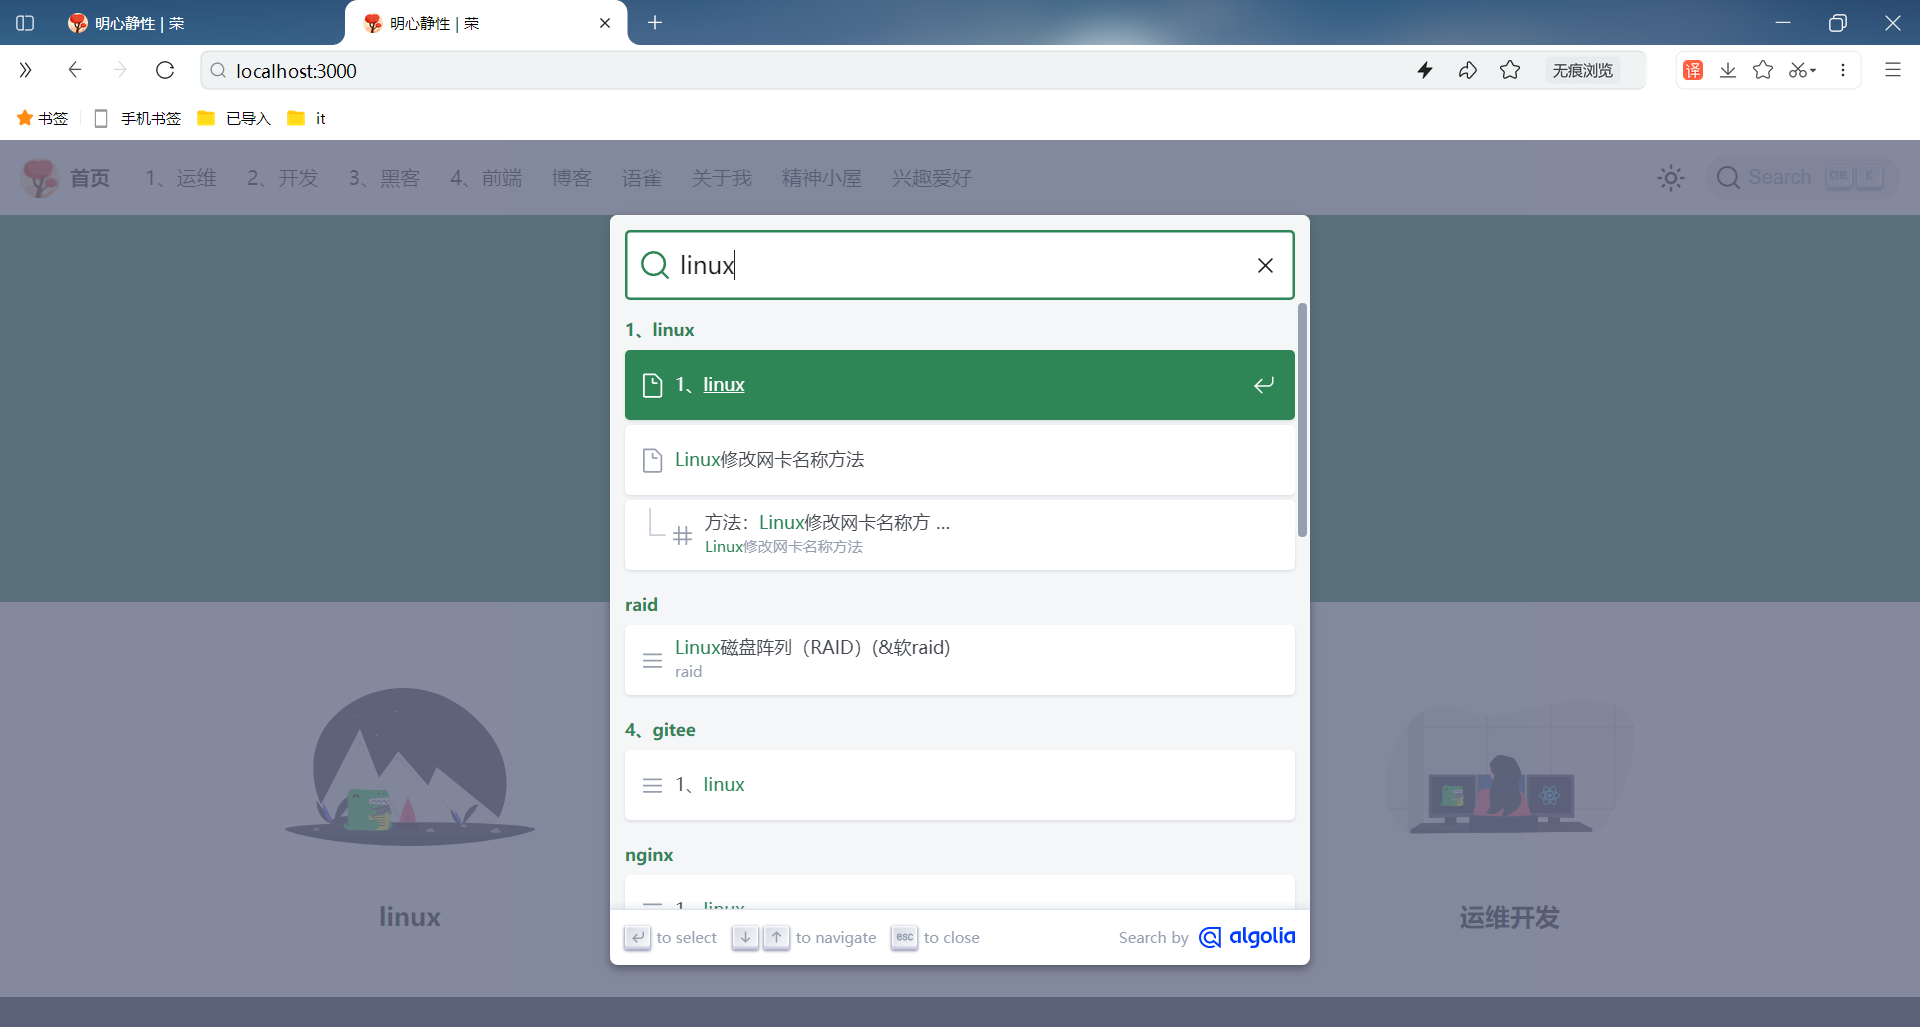
5、测试
可以看到,此时自己博客网站和本地测试DOI可以正常使用网站搜索功能的:(完美😘)

FAQ
官网其他搜索方案
https://www.docusaurus.cn/docs/search

参考链接
- 参考:别人docusarurus文章
自己本次主要参照的是这个文档,点赞作者。😘
https://ihoneys.github.io/docusaurus-algolia/
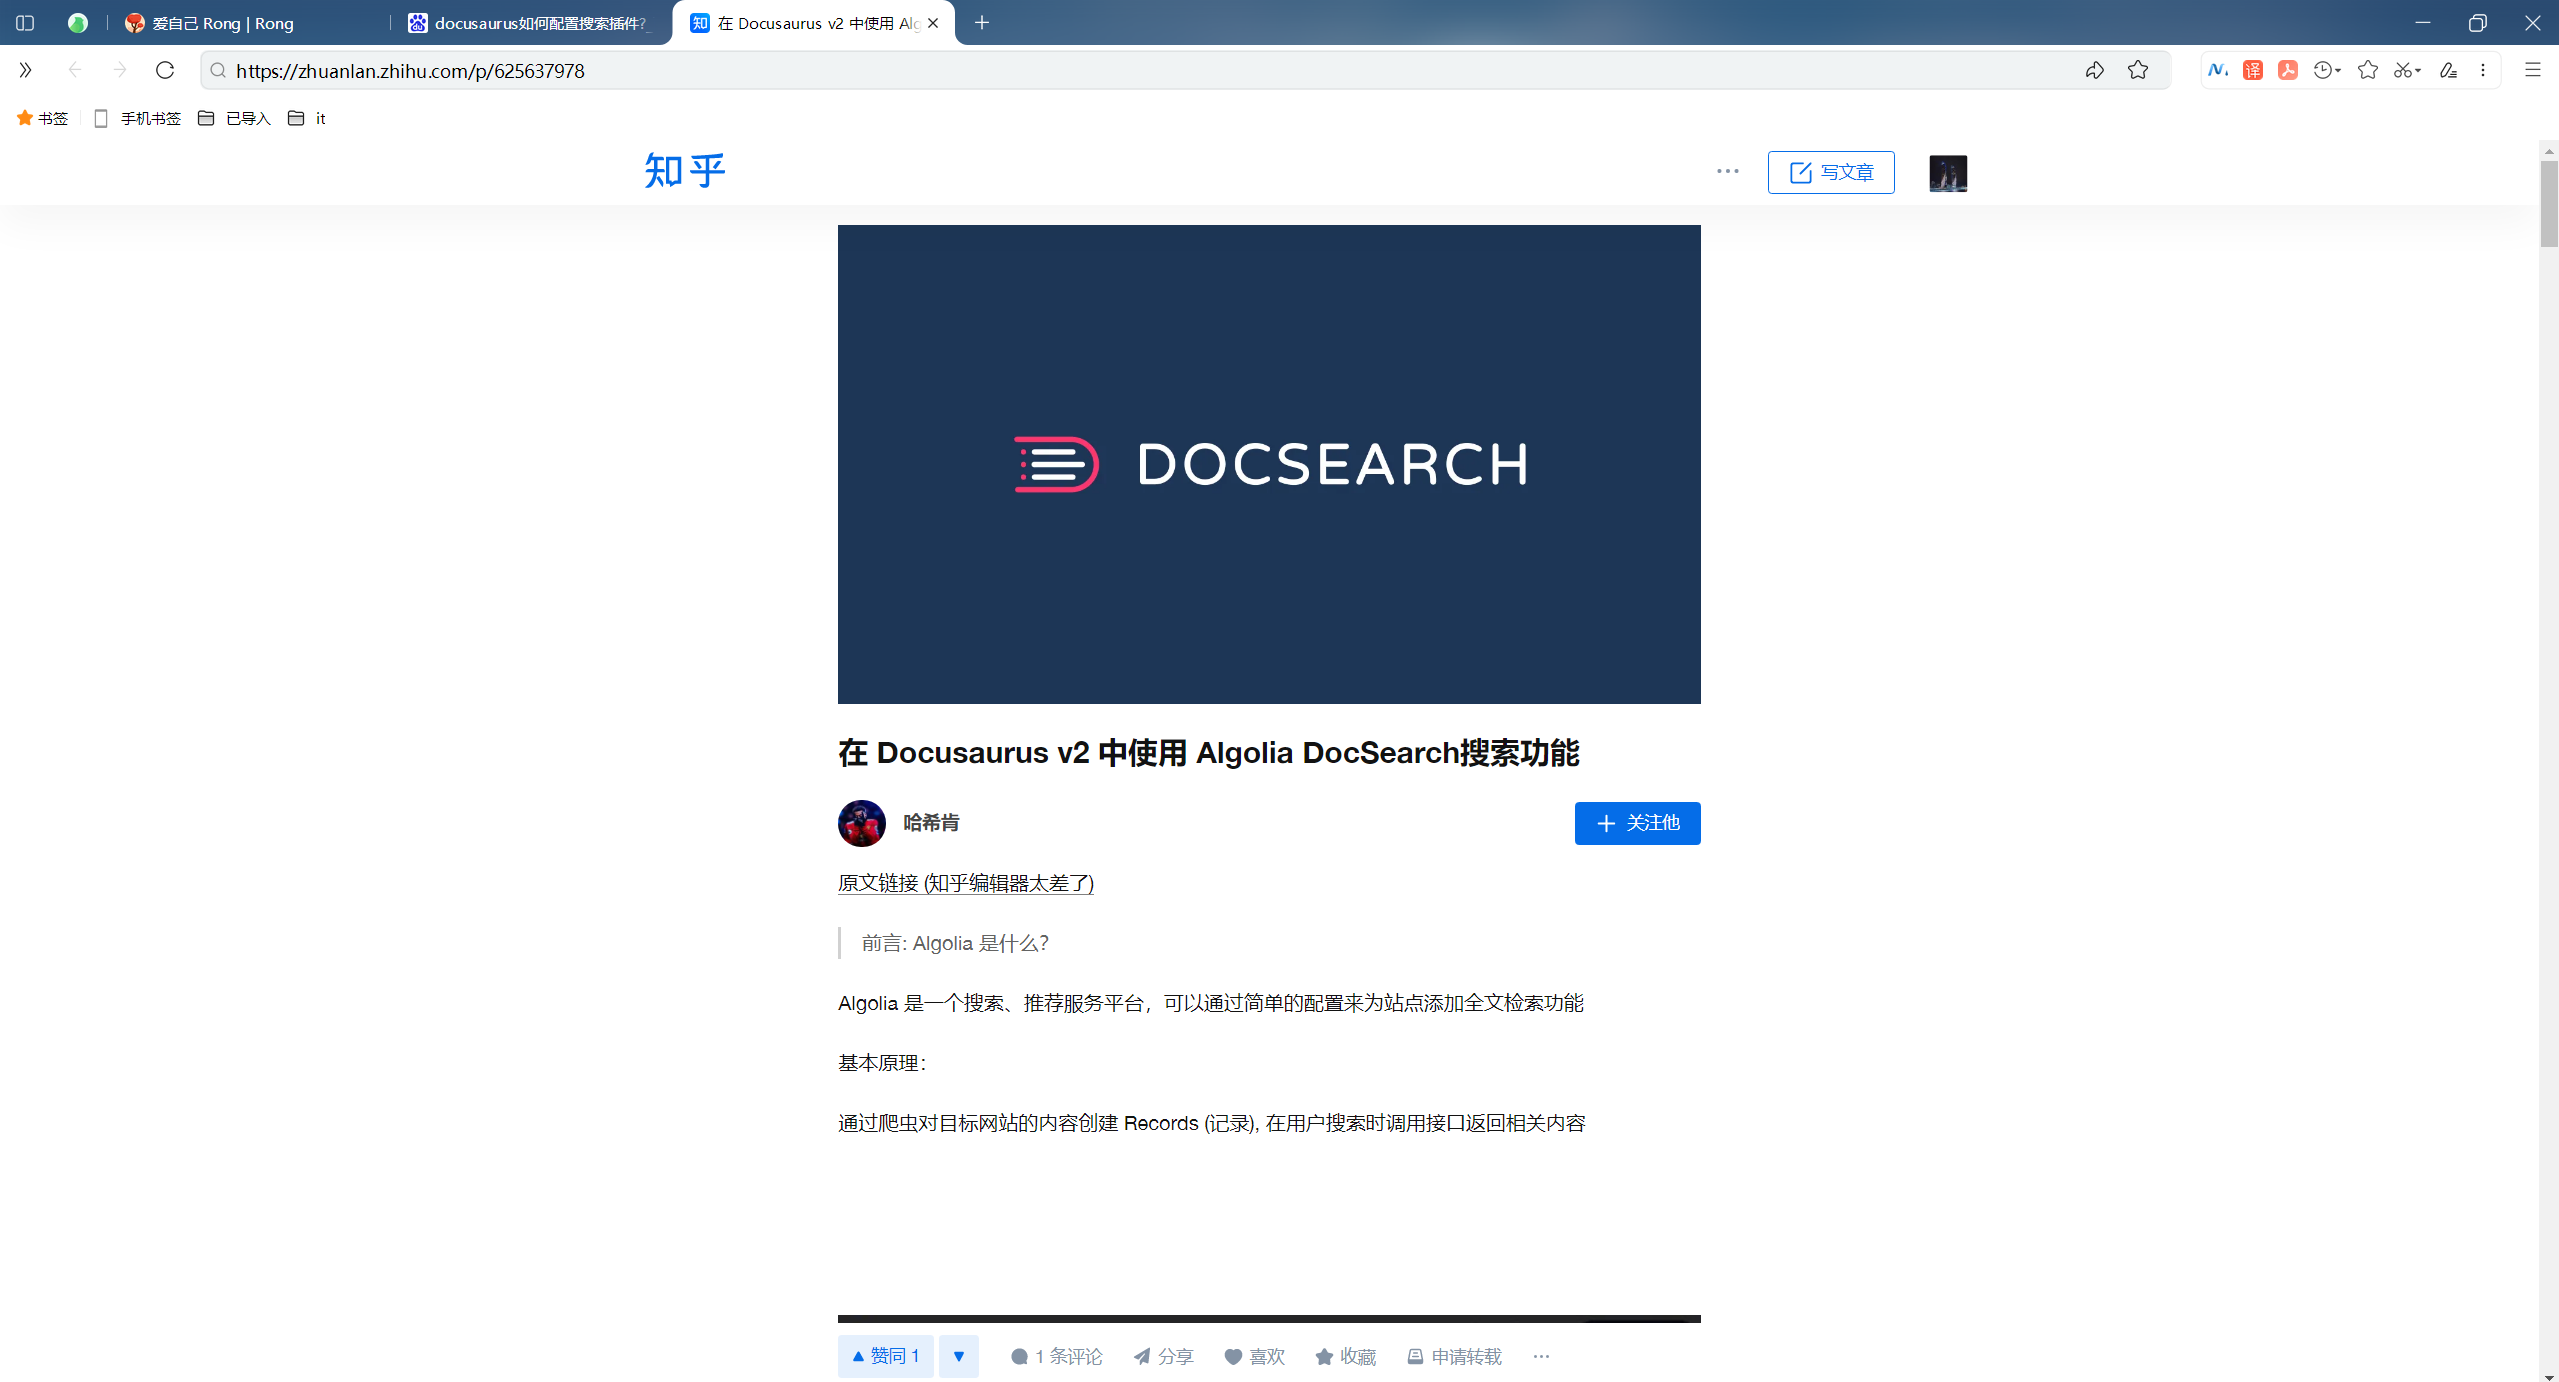
- 参考:知乎文章
https://zhuanlan.zhihu.com/p/625637978
微信文章地址:
https://mp.weixin.qq.com/s/PJZZ6fAqk_YguNmusvJ1Rg

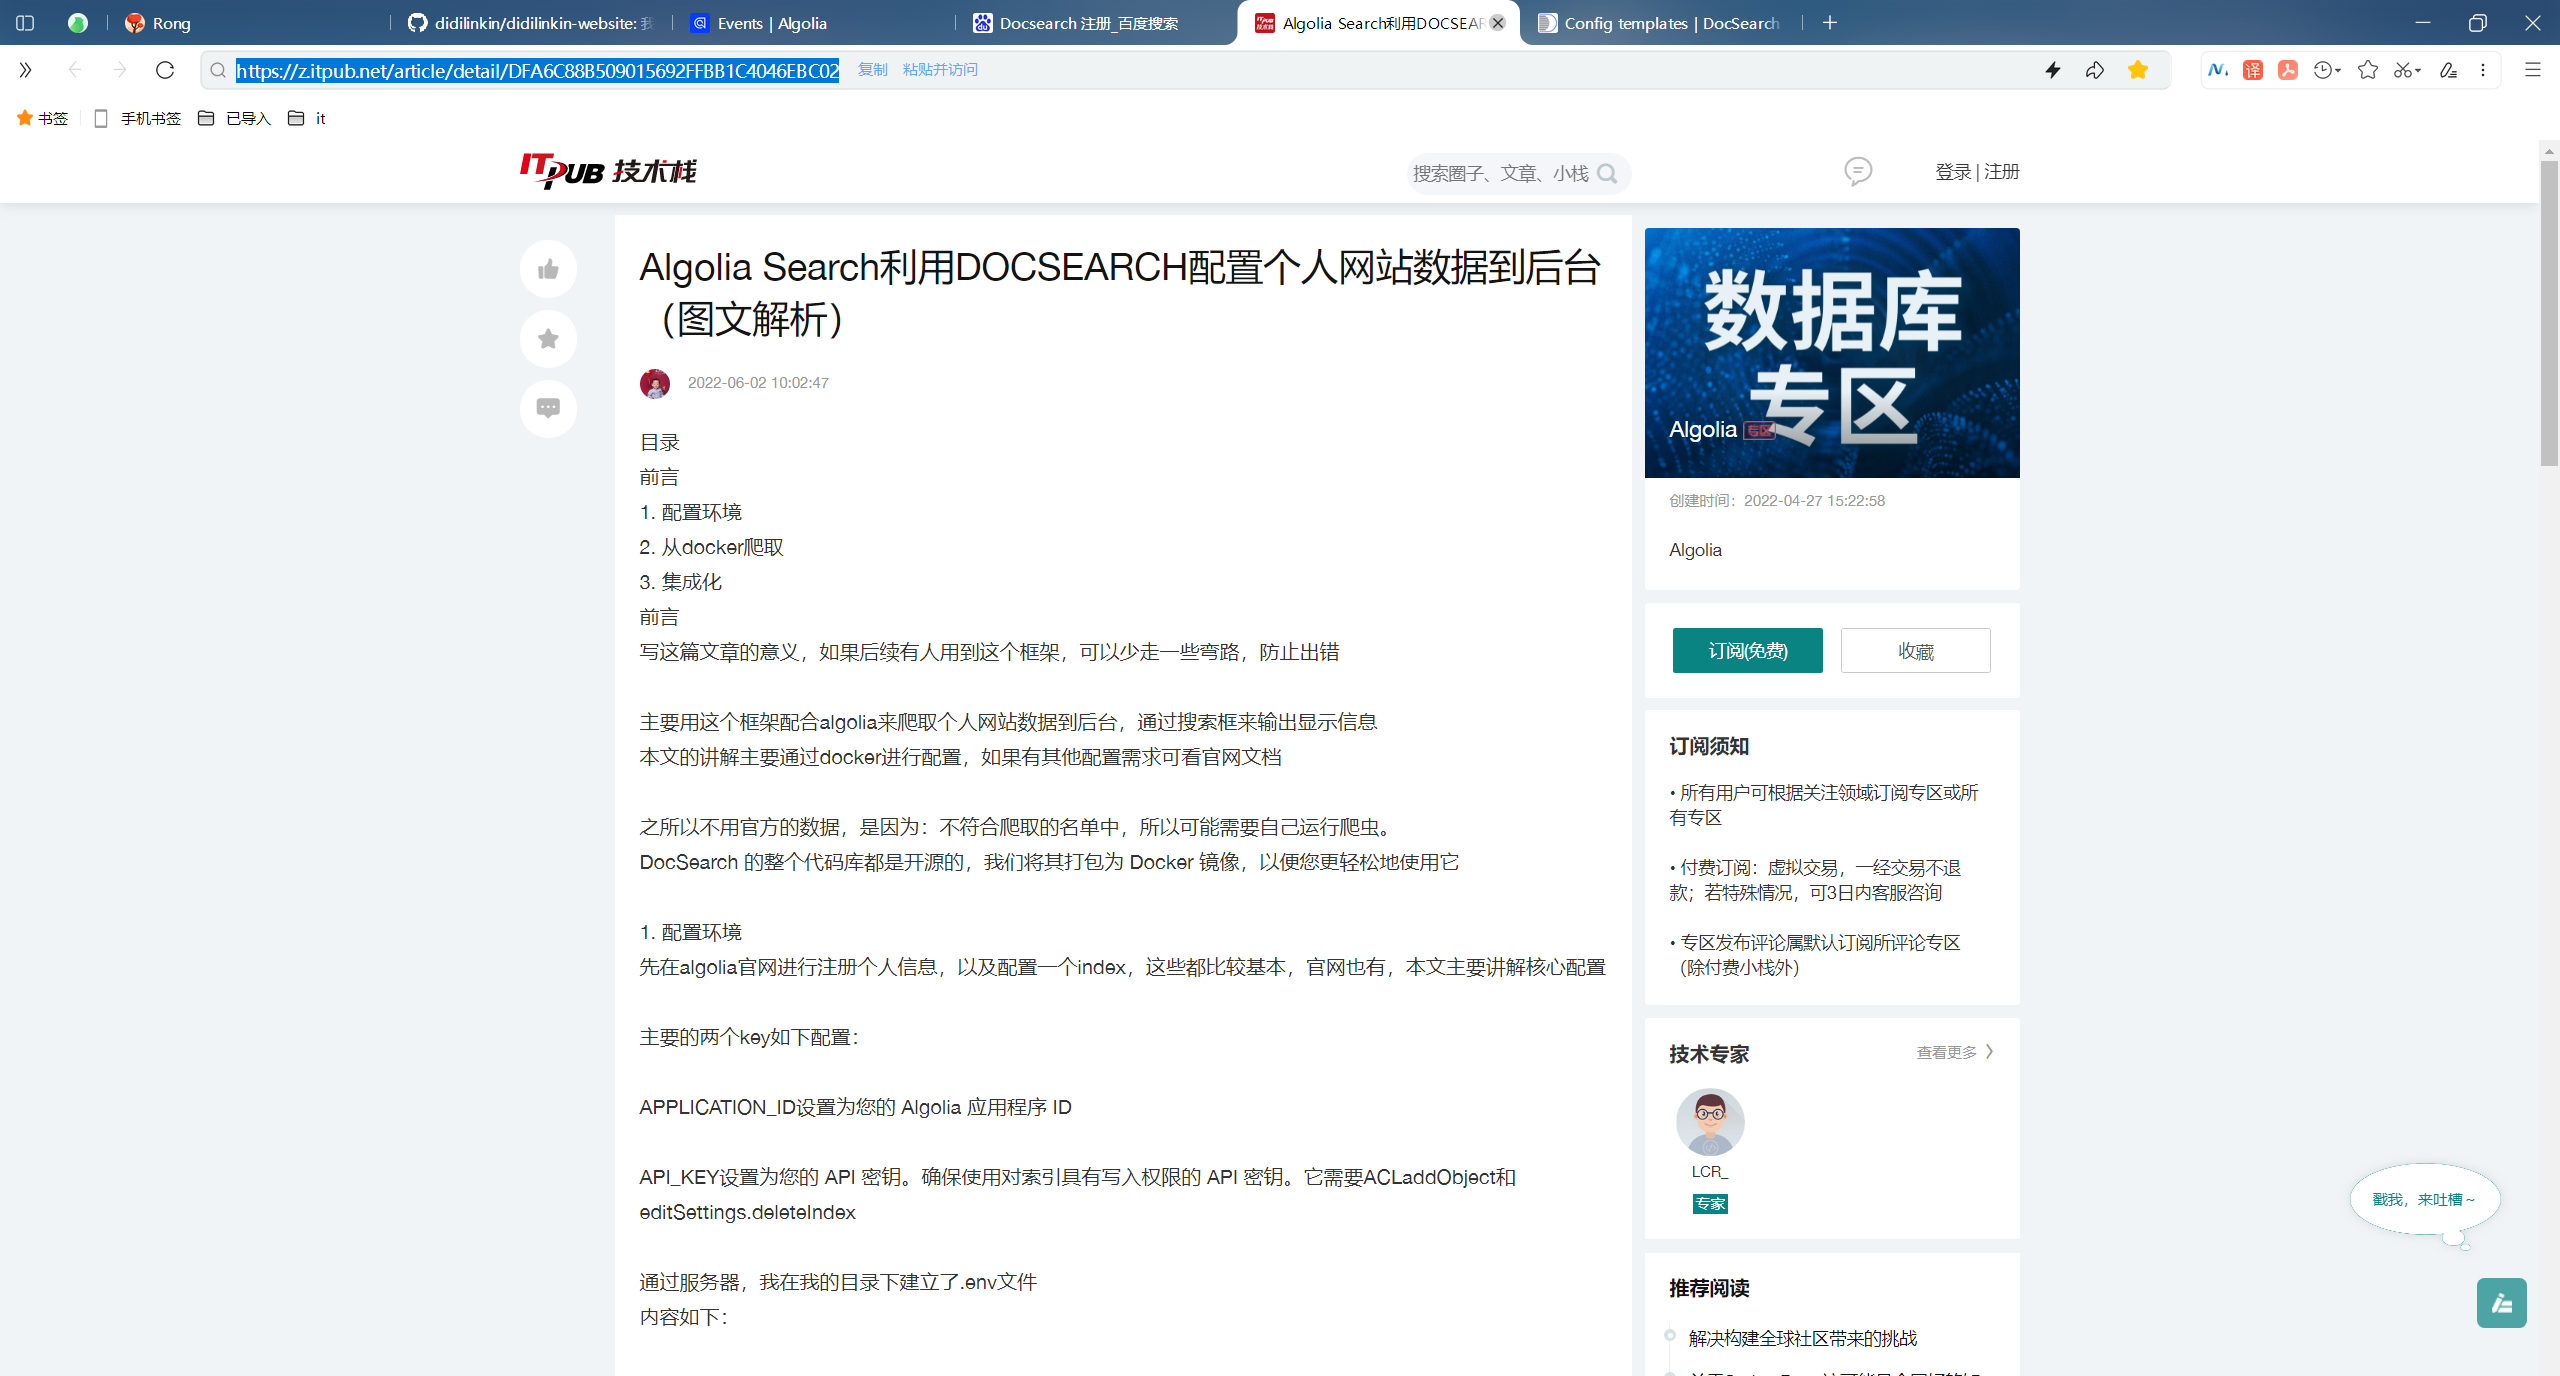
- 参考
https://z.itpub.net/article/detail/DFA6C88B509015692FFBB1C4046EBC02
常见问题
🍀 这个问题自己遇到了,最后换成Admin API Key就能正常工作了。
-
algoliasearch.exceptions.RequestException: Method not allowed with this API key
这个错误通常表示您在使用 Algolia Search API 时使用了无效的 API 密钥或 API 密钥权限不允许使用该请求方法
-
分析: 使用的 key 不对 - 当前使用的也许是
Search-Only API Key -
解决方法: 改为使用
Admin API Key -
Error: Process completed with exit code 3.
由于尝试使用 Algolia Search API 更新对象时所使用的 API 密钥缺少必要的权限
确认您正在使用具有正确权限的 Algolia Search API 密钥来更新对象
-
分析: 使用的 key 权限不对 - 当前使用的也许是
Write API Key -
解决方法: 改为使用
Admin API Key
🍀
-
本地执行 爬虫脚本, 报错: Error: Cannot find module ‘winston’
使用 yarn 重新安装 winston
 yarn global remove winston
 yarn global add winston
🍀
- 本地执行 爬虫脚本, 报错:
Error: {cli} was removed in winston@3.0.0.
  # 查看本地的 全局依赖是否存在 jq
  yarn global list --depth=0

  # 删除 jq依赖
  yarn global remove jq
- 本地执行 爬虫脚本, 报错: zsh: command not found: jq
确保本地 npm, yarn, pnpm 的全局依赖中没有 jq, 使用 brew 安装
# 安装最新版 jq
brew install --HEAD jq

# 链接 最新版 jq
brew link jq
关于我
我的博客主旨:
- 排版美观,语言精炼;
- 文档即手册,步骤明细,拒绝埋坑,提供源码;
- 本人实战文档都是亲测成功的,各位小伙伴在实际操作过程中如有什么疑问,可随时联系本人帮您解决问题,让我们一起进步!
🍀 微信二维码
x2675263825 (舍得), qq:2675263825。

🍀 微信公众号
《云原生架构师实战》

🍀 个人博客站点
http://onedayxyy.cn/
🍀 语雀
https://www.yuque.com/xyy-onlyone
🍀 csdn
https://blog.csdn.net/weixin_39246554?spm=1010.2135.3001.5421
🍀 知乎
https://www.zhihu.com/people/foryouone

最后
好了,关于本次就到这里了,感谢大家阅读,最后祝大家生活快乐,每天都过的有意义哦,我们下期见!


 被折叠的 条评论
为什么被折叠?
被折叠的 条评论
为什么被折叠?
 到【灌水乐园】发言


