


前言
为了学习Spring框架源码,搭建一套Spring源码环境。
- Spring官网:Spring | Home
- Spring版本:6.0.19
基础环境
JDK:17.0.8
IDEA:2023.2.1
下载源码
访问官网页面,找到Spring Framework模块
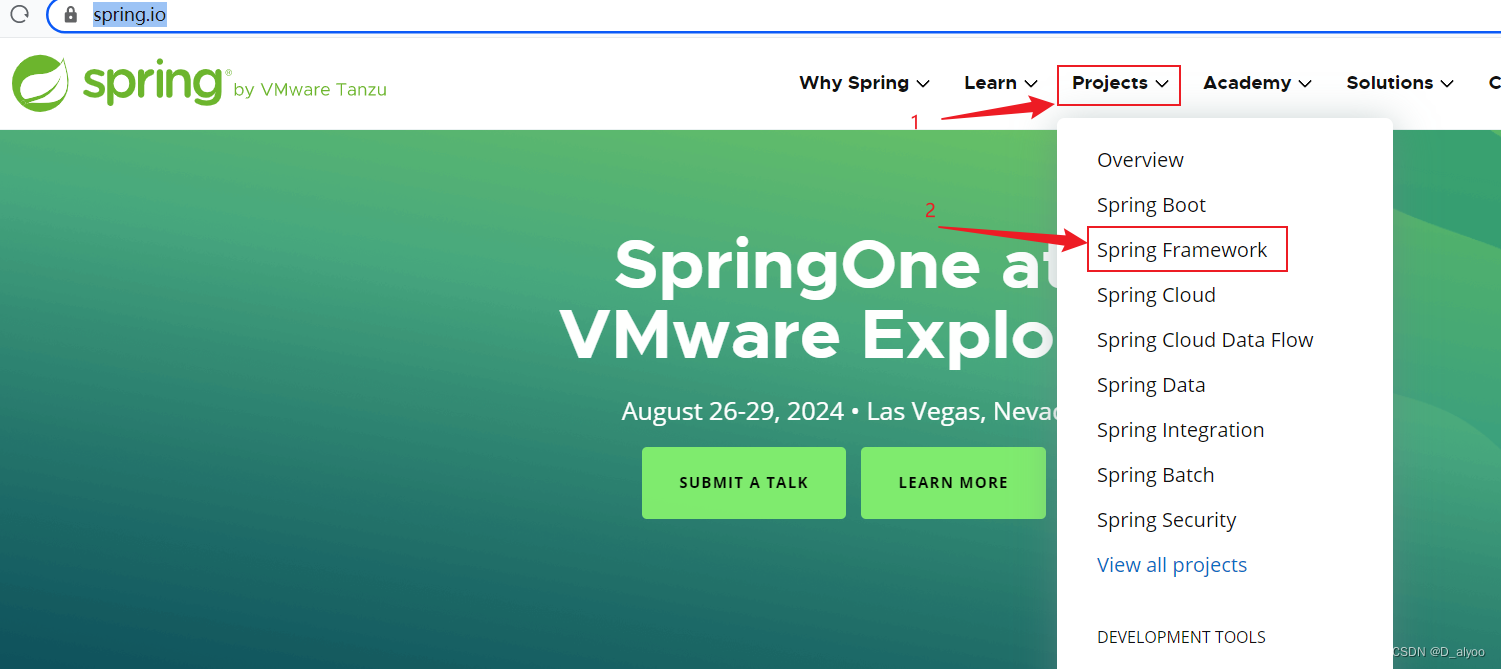
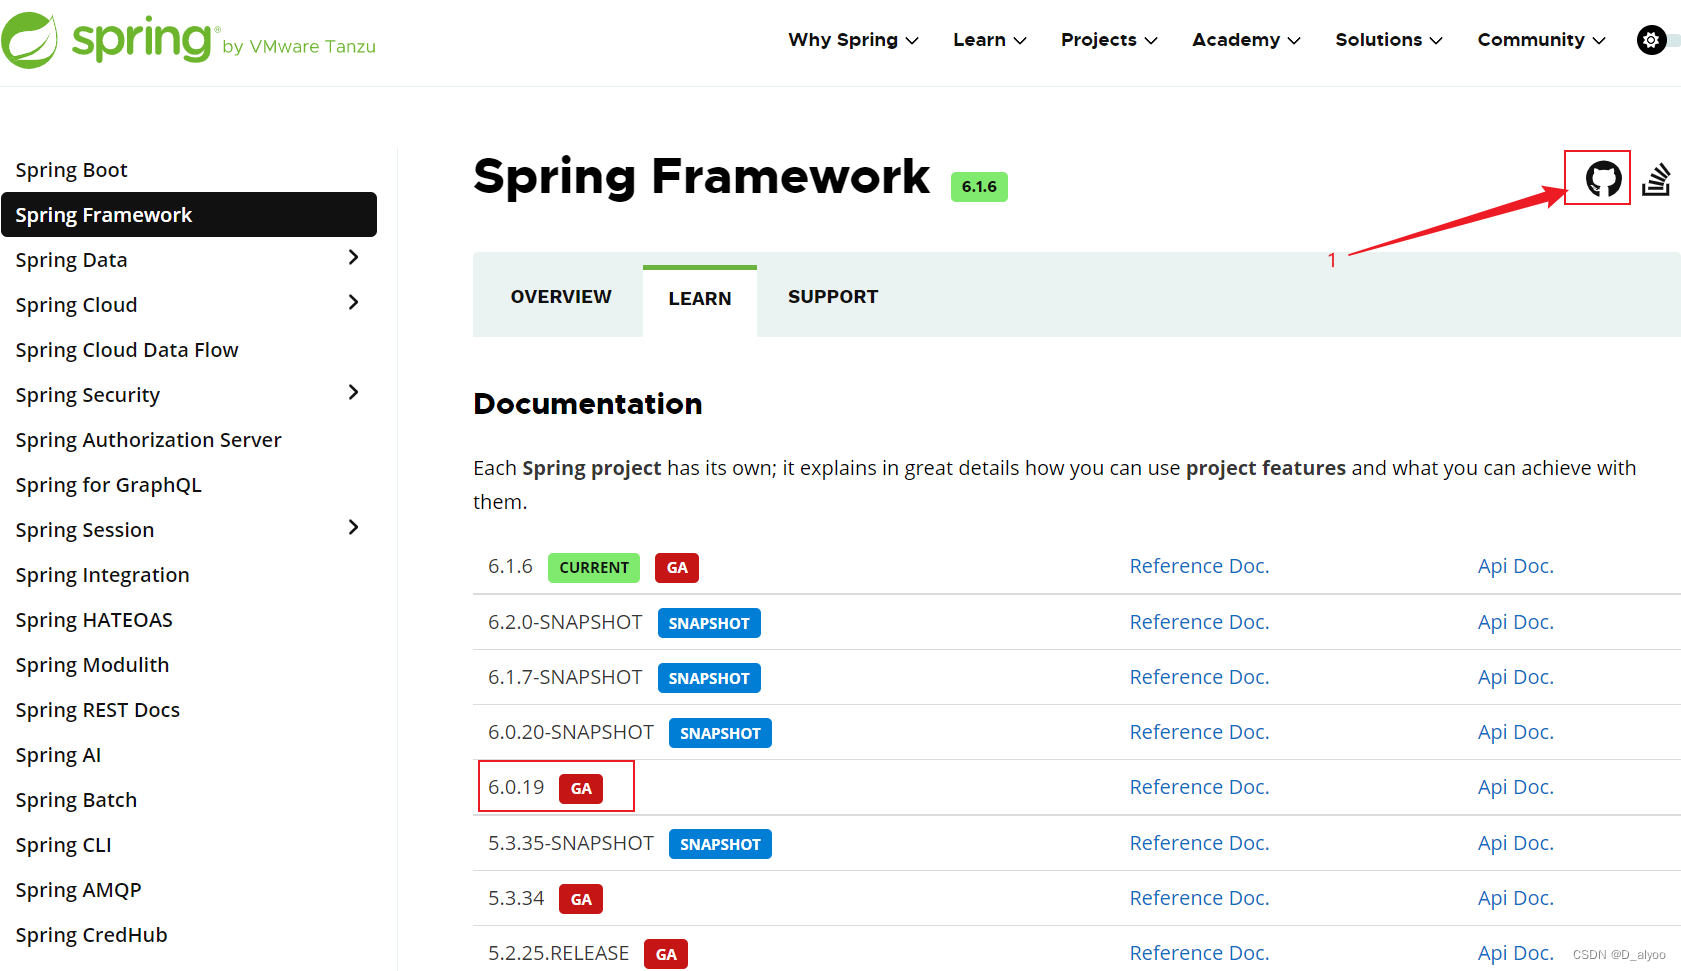
为了避免踩更多坑,选择上一版本的GA版本,点击右上角github图标,进入spring源码主页
spring源码仓库
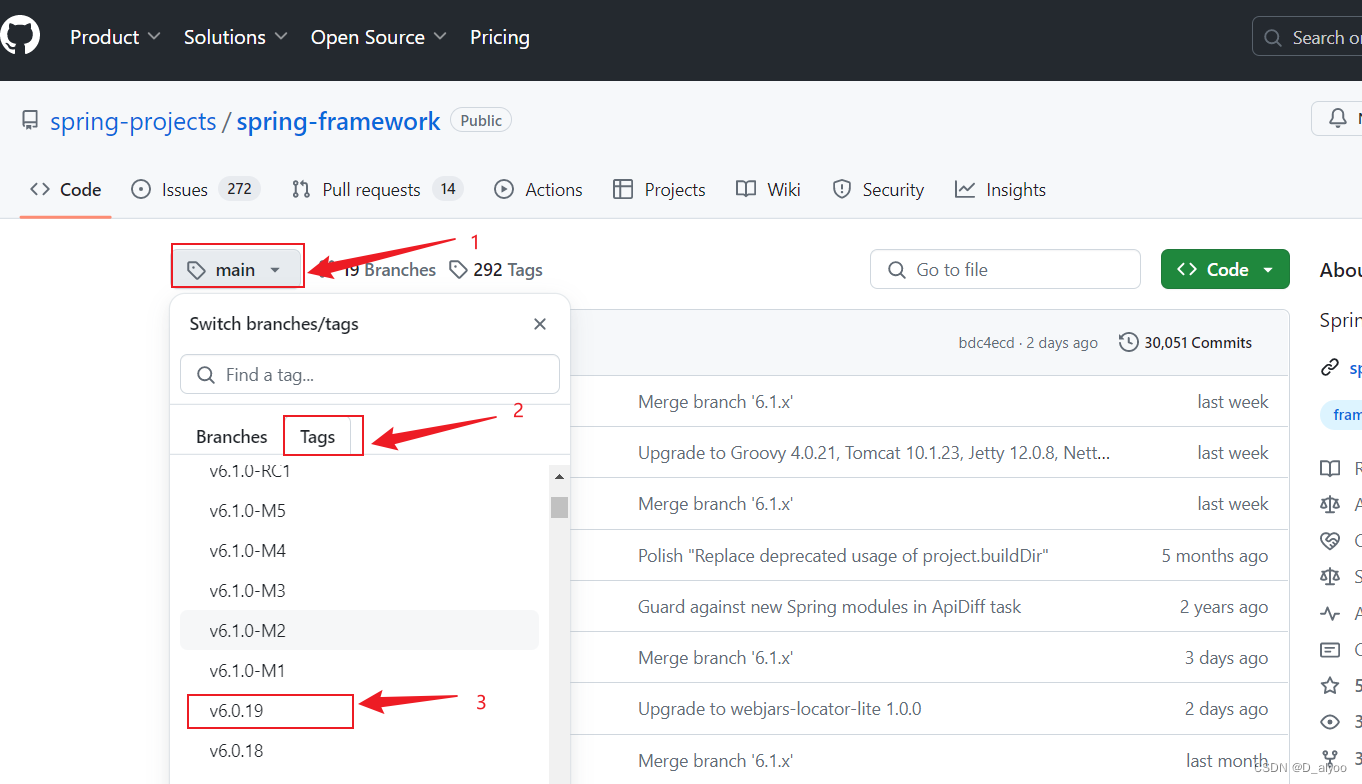
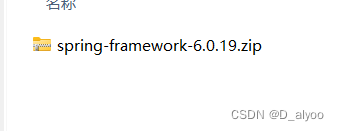
确保版本已经切换成功,然后下载源码的zip包
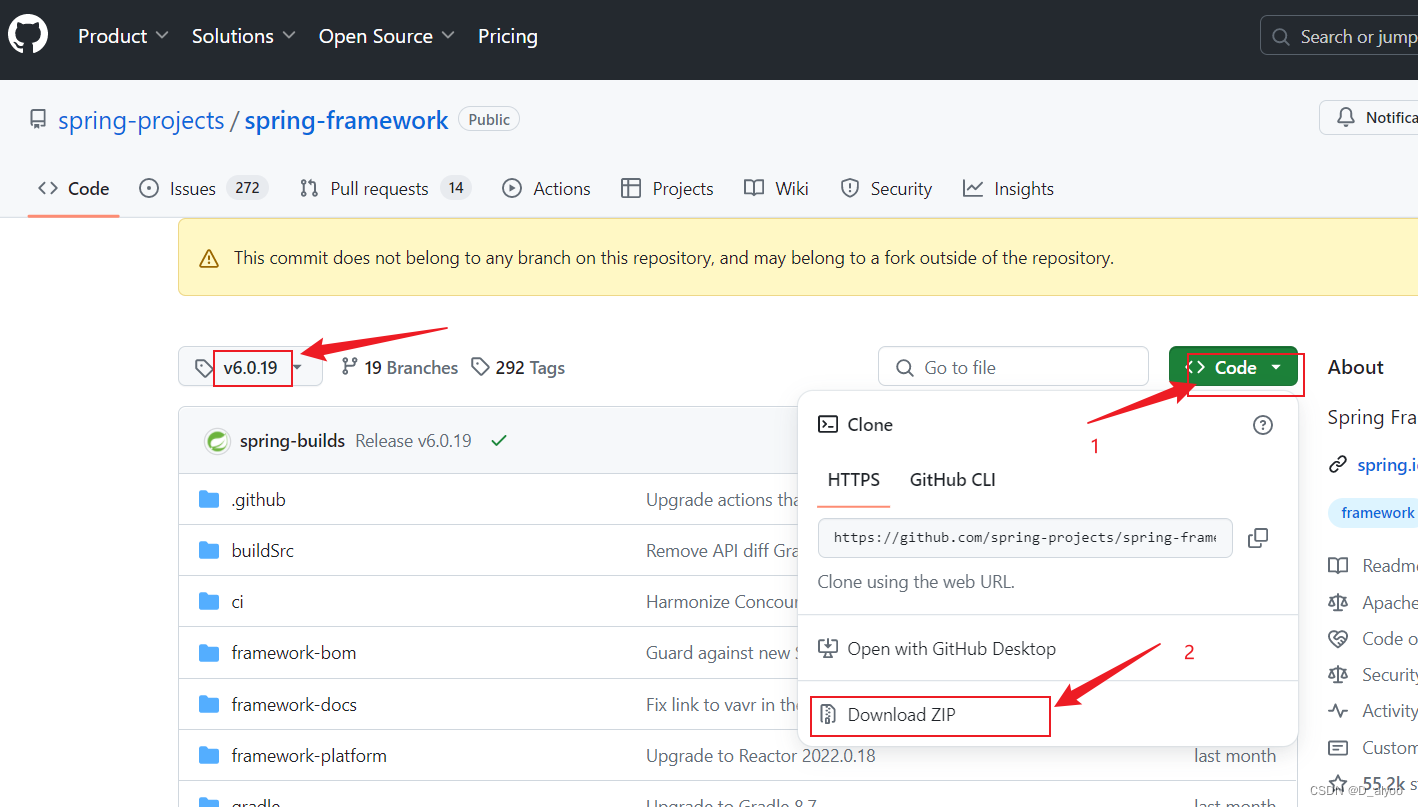
得到spring源码的zip包文件
源码编译
解压
解压spring-framework-6.0.19.zip包。
安装gradle
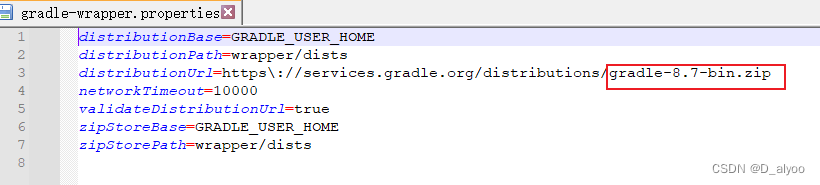
确定gradle版本,需在spring-framework-6.0.19\gradle\wrapper下找到并打开gradle-wrapper.properties文件,可看到gradle版本为:gradle-8.7-bin
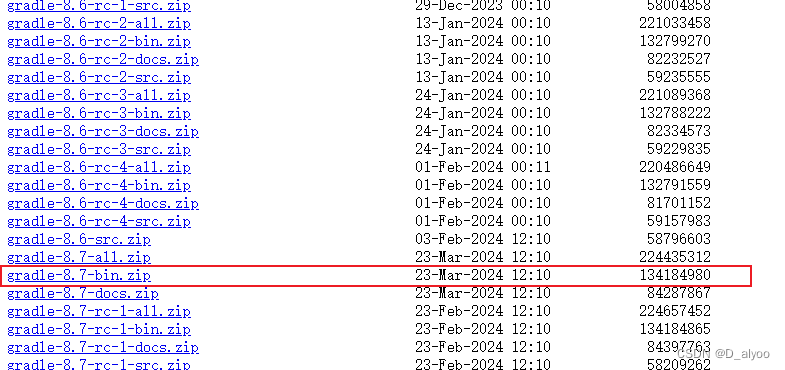
去网站 Index of /gradle/ 下载gradle-8.7-bin文件
下载完成后,找个路径存放zip包文件。
为了避免spring频繁去下载gradle包,我们把spring-framework-6.0.19\gradle\wrapper\gradle-wrapper.properties文件下面这个路径配置为本地的gradle-8.7.bin.zip的绝对路径(路径中不能有空格)。

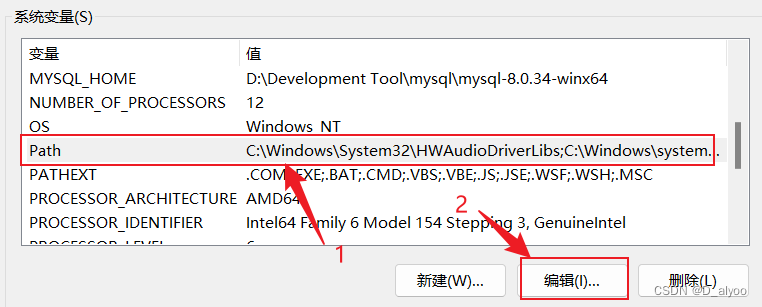
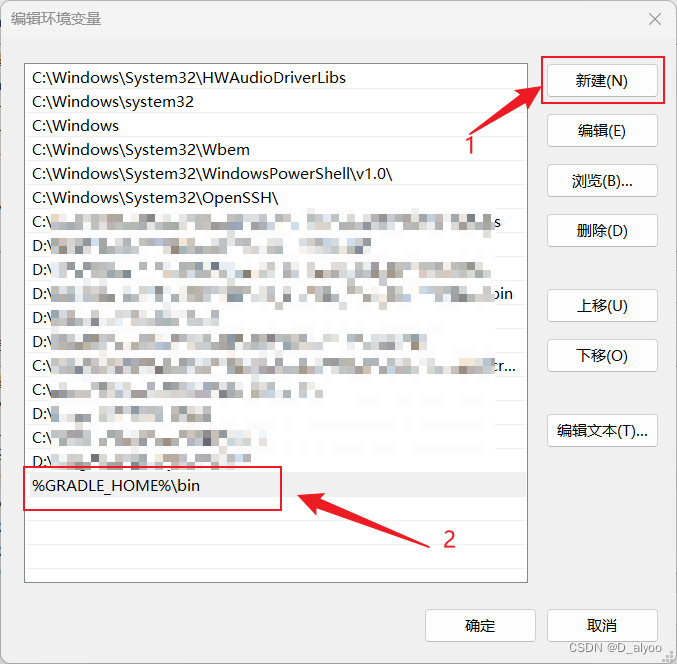
解压gradle-8.7.bin.zip包文件,在系统环境变量中添加gradle

验证gradle是否安装好,进入cmd命令行,输入:gradle -v
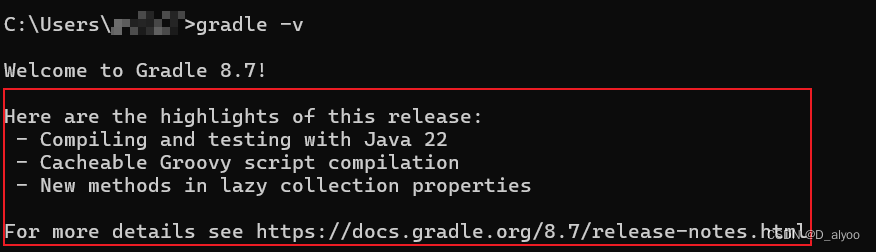
出现如上内容表示安装成功。
gradle构建工具配置
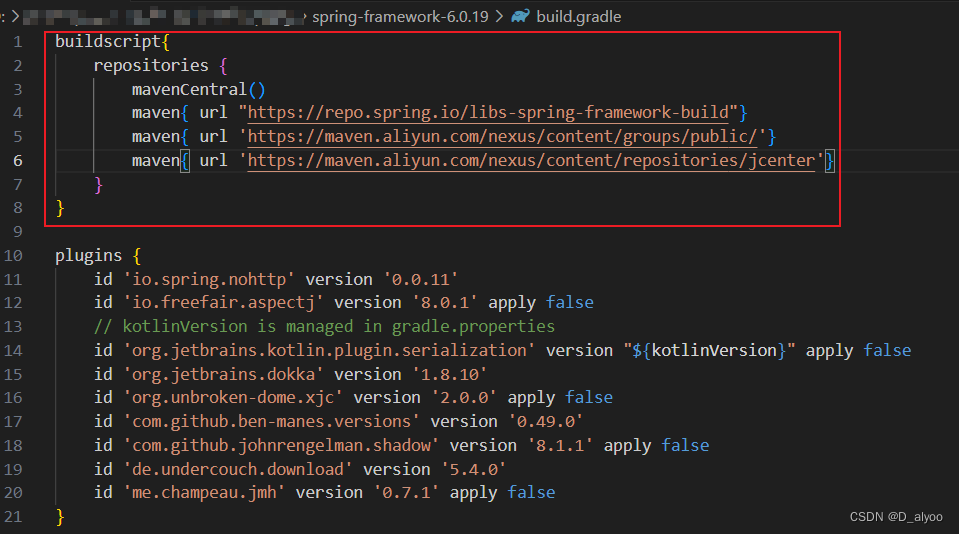
buildscript{
    repositories {
        mavenCentral()
        maven{ url "https://repo.spring.io/libs-spring-framework-build"}
        maven{ url 'https://maven.aliyun.com/nexus/content/groups/public/'}
        maven{ url 'https://maven.aliyun.com/nexus/content/repositories/jcenter'}
    }
}spring源码使用gradle来管理和维护项目工程中的jar包,在编译时会从默认网络配置中下载jar包,默认网络配置的是国外镜像网站,下载速度慢,需要切换为国内阿里云的镜像网站,速度会快上很多。如下图,在spring-framework-6.0.19\build.gradle配置添加阿里云镜像网站。
预编译
需要预编译 spirng-oxm 项目。参考spring官网中的spring-framework/import-into-idea.md at main · spring-projects/spring-framework · GitHub
其实下载好的源码的根目录下也有这个import-into-idea.md文档

cmd命令行进入源码根目录,也就是spring-framework-6.0.19目录下,执行预编译命令(环境变量中配置了gradle命令,因此直接可以使用gradle)
gradlew :spring-oxm:compileTestJava
编译成功如下

导入源码
打开IDEA,操作步骤:File->New->Project from Existing Sources->源码根目录->build.gradle
等待idea自动导入相关依赖的同时,做下面三件事
- 配置idea中的项目JDK
- 配置idea中的项目gradle
- 移除sping-aspects模块
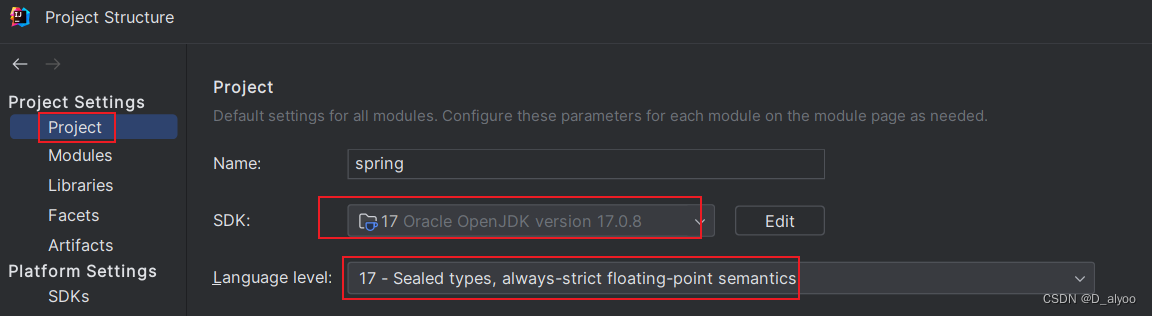
配置idea中的项目JDK,按快捷键:Ctrl + Alt + Shift + S 打开配置页面
配置idea中的项目gradle,按快捷键:Ctrl + Alt + S 打开配置页面

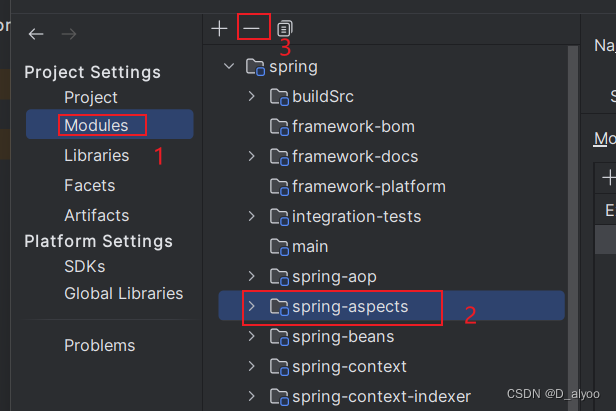
移除sping-aspects模块,按快捷键:Ctrl + Alt + Shift + S 打开配置页面
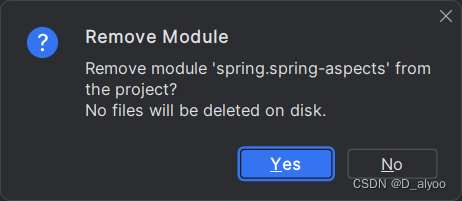
弹窗窗口,点击“YES”
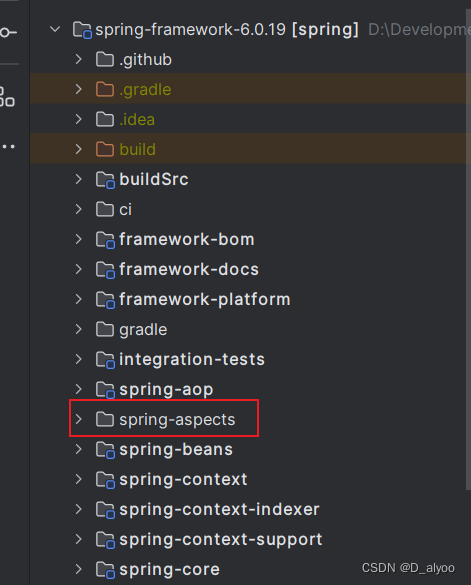
移除后,spring-aspects模块没有小蓝点
测试
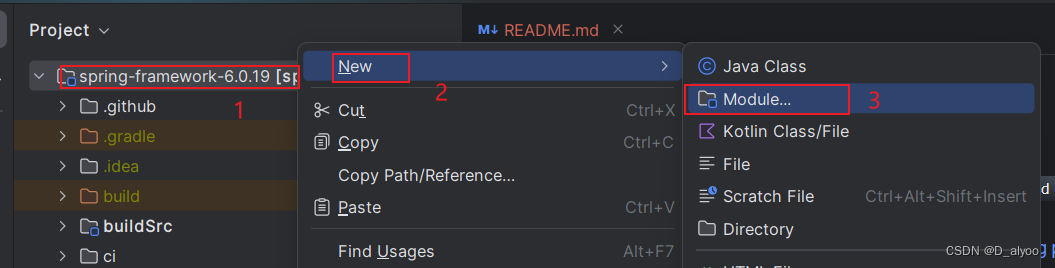
新建一个我们自己的子模块,用来测试Spring源码
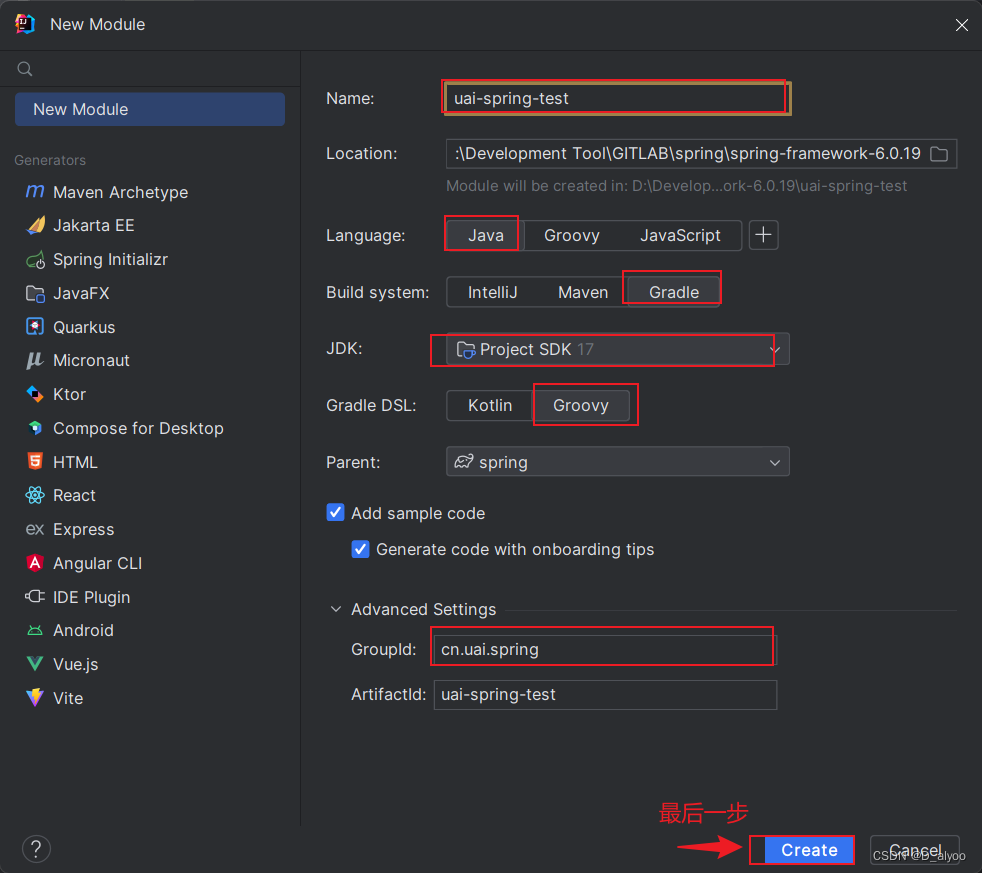
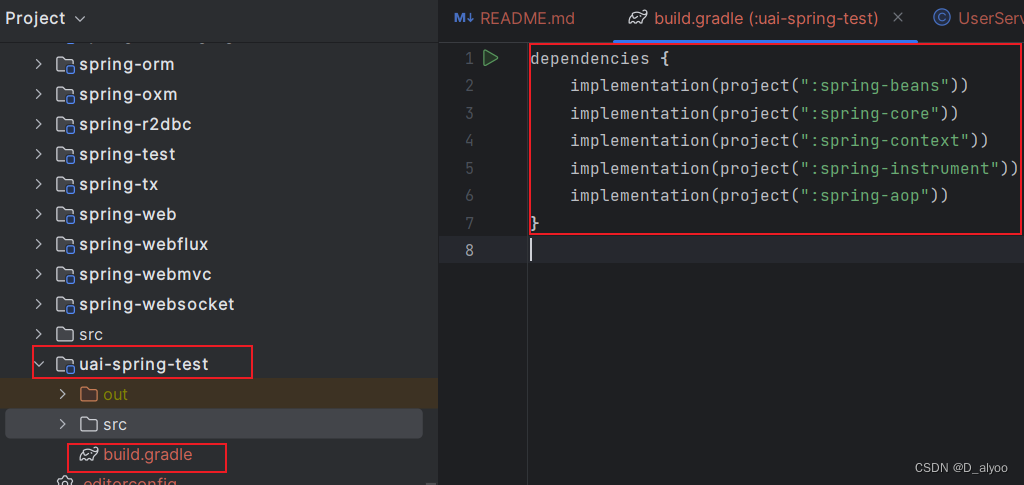
创建完uai-spring-test子项目后,编辑这个项目下的build.gradle,添加依赖
dependencies {
    implementation(project(":spring-beans"))
    implementation(project(":spring-core"))
    implementation(project(":spring-context"))
    implementation(project(":spring-instrument"))
    implementation(project(":spring-aop"))
}
截图如下
创建主配置类:AppConfig.java
package cn.uai.spring;

import org.springframework.context.annotation.ComponentScan;

@ComponentScan("cn.uai.spring")
public class AppConfig {

}
创建用户服务:UserService.java
package cn.uai.spring;
import org.springframework.stereotype.Component;
@Component
public class UserService {
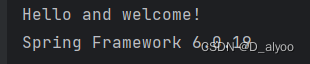
public void stdout() {
System.out.println("Spring Framework 6.0.19");
}
}运行主类
package cn.uai.spring;

import org.springframework.context.annotation.AnnotationConfigApplicationContext;

public class Main {
    public static void main(String[] args) {

       System.out.println("Hello and welcome!");

       AnnotationConfigApplicationContext context = new AnnotationConfigApplicationContext(AppConfig.class);
       UserService userService = (UserService) context.getBean("userService");
       userService.stdout();
    }
}
成功运行并输出
参考
spring-framework/import-into-idea.md at main · spring-projects/spring-framework · GitHub
如何编译 Spring 源码?_spring源码编译-CSDN博客


 1167
1167


 被折叠的 条评论
为什么被折叠?
被折叠的 条评论
为什么被折叠?
 到【灌水乐园】发言


