


IDEA搭建项目所需准备:idea开发工具、jdk1.7、mysql、Navicat、maven
一、创建maven项目
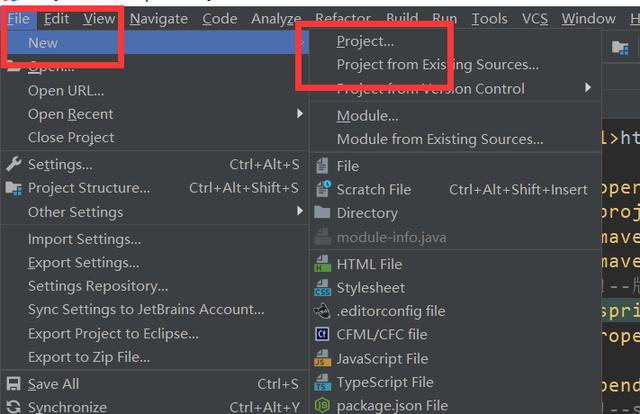
1、 file -----> new -----> project
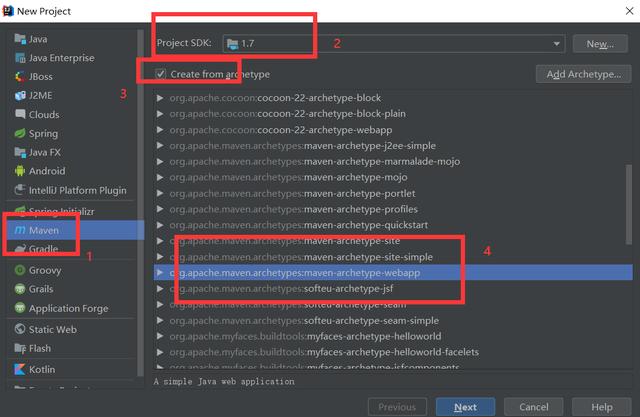
2、点击 next
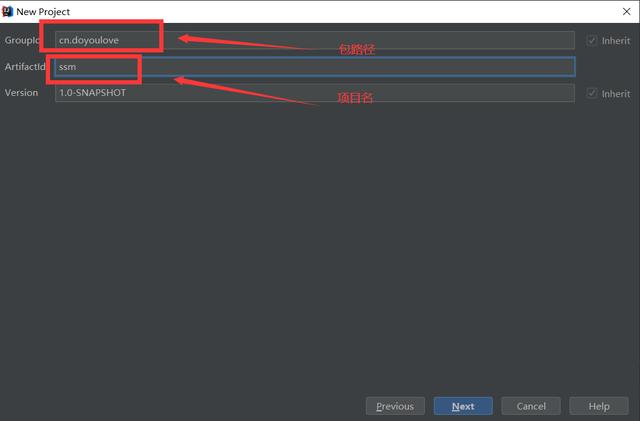
3、点击 next
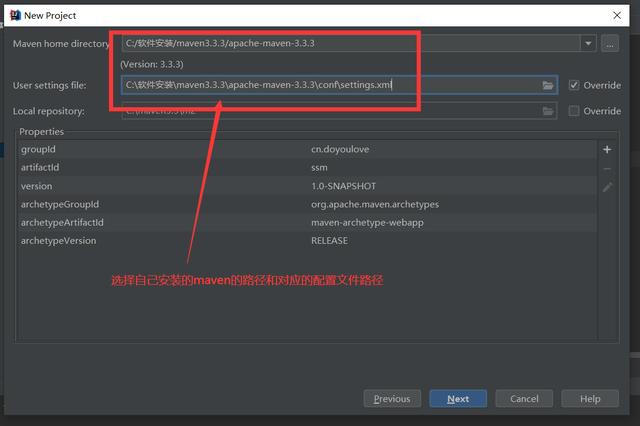
4、点击 next
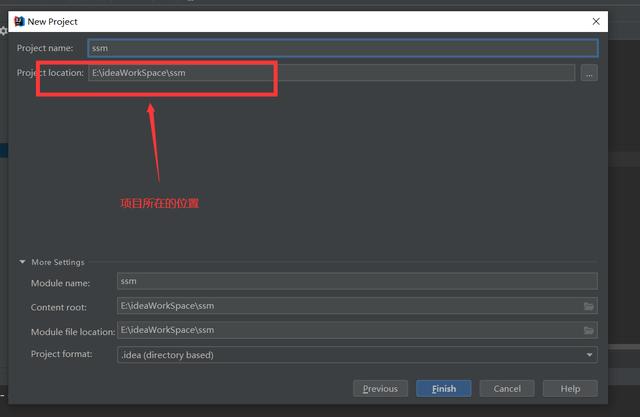
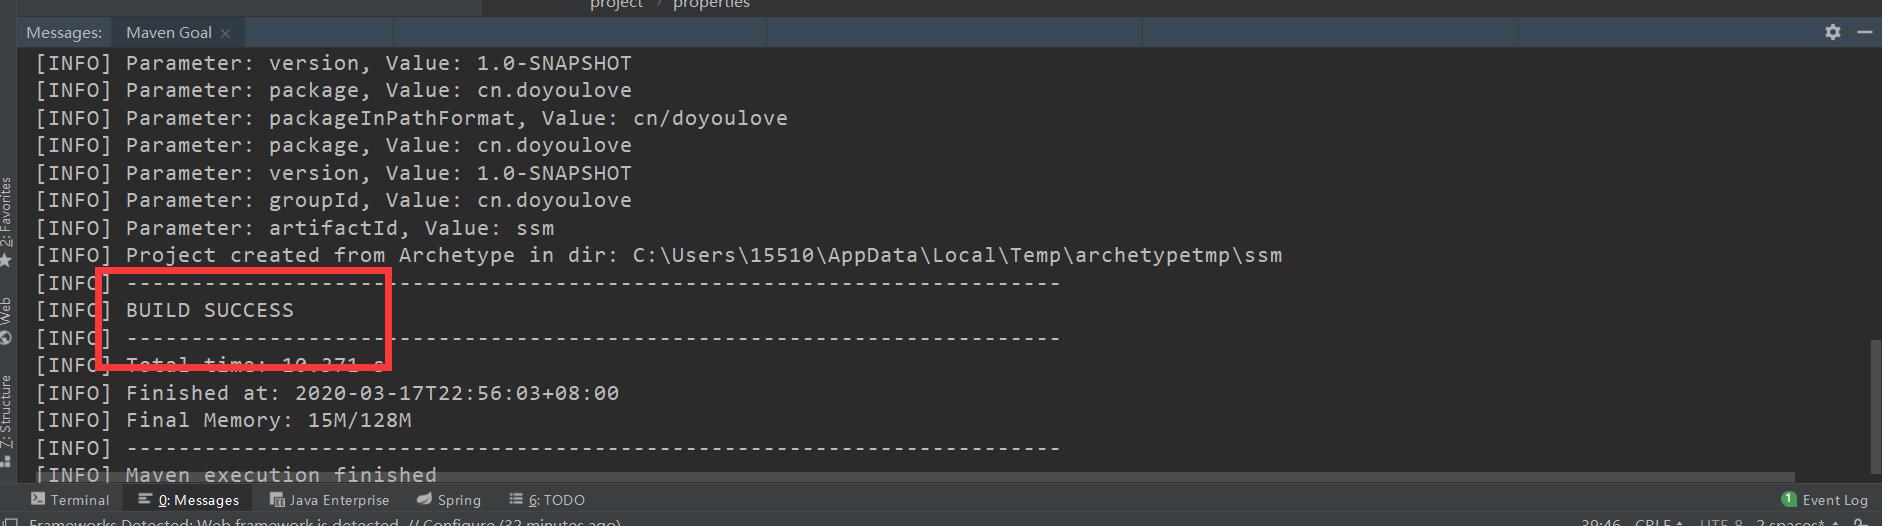
5、点击 finish ,静静的等待项目的创建,控制台出现夏天标志,则创建maven项目成功
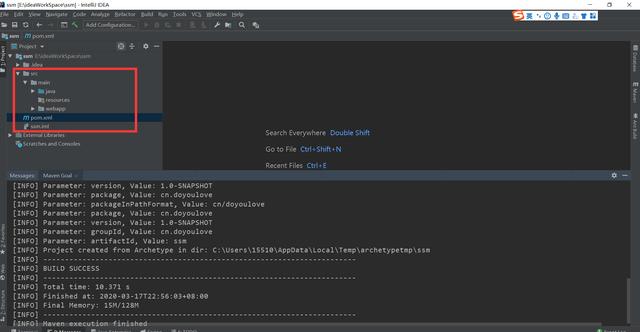
二、创建对应的文件夹
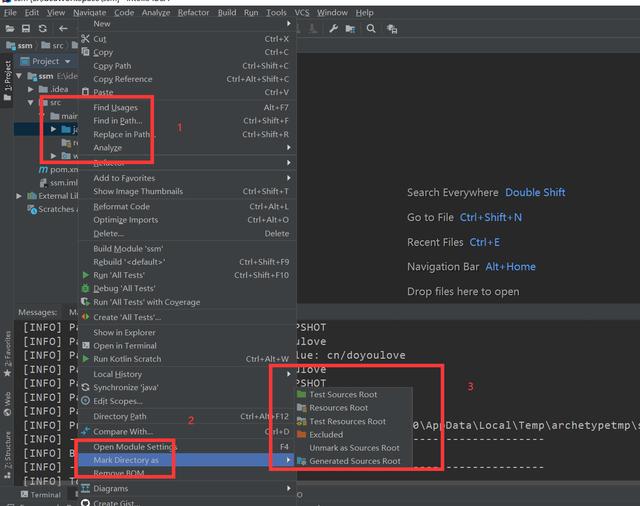
1、在main下创建java、resources文件夹并且设置为Sources Root 和Resources Root
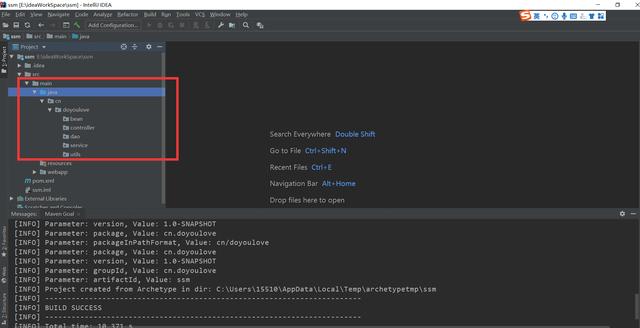
2、在java下建常用的包,如下图所示:
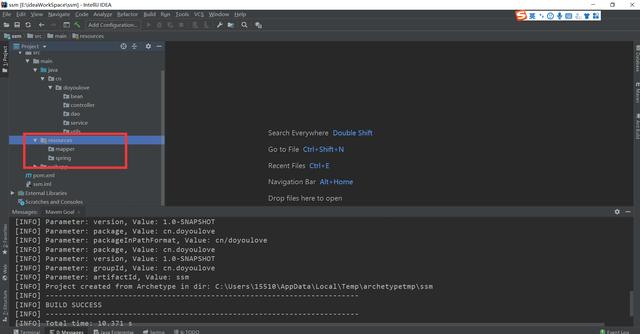
3、在resources 下建文件夹,如下图所示
4、创建jsp文件存放的文件夹

三、编写对应的配置文件
1、pom.xml,里面包含了所需要的jar包

版本控制,方便修改
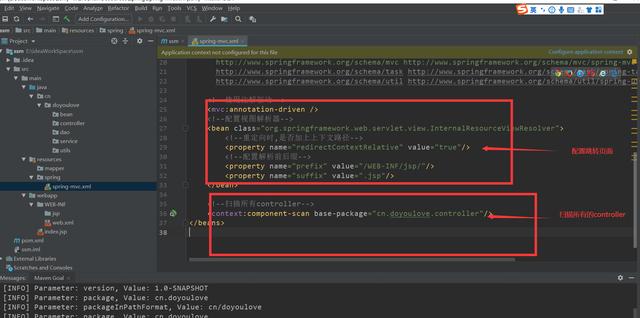
<?xml version="1.0" encoding="UTF-8"?>2、编写spring-mvc.xml
driver=com.mysql.jdbc.Driver#driver=com.mysql.cj.jdbc.Driver#mytest为我本地的数据库名url=jdbc:mysql://localhost:3306/test#url=jdbc:mysql://192.168.220.139:3306/teaching_manageusername=root#下面输入自己数据库的密码password=123456#定义初始连接数initialSize=1#定义最大连接数maxActive=20#定义最大空闲maxIdle=20#定义最小空闲minIdle=1#定义最长等待时间maxWait=600003、编写spring-mybatis.xml
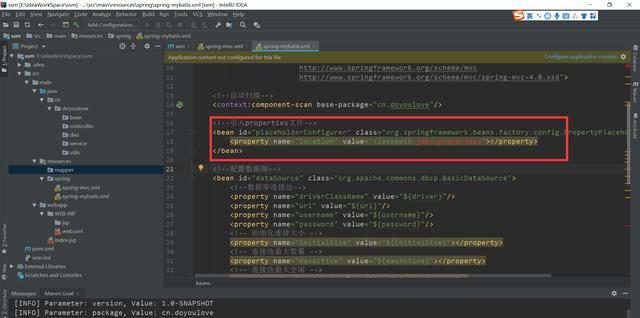
<?xml version="1.0" encoding="UTF-8"?>4、方便管理数据库的相关配置,所有会单独的用一个文件来存放。jdbc.properties文件

driver=com.mysql.jdbc.Driver#driver=com.mysql.cj.jdbc.Driver#mytest为我本地的数据库名url=jdbc:mysql://localhost:3306/test#url=jdbc:mysql://192.168.220.139:3306/teaching_manageusername=root#下面输入自己数据库的密码password=123456#定义初始连接数initialSize=1#定义最大连接数maxActive=20#定义最大空闲maxIdle=20#定义最小空闲minIdle=1#定义最长等待时间maxWait=600005、由于编写spring-mybatis.xml时,扫描mapper下的所有xml会报错,因为下面没有xml文件,所有建一个xml文件。
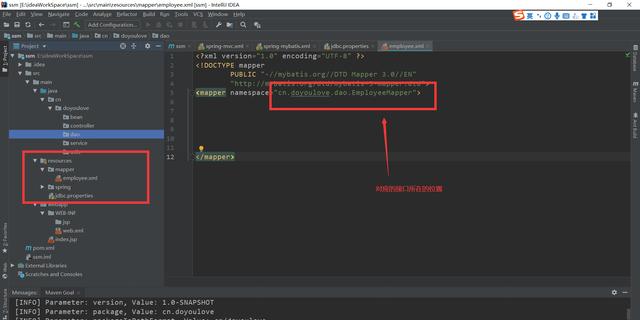
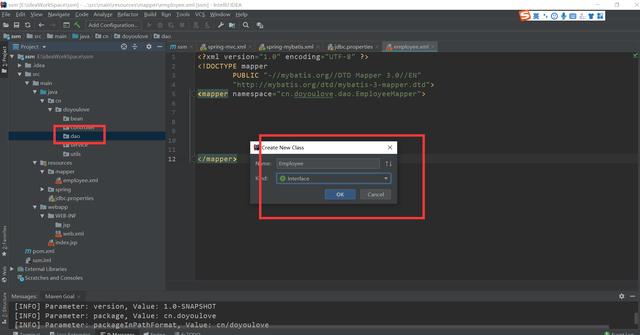
在dao下新建一个接口
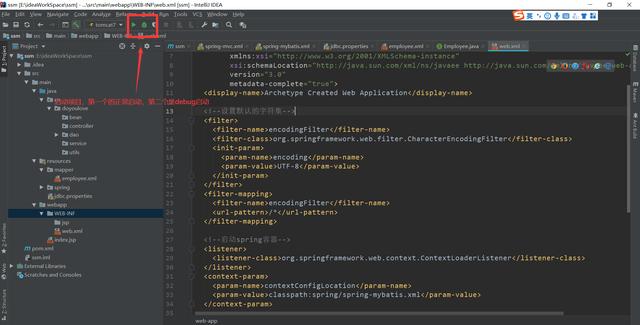
6、编写wen.xml
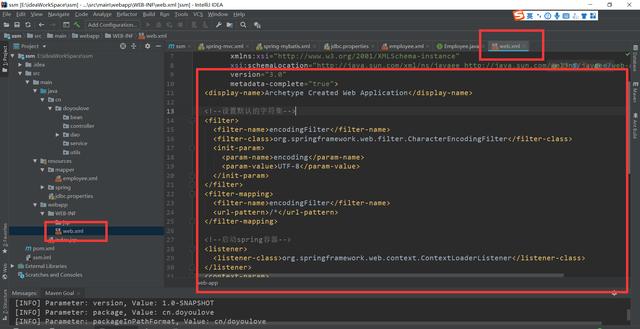
Archetype Created Web ApplicationencodingFilterorg.springframework.web.filter.CharacterEncodingFilterencodingUTF-8encodingFilter/*org.springframework.web.context.ContextLoaderListenercontextConfigLocationclasspath:spring/spring-mybatis.xmlspringDispatcherServletorg.springframework.web.servlet.DispatcherServletcontextConfigLocationclasspath:spring/spring-mvc.xml1springDispatcherServlet*.do到此为止,所有的配置文件编写完成
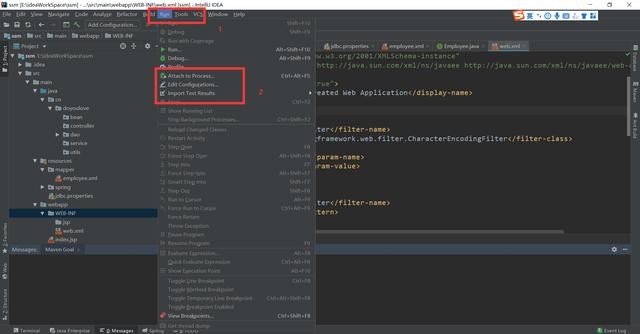
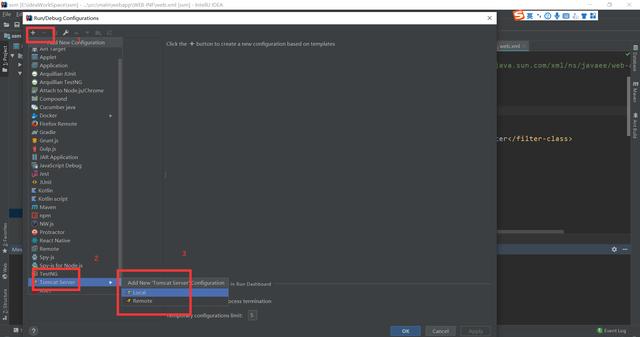
四、配置tomcat,启动项目
1、
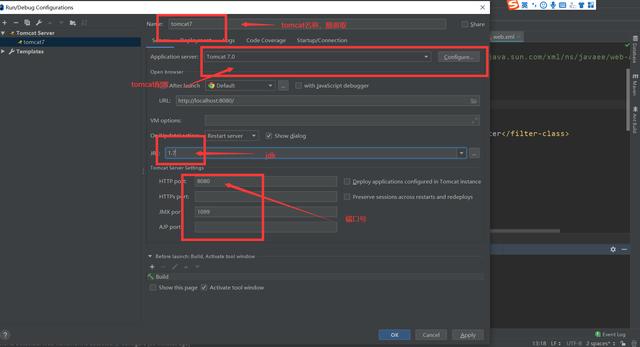
2、
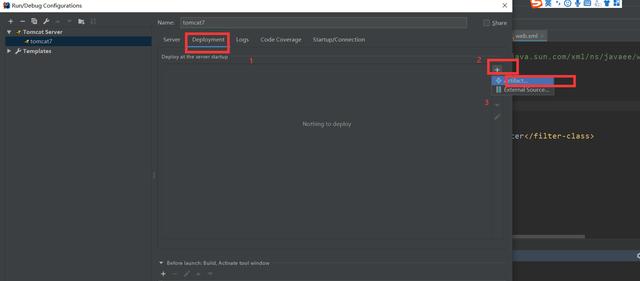
3、
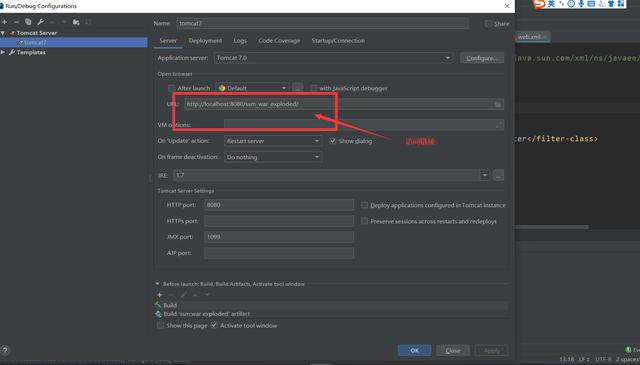
4、
5、

6、
7、
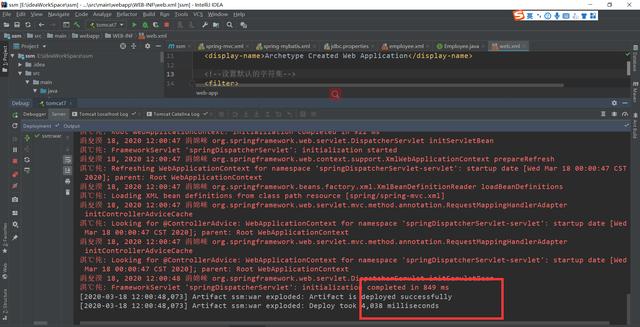
8、启动成功
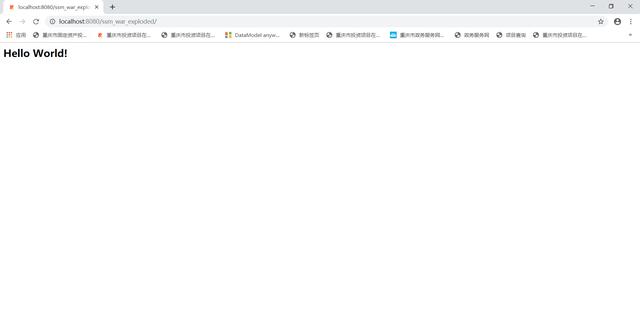
9、访问成功
自此,ssm整合完成,下一篇开始编写案例


 598
598


 被折叠的 条评论
为什么被折叠?
被折叠的 条评论
为什么被折叠?
 到【灌水乐园】发言


