


训练大纲(第087天)
大家如果想快速有效的学习,思想核心是“以建立知识体系为核心”,具体方法是“守破离”。确保老师课堂上做的操作,反复练习直到熟练。
第173次(ActiveMQ)
学习主题:ActiveMQ
学习目标:
1 掌握什么是spring整合mq
2 掌握jsonp
对应视频:
http://www.itbaizhan.cn/course/id/85.html
对应文档:
无
对应作业
Spring整合ActiveMQ
需求:
1)在 producer 中创建 Users 对象
2)将 Users 对象传递到 ActiveMQ 中
3)在 Consumer 中获取 Users 对象并在控制台打印
- Spring整合ActiveMQ-创建生产者
- Spring整合ActiveMQ创建消息生产者时需要添加哪些依赖?
<project xmlns="http://maven.apache.org/POM/4.0.0" xmlns:xsi="http://www.w3.org/2001/XMLSchema-instance"
xsi:schemaLocation="http://maven.apache.org/POM/4.0.0 http://maven.apache.org/xsd/maven-4.0.0.xsd">
<modelVersion>4.0.0</modelVersion>
<parent>
<groupId>com.bjsxt</groupId>
<artifactId>parent</artifactId>
<version>0.0.1-SNAPSHOT</version>
</parent>
<groupId>com.bjsxt</groupId>
<artifactId>spring-activemq-producer</artifactId>
<version>0.0.1-SNAPSHOT</version>
<packaging>war</packaging>
<dependencies>
<!-- ActiveMQ客户端完整jar包依赖 -->
<dependency>
<groupId>org.apache.activemq</groupId>
<artifactId>activemq-all</artifactId>
</dependency>
<!-- ActiveMQ和Spring整合配置文件标签处理jar包依赖 -->
<dependency>
<groupId>org.apache.xbean</groupId>
<artifactId>xbean-spring</artifactId>
</dependency>
<!-- Spring-JMS插件相关jar包依赖 -->
<dependency>
<groupId>org.springframework</groupId>
<artifactId>spring-jms</artifactId>
</dependency>
<dependency>
<groupId>org.apache.activemq</groupId>
<artifactId>activemq-pool</artifactId>
</dependency>
<dependency>
<groupId>org.apache.activemq</groupId>
<artifactId>activemq-jms-pool</artifactId>
</dependency>
<!-- 单元测试 -->
<dependency>
<groupId>junit</groupId>
<artifactId>junit</artifactId>
</dependency>
<!-- 日志处理 -->
<dependency>
<groupId>org.slf4j</groupId>
<artifactId>slf4j-log4j12</artifactId>
</dependency>
<!-- spring -->
<dependency>
<groupId>org.springframework</groupId>
<artifactId>spring-context</artifactId>
</dependency>
<dependency>
<groupId>org.springframework</groupId>
<artifactId>spring-beans</artifactId>
</dependency>
<dependency>
<groupId>org.springframework</groupId>
<artifactId>spring-webmvc</artifactId>
</dependency>
<!-- JSP相关 -->
<dependency>
<groupId>jstl</groupId>
<artifactId>jstl</artifactId>
</dependency>
<dependency>
<groupId>javax.servlet</groupId>
<artifactId>servlet-api</artifactId>
<scope>provided</scope>
</dependency>
<dependency>
<groupId>javax.servlet</groupId>
<artifactId>jsp-api</artifactId>
<scope>provided</scope>
</dependency>
</dependencies>
<build>
<plugins>
<!-- 配置Tomcat插件 -->
<plugin>
<groupId>org.apache.tomcat.maven</groupId>
<artifactId>tomcat7-maven-plugin</artifactId>
<configuration>
<path>/</path>
<port>8080</port>
</configuration>
</plugin>
</plugins>
</build>
</project>
- 如何在Spring中配置消息生产者?写出步骤
- 创建 spring-activemq-producer
- 修改 POM 文件
- 整合 ActiveMQ
<?xml version="1.0" encoding="UTF-8"?>
<beans xmlns="http://www.springframework.org/schema/beans"
xmlns:xsi="http://www.w3.org/2001/XMLSchema-instance" xmlns:jms="http://www.springframework.org/schema/jms"
xmlns:context="http://www.springframework.org/schema/context"
xmlns:amq="http://activemq.apache.org/schema/core"
xsi:schemaLocation="
http://www.springframework.org/schema/beans
http://www.springframework.org/schema/beans/spring-beans.xsd
http://www.springframework.org/schema/jms
http://www.springframework.org/schema/jms/spring-jms.xsd
http://activemq.apache.org/schema/core
http://activemq.apache.org/schema/core/activemq-core.xsd
http://www.springframework.org/schema/context
http://www.springframework.org/schema/context/spring-context.xsd">
<!-- 需要创建一个连接工厂,连接ActiveMQ. ActiveMQConnectionFactory. 需要依赖ActiveMQ提供的amq标签 -->
<!-- amq:connectionFactory 是bean标签的子标签, 会在spring容器中创建一个bean对象. 可以为对象命名.
类似: <bean id="" class="ActiveMQConnectionFactory"></bean> -->
<amq:connectionFactory brokerURL="tcp://192.168.240.134:61616"
userName="admin" password="admin" id="amqConnectionFactory" />
<!-- 配置池化的ConnectionFactory。 为连接ActiveMQ的connectionFactory提供连接池 -->
<bean id="pooledConnectionFactory" class="org.apache.activemq.pool.PooledConnectionFactoryBean">
<property name="connectionFactory" ref="amqConnectionFactory"></property>
<property name="maxConnections" value="10"></property>
</bean>
<!-- spring管理JMS相关代码的时候,必须依赖jms标签库. spring-jms提供的标签库. -->
<!-- 定义Spring-JMS中的连接工厂对象 CachingConnectionFactory - spring框架提供的连接工厂对象.
不能真正的访问MOM容器. 类似一个工厂的代理对象. 需要提供一个真实工厂,实现MOM容器的连接访问. -->
<!-- 配置有缓存的ConnectionFactory,session的缓存大小可定制。 -->
<bean id="connectionFactory"
class="org.springframework.jms.connection.CachingConnectionFactory">
<property name="targetConnectionFactory" ref="amqConnectionFactory"></property>
<property name="sessionCacheSize" value="3"></property>
</bean>
<!-- JmsTemplate配置 -->
<bean id="template" class="org.springframework.jms.core.JmsTemplate">
<!-- 给定连接工厂, 必须是spring创建的连接工厂. -->
<property name="connectionFactory" ref="connectionFactory"></property>
<!-- 可选 - 默认目的地命名 -->
<property name="defaultDestinationName" value="test-spring"></property>
</bean>
</beans>
- Spring整合ActiveMQ-创建消费者
- Spring整合ActiveMQ创建消息消费者时需要添加哪些依赖?
<project xmlns="http://maven.apache.org/POM/4.0.0" xmlns:xsi="http://www.w3.org/2001/XMLSchema-instance"
xsi:schemaLocation="http://maven.apache.org/POM/4.0.0 http://maven.apache.org/xsd/maven-4.0.0.xsd">
<modelVersion>4.0.0</modelVersion>
<parent>
<groupId>com.bjsxt</groupId>
<artifactId>parent</artifactId>
<version>0.0.1-SNAPSHOT</version>
</parent>
<groupId>com.bjsxt</groupId>
<artifactId>spring-activemq-consumer</artifactId>
<version>0.0.1-SNAPSHOT</version>
<dependencies>
<!-- activemq客户端 -->
<dependency>
<groupId>org.apache.activemq</groupId>
<artifactId>activemq-all</artifactId>
</dependency>
<!-- spring框架对JMS标准的支持 -->
<dependency>
<groupId>org.springframework</groupId>
<artifactId>spring-jms</artifactId>
</dependency>
<!-- ActiveMQ和spring整合的插件 -->
<dependency>
<groupId>org.apache.xbean</groupId>
<artifactId>xbean-spring</artifactId>
</dependency>
<dependency>
<groupId>org.springframework</groupId>
<artifactId>spring-context</artifactId>
</dependency>
<dependency>
<groupId>org.springframework</groupId>
<artifactId>spring-beans</artifactId>
</dependency>
</dependencies>
</project>
- 如何在Spring中配置消息消费者?写出步骤
1.创建 spring-activemq-consumer
是一个 jar 工程
2. 修改 POM 文件
3. 整合 ActiveMQ
<?xml version="1.0" encoding="UTF-8"?>
<beans xmlns="http://www.springframework.org/schema/beans"
xmlns:xsi="http://www.w3.org/2001/XMLSchema-instance" xmlns:jms="http://www.springframework.org/schema/jms"
xmlns:amq="http://activemq.apache.org/schema/core"
xsi:schemaLocation="
http://www.springframework.org/schema/beans
http://www.springframework.org/schema/beans/spring-beans.xsd
http://www.springframework.org/schema/jms
http://www.springframework.org/schema/jms/spring-jms.xsd
http://activemq.apache.org/schema/core
http://activemq.apache.org/schema/core/activemq-core.xsd">
<!-- 需要创建一个连接工厂,连接ActiveMQ. ActiveMQConnectionFactory. 需要依赖ActiveMQ提供的amq标签 -->
<!-- amq:connectionFactory 是bean标签的子标签, 会在spring容器中创建一个bean对象. 可以为对象命名.
类似: <bean id="" class="ActiveMQConnectionFactory"></bean> -->
<amq:connectionFactory brokerURL="tcp://192.168.70.151:61616"
userName="admin" password="admin" id="amqConnectionFactory" />
<!-- spring管理JMS相关代码的时候,必须依赖jms标签库. spring-jms提供的标签库. -->
<!-- 定义Spring-JMS中的连接工厂对象 CachingConnectionFactory - spring框架提供的连接工厂对象.
不能真正的访问MOM容器. 类似一个工厂的代理对象. 需要提供一个真实工厂,实现MOM容器的连接访问. -->
<bean id="connectionFactory"
class="org.springframework.jms.connection.CachingConnectionFactory">
<property name="targetConnectionFactory" ref="amqConnectionFactory"></property>
<property name="sessionCacheSize" value="3"></property>
</bean>
<!-- 注册监听器 -->
<!-- 开始注册监听. 需要的参数有: acknowledge - 消息确认机制 container-type - 容器类型 default|simple
simple:SimpleMessageListenerContainer最简单的消息监听器容器,只能处理固定数量的JMS会话,且不支持事务。 default:DefaultMessageListenerContainer是一个用于异步消息监听器容器
,且支持事务 destination-type - 目的地类型. 使用队列作为目的地. connection-factory - 连接工厂, spring-jms使用的连接工厂,必须是spring自主创建的
不能使用三方工具创建的工程. 如: ActiveMQConnectionFactory. -->
<jms:listener-container acknowledge="auto"
container-type="default" destination-type="queue" connection-factory="connectionFactory">
<!-- 在监听器容器中注册某监听器对象. destination - 设置目的地命名 ref - 指定监听器对象 -->
<jms:listener destination="test-spring" ref="myListener" />
</jms:listener-container>
</beans>
- Jsonp介绍
- 什么是Jsonp?
Jsonp(JSON with Padding) 是 json 的一种"使用模式",可以让网页从别的域名(网站) 那获取资料,即跨域读取数据。
为什么我们从不同的域(网站)访问数据需要一个特殊的技术(JSONP )呢?
这是因为同源策略。
- Jsonp的优缺点是什么?
JSONP 的优点是:它不像 XMLHttpRequest 对象实现的 Ajax 请求那样受到同源策略的 限制;它的兼容性更好,在更加古老的浏览器中都 可以运行,不需要 XMLHttpRequest 或 ActiveX 的支持;并且在请求完毕后可以通过调用 callback 的方式回传结果。 JSONP 的缺点则是:它只支持 GET 请求而不支持 POST 等其它类型的 HTTP 请求;它只支持跨域 HTTP 请求这种情况,不能解决不同域的两个页面之间如何进行 JavaScript 调用 的问题。
- 什么是跨域?
跨域是指一个域(网站)下的文档或脚本试图去请求另一个域(网站)下的资源。
- 什么是同源策略?
同源策略/SOP(Same origin policy)是一种约定,由 Netscape 公司 1995 年引入浏览器, 它是浏览器最核心也最基本的安全功能,现在所有支持 JavaScript 的浏览器都会使用这个策 略。如果缺少了同源策略,浏览器很容易受到 XSS、CSFR 等攻击。所谓同源是指"协议+域名+端口"三者相同,即便两个不同的域名指向同一个 ip 地址,也非同源。
分享/讲解/扩展思考
点名提问从第一节课到最后一节课分别学到了什么,直到同学们把所有的知识点都说出来并且保证无误。
第174次(jsonp和httpclient)
学习主题:ActiveMQ
学习目标:
1 掌握jsonp跨域
2 掌握httpclient工具的使用
对应视频:
http://www.itbaizhan.cn/course/id/85.html
对应文档:
无
对应作业
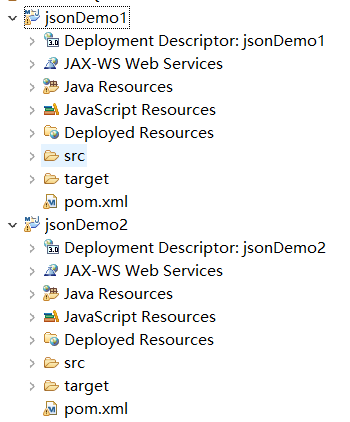
- 搭建跨域环境
- 创建两个项目作为跨域环境。
- 使用JsonP实现跨域
- 写出使用Jsonp完成跨域处理的实现步骤
在 ajax 中请求方式有所改变
<%@ page language="java" contentType="text/html; charset=UTF-8"
pageEncoding="UTF-8"%>
<!DOCTYPE html PUBLIC "-//W3C//DTD HTML 4.01 Transitional//EN" "http://www.w3.org/TR/html4/loose.dtd">
<html>
<head>
<meta http-equiv="Content-Type" content="text/html; charset=UTF-8">
<title>Insert title here</title>
<script type="text/javascript" src="/js/jquery-1.7.2.js"></script>
<script type="text/javascript">
$(function() {
$("#but").click(
function() {
$.ajax({
type : "get",
url : "http://localhost:9090/user/findUser",
dataType : "jsonp",
jsonp : "callback",
success : function(data) {
alert(data);
var str = "";
for (i = 0; i < data.length; i++) {
str += data[i].userid + " " + data[i].username
+ " " + data[i].userage + " ";
}
$("#show").html(str);
}
});
});
});
</script>
</head>
<body>
<span id="show"></span>
<input type="button" value="ok" id="but" />
</body>
</html>
- MappingJacksonValue的使用
- 在Controller中使用MappingJacksonValue实现跨域响应
package com.bjsxt.web.controller;
import java.util.ArrayList;
import java.util.List;
import org.springframework.http.converter.json.MappingJacksonValue;
import org.springframework.stereotype.Controller;
import org.springframework.web.bind.annotation.RequestMapping;
import org.springframework.web.bind.annotation.ResponseBody;
import com.bjsxt.commons.JsonUtils;
import com.bjsxt.pojo.Users;
@Controller
@RequestMapping("/user")
public class UserController {
@RequestMapping("/findUser")
@ResponseBody
public Object findUser(String callback){
Users user = new Users(1, "admin", 20);
Users user1 = new Users(2, "zhangsan", 22);
Users user2 = new Users(3, "lisi", 24);
List<Users> list = new ArrayList<>();
list.add(user);
list.add(user1);
list.add(user2);
//json转换
/*String json = JsonUtils.objectToJson(list);*/
MappingJacksonValue mv = new MappingJacksonValue(list);//json转换
mv.setJsonpFunction(callback);//字符串list和callback拼接
return mv;
}
}
- 什么是HttpClient
- 什么是HttpClient?
HttpClient 是 Apache Jakarta Common 下的子项目,可以用来提供高效的、最新的、 功能丰富的支持 HTTP 协议的客户端编程工具包,并且它支持 HTTP 协议最新的版本和 建议。
HTTP 协议可能是现在 Internet 上使用得最多、最重要的协议了,越来越多的 Java 应用程序需要直接通过 HTTP 协议来访问网络资源。虽然在 JDK 的 java net 包中已经提 供了访问 HTTP 协议的基本功能,但是对于大部分应用程序来说,JDK 库本身提供的功能 还不够丰富和灵活
- HttpClient发送Get请求不带参数
- 如何通过HttpClient发送Get请求且不带参数?
package com.bjsxt.test;
import java.io.IOException;
import org.apache.http.HttpEntity;
import org.apache.http.client.ClientProtocolException;
import org.apache.http.client.methods.CloseableHttpResponse;
import org.apache.http.client.methods.HttpGet;
import org.apache.http.impl.client.CloseableHttpClient;
import org.apache.http.impl.client.HttpClients;
import org.apache.http.util.EntityUtils;
public class HttpClientTest {
public static void main(String[] args) throws Exception {
HttpClientTest.doGet();
}
/**
* get请求不带参数
*
* @throws Exception
* @throws ClientProtocolException
*/
public static void doGet() throws Exception {
// 创建HttpClient对象
CloseableHttpClient client = HttpClients.createDefault();
// 创建get请求对象。在请求中输入url
HttpGet get = new HttpGet("http://www.baidu.com");
// 发送请求并返回响应
CloseableHttpResponse res = client.execute(get);
// 处理响应
// 获取响应的状态码
int code = res.getStatusLine().getStatusCode();
System.out.println(code);
// 获取响应的内容
HttpEntity entity = res.getEntity();
String content = EntityUtils.toString(entity, "utf-8");
System.out.println(content);
// 关闭链接
client.close();
}
}
- HttpClient发送Get请求带参数
- 如何通过HttpClient发送Get请求并且带参数?
/**
* Get 请求带参数
* @throws Exception
*/
public static void doGetParam() throws
Exception{
CloseableHttpClient client =
HttpClients.createDefault();
//创建一个封装 URI 的对象。在该对象中可以给定请
求参数
URIBuilder bui = new
URIBuilder("https://www.sogou.com/web");
bui.addParameter("query", "西游记");
//创建一个 Get 请求对象
HttpGet get = new HttpGet(bui.build());
//发送请求,并返回响应
CloseableHttpResponse res =
client.execute(get);
//处理响应
//获取响应的状态码
int code =
res.getStatusLine().getStatusCode();
System.out.println(code);
//获取响应的内容
HttpEntity entity = res.getEntity();
String content =
EntityUtils.toString(entity,"utf-8");
System.out.println(content);
//关闭连接
client.close();
}
- HttpClient发送POST请求不带参数
- 如何通过HttpClient发送Post请求且不带参数?
/**
* 发送 POST 请求不带参数
*/
public static void doPostTest()throws
Exception{
CloseableHttpClient client =
HttpClients.createDefault();
HttpPost post = new
HttpPost("http://localhost:8080/test/post");
CloseableHttpResponse res =
client.execute(post);
//处理响应
//获取响应的状态码
int code =
res.getStatusLine().getStatusCode();
System.out.println(code);
//获取响应的内容
HttpEntity entity = res.getEntity();
String content =
EntityUtils.toString(entity,"utf-8");
System.out.println(content);
//关闭连接
client.close();
}
- HttpClient发送POST请求带参数
- 如何通过HttpClient发送Post请求并且带参数?
/**
* 发送 POST 请求带参数
*/
public static void doPostParamTest()throws
Exception{
CloseableHttpClient client =
HttpClients.createDefault();
HttpPost post = new
HttpPost("http://localhost:8080/test/post/param");
//给定参数
List<BasicNameValuePair> list = new
ArrayList<>();
list.add(new BasicNameValuePair("name", "张
三丰"));
list.add(new BasicNameValuePair("pwd",
"zhangsanfeng"));
//将参数做字符串的转换
StringEntity entity = new
UrlEncodedFormEntity(list,"utf-8");
//向请求中绑定参数
post.setEntity(entity);
//处理响应
CloseableHttpResponse res =
client.execute(post);
//获取响应的状态码
int code =
res.getStatusLine().getStatusCode();
System.out.println(code);
//获取响应的内容
HttpEntity en = res.getEntity();
String content =
EntityUtils.toString(en,"utf-8");
System.out.println(content);
//关闭连接
client.close();
}
- HttpClient发送POST请求带Json格式参数
- 如何通过HttpClient发送Post请求并且带Json格式参数?
/**
* 发送 POST 请求带 JSON 格式参数
*/
public static void doPostParamJsonTest()throws
Exception{
CloseableHttpClient client =
HttpClients.createDefault();
HttpPost post = new
HttpPost("http://localhost:8080/test/post/param/js
on");
String json ="{"name":"张三丰
","pwd":"zhangsanfeng"}";
StringEntity entity = new StringEntity(json,
ContentType.APPLICATION_JSON);
//向请求中绑定参数
post.setEntity(entity);
//处理响应
CloseableHttpResponse res =
client.execute(post);
//获取响应的状态码
int code =
res.getStatusLine().getStatusCode();
System.out.println(code);
//获取响应的内容
HttpEntity en = res.getEntity();
String content =
EntityUtils.toString(en,"utf-8");
System.out.println(content);
//关闭连接
client.close();
}
分享/讲解/扩展思考
点名提问从第一节课到最后一节课分别学到了什么,直到同学们把所有的知识点都说出来并且保证无误。


 1014
1014


 被折叠的 条评论
为什么被折叠?
被折叠的 条评论
为什么被折叠?
 到【灌水乐园】发言


