


1. vue使用示例
<!-- id标识vue作用的范围 -->
<div id="app">
    <!-- {{}} 插值表达式,绑定vue中的data数据 -->
    {{ message }}
</div>
<script src="vue.min.js"></script>
<script>
    // 创建一个vue对象
    new Vue(
    {
        el: '#app',//绑定vue作用的范围
        data:
        {//定义页面中显示的模型数据
		message: 'Hello Vue!'
        }
    })
</script>
2. v-bind指令*
    <div id="app">
        {{message}}
        <h1 v-bind:title="message">
            我是标题
        </h1>
        <h2 :title="message">//可以省略v-bind直接使用:使用message
            我是标题
        </h2>
        <input type="text" v-bind:value="searchMap.keyword">
    </div>
<script>
    new Vue(
        {
            el:'#app',
            data:{
            	message:"hello vue",
             	searchMap:{"keyword":"work"}
            }
        }
    )

</script>
3.v-model双向数据绑定*
    <div id="app">
        <input type="text" v-bind:value="searchMap.keyword">
        <input type="text"  v-model="searchMap.keyword" >//*注意与v-bind的区别*
    </div>
<script>
    new Vue(
        {
            el:'#app',
            data:{message:"hello vue"
             ,searchMap:{"keyword":"testword"}
            }
        }
    )

</script>

4. v-on事件绑定使用
 <input type="button" id="but" v-on:click="a()"  value="按钮">
 <script>
     new Vue(
         {
             el:'#but',
             data:{},
             methods:
             {
                 a()
                 {
                     alert("hello");
                     console.log(11);
                 }
             }
         }
     )

 </script>
**
5.阻止事件原本的默认行为.prevent
**
v-on:submit.prevent使用
<form id="fm" v-on:submit.prevent="onSubmit">
        <input type="text" v-model="user.username">
        <input type="submit" value="提交">
    </form>
<script>
    new Vue(
        {
            el:'#fm',
            data:{user:{}},
            methods:{
                onSubmit()
                {
                    if(this.user.username)
                    {
                        alert('提交');
                    }
                    else
                    {
                        alert("用户名为空");
                    }
                }
            }
        }
    )
</script>
**
6.v-if指令
**
    <form id="fm">
        <input type="checkbox" v-model="check"> 是否同意
        <h1 v-if="check">
            同意
        </h1>
        <h2 v-else="check">
            不同意
        </h2>
    </form>
    <script>
        new Vue(
            {
                el:'#fm',
                data:{check:false}
            }
        )
    </script>
7.v-for指令
第一种使用
 <ul>
        <li v-for="n in 10">{{n}}}</li>
  </ul>

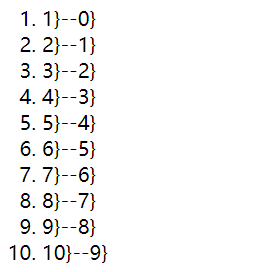
第二种使用
 <ol>
        <li v-for="(n,index) in 10">{{n}}}--{{index}}}</li>
  </ol>
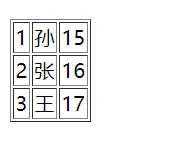
第二种使用 最常用
    <table border="1">
        <tr v-for="user in students">
            <td >{{user.id}}</td>
            <td >{{user.name}}</td>
            <td >{{user.age}}</td>
        </tr>
    </table>
</div>

    <script>
        new Vue(
            {
                el:'#div',
                data:{students:[
                        {id:1,name:"孙",age:15},
                        {id:2,name:"张",age:16},
                        {id:3,name:"王",age:17}
                    ]}
            }
        )
    </script>


 1万+
1万+


 被折叠的 条评论
为什么被折叠?
被折叠的 条评论
为什么被折叠?
 到【灌水乐园】发言


