


环境介绍
这里我们尝试搭建一个简单的Demo环境,基本的环境信息如下:
本机[MacOS]
 |--VirtualBox虚拟机 [docker host] [ssh:22] [http:9980] [https:9433] [ssh:9922]
|--GitLab [docker container] [http:80] [https:443] [ssh:22]为了方便我们用docker-machine快速建立一个docker环境。
从Docker Machine开始
我使用virtualbox作为虚拟环境。virtualbox的安装这里就介绍了。
docker-machine create -d virtualbox
   --virtualbox-memory 2048
   --virtualbox-cpu-count 2
   test1
执行结果
Running pre-create checks...
(test1) Unable to get the latest Boot2Docker ISO release version:  Get https://api.github.com/repos/boot2docker/boot2docker/releases/latest: EOF
Creating machine...
(test1) Unable to get the latest Boot2Docker ISO release version:  Get https://api.github.com/repos/boot2docker/boot2docker/releases/latest: EOF
(test1) Copying /Users/shixiao/.docker/machine/cache/boot2docker.iso to /Users/shixiao/.docker/machine/machines/test1/boot2docker.iso...
(test1) Creating VirtualBox VM...
(test1) Creating SSH key...
(test1) Starting the VM...
(test1) Check network to re-create if needed...
(test1) Waiting for an IP...
Waiting for machine to be running, this may take a few minutes...
Detecting operating system of created instance...
Waiting for SSH to be available...
Detecting the provisioner...
Provisioning with boot2docker...
Copying certs to the local machine directory...
Copying certs to the remote machine...
Setting Docker configuration on the remote daemon...
Checking connection to Docker...
Docker is up and running!
To see how to connect your Docker Client to the Docker Engine running on this virtual machine, run: docker-machine env test1
--virtualbox-memory是分配给虚拟机的内存,单位为M。小于2G内存对于GitLab是不够用的。
查看一下创建的虚拟机
docker-machine ls

NAME    ACTIVE   DRIVER       STATE     URL                         SWARM   DOCKER     ERRORS
test1   -        virtualbox   Running   tcp://192.168.99.105:2376           v18.09.1
这里我们创建的IP是192.168.99.105,后面我们用这个IP作为GitLab的hostname。
获取GitLab的Docker镜像
这里需要注意一点,我们可以通过两种方式操作
docker engine。
- 第一种是
ssh到虚拟机中操作 - 第二种是通过
docker-machine env将虚拟机激活为本机docker环境进行操作。
如果使用第二种方法在后面映射volume的时候GitLab会报权限错误,所以建议使用第一种方法。
进入machine
docker-machine ssh test1 获取GitLab镜像
docker pull gitlab/gitlab-ce 创建容器
# 建立映射卷目录
mkdir -p ~/volumes/gitlib
# 创建容器 [hostname使用虚拟机的IP地址]
docker run --name gl -p 9980:80 -p 9443:443 -p 9922:22
  --hostname 192.168.99.105
  -v ~/volumes/gitlab/etc/gitlab:/etc/gitlab
  -v ~/volumes/gitlab/var/log/gitlab:/var/log/gitlab
  -v ~/volumes/gitlab/var/opt/gitlab:/var/opt/gitlab
  -dit gitlab/gitlab-ce
GitLab的启动需要花一些时间,在这期间可以开始修改配置。反正一会儿好需要重启容器。
配置容器对中文的支持
# 进入容器
docker exec -it gl bash
# 由于GitLab的镜像制作时没有支持多语言
# 这会导致带有中文的配置信息出现乱码,我们现在配置UTF8的环境

# 终端支持中文输入
echo '
set meta-flag on
set convert-meta off
set input-meta on
set output-meta on
' > ~/.inputrc

# vim支持中文
echo '
set encoding=utf-8
set langmenu=C.UTF-8
' >  ~/.vimrc

# 系统支持UTF8
echo '
export LANG="C.UTF-8"
export LANGUAGE="en_US:en"
' >> ~/.bashrc

# 重新进入容器
exit
docker exec -it gl bash添加LDAP配置
echo "
gitlab_rails['time_zone'] ='Asia/Shanghai'   # 设置时区
gitlab_rails['gitlab_shell_ssh_port'] = 9922  # 访问ssh的端口
gitlab_rails['ldap_enabled'] = true
gitlab_rails['ldap_servers'] = YAML.load <<-'EOS'
  main: # 'main' is the GitLab 'provider ID' of this LDAP server
    label: 'LDAP'           # 显示在登录页面上的名称
    host: 'xxx.xxx.xxx.xxx'      # LDAP服务地址
    port: 389               # LDAP服务端口,如果LDAP基于SSL在端口通常为636
    uid: 'sAMAccountName'   # LDAP中用户名对应的属性,通常为'sAMAccountName'
    bind_dn: 'xxxxxx' # 同步用户信息的账户格式为'domainusername'
    password: '*********'     # 同步用户信息的账户密码
    encryption: 'plain'     # 'start_tls' or 'simple_tls' or 'plain'
    verify_certificates: false  # 如果使用SSL,则设为true
    active_directory: false     # 如果是 Active Directory LDAP server 则设为true
    allow_username_or_email_login: false  # 是否允许email登录
    lowercase_usernames: false            # 是否将用户名转为小写
    block_auto_created_users: false       # 是否自动创建用户
    base: 'OU=XXXX,DC=XXXX,DC=XXXX,DC=com,DC=cn' # 搜索LDAP用户是的BaseDN
    user_filter: ''
EOS
" >> /etc/gitlab/gitlab.rb

# 使新配置生效
gitlab-ctl reconfigure
...
...
先不要重启容器,使用浏览器访问
http://192.168.99.105:9980设置管理员密码
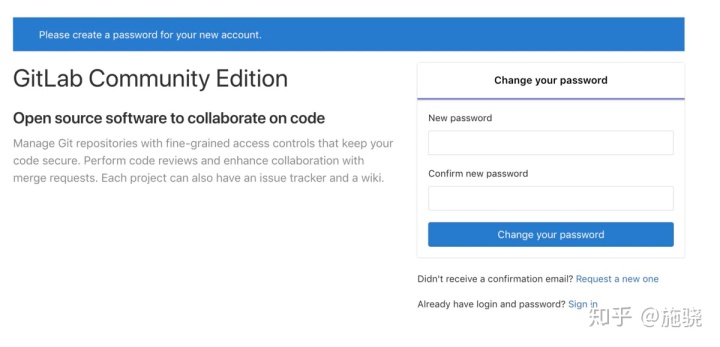
使用root和密码登录
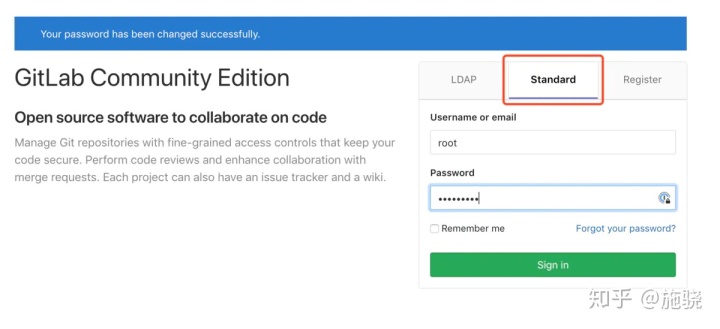
再次访问http://192.168.99.105:9980,选择LDAP方式登录

输入LDAP中的用户和密码后进入系统
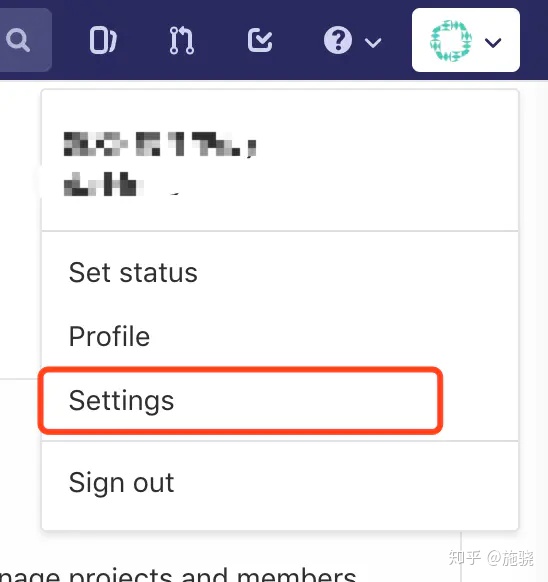
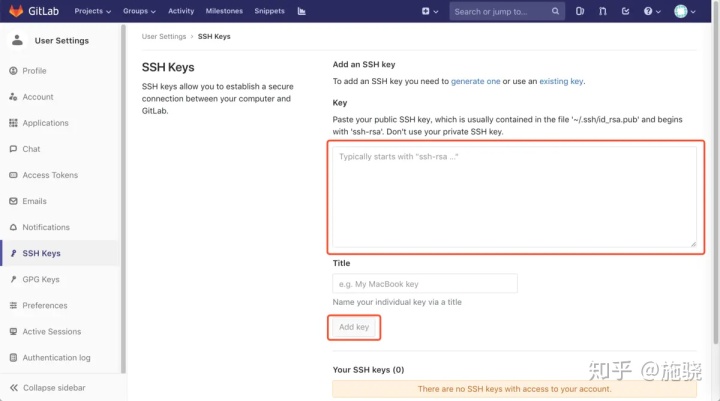
设置SSH Key
进入用户Setting页面
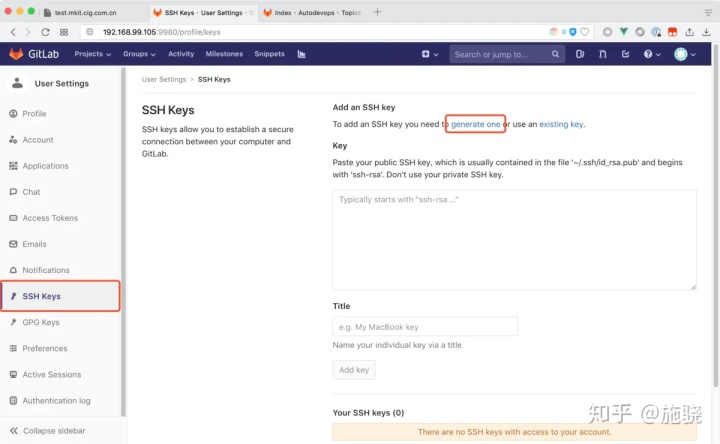
生成ssh秘钥,查看帮助页面http://192.168.99.105:9980/help/ssh/README#generating-a-new-ssh-key-pair
将公钥添加到GitLab,私钥自己好好保存。
。
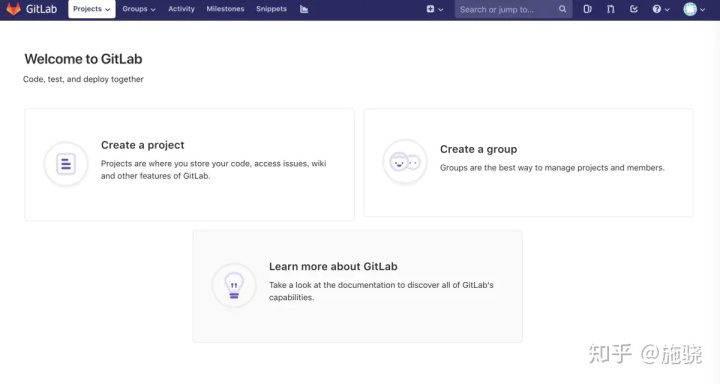
至此GitLab安装完毕。


 1071
1071

 被折叠的 条评论
为什么被折叠?
被折叠的 条评论
为什么被折叠?
 到【灌水乐园】发言


