


想了解更多好玩的人工智能应用,请关注公众号“机器AI学习 数据AI挖掘”,”智能应用"菜单中包括:颜值检测、植物花卉识别、文字识别、人脸美妆等有趣的智能应用。。

windows系统下利用tensorflow+python实现花朵识别
本文主要通过CNN进行花卉的分类,训练结束保存模型,最后通过调用模型,输入花卉的图片通过模型来进行类别的预测。
目的:识别不同的花朵
环境:win10 +TensorFlow 1.12.0+pycharm
数据集:http://download.tensorflow.org/example_images/flower_photos.tgz
一、环境的搭建
首先肯定是要搭建tensorflow和python的环境了,可以参考我之前的博客:在windows 10 64位系统下安装TensorFlow 和 pycharm安装教程 其他环境也可以百度。
二、下载花朵图片数据集
下载地址:http://download.tensorflow.org/example_images/flower_photos.tgz
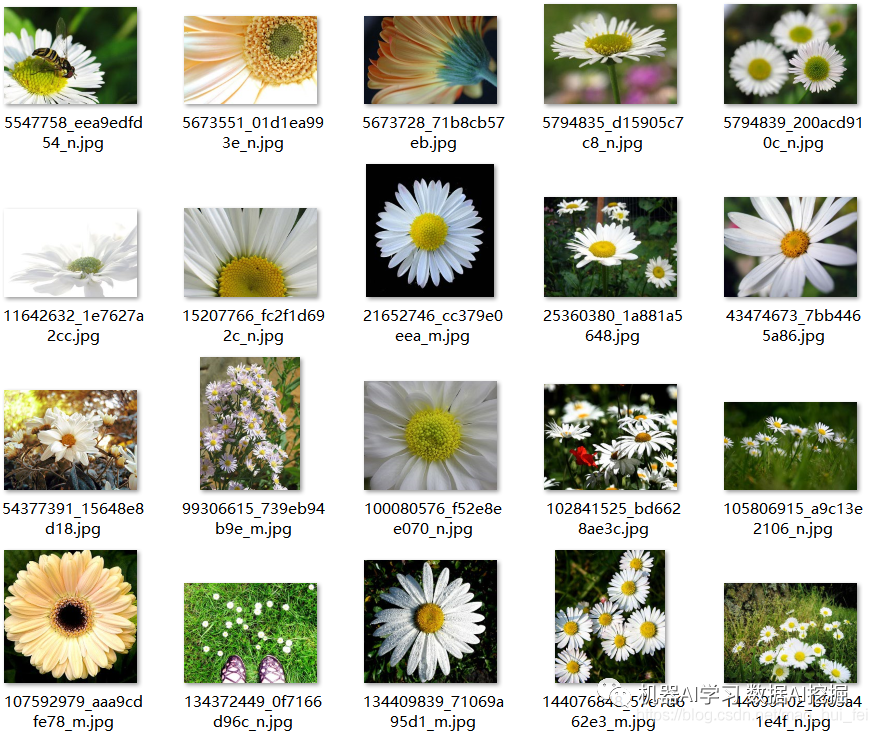
现在我们要训练花朵的识别模型,这是 Google 在TensorFlow里面提供的一个例子,其中包含了5类花朵的训练图片。可以新建个文件夹,用于存放数据和训练的模型。
如下图:flower_photos,用于放置训练图片
flower_model用于放置产生的模型,具体程序里有路径,灵活应用。
三、训练模型
我用的pycharm编译的程序,新建一个py文件
代码如下,复制进去
#程序功能:用tensorflow训练5种花朵的模型
#作者:Mao
#时间:2018.12.6
#参考博文
#作者:Enchanted_ZhouH
#来源:CSDN
#原文:https://blog.csdn.net/Enchanted_ZhouH/article/details/74116823


import os
os.environ['TF_CPP_MIN_LOG_LEVEL'] = '2'


from skimage import io,transform
import glob
import os
import tensorflow as tf
import numpy as np
import time

#数据集地址
path=      'E:/TensorFlow_project/18_12_5_flower/flower_photos/'
#模型保存地址
model_path='E:/TensorFlow_project/18_12_5_flower/flower_model/model.ckpt'

#将所有的图片resize成100*100
w=100
h=100
c=3


#读取图片
def read_img(path):
    cate=[path+x for x in os.listdir(path) if os.path.isdir(path+x)]
    imgs=[]
    labels=[]
    for idx,folder in enumerate(cate):
        for im in glob.glob(folder+'/*.jpg'):
            print('reading the images:%s'%(im))
            img=io.imread(im)
            img=transform.resize(img,(w,h))
            imgs.append(img)
            labels.append(idx)
    return np.asarray(imgs,np.float32),np.asarray(labels,np.int32)
data,label=read_img(path)


#打乱顺序
num_example=data.shape[0]
arr=np.arange(num_example)
np.random.shuffle(arr)
data=data[arr]
label=label[arr]


#将所有数据分为训练集和验证集
ratio=0.8
s=np.int(num_example*ratio)
x_train=data[:s]
y_train=label[:s]
x_val=data[s:]
y_val=label[s:]

#-----------------构建网络----------------------
#占位符
x=tf.placeholder(tf.float32,shape=[None,w,h,c],name='x')
y_=tf.placeholder(tf.int32,shape=[None,],name='y_')

def inference(input_tensor, train, regularizer):
    with tf.variable_scope('layer1-conv1'):
        conv1_weights = tf.get_variable("weight",[5,5,3,32],initializer=tf.truncated_normal_initializer(stddev=0.1))
        conv1_biases = tf.get_variable("bias", [32], initializer=tf.constant_initializer(0.0))
        conv1 = tf.nn.conv2d(input_tensor, conv1_weights, strides=[1, 1, 1, 1], padding='SAME')
        relu1 = tf.nn.relu(tf.nn.bias_add(conv1, conv1_biases))

    with tf.name_scope("layer2-pool1"):
        pool1 = tf.nn.max_pool(relu1, ksize = [1,2,2,1],strides=[1,2,2,1],padding="VALID")

    with tf.variable_scope("layer3-conv2"):
        conv2_weights = tf.get_variable("weight",[5,5,32,64],initializer=tf.truncated_normal_initializer(stddev=0.1))
        conv2_biases = tf.get_variable("bias", [64], initializer=tf.constant_initializer(0.0))
        conv2 = tf.nn.conv2d(pool1, conv2_weights, strides=[1, 1, 1, 1], padding='SAME')
        relu2 = tf.nn.relu(tf.nn.bias_add(conv2, conv2_biases))

    with tf.name_scope("layer4-pool2"):
        pool2 = tf.nn.max_pool(relu2, ksize=[1, 2, 2, 1], strides=[1, 2, 2, 1], padding='VALID')

    with tf.variable_scope("layer5-conv3"):
        conv3_weights = tf.get_variable("weight",[3,3,64,128],initializer=tf.truncated_normal_initializer(stddev=0.1))
        conv3_biases = tf.get_variable("bias", [128], initializer=tf.constant_initializer(0.0))
        conv3 = tf.nn.conv2d(pool2, conv3_weights, strides=[1, 1, 1, 1], padding='SAME')
        relu3 = tf.nn.relu(tf.nn.bias_add(conv3, conv3_biases))

    with tf.name_scope("layer6-pool3"):
        pool3 = tf.nn.max_pool(relu3, ksize=[1, 2, 2, 1], strides=[1, 2, 2, 1], padding='VALID')

    with tf.variable_scope("layer7-conv4"):
        conv4_weights = tf.get_variable("weight",[3,3,128,128],initializer=tf.truncated_normal_initializer(stddev=0.1))
        conv4_biases = tf.get_variable("bias", [128], initializer=tf.constant_initializer(0.0))
        conv4 = tf.nn.conv2d(pool3, conv4_weights, strides=[1, 1, 1, 1], padding='SAME')
        relu4 = tf.nn.relu(tf.nn.bias_add(conv4, conv4_biases))

    with tf.name_scope("layer8-pool4"):
        pool4 = tf.nn.max_pool(relu4, ksize=[1, 2, 2, 1], strides=[1, 2, 2, 1], padding='VALID')
        nodes = 6*6*128
        reshaped = tf.reshape(pool4,[-1,nodes])

    with tf.variable_scope('layer9-fc1'):
        fc1_weights = tf.get_variable("weight", [nodes, 1024],
                                      initializer=tf.truncated_normal_initializer(stddev=0.1))
        if regularizer != None: tf.add_to_collection('losses', regularizer(fc1_weights))
        fc1_biases = tf.get_variable("bias", [1024], initializer=tf.constant_initializer(0.1))

        fc1 = tf.nn.relu(tf.matmul(reshaped, fc1_weights) + fc1_biases)
        if train: fc1 = tf.nn.dropout(fc1, 0.5)

    with tf.variable_scope('layer10-fc2'):
        fc2_weights = tf.get_variable("weight", [1024, 512],
                                      initializer=tf.truncated_normal_initializer(stddev=0.1))
        if regularizer != None: tf.add_to_collection('losses', regularizer(fc2_weights))
        fc2_biases = tf.get_variable("bias", [512], initializer=tf.constant_initializer(0.1))

        fc2 = tf.nn.relu(tf.matmul(fc1, fc2_weights) + fc2_biases)
        if train: fc2 = tf.nn.dropout(fc2, 0.5)

    with tf.variable_scope('layer11-fc3'):
        fc3_weights = tf.get_variable("weight", [512, 5],
                                      initializer=tf.truncated_normal_initializer(stddev=0.1))
        if regularizer != None: tf.add_to_collection('losses', regularizer(fc3_weights))
        fc3_biases = tf.get_variable("bias", [5], initializer=tf.constant_initializer(0.1))
        logit = tf.matmul(fc2, fc3_weights) + fc3_biases

    return logit

#---------------------------网络结束---------------------------
regularizer = tf.contrib.layers.l2_regularizer(0.0001)
logits = inference(x,False,regularizer)

#(小处理)将logits乘以1赋值给logits_eval,定义name,方便在后续调用模型时通过tensor名字调用输出tensor
b = tf.constant(value=1,dtype=tf.float32)
logits_eval = tf.multiply(logits,b,name='logits_eval')

loss=tf.nn.sparse_softmax_cross_entropy_with_logits(logits=logits, labels=y_)
train_op=tf.train.AdamOptimizer(learning_rate=0.001).minimize(loss)
correct_prediction = tf.equal(tf.cast(tf.argmax(logits,1),tf.int32), y_)
acc= tf.reduce_mean(tf.cast(correct_prediction, tf.float32))


#定义一个函数,按批次取数据
def minibatches(inputs=None, targets=None, batch_size=None, shuffle=False):
    assert len(inputs) == len(targets)
    if shuffle:
        indices = np.arange(len(inputs))
        np.random.shuffle(indices)
    for start_idx in range(0, len(inputs) - batch_size + 1, batch_size):
        if shuffle:
            excerpt = indices[start_idx:start_idx + batch_size]
        else:
            excerpt = slice(start_idx, start_idx + batch_size)
        yield inputs[excerpt], targets[excerpt]


#训练和测试数据,可将n_epoch设置更大一些

n_epoch=10
batch_size=64
saver=tf.train.Saver()
sess=tf.Session()
sess.run(tf.global_variables_initializer())
for epoch in range(n_epoch):
    start_time = time.time()

    #training
    train_loss, train_acc, n_batch = 0, 0, 0
    for x_train_a, y_train_a in minibatches(x_train, y_train, batch_size, shuffle=True):
        _,err,ac=sess.run([train_op,loss,acc], feed_dict={x: x_train_a, y_: y_train_a})
        train_loss += err; train_acc += ac; n_batch += 1
    print("   train loss: %f" % (np.sum(train_loss)/ n_batch))
    print("   train acc: %f" % (np.sum(train_acc)/ n_batch))

    #validation
    val_loss, val_acc, n_batch = 0, 0, 0
    for x_val_a, y_val_a in minibatches(x_val, y_val, batch_size, shuffle=False):
        err, ac = sess.run([loss,acc], feed_dict={x: x_val_a, y_: y_val_a})
        val_loss += err; val_acc += ac; n_batch += 1
    print("   validation loss: %f" % (np.sum(val_loss)/ n_batch))
    print("   validation acc: %f" % (np.sum(val_acc)/ n_batch))
saver.save(sess,model_path)
sess.close()
1
2
3
4
5
6
7
8
9
10
11
12
13
14
15
16
17
18
19
20
21
22
23
24
25
26
27
28
29
30
31
32
33
34
35
36
37
38
39
40
41
42
43
44
45
46
47
48
49
50
51
52
53
54
55
56
57
58
59
60
61
62
63
64
65
66
67
68
69
70
71
72
73
74
75
76
77
78
79
80
81
82
83
84
85
86
87
88
89
90
91
92
93
94
95
96
97
98
99
100
101
102
103
104
105
106
107
108
109
110
111
112
113
114
115
116
117
118
119
120
121
122
123
124
125
126
127
128
129
130
131
132
133
134
135
136
137
138
139
140
141
142
143
144
145
146
147
148
149
150
151
152
153
154
155
156
157
158
159
160
161
162
163
164
165
166
167
168
169
170
171
172
173
174
175
176
177
178
179
180
181
182
183
184
185
186
187
188
189
190
191
192
193
运行这个py文件,会不断的读图,最后生成模型,运行图如下: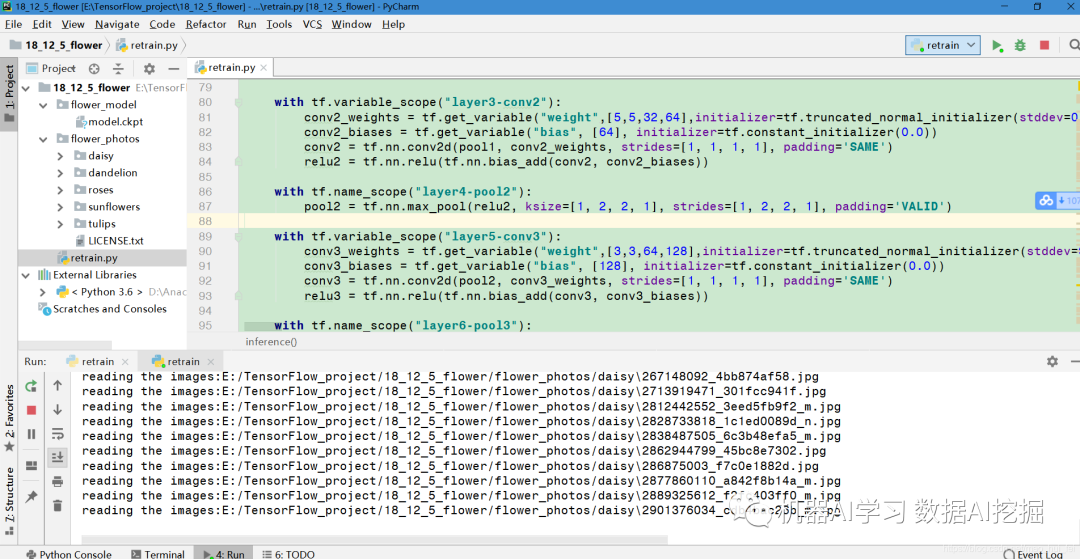
运行成功后的界面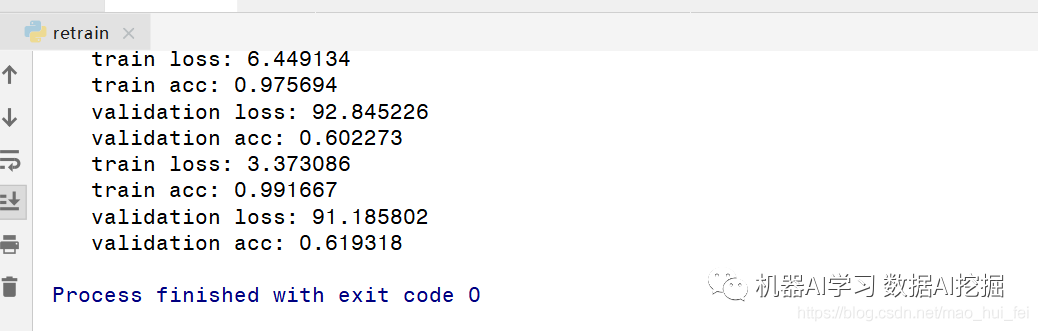
并且在相应文件夹下生成模型文件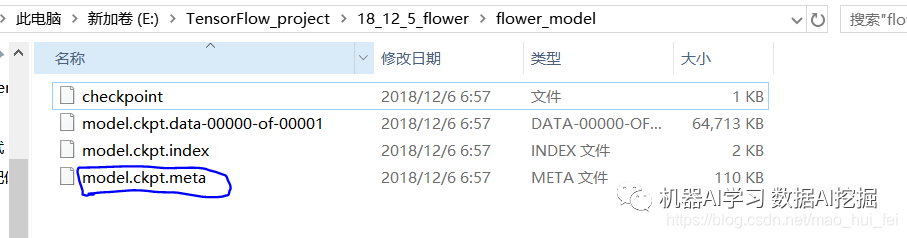
四、 调用模型,进行识别
代码如下:
#程序功能:用tensorflow训练5种花朵的模型后,调用模型,识别花朵
#作者:mao
#时间:2018.12.6
#参考博文
#作者:Enchanted_ZhouH
#来源:CSDN
#原文:https://blog.csdn.net/Enchanted_ZhouH/article/details/74116823


import os
os.environ['TF_CPP_MIN_LOG_LEVEL'] = '2'

from skimage import io,transform
import tensorflow as tf
import numpy as np


path1 = "E:/TensorFlow_project/18_12_5_flower/flower_photos/daisy/5547758_eea9edfd54_n.jpg"
path2 = "E:/TensorFlow_project/18_12_5_flower/flower_photos/dandelion/7355522_b66e5d3078_m.jpg"
path3 = "E:/TensorFlow_project/18_12_5_flower/flower_photos/roses/394990940_7af082cf8d_n.jpg"
path4 = "E:/TensorFlow_project/18_12_5_flower/flower_photos/sunflowers/6953297_8576bf4ea3.jpg"
path5 = "E:/TensorFlow_project/18_12_5_flower/flower_photos/tulips/10791227_7168491604.jpg"

flower_dict = {0:'dasiy',1:'dandelion',2:'roses',3:'sunflowers',4:'tulips'}

w=100
h=100
c=3

def read_one_image(path):
    img = io.imread(path)
    img = transform.resize(img,(w,h))
    return np.asarray(img)

with tf.Session() as sess:
    data = []
    data1 = read_one_image(path1)
    data2 = read_one_image(path2)
    data3 = read_one_image(path3)
    data4 = read_one_image(path4)
    data5 = read_one_image(path5)
    data.append(data1)
    data.append(data2)
    data.append(data3)
    data.append(data4)
    data.append(data5)

    saver = tf.train.import_meta_graph('E:/TensorFlow_project/18_12_5_flower/flower_model/model.ckpt.meta')
    saver.restore(sess,tf.train.latest_checkpoint('E:/TensorFlow_project/18_12_5_flower/flower_model/'))

    graph = tf.get_default_graph()
    x = graph.get_tensor_by_name("x:0")
    feed_dict = {x:data}

    logits = graph.get_tensor_by_name("logits_eval:0")

    classification_result = sess.run(logits,feed_dict)

    #打印出预测矩阵
    print(classification_result)
    #打印出预测矩阵每一行最大值的索引
    print(tf.argmax(classification_result,1).eval())
    #根据索引通过字典对应花的分类
    output = []
    output = tf.argmax(classification_result,1).eval()
    for i in range(len(output)):
        print("第",i+1,"朵花预测:"+flower_dict[output[i]])
1
2
3
4
5
6
7
8
9
10
11
12
13
14
15
16
17
18
19
20
21
22
23
24
25
26
27
28
29
30
31
32
33
34
35
36
37
38
39
40
41
42
43
44
45
46
47
48
49
50
51
52
53
54
55
56
57
58
59
60
61
62
63
64
65
66
67
68
运行结果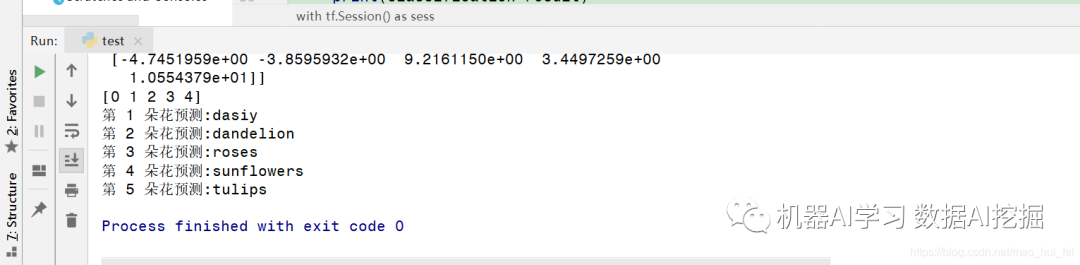
说明我们运行成功了,预测结果和调用模型代码中的五个路径相比较是完全准确的。
本文的模型对于花卉的分类准确率大概在70%左右,采用迁移学习调用Inception-v3模型对本文中的花卉数据集分类准确率在95%左右。主要的原因在于本文的CNN模型较于简单,而且花卉数据集本身就比mnist手写数字数据集分类难度就要大一点,同样的模型在mnist手写数字的识别上准确率要比花卉数据集准确率高不少。
本文的CNN模型完全可以通过增大模型复杂度或者改参数调试以及对图像进行预处理来提高准确率,
注意:一些图片读取或者模型保存及读取的路径要正确,需要在程序里修改一下。


 3330
3330


 被折叠的 条评论
为什么被折叠?
被折叠的 条评论
为什么被折叠?
 到【灌水乐园】发言


