


I'm working on depth map with OpenCV. I can obtain it but it is reconstructed from the left camera origin and there is a little tilt of this latter and as you can see on the figure, the depth is "shifted" (the depth should be close and no horizontal gradient):
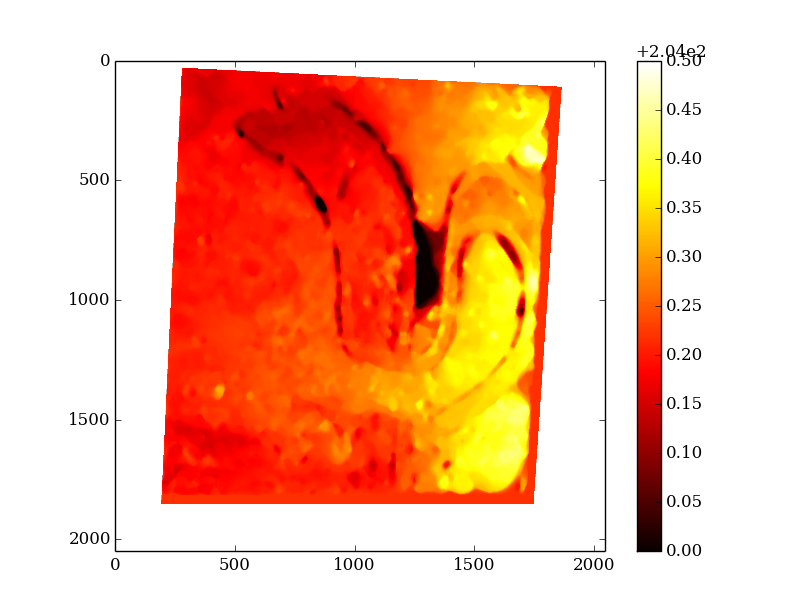
I would like to express it as with a zero angle, i try with the warp perspective function as you can see below but i obtain a null field...
P = np.dot(cam,np.dot(Transl,np.dot(Rot,A1)))
dst = cv2.warpPerspective(depth, P, (2048, 2048))
with :
#Projection 2D -> 3D matrix
A1 = np.zeros((4,3))
A1[0,0] = 1
A1[0,2] = -1024
A1[1,1] = 1
A1[1,2] = -1024
A1[3,2] = 1
#Rotation matrice around the Y axis
theta = np.deg2rad(5)
Rot = np.zeros((4,4))
Rot[0,0] = np.cos(theta)
Rot[0,2] = -np.sin(theta)
Rot[1,1] = 1
Rot[2,0] = np.sin(theta)
Rot[2,2] = np.cos(theta)
Rot[3,3] = 1
#Translation matrix on the X axis
dist = 0
Transl = np.zeros((4,4))
Transl[0,0] = 1
Transl[0,2] = dist
Transl[1,1] = 1
Transl[2,2] = 1
Transl[3,3] = 1
#Camera Intrisecs matrix 3D -> 2D
cam = np.concatenate((C1,np.zeros((3,1))),axis=1)
cam[2,2] = 1
P = np.dot(cam,np.dot(Transl,np.dot(Rot,A1)))
dst = cv2.warpPerspective(Z0_0, P, (2048*3, 2048*3))
EDIT LATER :
You can download the 32MB field dataset here: https://filex.ec-lille.fr/get?k=cCBoyoV4tbmkzSV5bi6. Then, load and view the image with:
from matplotlib import pyplot as plt
import numpy as np
img = np.load('testZ0.npy')
plt.imshow(img)
plt.show()
解决方案
I have got a rough solution in place. You can modify it later.
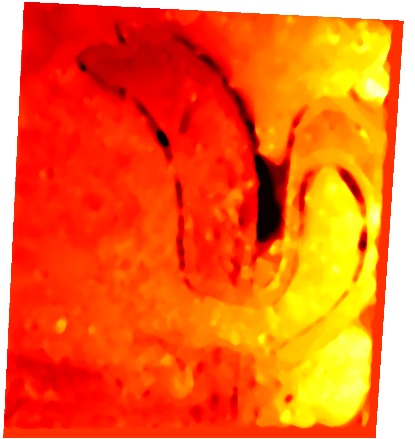
I used the mouse handling operations available in OpenCV to crop the region of interest in the given heatmap.
(Did I just say I used a mouse to crop the region?) Yes, I did. To learn more about mouse functions in OpenCV SEE THIS. Besides, there are many other SO questions that can help you in this regard.:)
Using those functions I was able to obtain the following:
Now to your question of removing the tilt. I used the homography principal by taking the corner points of the image above and using it on a 'white' image of a definite size. I used the cv2.findHomography() function for this.
Now using the cv2.warpPerspective() function in OpenCV, I was able to obtain the following:
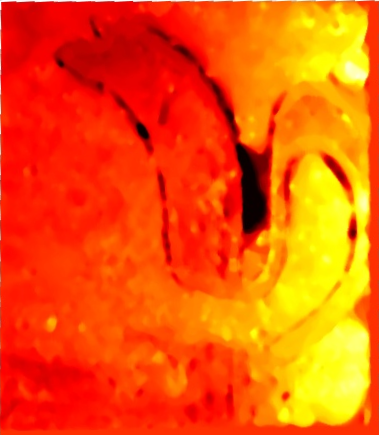
Now you can the required scale to this image as you wanted.
CODE:
I have also attached some snippets of code for your perusal:
#First I created an image of white color of a definite size
back = np.ones((435, 379, 3)) # size
back[:] = (255, 255, 255) # white color
Next I obtained the corner points pts_src on the tilted image below :
pts_src = np.array([[25.0, 2.0],[403.0,22.0],[375.0,436.0],[6.0,433.0]])
I wanted the points above to be mapped to the points 'pts_dst' given below :
pts_dst = np.array([[2.0, 2.0], [379.0, 2.0], [379.0, 435.0],[2.0, 435.0]])
Now I used the principal of homography:
h, status = cv2.findHomography(pts_src, pts_dst)
Finally I mapped the original image to the white image using perspective transform.
fin = cv2.warpPerspective(img, h, (back.shape[1],back.shape[0]))
# img -> original tilted image.
# back -> image of white color.
Hope this helps! I also got to learn a great deal from this question.
Note: The points fed to the 'cv2.findHomography()' must be in float.
For more info on Homography , visit THIS PAGE


 4566
4566


 被折叠的 条评论
为什么被折叠?
被折叠的 条评论
为什么被折叠?
 到【灌水乐园】发言


