


微服务架构
后端框架结合gin + go-micro + etcd
- etcd:充当服务注册、服务发现功能
- go-micro:提供微服务功能
- gin:web框架,API实现
在前端进行http请求时,会先到gin,考虑请求的接口实现中是否需要用到微服务。
先将微服务提取出来,在go-micro实现并注册到etcd中。
在gin中通过etcd调用微服务。
后端实现
go-micro
安装工具集
go get -u -v github.com/micro/micro
安装go-micro
go get -u -v github.com/micro/go-micro
安装Protobuf插件
如果您使用代码生成,您还需要使用protoc-gen-go
go get -u github.com/micro/protobuf/{proto,protoc-gen-go}
go get -u github.com/micro/protoc-gen-micro
micro命令使用
创建服务:
micro new --type srv hello
参数介绍:
 new  创建目录
    - namespace: 命名空间 == 包名
    - type : 微服务类型。
        - src: 微服务
        - web:  基于微服务的web网站
目录文件:
- main.go: 入口文件
- handler/: 处理grpc实现的接口,对应实现接口的子类。
- proto/: 预生成的protobuf文件
- Dockerfile: 部署微服务使用的Dockerfile
- Makefile:编译文件。 --快速编译protobuf文件
执行proto生成代码,没了解过grpc的点这里
protoc --proto_path=/c/go/work/src:. --go_out=. --micro_out=. /c/go/work/src/hello/proto /hello/hello.proto
go-micro创建服务后会生成一个hello wolrd的demo服务,可以直接运行go run main.go拿来用
如果想重写服务可以修改/hello/proto/hello/hello.proto
syntax = "proto3";

option go_package="./proto/hello;hello";

package go.micro.srv.hello;

service Hello {
	rpc Call(Request) returns (Response) {}
}

message Request {
	string name = 1;
}

message Response {
	string msg = 1;
}
再重新执行proto生成代码,然后在/hello/handler/hello.go编写你的服务
package handler

import (
	"context"

	"github.com/micro/go-micro/util/log"

	hello "hello/proto/hello"
)

type Hello struct{}

// Call is a single request handler called via client.Call or the generated client code
func (e *Hello) Call(ctx context.Context, req *hello.Request, rsp *hello.Response) error {
	log.Log("Received Hello.Call request")
	rsp.Msg = "hello " + req.Name
	return nil
}
etcd
ercd在linux环境下安装,安装脚本如下:
#!/bin/bash
ETCD_VER=v3.5.1

# choose either URL
GOOGLE_URL=https://storage.googleapis.com/etcd
GITHUB_URL=https://github.com/etcd-io/etcd/releases/download
DOWNLOAD_URL=${GOOGLE_URL}

rm -f /tmp/etcd-${ETCD_VER}-linux-amd64.tar.gz
rm -rf /tmp/etcd-download-test && mkdir -p /tmp/etcd-download-test

curl -L ${DOWNLOAD_URL}/${ETCD_VER}/etcd-${ETCD_VER}-linux-amd64.tar.gz -o /tmp/etcd-${ETCD_VER}-linux-amd64.tar.gz
tar xzvf /tmp/etcd-${ETCD_VER}-linux-amd64.tar.gz -C /tmp/etcd-download-test --strip-components=1
rm -f /tmp/etcd-${ETCD_VER}-linux-amd64.tar.gz

/tmp/etcd-download-test/etcd --version
/tmp/etcd-download-test/etcdctl version
/tmp/etcd-download-test/etcdutl version

mv /tmp/etcd-download-test/etcd /usr/local/bin
单机etcd 启动命令:
etcd --name my-etcd-1 --listen-client-urls http://0.0.0.0:2379 --advertise-client-urls http://0.0.0.0:2379 --listen-peer-urls http://0.0.0.0:2380 --initial-advertise-peer-urls http://0.0.0.0:2380 --initial-cluster my-etcd-1=http://0.0.0.0:2380
集群部署
etcd --name etcd01  \
--data-dir .\data\etcd01  \
--advertise-client-urls http://127.0.0.1:2379 \
--listen-client-urls http://127.0.0.1:2379 \
--listen-peer-urls http://127.0.0.1:2380 \
--initial-advertise-peer-urls http://127.0.0.1:2380 \
--initial-cluster-token etcd-cluster-1 \
--initial-cluster etcd01=http://127.0.0.1:2380,etcd02=http://127.0.0.1:2381,etcd03=http://127.0.0.1:2382 \
--initial-cluster-state new

etcd --name etcd02 \
--data-dir .\data\etcd02 \
--advertise-client-urls http://127.0.0.1:3379 \
--listen-client-urls http://127.0.0.1:3379 \
--listen-peer-urls http://127.0.0.1:2381 \
--initial-advertise-peer-urls http://127.0.0.1:2381 \
--initial-cluster-token etcd-cluster-1 \
--initial-cluster etcd01=http://127.0.0.1:2380,etcd02=http://127.0.0.1:2381,etcd03=http://127.0.0.1:2382 \
--initial-cluster-state new

etcd --name etcd03 \
--data-dir .\data\etcd03 \
--advertise-client-urls http://127.0.0.1:4379 \
--listen-client-urls http://127.0.0.1:4379 \
--listen-peer-urls http://127.0.0.1:2382 \
--initial-advertise-peer-urls http://127.0.0.1:2382 \
--initial-cluster-token etcd-cluster-1 \
--initial-cluster etcd01=http://127.0.0.1:2380,etcd02=http://127.0.0.1:2381,etcd03=http://127.0.0.1:2382 \
--initial-cluster-state new
查看节点状态
etcdctl --write-out=table
服务注册:
 go run service1/main.go --registry=etcd --registry_address=http://127.0.0.1:3379
 go run service2/main.go --registry=etcd --registry_address=http://127.0.0.1:4379
gin
代码实现:
package main

import (
	"fmt"
	"github.com/gin-gonic/gin"
	"github.com/micro/go-micro"
	"github.com/micro/go-micro/registry/etcd"
	"github.com/micro/go-micro/registry"
	"test66/proto/hello"
	context2 "context"
)

func main(){

	router := gin.Default()
	router.GET("/", func(context *gin.Context) {
		server := micro.NewService(
			micro.Name("go.micro.srv.hello"),
			// 配置etcd为注册中心,配置etcd路径,默认端口是2379
			micro.Registry(etcd.NewRegistry(
				// 地址是我本地etcd服务器地址,不要照抄
				registry.Addrs("127.0.0.1:2379"),
			)),
		)
		server.Init()

		// 1.初始化客户端
		microClient := hello.NewHelloService("go.micro.srv.hello",server.Client())

		resp,err := microClient.Call(context2.TODO(),&hello.Request{
			Name: "小白",
		})
		if err!= nil {
			fmt.Println("调用服务错误:",err)
			context.Writer.Write([]byte("调用服务错误"))
			return
		}
		context.Writer.Write([]byte(resp.Msg))
	})
	err := router.Run(":8080")
	if err !=nil {
		fmt.Println("服务启动失败:",err)
	}
}
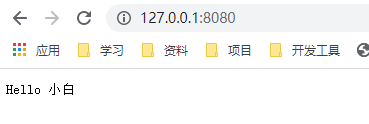
测试调用服务正常


 1461
1461


 被折叠的 条评论
为什么被折叠?
被折叠的 条评论
为什么被折叠?
 到【灌水乐园】发言


