


Python实现在远端服务器挂代码—发送定时天气预报至邮箱+每日一句(小白教程)

人生苦短,我用python。下面来讲解一个python每天定时发送天气预报和每日一句至指定邮箱的脚本挂在服务器运行的程序。
废话不多说,先来看一眼整体代码,再来一步一步讲解。
import requests
import smtplib
import schedule
import time
from bs4 import BeautifulSoup
from email.mime.text import MIMEText
from email.header import Header
account =' xxxxxxx@qq.com'#**这里填发件人邮箱,我用的是QQ邮箱**。
password = 'xxxxx'#**这里填发件人的授权码!不是登录密码!**
receiver ='xxxxxx @qq.com'#**这里填收件人的邮箱。**
def sentence():
url = "http://open.iciba.com/dsapi/"
r = requests.get(url)
content = r.json()['content']
note = r.json()['note']
return content,note
def weather_spider():
headers={'xxxx'}#伪装头
url='http://www.weather.com.cn/weather1d/XXXXX.shtml'#填写天气网站所在地的网址
res=requests.get(url=url,headers=headers)
res.encoding='utf-8'
soup=BeautifulSoup(res.text,'html.parser')
tem1= soup.find(class_='tem')
weather1= soup.find(class_='wea')
clothes1=soup.find(class_='li3 hot').find('p')
tem=tem1.text
weather=weather1.text
clothes=clothes1.text
return tem,weather,clothes
def send_email(tem,weather,clothes,content,note):
mailhost = 'smtp.qq.com'##把qq邮箱的服务器地址赋值到变量mailhost上,地址应为字符串格式
qqmail = smtplib.SMTP_SSL(mailhost)##实例化并连接SMTP端口号。
qqmail.connect(mailhost,465)#**如果放在阿里云服务器运行,只能465端口,25端口会被当做垃圾邮件。**
qqmail.login(account,password)
content= '亲,今日天气: '+tem+', '+weather+', '+clothes+' '+content+' '+note
message = MIMEText(content, 'plain', 'utf-8')
subject = ' 标题'#***这里写邮件的标题***
message['Subject'] = Header(subject, 'utf-8')
try:
qqmail.sendmail(account, receiver, message.as_string())
print ('邮件发送成功')
except:
print ('邮件发送失败')
qqmail.quit()
def job():
print('开始一次任务')
content,note=sentence()
tem,weather,clothes= weather_spider()
send_email(tem,weather,clothes,content,note)
print('任务完成')
schedule.every().day.at("07:00").do(job)#定时七点执行任务。
while True:
schedule.run_pending()
time.sleep(1)#检查部署的情况,如果任务准备就绪,就开始执行任务。
一、完成代码
1、安装需要的库
这三个属于第三方库,需要另行下载
requests Win10在cmd命令输入 pip install request
BeautifulSoup4 pip install BeautifulSoup4
schedule pip install schdeduile
2、填写发收件人信息
ccount =' xxxxxxx@qq.com'#**这里填发件人邮箱,我用的是QQ邮箱**。
password = 'xxxxx'#**这里填发件人的授权码**
receiver ='xxxxxx @qq.com'#**这里填收件人的邮箱。**
这个password需要我们去到这里获取:请打开https://mail.qq.com/,登录你的邮箱。然后点击位于顶部的【设置】按钮,选择【账户设置】,然后下拉到这个位置。
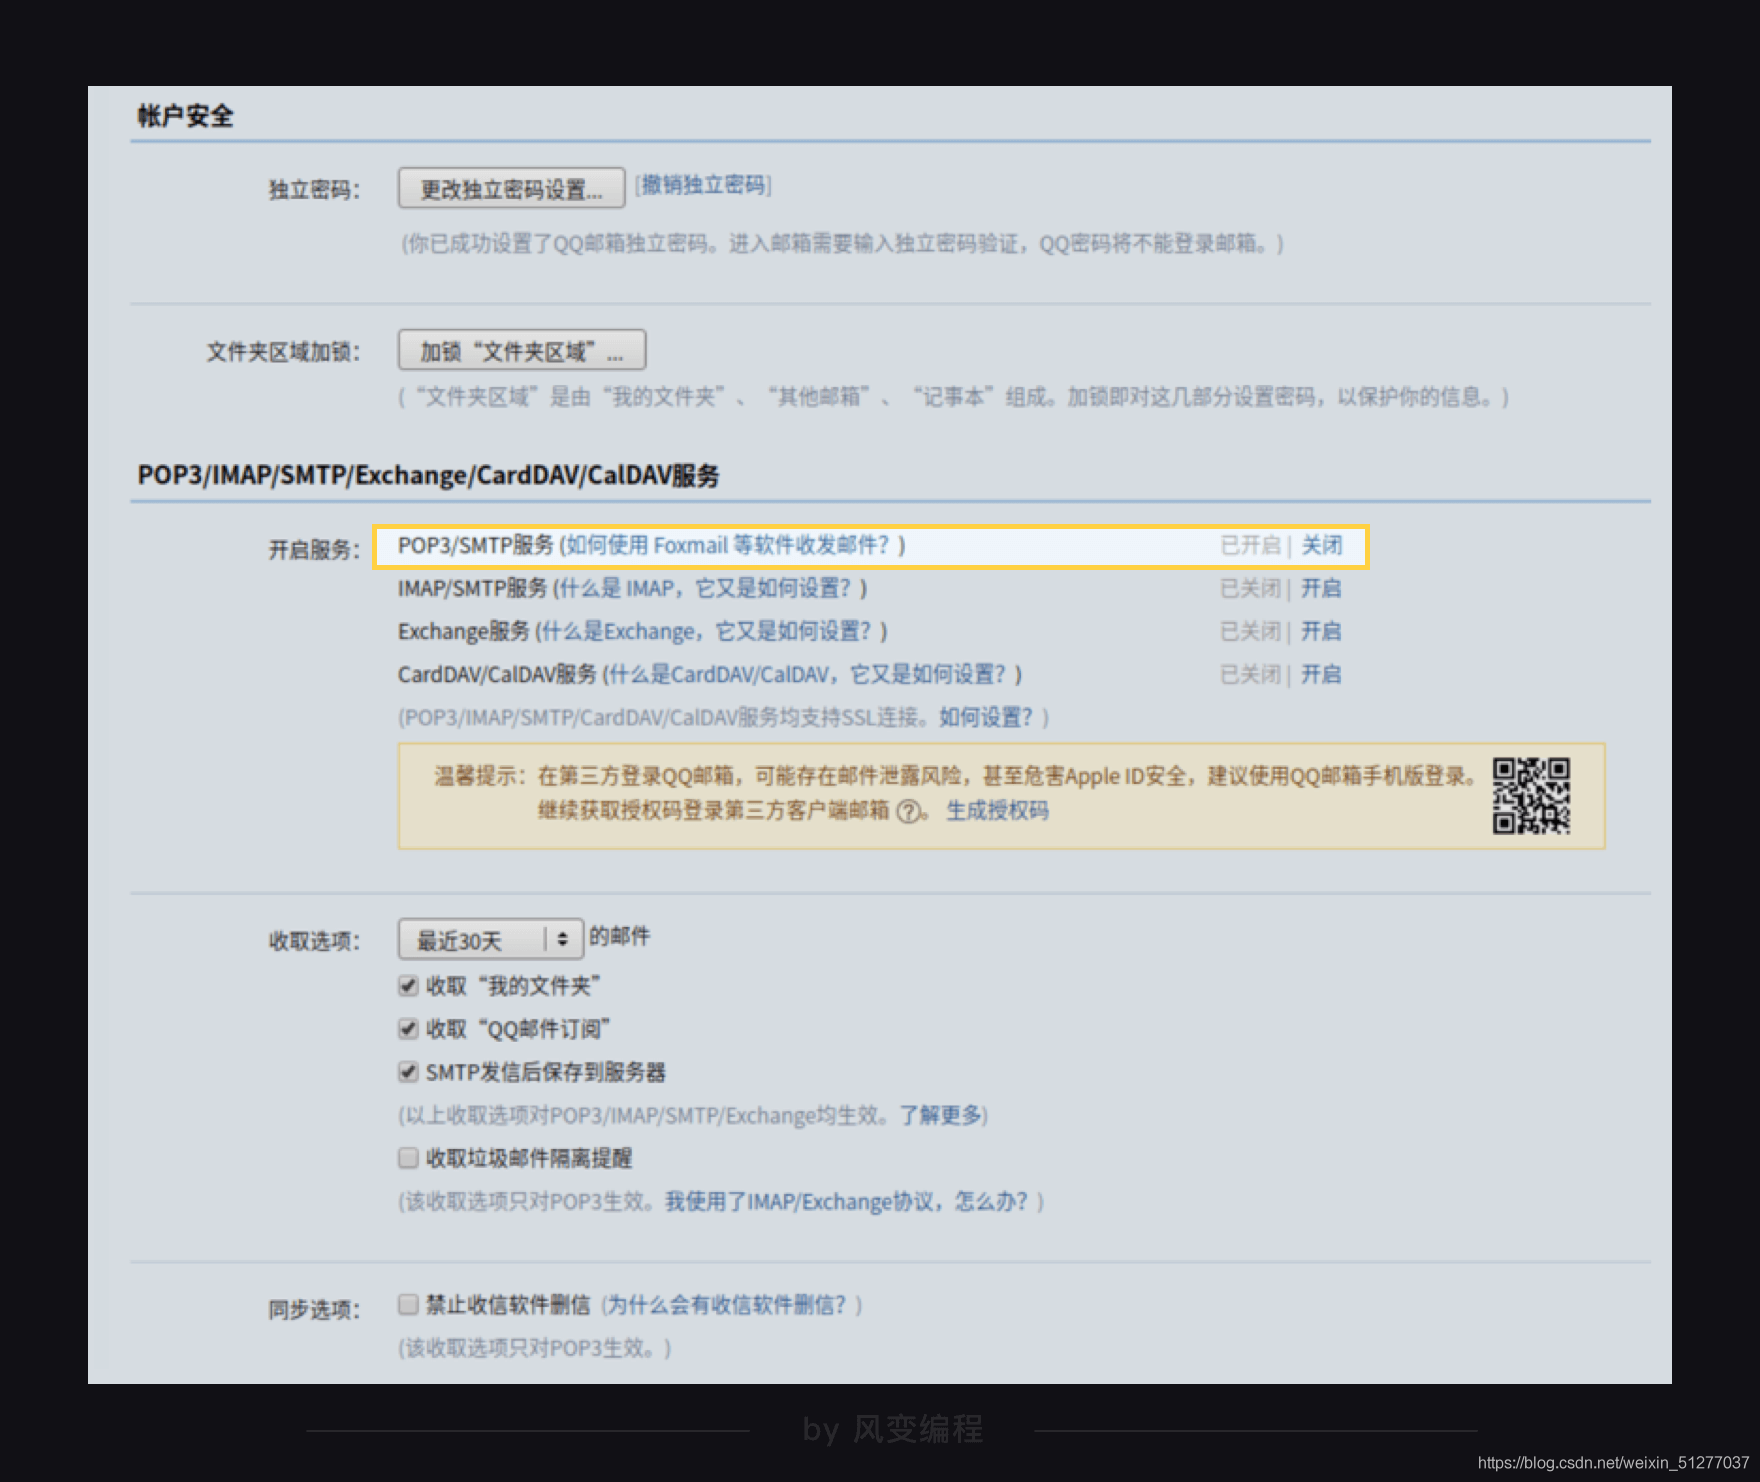
若为关闭,则开启POP3服务()
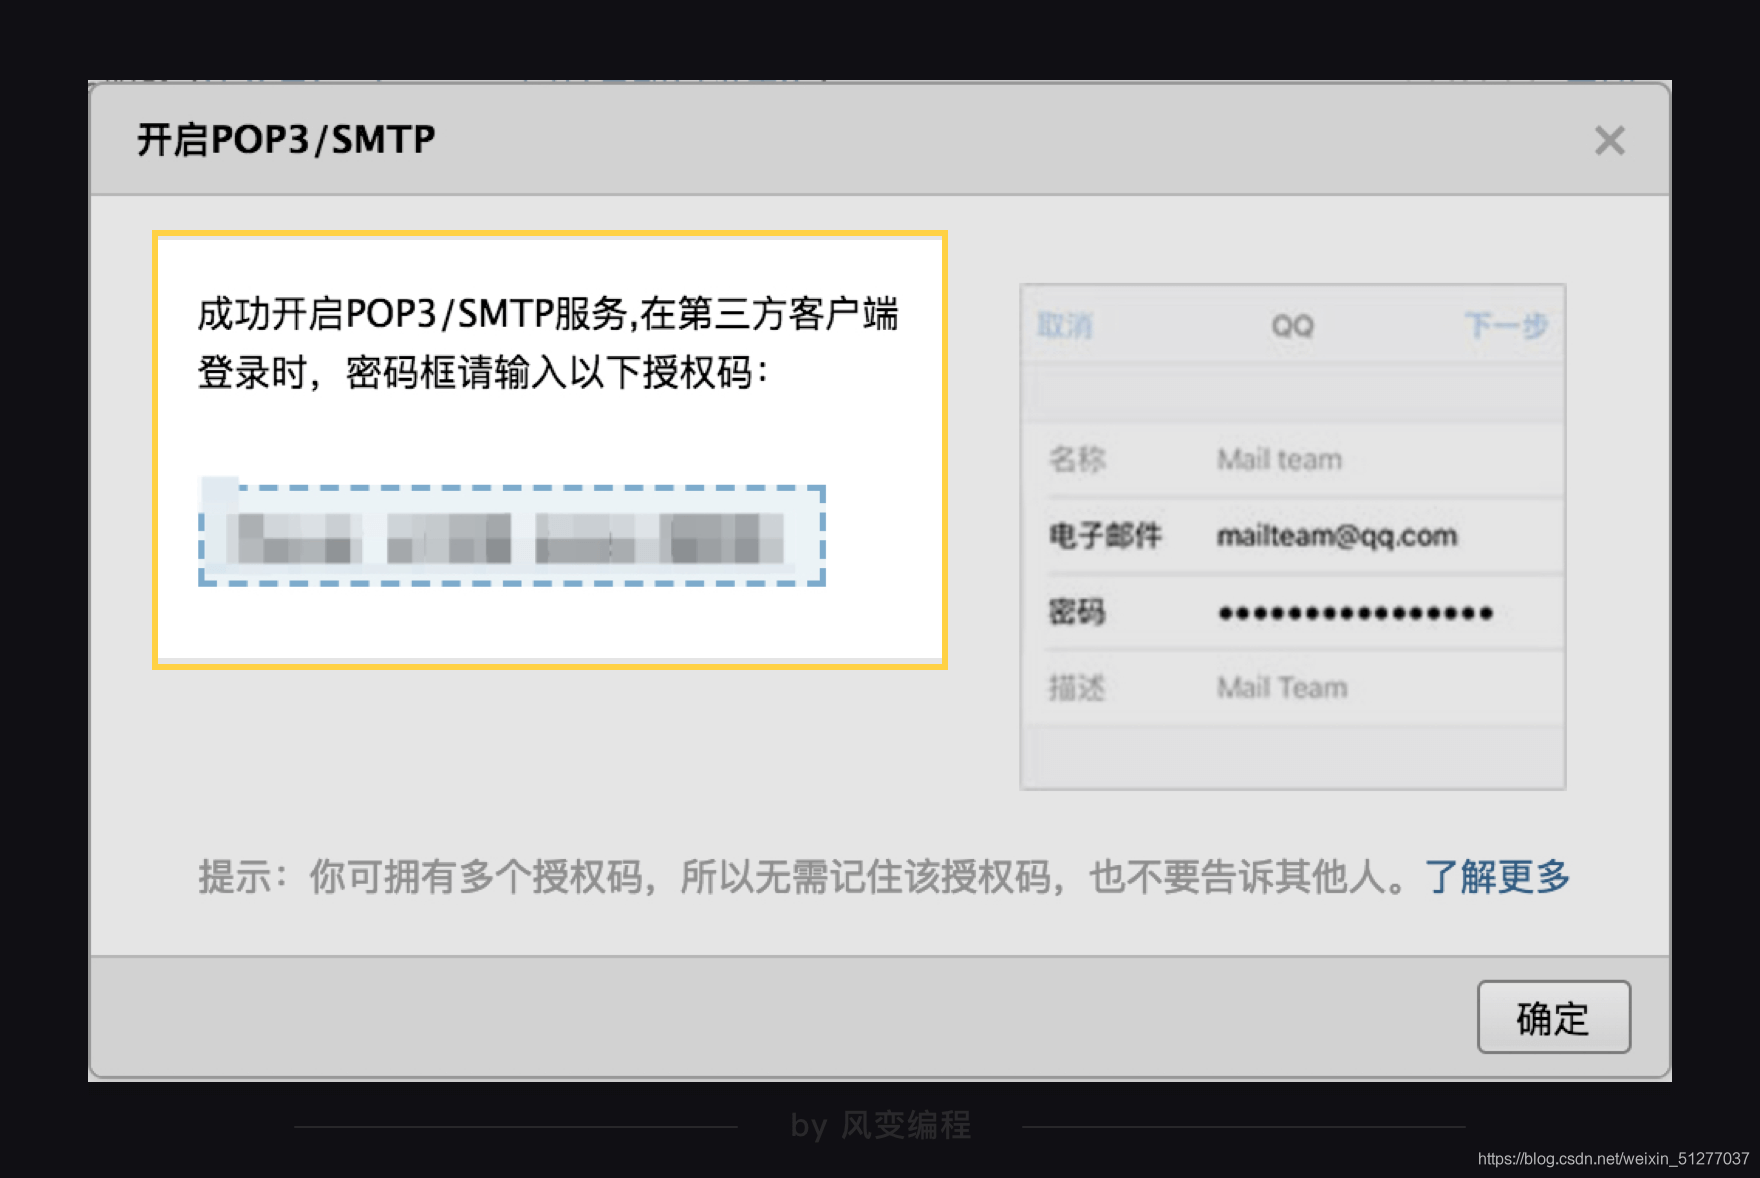
会收到一个授权码,即为password。
二、定义函数
——1(每日一句爬取)
def sentence():
url = "http://open.iciba.com/dsapi/"
r = requests.get(url)
content = r.json()['content']
note = r.json()['note']
return content,note
——2(天气预报爬取)
def weather_spider():
headers={'xxxx'}#伪装头
url='http://www.weather.com.cn/weather1d/101221201.shtml'#替换为自己所在地方网址
res=requests.get(url=url,headers=headers)
res.encoding='utf-8'
soup=BeautifulSoup(res.text,'html.parser')
tem1= soup.find(class_='tem')
weather1= soup.find(class_='wea')
clothes1=soup.find(class_='li3 hot').find('p')
tem=tem1.text
weather=weather1.text
clothes=clothes1.text
return tem,weather,clothes
——3(发送邮件)
def send_email(tem,weather,clothes,content,note):
mailhost = 'smtp.qq.com'
qqmail = smtplib.SMTP_SSL(mailhost)
qqmail.connect(mailhost,465)#**如果放在阿里云服务器运行,只能465端口,25端口会被当做垃圾邮件。**
qqmail.login(account,password)
content= '今日天气: '+tem+', '+weather+', '+clothes+' '+content+' '+note
message = MIMEText(content, 'plain', 'utf-8')
subject = ' 标题'#***这里填写邮件的标题***
message['Subject'] = Header(subject, 'utf-8')
try:
qqmail.sendmail(account, receiver, message.as_string())
print ('邮件发送成功')
except:
print ('邮件发送失败')
qqmail.quit()
——4(执行任务)
def job(): #创建任务函数
print('开始一次任务')
content,note=sentence()
tem,weather,clothes= weather_spider()
send_email(tem,weather,clothes,content,note)
print('任务完成')
schedule.every().day.at("07:00").do(job)#定时七点执行任务。
while True:
schedule.run_pending()
time.sleep(1) #检查部署的情况,如果任务准备就绪,就开始执行任务。
——5小结
到这里代码就完成了

只要电脑开着,脚本就会一直运行下去。 在本地运行显示这样就是成功了。 但这样太麻烦,谁大清早起来开机运行电脑。
可以用服务器远程挂着脚本,让他自动运行。 接下来来讲如何做。
三、 服务器
1、搭建服务器
在这里推荐使用阿里云,因为相比其他服务器稳定且简便.
阿里云有开发者计划,专门针对学生的优惠,首次可以试用免费服务器。
我用的是轻量应用级服务器,便宜而且实用,有学生优惠,其他免费试用的,也可以用。
找到自己的服务器,设置密码并记住。

记住自己的IP 和账号名:adminstrator
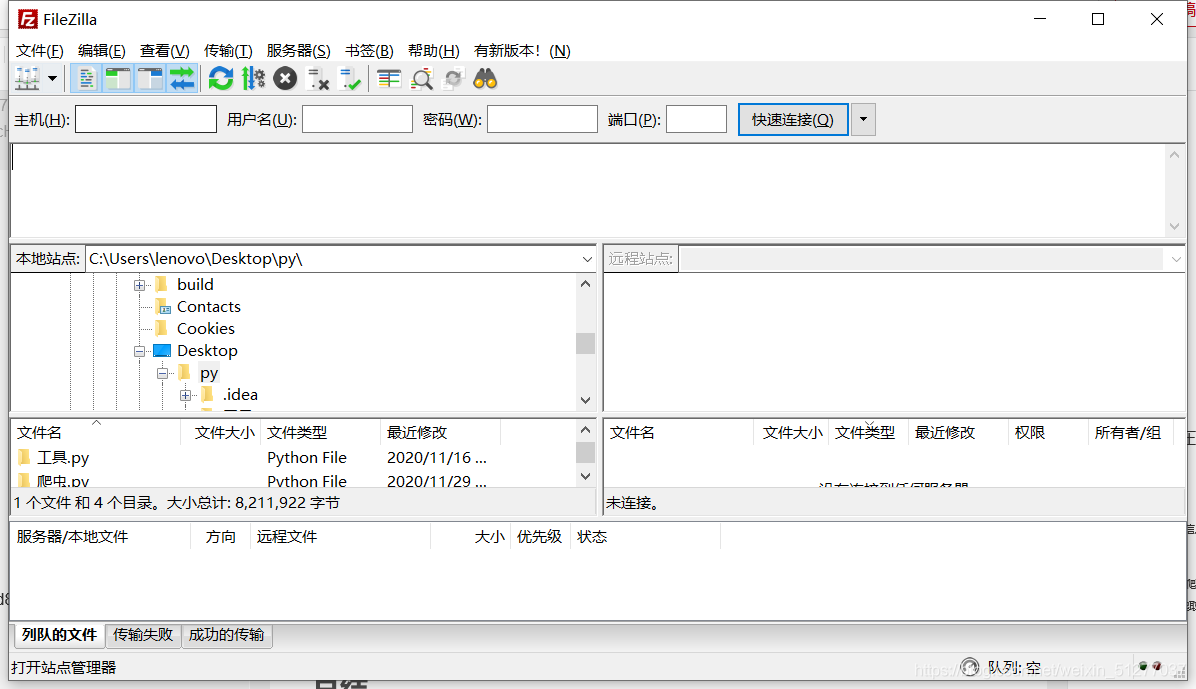
2、建立ftp站点
——1
在电脑中下载FileZilla
依次 输入主机(即刚才的IP),用户名(即adminstrator),密码,端口不输入也可(默认21)
——2
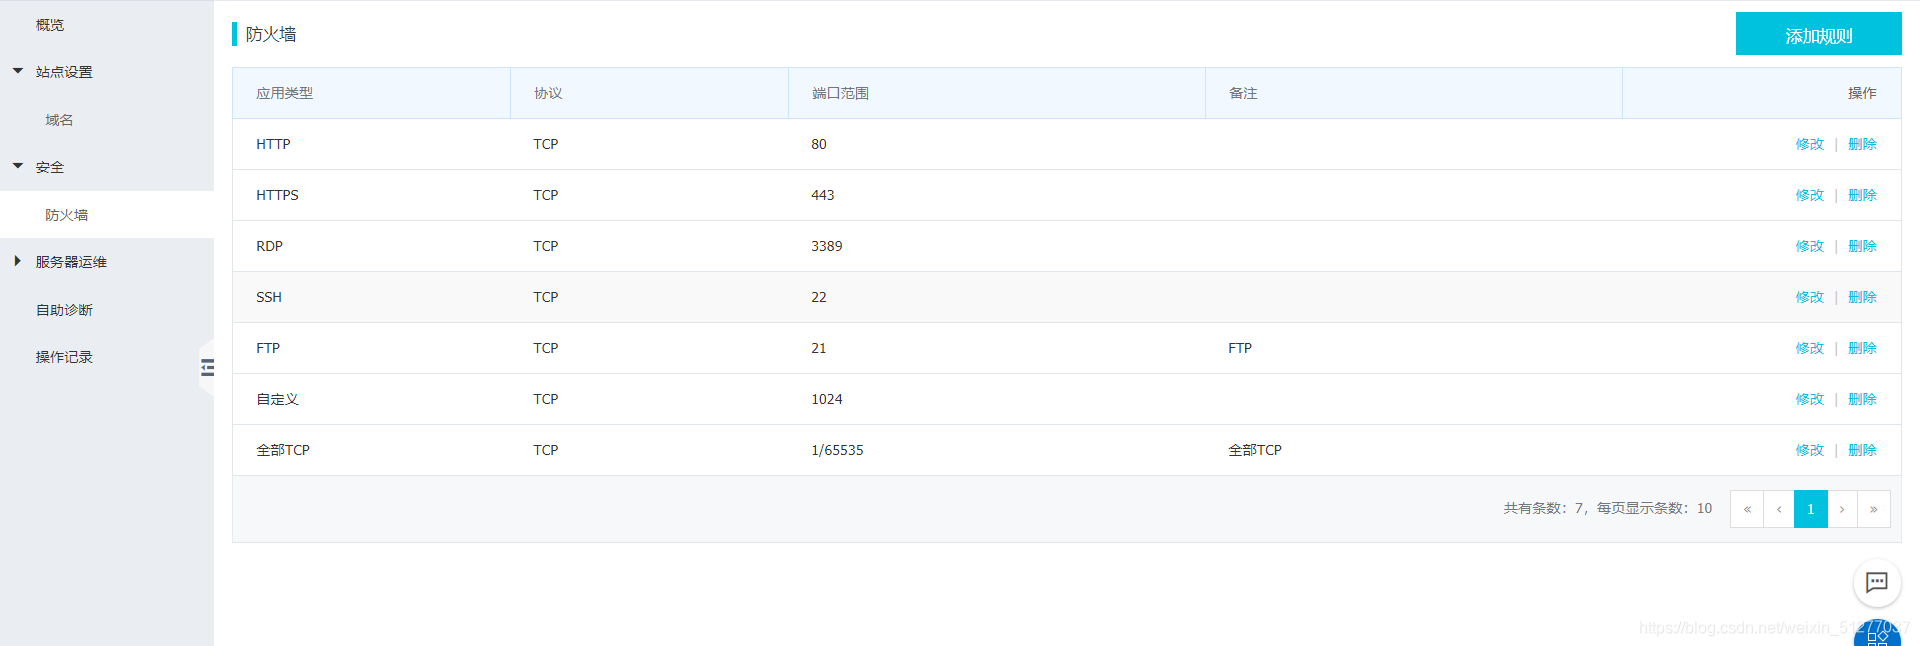
在服务器端完成文档中操作
之后防火墙添加规则如下图
3、建立python环境
之后在服务器端cmd依次安装需要的库,具体参照第开头第一步。
requests
BeautifulSoup4
schedule
总结
点击运行,之后这个程序就在服务器一直运行了!每天定时发送(我用的是vscode运行)
创作不易,谢谢支持!


 216
216


 被折叠的 条评论
为什么被折叠?
被折叠的 条评论
为什么被折叠?
 到【灌水乐园】发言


