


工程化概述
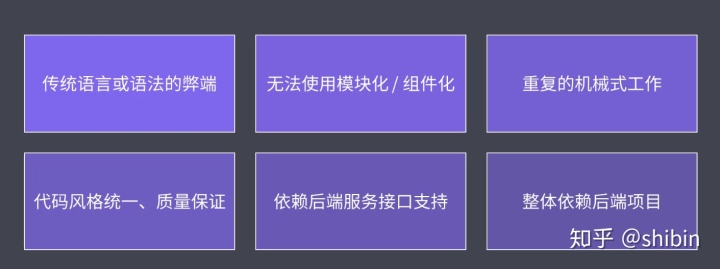
前端日常开发遇到的问题
- 想要使用ES6+新特性,但是兼容性有问题
- 想要使用Less/Sass/PostCss增强css编程性,但是运行环境不能直接支持
- 想要使用模块化的方式提高项目的可维护性,但是运行环境不能直接支持
- 部署上线前需要手动压缩代码及资源文件、部署过程需要手动上传代码到服务器
- 多人协作开发,无法硬性同一大家代码风格,从仓库pull回来的代码质量无法保证
- 部分开发功能开发时需要等待后端服务接口提前完成
主要解决问题
一个项目过程中工程化的表现
- 一切以提高效率、降低成本、质量保证为目的手段都属于工程化
- 一切重复的工作都应该被自动化
工程化≠某个工具
工程化与NodeJs
脚手架工具
脚手架的本质作用:创建项目基础结构、提供项目规范和约定 相同的文件结构 相同的开发范式 相同的模块依赖 相同的工具配置 * 相同的基础代码
常用的脚手架工具 根据信息创建对应的项目基础结构(create-app、vue-cli) Yeoman * Plop(例如创建一个组件、模块所需的文件)
Yeoman
Yeoman基础使用
全局安装yo
npm install yo -g安装对应的generator
npm install generator-node -g通过yo运行generator
mkdir my-module
cd my-module
yo node
Sub Generator
有时候我们并不需要创建完成的项目结构,可能需要在已有的项目上创建特定类型的文件,可以使用Sub Generator来实现
yo node:cli
npm link
npm install
常规使用步骤
- 明确你的需求
- 找到合适的Generator
- 全局范围安装Generator
- 通过yo运行对应的Generator
- 通过命令行交互填写选项
- 生成你所需要的项目结构
自定义Generator
创建Generator模块
Generator基本结构
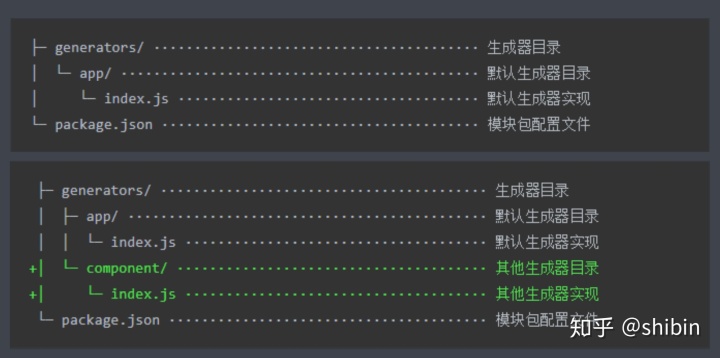
Yeoman的Generator模块名称必须是generator-<name>
mkdir generator-sample
cd generator-sample
npm init
npm install yeoman-generator
创建generators/app文件夹,在该文件夹下创建index.js
const Generator = require('yeoman-generator')

module.exports = class extends Generator {
    writing() {
        this.fs.write(
            this.destinationPath('temp.txt'),
            Math.random().toString()
        )
    }
}
然后执行
npm link
yo link
就会生成一个temp.txt文件
根据模板创建文件
新建一个templates文件夹,在该文件夹创建一个模板文件
const Generator = require('yeoman-generator')

module.exports = class extends Generator {
    writing() {
        // 模板文件路径
        const tmpl = this.templatePath('test.txt')
        const output=this.destinationPath('test.txt')
        // 模板数据上下文
        const ctx = {
            title: 'hello word',
            success: false
        }
        this.fs.copyTpl(tmpl,output,ctx)
    }
}
根据模板创建文件
const Generator = require('yeoman-generator')

module.exports = class extends Generator {
    prompting() {
        return this.prompt([{
            type: 'input',
            name: 'title',//结果的key
            message: 'Your project title',//提示信
            default: this.appname
        }]).then(res => {
            this.answers = res
        })
    }
    writing() {
        // this.fs.write(
        //     this.destinationPath('temp.txt'),
        //     Math.random().toString()
        // )
        const tmpl = this.templatePath('test.ejs')
        const output = this.destinationPath('test.txt')
        // 模板数据上下文
        const ctx = {
            title: this.answers.title,
            success: false
        }
        this.fs.copyTpl(tmpl, output, ctx)
    }
}
Plop
- 将plop模块作为项目开发依赖安装
- 在项目根目录下创建一个plopfile.js文件
- 在plopfile.js文件中定义脚手架任务
- 编写用于生成特定类型文件的模板
- 通过Plop提供的CLI运行脚手架服务 安装
npm install prop --save-dev创建plopfile.js
// Plop 入口文件,需要导出一个函数
// 此函数接收一个Plop对象,用于创建生成器任务
module.exports = plop => {
    plop.setGenerator('component', {
        description: 'create a component',
        prompts: [{
            type: 'input',
            name: 'name',
            message: 'component name',
            default: 'MyComponent'
        }],
        actions: [{
            type: 'add', //代表添加文件
            path: 'src/components/{{name}}/{{name}}.jsx',
            templateFile: 'plop-templates/component.hbs'
        }, {
            type: 'add',
            path: 'components/{{name}}/{{name}}.css',
            templateFile: 'code/plop-templates/component.css.hbs'
        }, {
            type: 'add',
            path: 'components/{{name}}/{{name}}.test.js',
            templateFile: 'plop-templates/component.test.hbs'
        }]
    })
}
npm plop component
脚手架工作原理
mkdir sample-test
cd sample-test
npm init
在package.json 文件
#!/usr/bin/env node

/**
 * Node Cli应用入口必须要有这样的文件头
 * 如果是Linux或macOS系统还需要修改此文件的读写权限为755
 * 具体就是通过 chmod 755 cli.js 实现修改
 */

const inquirer = require('inquirer')
const {
    join
} = require('path')
const fs = require('fs')
const ejs = require('ejs')

inquirer.prompt([{
    type: 'input',
    name: 'name',
    message: 'Project name?',
    default: this.appname
}]).then(answer => {
    // 模板目录
    const tmpDir = join(__dirname, 'templates')
    // 目标目录
    const destDir = process.cwd()
    fs.readdir(tmpDir, (err, files) => {
        if (err) throw err
        else {
            files.forEach(file => {
                // 模板引擎渲染问
                ejs.renderFile(join(tmpDir, file, ), answer, (err, res) => {
                    if (err) throw err
                    else {
                        // 写入目标文件
                        fs.writeFileSync(join(destDir, file), res)
                    }
                })
            })
        }
    })
})


 1万+
1万+


 被折叠的 条评论
为什么被折叠?
被折叠的 条评论
为什么被折叠?
 到【灌水乐园】发言


