


一般情况下我们Django默认的用户系统是满足不了我们的需求的,那么我们会对他做一定的扩展
创建用户项目
python manage.py startapp users
添加项目apps
settings.py
INSTALLED_APPS = [
...
'users.apps.UsersConfig',
]
添加AUTH_USRE_MODEL 替换默认的user
AUTH_USER_MODEL = 'users.UserProfile'
如果说想用全局认证需要在配置文件中添加
# 全局认证from rest_framework.authentication import TokenAuthentication,BasicAuthentication,SessionAuthentication
REST_FRAMEWORK = {
'DEFAULT_AUTHENTICATION_CLASSES': (
# 'rest_framework_jwt.authentication.JSONWebTokenAuthentication', # 全局认证,开源jwt
'rest_framework.authentication.BasicAuthentication',
'rest_framework.authentication.SessionAuthentication',
# 'rest_framework.authentication.TokenAuthentication', #全局认证drf 自带的
)
}
编写model
扩展User model
from django.contrib.auth.models import AbstractUser
from django.db import models
class UserProfile(AbstractUser):
"""
用户
"""
name = models.CharField(max_length=30, null=True, blank=True, verbose_name="姓名")
birthday = models.DateField(null=True, blank=True, verbose_name="出生年月")
gender = models.CharField(max_length=6, choices=(("male", u"男"), ("female", "女")), default="female", verbose_name="性别")
mobile = models.CharField(null=True, blank=True, max_length=11, verbose_name="电话")
email = models.EmailField(max_length=100, null=True, blank=True, verbose_name="邮箱")
class Meta:
verbose_name = "用户"
verbose_name_plural = verbose_name
def __str__(self):
return self.username
编写serializers.py
from rest_framework import serializers
from users.models import VerifyCode
class VerifyCodeSerializer(serializers.ModelSerializer):
class Meta:
model = VerifyCode
fields = "__all__"
编写views 动态验证不同的请求使用不同的验证
views.py测试
from django.shortcuts import render
from rest_framework import mixins, viewsets
from rest_framework.views import APIView
from users.models import VerifyCode
from .serializers import VerifyCodeSerializer
# Create your views here.
from rest_framework.authentication import TokenAuthentication,BasicAuthentication,SessionAuthentication
from rest_framework_jwt.authentication import JSONWebTokenAuthentication
class VerifyCodeListViewSet(mixins.ListModelMixin,mixins.RetrieveModelMixin, viewsets.GenericViewSet):
"""
验证码列表
"""
queryset = VerifyCode.objects.all()
serializer_class = VerifyCodeSerializer
# authentication_classes = [TokenAuthentication, ]
# authentication_classes = [JSONWebTokenAuthentication, ]
# JWT 认证 加密,过期时间
def get_authenticators(self):
"""
Instantiates and returns the list of authenticators that this view can use.
# 修改验证
"""
# 动态认证
print(self.authentication_classes)
print([JSONWebTokenAuthentication, ])
if self.action_map['get'] == "retrieve":
self.authentication_classes = [BasicAuthentication,SessionAuthentication,]
elif self.action_map['get'] == "list":
self.authentication_classes = [JSONWebTokenAuthentication,]
return [auth() for auth in self.authentication_classes]
# DRF 自带的认证 不过期,易发生xss攻击
# def get_authenticators(self):
# """
# Instantiates and returns the list of authenticators that this view can use.
# # 修改验证
# """
# print(self.authentication_classes)
# print([JSONWebTokenAuthentication, ])
# if self.action_map['get'] == "retrieve":
# self.authentication_classes = [BasicAuthentication,SessionAuthentication,]
# elif self.action_map['get'] == "list":
# self.authentication_classes = [JSONWebTokenAuthentication,]
# return [auth() for auth in self.authentication_classes]
def get_queryset(self):
# 取出认证信息
print(self.request.auth)
# print(self.action)
return self.queryset
# url
"""untitled URL Configuration
The `urlpatterns` list routes URLs to views. For more information please see:
https://docs.djangoproject.com/en/1.10/topics/http/urls/
Examples:
Function views
1. Add an import: from my_app import views
2. Add a URL to urlpatterns: url(r'^$', views.home, name='home')
Class-based views
1. Add an import: from other_app.views import Home
2. Add a URL to urlpatterns: url(r'^$', Home.as_view(), name='home')
Including another URLconf
1. Import the include() function: from django.conf.urls import url, include
2. Add a URL to urlpatterns: url(r'^blog/', include('blog.urls'))
"""
from rest_framework.authtoken import views
from rest_framework_jwt.views import obtain_jwt_token
from django.conf.urls import url, include
from django.contrib import admin
from rest_framework import routers
from users.views import VerifyCodeListViewSet
router = routers.DefaultRouter()
router.register(r'codes', VerifyCodeListViewSet, 'codes')
urlpatterns = [
url(r'^admin/', admin.site.urls),
url(r'^api-auth/', include('rest_framework.urls'))
]
urlpatterns += [
# drf 自带的
url(r'^api-token-auth/', views.obtain_auth_token),
# jwt 认证
url(r'^jwt_auth/', obtain_jwt_token),
]
urlpatterns += router.urls
1. debug模式启动
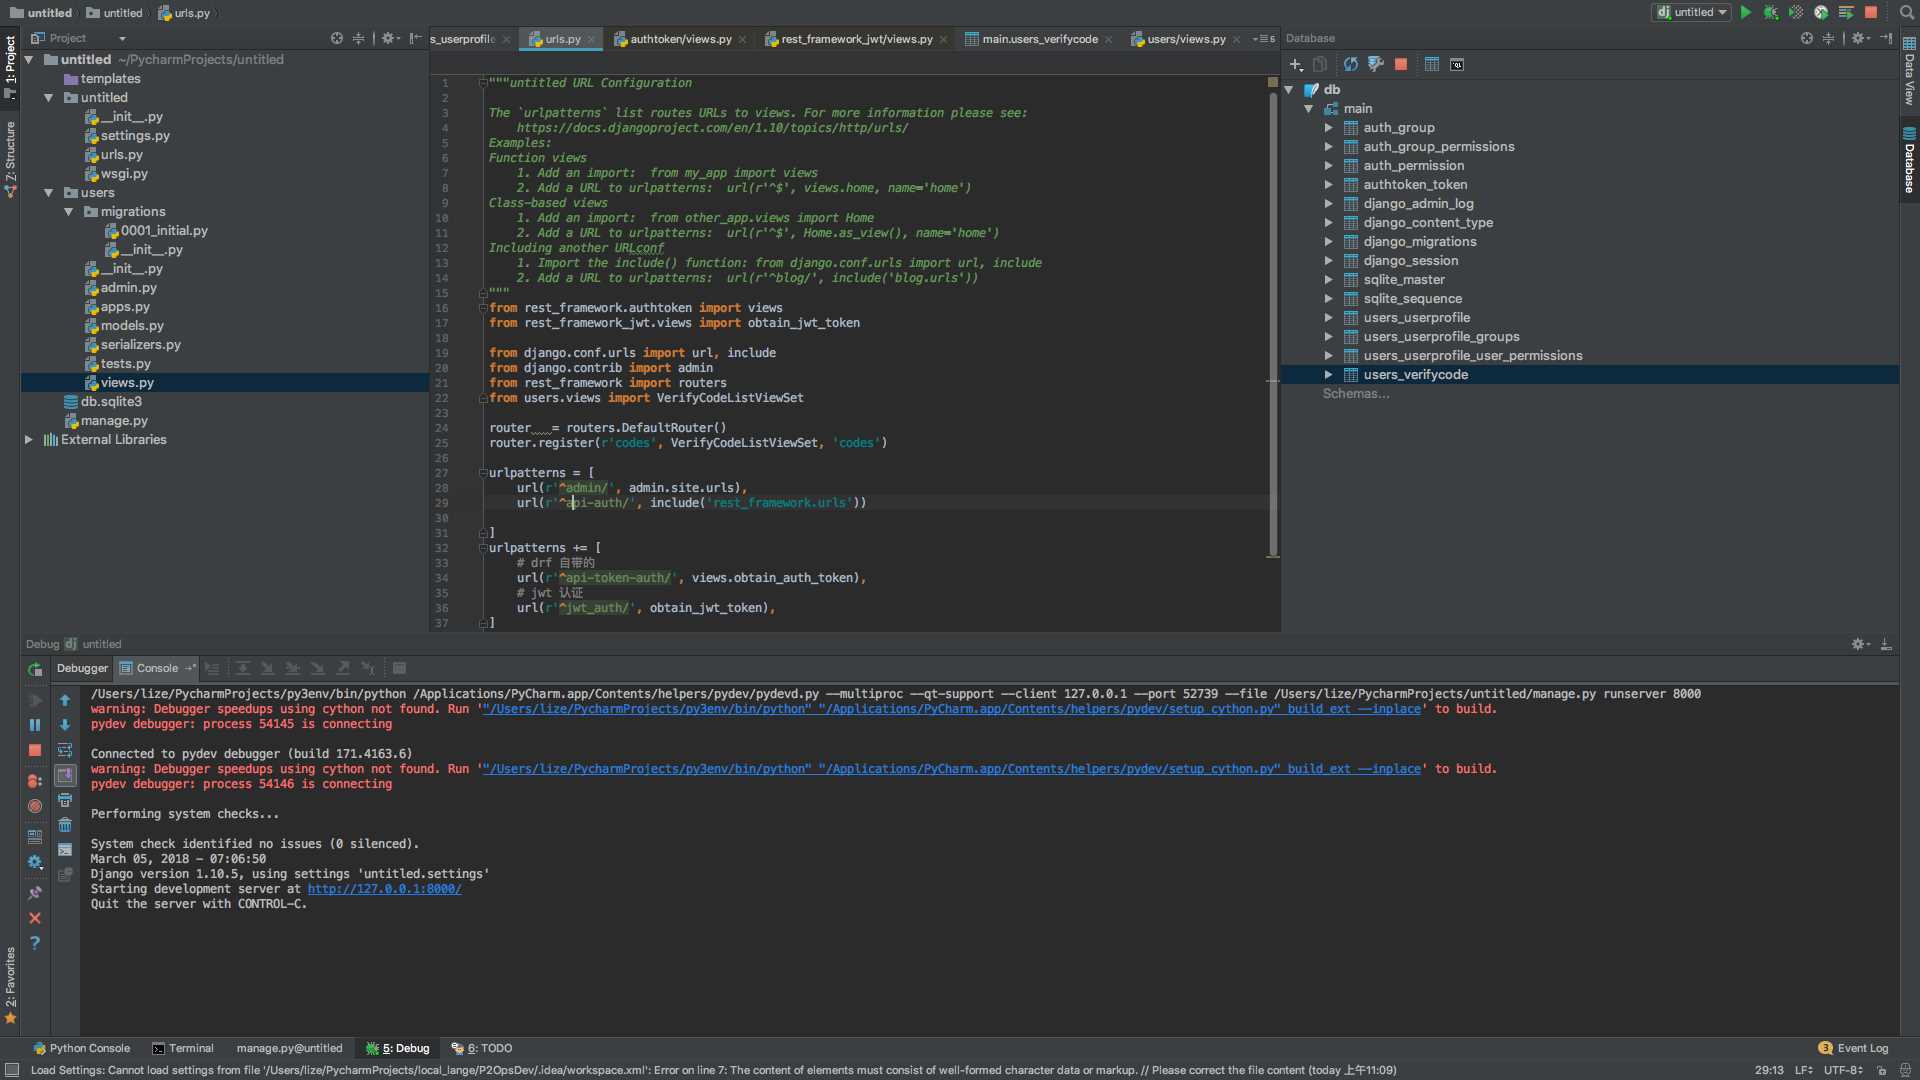
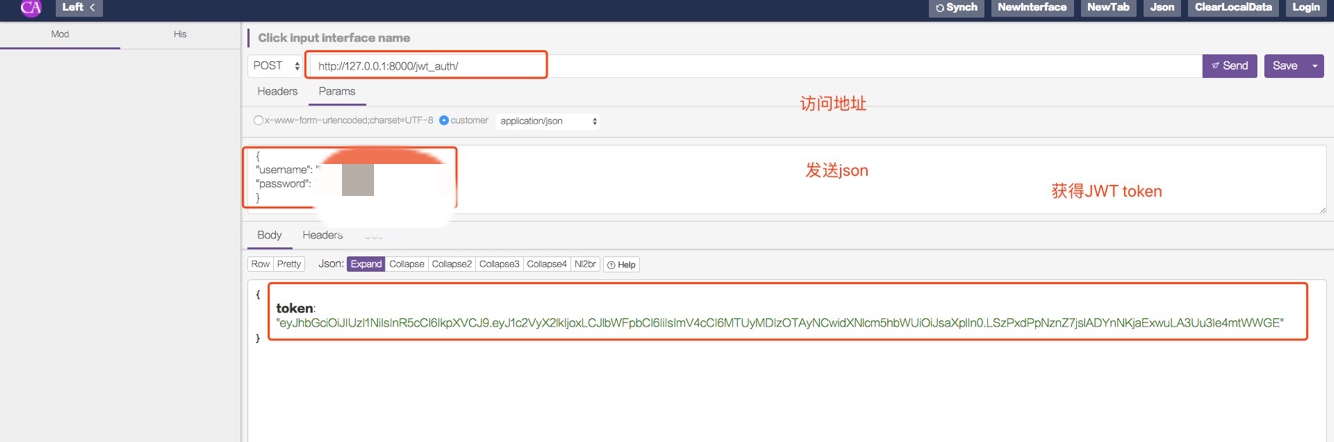
2. 使用postmain测试
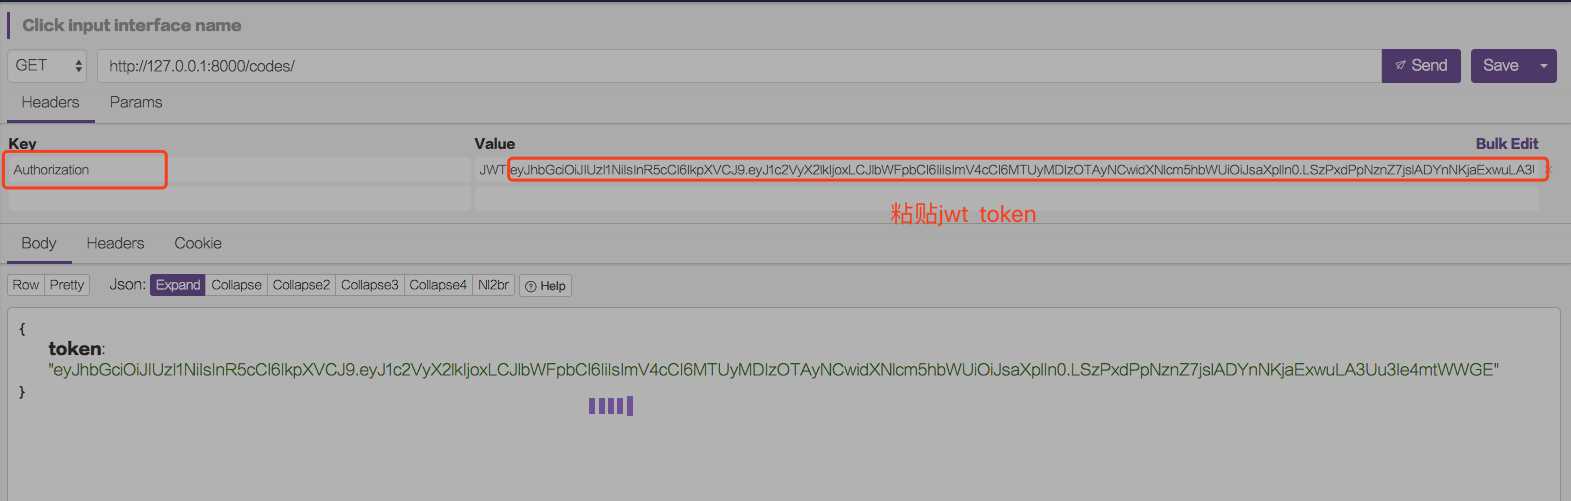
粘贴jwt token 到header中法功请求获取codes列表数据
查看request 中的user可以看到用户代表成功request.auth 可以获得token
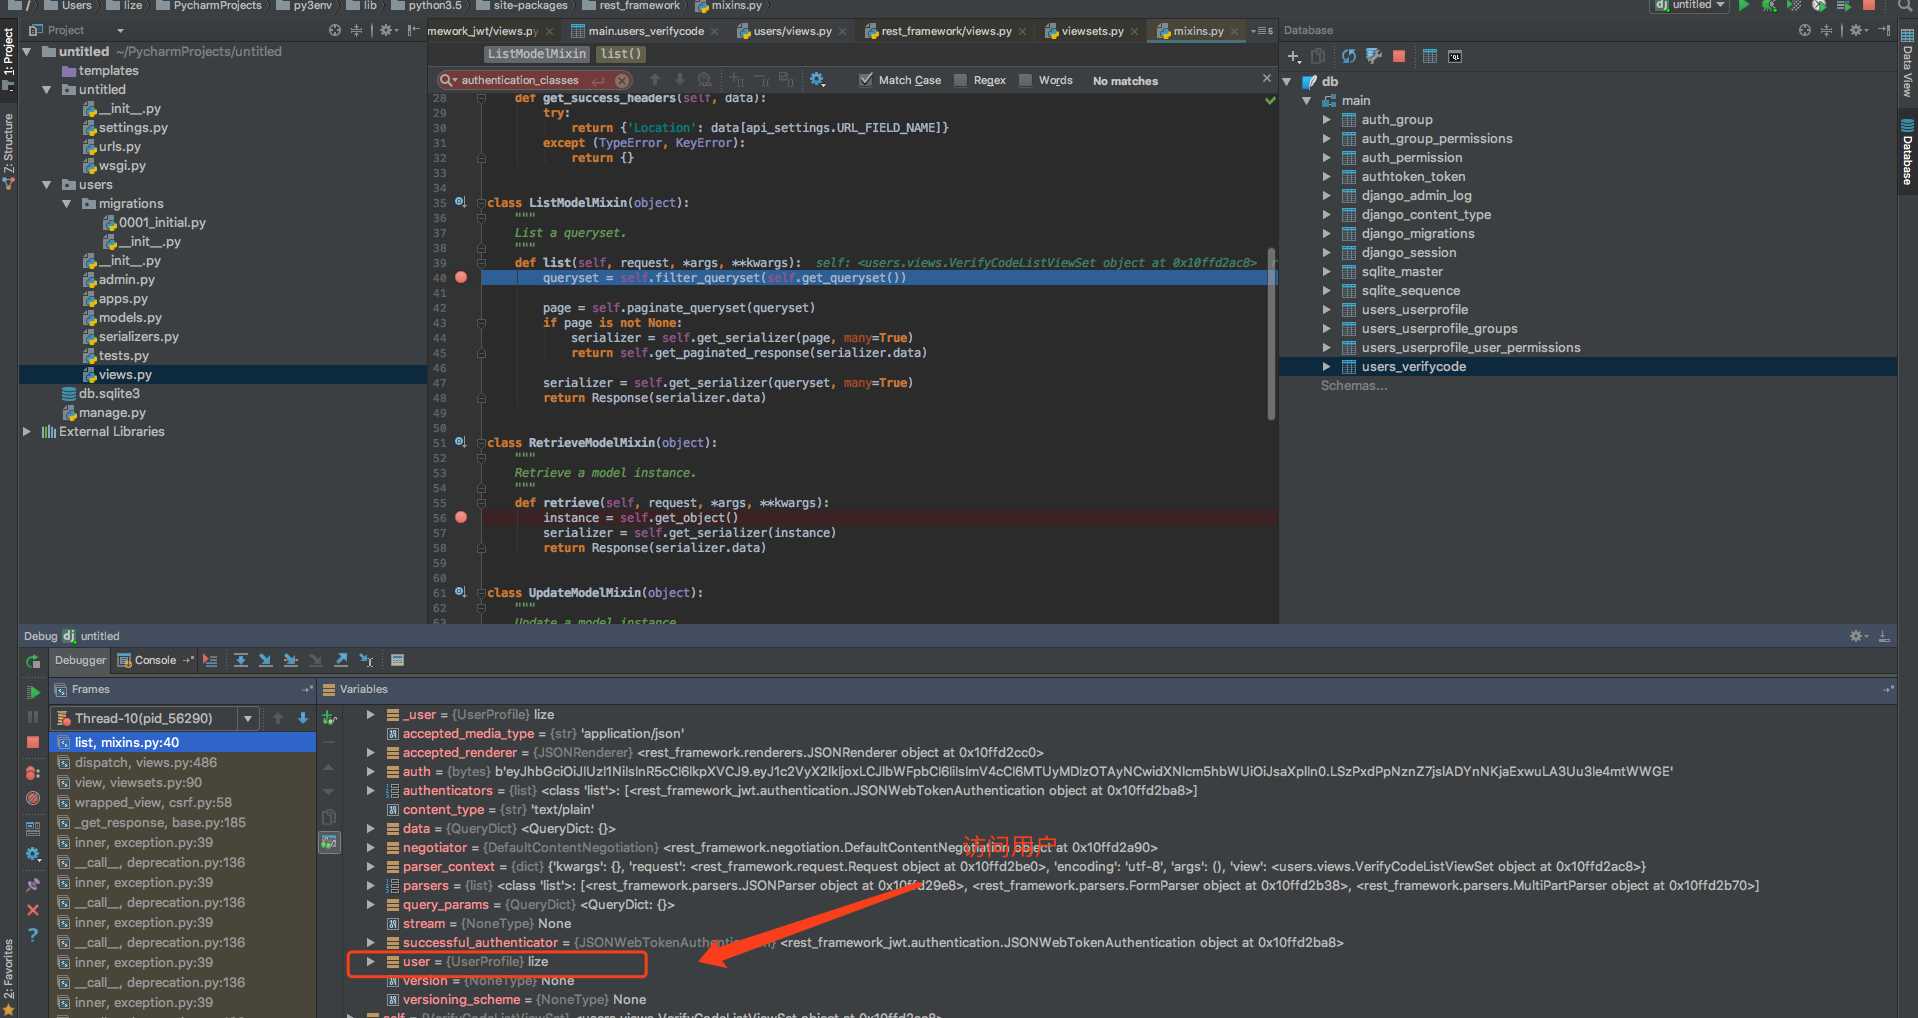
调试结束后可以看到结果
以上就是本文的全部内容,希望对大家的学习有所帮助,也希望大家多多支持脚本之家。


 1936
1936


 被折叠的 条评论
为什么被折叠?
被折叠的 条评论
为什么被折叠?
 到【灌水乐园】发言


