


前端组件之轮播图
继续更新组件的文章,今天来说说轮播图组件。相信这个组件应该在各大网站都能经常见到,大家面试的时候可能也会被问到轮播图的原理和实现。 所以,下面来说说说我自己实现的时候的一些心得!~

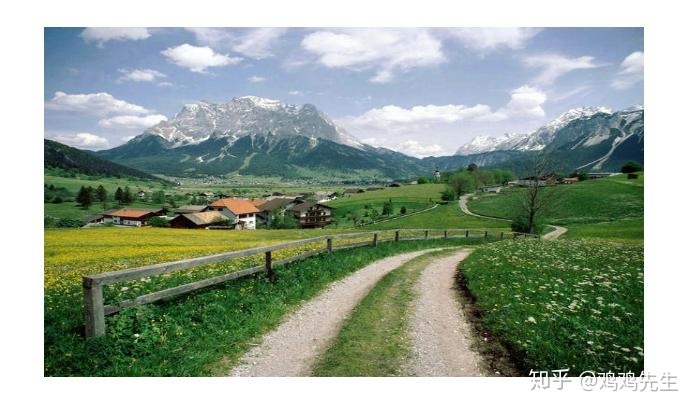
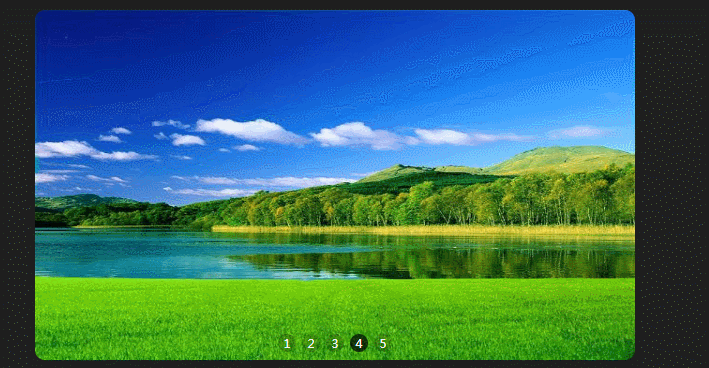
上面图这个就是京东的一个轮播图.我们就模仿类似的做一个轮播图。
原理
将图片在一行中平铺,然后计算偏移量再利用定时器实现定时轮播。
需求分析
功能分析
要实现这个效果,首先需要分析一下。轮播图最重要就是图片通过轮播实现图片展示。对应功能有向左和向右翻页,那么就需要两个按钮来实现。 在容器底部还应该有一行圆点,显示当前有多少图片和图片现在所处位置。那么我们又需要一排圆点按钮来实现。
样式分析
需要做的样式首先对于按钮我们需要进行一些控制,并且鼠标移到对应地方有交互效果。然后要控制容器的大小和图片容器大小。
用原生js做轮播图
步骤一:结构设计
html代码清单
<div class="container">
<div class="wraper" style="left: 0;">
<img src="img/a.jpg" >
<img src="img/b.jpg" >
<img src="img/c.jpg" >
<img src="img/d.jpg" >
<img src="img/05.jpg" >
</div>
<div class="button">
<span class="btn-num on"></span>
<span class="btn-num"></span>
<span class="btn-num"></span>
<span class="btn-num"></span>
<span class="btn-num"></span>
</div>
<a href="javascript:;" class="arrow arrow_left"><</a>
<a href="javascript:;" class="arrow arrow_right">></a>
</div>这部分直接贴代码,不用过多介绍,图片直接网上搜了几张图片尺寸一样的
步骤二:样式设计
首先就是要对一些默认的样式进行改变控制,然后就是对最外层的容器设置了。我们要把图片限制在最外层容器中移动,那么先把最外层容器container 设置为position:relative,固定容器的宽高,对于超出部分进行隐藏处理。然后对包裹图片的容器设置为绝对定位,相对于外层容器移动。这里注意~ 包裹的容器wraper其宽度应该是所有图片宽度的总和,控制一行,这样才能装载到全部图片,并且设置其为最底的一层即z-index=1。方面顶上的箭头和圆点的放置。再者就是对图片进行浮动和大小控制了。 那么设计完就有了一定效果。
设置好最基础的外层,就来完成一下圆点和箭头。因为这里箭头用转义字符串,所以可以当做字体处理。那么只要把其设置为z-index=2即在图片上了,同理圆点也是如此. 我们还希望,给一个高亮的样式来提示图片当前的位置。所以最终设置好,就有了默认的效果了。
下面是对应的css代码
css代码清单
* {
    margin: 0;
    padding: 0;
}

a {
    text-decoration: none;
}

/* container */
.container {
    width: 600px;
    height: 350px;
    overflow: hidden;
    position: relative;
    margin: 100px auto;

}


/* wrapper */
.wraper {
    width: 3000px;
    height: 350px;
    z-index: 1;
    position: absolute;

}

.wraper img {
    width: 600px;
    height: 350px;
    float: left;
}

/* button */
.button {
    width: 200px;
    height: 40px;
    z-index: 2;
    position: absolute;
    bottom: 0px;
    left: 50%;
    margin-left: -50px;

}

.button .btn-num {
    width: 10px;
    height: 10px;
    margin-left: 5px;
    display: inline-block;
    background-color: #FFF;
    border-radius: 50%;
    text-align: center;
    color: aqua;
    cursor: pointer;
}

.button  .on {
    background-color: #F60;
}

/* 箭头 */
.container .arrow {
    position: absolute;
    width: 30px;
    height: 60px;
    line-height: 60px;
    text-align: center;
    top: 35%;
    font-size: 36px;
    z-index: 2;
    display: none;
    background-color: rgba(207,207,207,0.7);
    color: rgb(221,221,221);
}

.container .arrow_left {
    left: 5px;
}

.container .arrow_right {
    right: 5px;
}

.container:hover .arrow {
    display: block;
    /* color: rgb(153,153,153); */
    color: lightsteelblue;
}
步骤三:功能实现
先来获取所有可能用到的元素,并用变量记录。如容器,左箭头右箭头还有圆点。
var wrap = document.querySelector(".wraper");
var nextBtn = document.querySelector(".arrow_right");
var preBtn = document.querySelector(".arrow_left");
var container = document.querySelector(".container");
var button = document.querySelector(".button");
var dot = button.getElementsByTagName("span")
先来实现第一个功能就是点击按钮翻页。首先我们给两个按钮绑定点击事件,当点击时触发翻页的方法。翻页有向前翻页和向后翻页,原理很简单, 就是获取当前图片的容器的left值,然后每一次点击,left值加上图片宽度变成新的left值,然后覆盖给容器的left值,使其变化。向前即加向后即减(left值越大离左边距越远) 特殊的当我们在第一个图片时向前则跳到最后一个图片,当我们在最后一个图片时向后,就跳到第一个图片,所以对应这两个方法直接给left赋值最后一个图的left值和0即可。
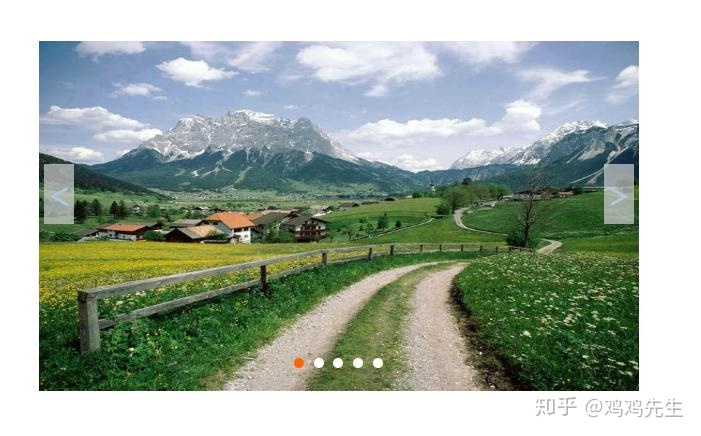
效果如下,在点击左右按钮时发生改变
设置好这个之后,我们用定时器即可让他自己轮播了!
// 自动翻页
var time = null;

function autoPlay() {
    time = setInterval(function() {
        next_pic();
    }, 2000)
}
autoPlay()

// 触碰时
container.onmouseenter = function() {
    clearInterval(time)
}
container.onmouseleave = function() {
    autoPlay()
}
最后就是当我们点击下方按钮,发生页面跳转,点击的圆点会有样式变化。
这里要注意的是,我们对每一个圆点绑定点击事件时,用for循环要注意不能直接发生 类似dot[i].onclick = function(){} 这种错误发生,这是关于闭包的一些问题的。 点击时对应哪个图片也是改变left即可。
最终效果如下
js代码清单
var wrap = document.querySelector(".wraper");
var nextBtn = document.querySelector(".arrow_right");
var preBtn = document.querySelector(".arrow_left");
var container = document.querySelector(".container");
var button = document.querySelector(".button");
var dot = button.getElementsByTagName("span")
var index = 0
nextBtn.onclick = function() {
    next_pic();
}
preBtn.onclick = function() {
    prev_pic();

}

function next_pic() {
    var newLeft
    if (wrap.style.left === "-2400px") {
        newLeft = "0"
    } else {
        newLeft = parseInt(wrap.style.left) - 600;
    }
    wrap.style.left = newLeft + "px";
    index++;
    if (index > 4) {
        index = 0;
    }
    showDot()
}

function prev_pic() {
    var newLeft
    if (wrap.style.left === "0px") {
        newLeft = "-2400"
    } else {
        newLeft = parseInt(wrap.style.left) + 600;
    }
    wrap.style.left = newLeft + "px";
    index--;
    if (index < 0) {
        index = 4;
    }
    showDot()
}

// 自动翻页
var time = null;

function autoPlay() {
    time = setInterval(function() {
        next_pic();
    }, 2000)
}
autoPlay()

// 触碰时
container.onmouseenter = function() {
    clearInterval(time)
}
container.onmouseleave = function() {
    autoPlay()
}

//点击下方按钮
function showDot() {
    for (var i = 0; i < dot.length; i++) {
        dot[i].className = "btn-num"
    }
    dot[index].className = "btn-num on"
}
function clickDot(){
    for (var i = 0, len = dot.length; i < len; i++){
            (function(i){
                dot[i].onclick = function () {
                   var res=index-i;
                   wrap.style.left = (parseInt(wrap.style.left) +  res * 600)+"px";
                   index = i;
                   showDot();
                }
            })(i);
        }
}

clickDot()
使用完原生的js实现了轮播图,我们会发现其实存在很多问题,很多方法都直接暴露出来,并且图片不好控制,圆点不对应图片数如何解决,万一一些功能我不想使用怎么办 比如自动播放。那么我们就来继续封装我们的组件。
封装组件
封装时把是否自动播放,自动播放时间间隔暴露出来,并且给组件播放时一些动画效果。 原理和原生写的类似,并且把容器类名当做参数写入函数中。
$(function(){
    $(".container").carousel({
        wrapper : ".wrapper",//轮播图容器
        indexContainer : ".img_index",//下标容器
        prev : ".arrow_left",//左按钮
        next : ".arrow_right",//右按钮
        timing : 3000,//自动播放间隔
        animateTime : 700,//动画时间
        autoPlay : true,//是否自动播放 true/false
    });
});
为了避免圆点和图片数不一致,所以html中默认不加入圆点,而是通过获取图片数后再在dom中加入圆点。 初始化后加入对应结构,并且在原来结构上也发生变化。对于原来的方法,我们把前翻页,后翻页,自动播放, 还有点击圆点,点击左右按钮全都独立出来。
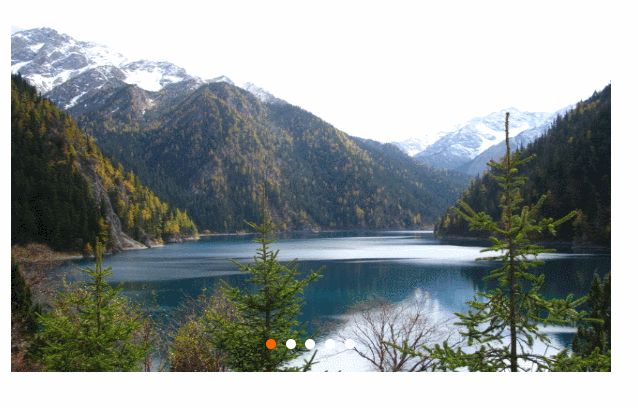
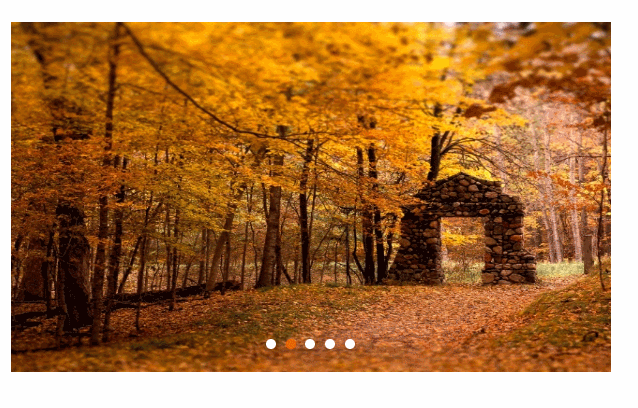
最终效果
部分js代码清单
;(function($){
    $.fn.carousel=function(param){
        var wrapper=param.wrapper,//轮播图容器
            indexContainer=param.indexContainer,//下标容器
            list=$(wrapper).children("li"),//轮播图内容
            len=list.length,//轮播图图数
            prev=param.prev//左箭头
            next=param.next//右箭头
            timing = param.timing,//自动轮播间隔时间
            animateTime = param.animateTime,//动画时间
            autoPlay = param.autoPlay,//自动播放 true/false
            time=null,//定时器
            index = 1,//索引值
            indexList=null,//下标列表
            indexClassName = "index_on",//下标高亮类名
            action = true,//开始滚动 true/false
            totalWidth = list.width()*(list.length+2)//轮播框架总宽度

            /*--初始化----------------------------------------------------------------------------------------*/
            /* 下标容器根据轮播图图片数添加下标 */
            for(var i=1;i<=len;i++){
                $(indexContainer).append("<li>"+i+"</li>")
            }
            /* 设置轮播图容器 */
            $(wrapper).width(totalWidth)
            .append($(list[0]).clone())
            .prepend($(list[list.length-1]).clone())
            .css("left","-"+list.width()+"px");
            list = $(wrapper).children("li");
            indexList = $(indexContainer).children("li");
            $(indexList[index-1]).addClass(indexClassName);

            /*--判断是否自动播放----------------------------------------------------------------------------------------*/
            if(autoPlay){
                startPlay();
                /* 鼠标在容器或者箭头时停止自动轮播 */
                $(wrapper+","+prev+","+next+","+indexContainer).hover(function(){
                    window.clearInterval(time);
                },function(){
                    startPlay();
                });
            }

            /*--startPlay()----------------------------------------------------------------------------------------*/
            function startPlay(){
                time = window.setInterval("$.rightChangeImg();",timing);
            }

            /*--切换下标样式变化----------------------------------------------------------------------------------------*/
            $.extend({changeIndex:function(index){
                $(indexList).removeClass(indexClassName);
                $(indexList[index]).addClass(indexClassName);
            }});

            /*--向左翻页----------------------------------------------------------------------------------------*/
            $.extend({leftChangeImg:function(){
                action = false;
                if (index==len) {
                    index = 0;
                    $(wrapper).stop(true,true).css("left","0px");
                }
                index++;
                $(wrapper).stop(true,true).animate({
                    left : "-="+list.width()+"px"
                },animateTime);
                setTimeout(function(){
                    if (index==len) {
                        index = 0;
                        $(wrapper).stop(true,true).css("left","0px");
                    }
                    action = true;
                },animateTime);
                $.changeIndex(index-1);
            }});

            /*--向右翻页----------------------------------------------------------------------------------------*/
            $.extend({rightChangeImg:function(){
                action = false;
                if (index==0) {
                    index = len;
                    $(wrapper).stop(true,true).css("left","-"+left+"px");
                }
                index--;
                var left = totalWidth-list.width()*2;
                $(wrapper).stop(true,true).animate({
                    left : "+="+list.width()+"px"
                },animateTime);
                setTimeout(function(){
                    if (index==0) {
                        index = len;
                        $(wrapper).stop(true,true).css("left","-"+left+"px");
                    }
                    action = true;
                },animateTime);
                if (index == 0) {
                    $.changeIndex(len-1);
                }else{
                    $.changeIndex(index-1);
                }
            }});

            /*下翻点击处理--------------------------------------------------------------------------------------*/
            $(next).on("click",function(){
                var nowLeft = Math.abs(parseInt($(wrapper).css("left")));
                var left = totalWidth-list.width()*2;
                if (action) {
                    if (nowLeft == left) {
                        index = 0;
                        $(wrapper).stop(true,true).css("left","0px");
                    }
                    $.leftChangeImg();
                }
            });

            /*上翻点击处理--------------------------------------------------------------------------------------*/
            $(prev).on("click",function(){
                var nowLeft = Math.abs(parseInt($(wrapper).css("left")));
                var left = totalWidth-list.width()*2;
                if (action) {
                    if (nowLeft == 0) {
                        index = len;
                        $(wrapper).stop(true,true).css("left","-"+left+"px");
                    }
                    $.rightChangeImg();
                }
            });

            /*下标点击处理--------------------------------------------------------------------------------------*/
            indexList.on("click",function(){
                var no = $(this).index()+1;
                if (action) {
                    if (no > index) {
                        $.changeIndex(no-1);
                        action = false;
                        var left = (no - index)*list.width();
                        index = no;
                        $(wrapper).stop(true,true).animate({
                            left : "-="+left+"px"
                        },animateTime);
                        setTimeout(function(){
                            action = true;
                        },animateTime);
                    }else if (no < index) {
                        $.changeIndex(no-1);
                        action = false;
                        var left = (index - no)*list.width();
                        index = no;
                        $(wrapper).stop(true,true).animate({
                            left : "+="+left+"px"
                        },animateTime);
                        setTimeout(function(){
                            action = true;
                        },animateTime);
                    }

                }
            });
    }
})(jQuery);
总结
上面就是我的这次分享了,如果喜欢的朋友可以关注下博主,如果觉得文章不错可以点个赞或者评论下哦~
我也会继续努力下去!~


 2583
2583


 被折叠的 条评论
为什么被折叠?
被折叠的 条评论
为什么被折叠?
 到【灌水乐园】发言


